Hi Crafty Friends,
It's my turn to post a tutorial on the Elizabeth Craft Designs blog today. My project today is a Pocket Card using the ModaScrap Lace Card die set.
Here is how I created my card:
Step 1 -
- Cut a piece of cardstock in color of choice so it is 6 inches x 9 1/2 inches.
- Place the ModaScrap Lace Card die along the bottom of the card so that the straight edge of the die is straight (this will create the score line to the pocket card).
- Die Cut and weed out any excess pieces of card from the design if necessary.
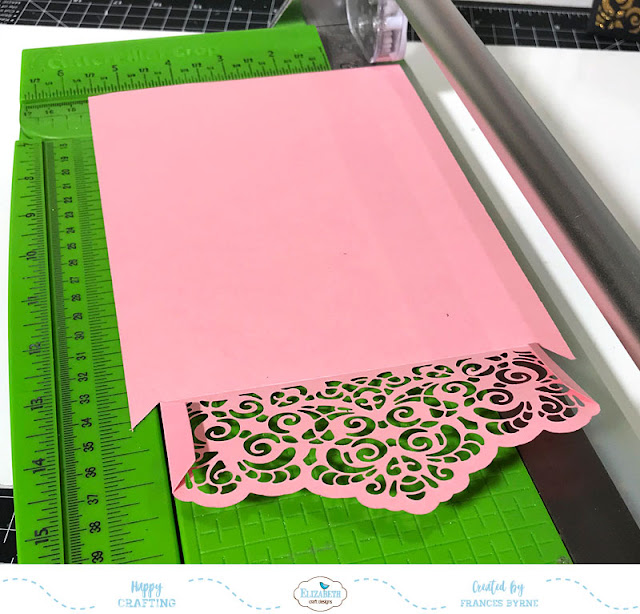
- Fold along the score line created by the die and then unfold. Fold in tabs at side of lace design.
- Line the cardstock in a trimmer so that the folded tab is level with the cutting line and trim excess card from the solid portion of the cardstock.
- Remove card from trimmer, flip and trim other side.
- Place Cleat Double Sided Adhesive Tape to the tabs.
- Fold over tabs and glue to the base of the solid cardstock area to form pocket card.
- Trim top of pocket card so it is 5 1/4 inches high.
Step 2 -
- Cut a piece of patterned paper from the ModaScrap Relax in the Garden Patterned Paper Pack so it measures 5 inches square.
- Cut a piece of cream cardstock 5 inches x 1 1/4 inches.
- Cut a piece of pink cardstock 5 inches x 1 1/2 inches.
- Layer the two pieces of cardstock together and attach to the upper portion of the patterned paper. Tip: Place paper into pocket before adhering the cardstock strip to it, to gauge the best position.
- Using the A Way with Words - Just For You die set, die cut the sentiment from pale green cardstock and adhere to strip at top of the card.
- Stamp three small flowers from the Color My Flowers Clear Stamp set, die cut using coordinating dies. Color. Attach flowers around sentiment.
Step 3 -
- Cut a piece of cream cardstock that measures 5 inches square.
- Using the 'xxxx' edge from the Decorative Edges 1 die set, place the die so it is on the edge of the cardstock, place a piece of removable tape on the die so it doesn't move. Tip: Before die cutting ensure that the die is centred on the cardstock as you can see in the second photo above.
- Die cut.
- Repeat this on other side of card so that the edge is top and bottom of the card.
Step 4 -
- Adhere the cream cardstock to the back of the patterned paper panel.
- Adhere a Glitter Border Peel Off Sticker underneath the die cut edge created in step 3.
Step 5 -
- Using the Color My Flowers Clear Stamp set, stamp one large flower; 3 small flowers and three leaves on White Soft Finish Cardstock with black ink.
- Die cut images using coordinating dies.
- Color as desired.
- Arrange flowers to the lower left hand corner of card and adhere in place.
- Stamp sentiment from the Birthday Sentiments Clear Stamp set to upper right hand corner of card.
Place insert card into pocket and the card is complete.
Thank you for stopping by, I hope you enjoyed my tutorial.
Supplies:
Elizabeth Craft Designs:
Elizabeth Craft Designs:

Other:
Cardstock - Pink; Cream
Black Ink
Copic Markers
Foam Tape


1 comment:
Sweet pocket card.
Post a Comment