Saturday, January 31, 2015

Snappy Birthday


Hi everyone,

It’s challenge time with the “Crazies” over on the Crazy 4 Challenges blog. This week challenge hostess, Peggy finishes off the month with one last challenge.


This week Peggy asks us ....... Doyou have a month in the year when a lot of family members have birthdays? Peggy's family has a lot in February, so let’s do a Birthday card challenge. A littletwist….make it masculine!


Recently fellow "Crazy" and Karen Burniston Pop It Up's DT Member Karen Aicken shared a card she made with all the Karen Burniston Pop It Up's Design Team. Karen Aicken had used the new Rectangle Pull Card as a stand up card. I always love when a die can be used in different ways to give it a new look, so of course I had to play with this idea too and my card today is the result. You can see Karen Aicken's card here.

 
For my card I used the Rectangle Pull Card; Rocky the Crab; Beach Edges as well as parts from the Rectangle Accordion Card and Katie Label Pivot Card all designed by Karen Burniston for Elizabeth Crafts Designs.
 
I used the waves from the Beach Edges along the base of my card and the sand on the panel behind the crab.
 
I attached Rocky the Crab to the spinner piece which comes in the Rectangle Pull Card die set. I wrote "Snappy Birthday" on one of the labels from the Katie Pivot Card set.
 
Here is my card when it is closed. You can see the waves at the bottom of the card and another cute little crab is sneaking up from the sand holding up the word "hello" (from the Rectangle Accordion Card set).
 
I felt the top of the card needed a little something, so I added some red glitter dots around the border.


Don't forget to check out the rest of the “Crazies” cards over on the Crazy 4 Challenges blog and also their individual blogs for more details.


Dies: Rectangle Pull Card; Beaches Edges; Rocky the Crab; Rectangle Accordion Card; Katie Label Pivot Card - designed by Karen Burniston for Elizabeth Craft Designs

Paper: White; Red; Black; Ahoy There DP - Carta Bella
Other: Kraft Ink Pad; Red/Gold Glitter Dots; Copics


Friday, January 30, 2015

Rebus - Herbs


Hi everyone,

It has been a little while since I posted a rebus card, as my friends and I who play this together had a break over December, But it was fun to get out my collection of rebus stamps again to stamp up my rebus postcard for our January theme.

This time round our theme is "Herbs".  Easy enough .... there are so many herbs to select from.

If you would like to solve my rebus puzzle, why not post a comment on my blog post with your answers. I will let you know what the correct answers are next time I post a rebus card here.

How did you go working out my November Rebus which was Names Starting with "C" .... here are the correct answers for you to check how you did.


  1. Cornelia
  2. Clive
  3. Clark
  4. Coralee
  5. Cher
  6. Charlene
  7. Cameron
  8. Coby
  9. Corbett
  10. Cindy
  11. Candice
  12. Cooper

You can find all my past rebus cards here


Thursday, January 29, 2015

Meow!


Hi everyone,

It's challenge time with my friends over on the CCEE Stampers challenge blog. This week Vicky Gould our challenge hostess for January brings us her final challenge for the month.

Vicky has challenges us this week to a technique challenge .... Bleached Out Images, you can find a tutorial on this technique here

It has been a while since I have played with bleach to either bleach out the image or create fun backgrounds. For best results you need to use fresh bleach, so I had to go and buy a new bottle of bleach as I don't normally use it.

For my card this week I have created an accordion card using the new Rectangle Accordion Card designed by Karen Burniston for Elizabeth Crafts Designs. I die cut the smaller rectangles from Kraft Card, stamped the cats onto the panels and then used the bleach to remove the kraft color from the card. I then colored the image using copics. I have left the cats belly uncolored so you can see what color this particular card looks like when bleached.  I used the fishtail banner from the Lorna Labels Pop Up Card for the sentiments.


Here is my card closed when it is ready to be placed in an envelope.

Don't forget to check out the CCEE Stampers blog (goes live 12 AM EST) to see the rest of the creations the CCEE Stampers created this week. You can also see more details of their creations on their individual blogs:

Stamps: Groovy Cats - Woodware Stamps
Paper: Kraft; Black; Orange; Playful Pals DP - Graphic 45
Dies: Rectangle Accordion Card; Katie Stars Frame Edges; Lorna Label Pop Up Card - designed by Karen Burniston for Elizabeth Craft Designs
Other: Black Ink; Clear Embossing Powder; Bleach; Elizabeth Craft Designs Transparent Double Sided Adhesive Tape; Foam Tape; Copics


Wednesday, January 28, 2015

Love


Hi everyone,

Today I am sharing a card I created a while back using the Sizzix Charming Frame Flip-its Card Framelits. The love block on the front of the card is also from this dies set.


Here is the "flip' side of my card, I added a sentiment to the back panel.

Stamps: Sizzix
Paper: White; Red; DP
Dies: Sizzix Charming Frame Flip-its Card Framelits; Sizzix Charming Frame Stand-Ups Card Framelits


Tuesday, January 27, 2015

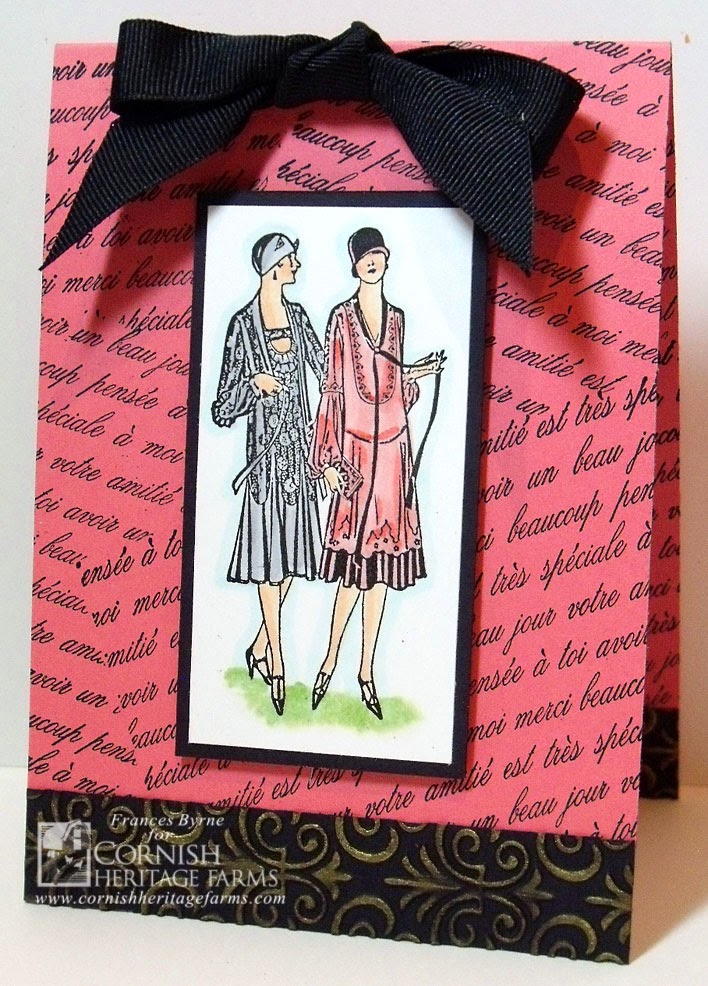
Haute Couture


Hi everyone,

It's time for another CHF challenge over on the Cornish Heritage Farms Blog.  This week the challenge is hosted by Steph.

For our challenge this week Steph has challenged us Create a card using stamps ONLY.  No pattern paper allowed.


For my card this week I used Cornish Heritage Farms' French Script Backgrounder and Haute Couture Stamp set.  These two stamps go perfectly with the new Eiffel Tower Pop Stand Card die set designed by Karen Burniston for Elizabeth Craft Designs

For the background on this card I didn't use the French Script Backgrounder stamp in it's normal way ...  this is a very large stamp which would fit the whole of the front of the card. To get a different look, I inked up the stamp with black ink and stamped part of it onto my pink card at an angle. I then masked what was already stamped and ink the stamp again and stamped on the part of the card not stamped at a different angle and continued doing this until the whole inside of the card and the outside front where all stamped.


I die cut the Pop Stand from the Eiffel Tower Pop Stand die set in the centre of the card and added the Eiffel Tower. It is hard to tell by these photos but I have used gold ink over the black embossed Eiffel Tower for some texture. 


I added a tag on each side of my card which I have stamped with the words from the Haute Couture Stamp set.


Here is the front of my card. I have again used stamps from the Haute Couture Stamp set to decorate the front. The Bow at the top of the card goes through the holes created when die cutting the pop stand on the inside, this idea was inspired by a card Karen Burniston used as a make and take at the recent CHA. You can see Karen's video on how to create this here


Want to play along????

If you would like to play along with us of course we would love to have you!

To play create a card using CHF images. You can use either CHF digi or rubber stamps to create a card or project.... anything you like as long as the stamps are Cornish Heritage Farms. (Yes, they can be older stamps.)

Once you have created your card/project come back here and place a comment with a link to your card/project to this post so that we can see what you created. If you upload your card/project to SCS don't forget to include the keyword CHF71. We can't wait to see what you create!

Don’t forget to check out the rest of the Design Teams blogs today so see what they created for this challenge.


  • Amber Hillman
  • Steph Ackerman


  • Stamps: Haute Couture; French Script - Cornish Heritage Farms
    Paper: White; Pink; Black
    Dies: Eiffel Tower Pop Stand Card - designed by Karen Burniston for Elizabeth Craft Designs; Jewelry 3 Dog Tags - Elizabeth Craft Designs
    Other: Black Ink; Gold Ink; ECD Fleur De Lis Embossing Folder; Black Ribbon; Black Hemp Cord; Foam Tape; Copics


    Monday, January 26, 2015

    Victorian Flower


    Hi everyone,

    It's my turn to post a card on the Elizabeth Craft Designs blog today.  

    Have you seen all the new Tags & More Dies available from Elizabeth Craft Designs, there are now 8 different Tags & More Dies set covering 3 different widths. So whatever your needs we have the Tags & More set for you! Today I am using the Tags & More 6 - Daisy with the new Victoria Flower die sets to create my card.

    Here is how I created my card:

    1. Cut a piece of designer paper 5 1/8 inches x 3 7/8inches and layer this onto a piece of green card that is 5 3/8 inches x 4 1/16 inches. Layers these to a folded orange card which is 5 1/2 inches x 4 1/4 inches.

    2. From the Tags & More 6 - Daisy die set, die cut 4 of the corner pieces from orange card. Layer these to green card and trim around them with scissors. Adhere the corners to each corner of the card.

    3. Position the main tag die from the Tags & More 6 -  Daisy onto a piece of green card which is 2 3/4 inches x 5 1/2 inches. Run through your die cutting machine. Now position decorative overlay over the tag so the hole in the overlay lines up with the hole in the tag and also lines up with the tag shape of the card. Run this through your die cutting machine. 

    Use your trimmer to trim down both sides of the card so the edge is level with the part of the tag which was cut by the die. Use the Spring Leaves Embossing Folder to emboss tag.
    Die cut another tag from orange card without adding the decorative layer and adhere this under the green tag. Trim tag so it measures approx 4 5/8 inches. Thread some orange hemp cord through the hole of the tag and adhere to the card as per photo.

    4. Use the flower dies from the Victorian Flower Set 1 to die cut a large and small flower from Orange Iridescent Shimmer Sheetz. 

    Cut a piece of white card big enough to fit both flowers from the Victorian Flower Overlay Set 2 and cover the front of the card with a piece of Elizabeth Craft Designs Transparent Double Sided Adhesive Tape Sheet. Die cut the flowers so the adhesive is on the front of the flower.

    Remove the protective backing from the tape and cover the flower with Orange Silk Microfine Glitter. Remove excess glitter and polish the glittered flowers with your finger. 
    Layer the glittered flowers to the Shimmer Sheetz flower and then layer these together.
    Die cut the large circle included in the die set and cover this with Gold Glitter Dots. Assemble Flower.

    5. Cut a piece of card big enough to fit the Flourish with Flowers and apply a piece of Elizabeth Craft Designs Transparent Double Sided Adhesive Tape Sheet to the front. Die cut, Remove protective backing and cover with Soft Green Silk Microfine Glitter. Remove excess glitter from flower and polish with finger.

    6. Adhere Flourish with Flower to card as per photo and then add the assembled flower.

    Thanks for stopping by today!

    Supplies: 

    Elizabeth Craft Designs
    Tags & More 6 - Daisy (959)
    Victorian Flower Set 1 (964)
    Victorian Flower Overlay Set 2 (966)
    Flourish with Flowers (797)
    Orange Silk Microfine Glitter (613)
    Soft Green Silk Microfine Glitter (631)
    Orange Iridescent Shimmer Sheetz (SS  0109)
    Transparent Double Sided Tape Sheet (502)
    Spring Leaves Embossing Folder (E118)
    Gold/Silver Glitter Dots (SKU 7018)
     
    Other
    White Card
    Green Card
    Orange Card
    Kalahari Dreams Designer Paper - Wild Rose Studio
    Foam Tape


    Sunday, January 25, 2015

    It's a Girl


    Hi everyone,

    Today I am sharing a baby card I created using the new It's a Boy/Girl  word die from Elizabeth Craft Designs. I was hoping we would get a sentiment we could use for baby cards :).

    I have also used the Honey the Bear Character die designed by Karen Burniston to decorate my card.

    I have used Elizabeth Craft Designs Pink Velvet Adhesive Sheets and Beige Velvet Adhesive Sheets to die cut the bear.


    Dies: Honey the Bear -  designed by Karen Burniston for Elizabeth Craft Designs; It's A Boy/Girl
    Other ECD Products: Pink Velvet Adhesive Sheet; Beige Velvet Adhesive Sheet
    Paper: White; Pink; Pitter Patter DP - Kaisercraft


    Saturday, January 24, 2015

    Hi

    ECDFlowerHiwm

    Hi everyone,

    It’s challenge time with the “Crazies” over on the Crazy 4 Challenges blog. This week challenge hostess, Peggy continues to bring us a fun challenge.

    Peggy stumbled across a “Funky Holidays” listing one day. Did you know that tomorrow is National Opposite Day? To celebrate this funky holiday make a card/project that has opposites on it. Think opposite colors on the color wheel, stripes and polka dots, black and white, mirror image, etc.

    The opposites for my card are the colors red and green on the color wheel and also glitter and lace … I figure they are opposite too Smile.

    To create my card I covered a piece of white card with some ECD Transparent Double Sided Adhesive Tape Sheet and after removing the protective backing from the adhesive I covered the adhesive with a piece of lace curtaining I have to use for card making. Smooth the lace down with a bone folder so that the lace is completely adhered to the adhesive. Next pour over the lace with Peony Silk Microfine Glitter. Brush off the excess, polish the glitter through the lace with your finger and then carefully remove the lace from your card. Now cover the remaining adhesive with Cool Diamond Silk Microfine Glitter. Dump any remaining glitter in the bin as it may be contaminated with the Peony Glitter (only use a small amount of the Cool Diamond as you can always add more if not enough.)

    The flowers used on this card are the new Elizabeth Craft Designs Victorian Flowers Set 1 (which I die cut using Red Iridescent Shimmer Sheetz) and the Victorian Flowers Overlay Set 2 … I covered a piece of white card with ECD Transparent Double Sided Adhesive Tape Sheet and die cut the overlay flowers so the adhesive was at the top of the flower. I removed the protective backing from the adhesive and added Peony Silk Microfine Glitter. The leaves (Big Triple Leaf) were done the same way was the Overlay but I used Leaf Green Silk Microfine Glitter.  The flower centres were done using Champagne Gold Silk Microfine Glitter.

    For the sentiment I created the “Hi” using the new ECD Alphabet 1 Caps set again covering with Peony Silk Microfine Glitter. This was layered onto a white tag created using the ECD Jewelry 3 – Dog Tags.

    Don't forget to check out the rest of the “Crazies” cards over on the Crazy 4 Challenges blog and also their individual blogs for more details.
    Dies: Victorian Flower Set 1; Victorian Flower Overlay Set 2; Big Triple Leaf; Alphabet 1 Caps; Jewelry 3  Dog Tags – Elizabeth Craft Designs
    Other ECD Products: Red Iridescent Shimmer Sheetz; Peony Silk Microfine Glitter; Leaf Green Silk Microfine Glitter; Champagne Silk Microfine Glitter; Transparent Double  Sided Adhesive Tape Sheet
    Other: Lace Curtaining; Foam Tape

    #aa-owl-signature

    Friday, January 23, 2015

    Love


    Hi everyone,

    The Stamps of Life recently released a few new dies one of which was this fun "Love" Die ... I love (pun intended) the curly tail on the end.

    For my first card I die cut the shadow layer directly onto the front of my card and then adhered the love word and shadow together and placed them on the inside of my card so it peek through the opening.


    Here you can see the hole in the front of the card. My card is fairly widely open in this photo so you can't see the word 'love' but you would if it was opened normally.

    The hearts used here are from the Heart Locket die set.


    Here is the inside of my card, you can see the love die cut and shadow and I have stamped the word you to the right of the word.


    For my second card I die cut the love word in red and mounted it onto white card. The top portion of the card was embossed using the Sizzix Swirls Embossing Folder.


    And finally I die cut the word 'love' in three times using different colors and then layered them onto a card staggering each word.


    Dies: Love - The Stamps of Life; Heart Locket Die - TSOL
    Paper: White; Kraft; Red
    Other: Love Word Die - TSOL; Sizzix Swirls Embossing Folder; Red Ribbon; Foam Tape


    Thursday, January 22, 2015

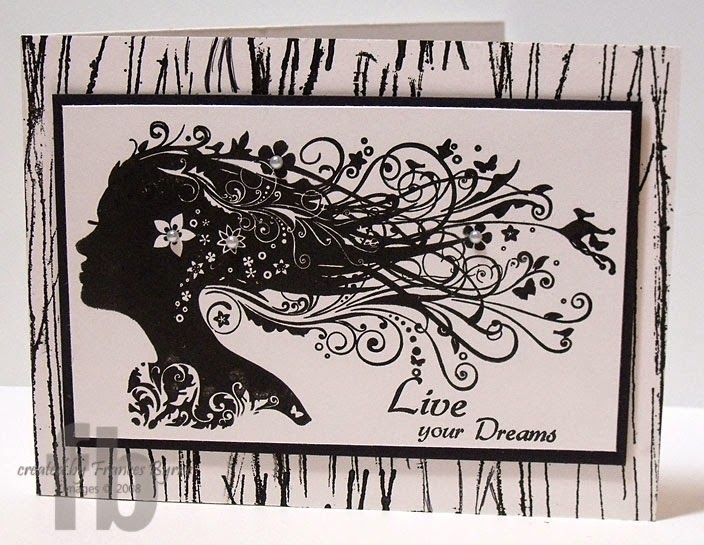
    Live Your Dreams


    Hi everyone,

    It's challenge time with my friends over on the CCEE Stampers challenge blog. This week Vicky Gould our challenge hostess for January continues to bring us fun challenges.

    Vicky has challenges us this week to use a silhouette stamp ... any kind ... your choice. We also had to include a sentiment on the front.

    Late last year I purchased a stamping magazine which included a freebie stamp set from IndigoBlu and it was perfect for this challenge and as it was sitting on my desk waiting to be inked :)


    For the front of my card I stamped the girl onto white card using black ink and layered that onto black card. I added a sentiment in the lower right hand corner. I also added a background to the folded white card.


    The hardest part of this challenge was trying to figure out how to use this stamp set and still do something Pop It Up related which I normally like to do. Then I remembered that I could turn a few of the pop up dies on their side. And with the Lorna Label Pop Up Card designed by Karen Burniston for Elizabeth Crafts Designs you can even make this a double pop up by placing the die on the fold when it is folded (on the outside) rather than when it is opened. 

    I then decorated the card with a few more of the stamps from the set and added a couple of sentiments from my stash.

    Don't forget to check out the CCEE Stampers blog (goes live 12 AM EST) to see the rest of the creations the CCEE Stampers created this week. You can also see more details of their creations on their individual blogs:


    Stamps: Juliet/Free Set from Magazine - IndigoBlu; Dream Quotes - Paper Pretties; Background - Stampers Anonymous
    Paper: White; Black
    Dies: Lorna Label Pop Up Card - designed by Karen Burniston for Elizabeth Craft Designs
    Other: Black Ink; Foam Tape


    Wednesday, January 21, 2015

    Snow Buddy Like You!


    Hi everyone,

    It's challenge time again over on the Riley and Company blog.  This time round our challenge is hosted by Kendra. 

    Our challenge this week is to create a card/project that features an Outdoor winter activity (ex:  sledding, skiing, ice fishing etc.)

    For my card I used Riley and Company's Riley and Percy Snow Dancing and Christmas Words 1


    As you can see I have created a flip-its card and Riley and Percy seem to be having fun in the snow :).


    Want to Play Along?

    If you would like to play along with us of course we would love to have you!

    To play create a card using Riley and Company image.

    Once you have created your card/project, come back here and place a comment with a link to your card so we can see what you have created. If you upload your card/project to Splitcoast Stampers please use the keyword Riley0215. We can't wait to see what you create!

    Don't forget to check out the Riley and Company Design Team's cards on their blogs:


    Stamps: Riley and Percy Snow Dancing; Christmas Words 1 - Riley and Company
    Paper: White; Bundled Up DP - Carta Bella
    Other: Black Ink; Sizzix Royal Flip-Its Card Framelits; Elizabeth Craft Designs Outdoor Edges; Distress Stickles; Foam Tape; Copics