Saturday, March 31, 2018

Thanks - You're the Best Ever


Hi Crafty Friends,

It’s challenge time with the “Crazies” over on the Crazy 4 Challenges blog. Bonnie Sharp our challenge hostess for the month, finishes off the month with one last challenge.

 It is National Doctor’s Day - and Bonnie says she has a lot to be thankful for when it comes to Doctors and Nurses. 

For our challenge this week you have two options ....
Either 
create a "Thank You" card of some type, it could be for a Doctor, Nurse, some other person in the medical profession or any one you like
OR
 create a "Get Well Card" that features a doctor, nurse or any medical theme


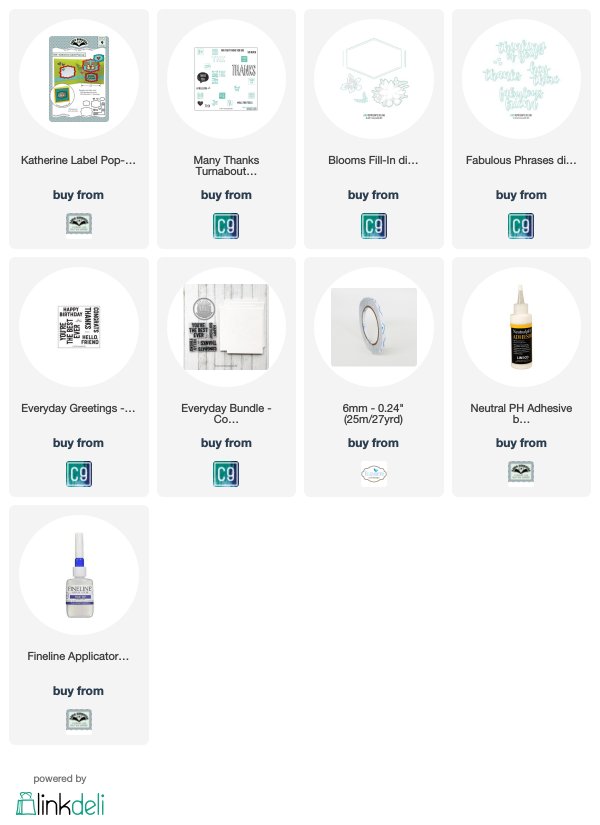
This challenge gave me the opportunity to finally pull out the Concord & 9th Many Thanks Turnabout Clear Stamp set and play. I have had this for a few months now and have been wanting to use it.

I stamped it on white cardstock using a variety of blue/green inks. Once I had stamped the background 4 times, I then splattered the same inks over the background to have even less white space.

I used the thanks sentiment from Concord & 9th's Fabulous Phrases die set for the large sentiment on the black fishtail banner which is hand cut.

To finish off the front of the card I added some Nuvo Aquatic Mist Glitter Drops.


For the inside of my card I used the same Many Thanks Turnabout stamp set to create the patterned papers.

I used Karen Burniston's Katherine Label Pop-Up Card set for the larger sentiment which is another Concord & 9th stamp set ... Everyday Greetings.

Don't forget to check out the rest of the “Crazies” cards over on the Crazy 4 Challenges blog and also their individual blogs for more details.


Supplies:


Other:
Cardstock - White; Black; Pale Green; Teal
Inks - Black; Aquatini & Mint To Be - Catherine Pooler; Turquoise Sea - Gina K Designs; Peacock - Lawn Fawn
Nuvo Aquatic Mist Glitter Drops


Friday, March 30, 2018

Rebus - Names Starting with "M"


Hi Crafty Friends,

It's time to share another rebus puzzle swap with you. This month the theme is "Names Starting with the Letter "M"


If you would like to solve my rebus puzzle, why not post a comment on my blog post with your answers. I will let you know what the correct answers are next time I post a rebus card here.

How did you go solving my February Rebus which was "Movies Starring Tom Hanks". Here are the correct answers so you can check how you did.

  1. Catch Me If You Can
  2. Dragnet
  3. Forest Gump
  4. Philadelphia
  5. The Green Mile
  6. Saving Mr Banks


You can find all my past Rebus Cards here.


Thursday, March 29, 2018

Sandy Birthday Wishes


Hi Crafty Friends,

It's challenge time with my friends over on the CCEE Stampers challenge blog. Our challenge hostess for the month, Vicky Gould finishes off the month with one last challenge.

Our challenge this week was to use a fun fold of our choice!

As you can see I decided to create an accordion card using Karen Burniston's Fancy Label Accordion Card die set. 


I had an idea to create the background on the main accordion pages using the Honey Bee Stamps Ocean Borders Clear Stamp set. I cut my cardstock slightly larger than each page, stamped the background stamp onto each piece of cardstock using VersaMark Ink and White Embossing Powder. I then added four different colors of blue Distress Oxide ink to create an ombre Emboss Resist. The first page was stamped on both the front and back of the cardstock as I need both sides of this page decorated.


For the middle page of my accordion card I added a birthday sentiment using Honey Bee Stamps Mermaid Song Clear stamp set.


On the first and third pages I decorated the pages using Karen Burniston's Tropical Scene and Sea Animals die sets. 


Here is a look at my card when it is closed ready to be placed in an envelope.

Don't forget to check out the CCEE Stampers blog (goes live 12 AM EST) to see the rest of the creations the CCEE Stampers created this week. You can also see more details of their creations on their individual blogs:


Stamps: Ocean Borders; Mermaid Song - Honey Bee Stamps
Paper: Song; Blue
Dies: Fancy Label Accordion; Tropical Scene; Sea Animals - Karen Burniston
Other: Black Ink; Peacock Feathers Distress Oxide; Salty Ocean Distress Oxide; Mermaid Lagoon Distress Oxide; Blueprint Sketch Distress Oxide; Broken China Distress Oxide; Wild Honey Distress Ink; VersaMark Ink; White Embossing Powder; Black Glaze Pen; White Gel Pen; Earth & Sky Stencil - Elizabeth Craft Designs; Copics

Wednesday, March 28, 2018

Hey There


Hi Crafty Friends,

I have another card to share with you today using the Rotated Stencils technique that posted on my blog yesterday which was an Inspired by Jennifer McGuire challenge I had with a couple of friends of mine. You can find Jennifer's blog post here which shows how this technique is done.

I didn't have many stencils that were suitable for this technique, but I did find two. One I used and shared here yesterday creating two cards with it. And this one I am using on my card today.


This time around I have used Hero Arts Spiral Petal stencil. I placed this over pale pink cardstock and then sponged on Gina K Designs Dusty Rose Ink. After cleaning the stencil I turned it over to the other side and sponged over Hero Arts Unicorn White ink.

I die cut the panel using the largest rectangle from the MFT Stamps Stitched Mod Rectangles. I didn't want to hid the background with too much, so added a circle to the lower left hand corner of the card and added a sentiment from Concord & 9th's Fabulous Phrases die set.

To finish off the card I added some Nuvo Drops.


For the inside of the card I die cut another Stitched Mod Rectangle and then used the Honey Bee Stamps Happiness Clear Stamp set for the sentiments.

I die cut three hearts from the left over stencilled background paper using the heart die included in the Concord & 9th Fabulous Phrases die set.

Supplies:


Stamps: Happiness - Honey Bee Stamps
Paper: White; Black; Pale Pink; Pink
Dies: Stitched Mod Rectangles Stax - MFT Stamps; Fabulous Phrases; Everyday Circle - Concord & 9th; Dashing Circles - Elizabeth Craft Designs
Other: Unicorn White Ink Cube - Hero Arts; Dusty Rose Ink Cube - Gina K; Spiral Petals Stencil - Hero Arts; Nuvo Carnation Pink Crystal Drops; Foam Tape


Tuesday, March 27, 2018

Hello Fabulous Friend


Hi Crafty Friends,

My card today is for a challenge I do with a couple of friends of mine. Each month we challenge each other to create something using supplies we all own.

For our challenge this month we were to create a card Inspired by a technique shown by Jennifer McGuire. This is probably one of the harder challenges we have done, for the simple reason Jennifer has so many wonderful ideas that you can't decide which one to do.

For my cards today I finally decided to use her Rotated Stencils technique that she shared the day I ended up making my cards. You can find Jennifer's blog post here.

I ended up making two cards using the one stencil as I had used light blue card for one and teal for the other but the stencil and inks were the same. I liked both results ... so two cards.


The stencil I used for both card was the Waves Stencil from Hero Arts. I sponged Hero Arts Topaz Teal ink through the stencil onto Teal cardstock. Once I had cover the card with ink I cleaned the stencil and then turned the stencil 180 degrees and sponged over Unicorn White Ink also from Hero Arts.

To decorate my card I used Concord & 9th's Everyday Circle die set and sequins.


I had a little bit of the stencilled background left over so I added this to the inside of the card and then added the "Thinking of You" sentiment from Concord & 9th's Fabulous Phrases die set.


For my second card I used the same inks and stencil but this time around used light blue cardstock for the base. 

I then used the MFT Stamps Stitched Basic Scallop Edge to create the fancy edge at the bottom of the panel.

I hand cut a fishtail banner and added the "Fabulous Friend" sentiment from the Concord & 9th Fabulous Phrases die set. The circle pieces coming off the fishtail banner was created using the thin circle created when die cutting the circle from the Everyday Circles die set.

At the bottom of the card I added the heart border which is from a Simon Says Stamp die set. Inside the heart and the glitter dots on the fishtail banner were created using Nuvo Aquatic Mist Glitter Drops.


For the inside of the card I added the off cut created from the front panel and added the HB to you sentiment from Simon Says Stamp which I die cut into the circle from Concord & 9th's Everyday Circles die set.

Supplies:


Card 1 Supplies - 


Paper: White; Teal; Dark Teal
Dies: Everyday Circle; Fabulous Phrases - Concord & 9th; Stitched Scallop Basic Edge - MFT Stamps
Other: Unicorn White Ink Cube; Teal Topaz Ink Cube - Hero Arts;  Waves Stencil - Hero Arts; White Sequins; Blue Rhinestones; Foam Tape

Card 2 Supplies -

Paper: White; Black; Blue; Teal; Dark Teal
Dies: Everyday Circle ; Fabulous Phrases - Concord & 9th; Stitched Scallop Basic Edge - MFT Stamps; Highlight Frames; Happy HB - Simon Says Stamp
Other: Unicorn White Ink Cube; Teal Topaz Ink Cube - Hero Arts;  Waves Stencil - Hero Arts; Nuvo Aquatic Mist Glitter Drops; Foam Tape


Monday, March 26, 2018

Best Daddy


Hi Crafty Friends,

Father's Day is about 6 months away down here in Australia, but as I have had this card in my head for months and months, I figured now was as good a time as any to finally make it. I have a number of cards to make for Father's Day so getting an early start is always a good thing.


Before my husband retired a few years ago, he was in the building industry for over 40 years so when I saw this cute Build It Beaver Stamp set from Clearly Besotted I knew I had to add it to my collect to make a card for him.

As you can see I have created a pop-up card this time using Lawn Fawn's Stitched Hillside Pop-up die set. It has been a while since I played with this die set. To create my pop up I also used the Stitched Mountain Borders also from Lawn Fawn.


I stamped the images a couple of times using my MISTI (some like the trees and logs, multiple times) and then used my Scan N Cut to cut them out. When you have so many to cut out that machine sure is a time saver!!

To the base of the card I added the Father's Day Border also from Lawn Fawn.


I used the same elements for the front of my card that I used for the inside ... the mountains; the grassy pop-up hills and a few of the beavers. The stamped sentiments on this card are also included in this stamp set.

Stamps:  Build It Beavers - Clearly Besotted
Paper: White; Green; Brown; Black; Watercolor Paper Pad - Lawn Fawn
Dies: Stitched Hillside Pop-Ups; Stitched Mountain Borders;   Father's Day Border - Lawn Fawn
Other: Black Ink; VersaMark Ink; Forest Moss Distress Oxide; Gathered Twigs Distress Oxide; White Embossing Powder; Black Glaze Pen; White Gel Pen; Foam Tape; Copics


Sunday, March 25, 2018

Happy Easter Bunny Card and Bag


Hi Crafty Friends,

Easter is only a week away, so today I am share a couple of Easter Bunny cards and gift bags I created for my grandchildren.


I used the Mama Elephant Favor Bag Accessory - Bunny die set which I purchased some time last year. I made a little girl bunny and a little boy bunny by changing the position of the tie (and colors used). I also added eye lashes to the little girl bunny.


For a little extra fun I added a little pompom to the back of the card for the bunny's tail.


On the inside of the card I added a sentiment and a couple of Easter Egg images using the Spring Sentiments Clear Stamp set from Elizabeth Craft Designs.


Here is a close up of the little girl bunny card, both cards are side folding.


Here is a close up of the little boy bunny card. I have folded the bow tie a little to allow the card to stand.


Here is a look at the little boy card and favour bag together. I don't have Mama Elephant's Favor Bag die, but I did find two ready made gift bags which work well with this die set.


A look at the little girl bunny card and favour bag.


A close up of the little boy bunny gift bag


A close up of the little girl bunny gift bag


One final photo, I die cut the Bunny, cut off the ears and adhered this panel to the back of the gift bag. I then added a pompom to the back for the bunny tail.

Stamps: Spring Sentiments - Elizabeth Craft Designs
Paper: White; Black; Pink; Hello Spring 6 x 6 Paper Pad - Doodlebug Design Inc
Dies: Favor Bag Accessory Bunny - Mama Elephant
Other: Black Ink; Clear Double Sided Adhesive Tape; White Pom Poms


Saturday, March 24, 2018

You Arrrrgh Awesome


Hi Crafty Friends,

It’s challenge time with the “Crazies” over on the Crazy 4 Challenges blog. Bonnie Sharp our challenge hostess for the month, continues to issue the challenges.

A cutie patootie challenge for you today - make a card or scrapbook page that has a child theme! Blocks, playground- even a little red wagon if you wish!  Bonus points if you use baby or children stamps!

I had just finished looking at the upcoming challenges I still had to do for the month and then went to check out some blog posts in my blog reader and up popped this cutie patootie Pirate digital stamp from Mo's Digital Pencil. As I figured it would be perfect for this challenge and I do adore pirate stamps ... it fell into my cart! 😀


As you can see I have created an Easel Card. I added a few different sentiments to my card.


The card folds flat so it can be placed in an envelope.

Don't forget to check out the rest of the “Crazies” cards over on the Crazy 4 Challenges blog and also their individual blogs for more details.


Supplies:


Stamps: Pirate Digital Stamp - Mo's Digital Pencil; Scripty Birthday; Occasional Labels - Mama Elephant; Ahoy Matey - Lawn Fawn
Paper: White; Black; Red; Cool Treats/Sunkissed DP - Doodlebug Design Inc.
Dies: Dashing Squares; Dotted Scallop Squares; Katie Label Pivot Card (retired); Katie Label Accordion Card (retired) - Elizabeth Craft Designs;
Other: Black Ink; Twisted Citron Distress Oxide; Mowed Lawn Distress Oxide; Peacock Feathers Distress Oxide; Earth & Sky Stencil; Foam Tape; Copics


Friday, March 23, 2018

Just for You Lace Pocket Card


Hi Crafty Friends,

It's my turn to post a tutorial on the Elizabeth Craft Designs blog today. My project today is a Pocket Card using the ModaScrap Lace Card die set.


Here is how I created my card:


Step 1 -
  • Cut a piece of cardstock in color of choice so it is 6 inches x 9 1/2 inches.
  • Place the ModaScrap Lace Card die along the bottom of the card so that the straight edge of the die is straight (this will create the score line to the pocket card). 
  • Die Cut and weed out any excess pieces of card from the design if necessary.

  • Fold along the score line created by the die and then unfold. Fold in tabs at side of lace design.
  • Line the cardstock in a trimmer so that the folded tab is level with the cutting line and trim excess card from the solid portion of the cardstock.
  • Remove card from trimmer, flip and trim other side.

  • Place Cleat Double Sided Adhesive Tape to the tabs.
  • Fold over tabs and glue to the base of the solid cardstock area to form pocket card.

  • Trim top of pocket card so it is 5 1/4 inches high.

Step 2 -
  • Cut a piece of patterned paper from the ModaScrap Relax in the Garden Patterned Paper Pack so it measures 5 inches square.
  • Cut a piece of cream cardstock 5 inches x 1 1/4 inches.
  • Cut a piece of pink cardstock 5 inches x 1 1/2 inches.
  • Layer the two pieces of cardstock together and attach to the upper portion of the patterned paper. Tip: Place paper into pocket before adhering the cardstock strip to it, to gauge the best position.
  • Using the A Way with Words - Just For You die set, die cut the sentiment from pale green cardstock and adhere to strip at top of the card.
  • Stamp three small flowers from the Color My Flowers Clear Stamp set, die cut using coordinating dies. Color. Attach flowers around sentiment. 


Step 3 - 
  • Cut a piece of cream cardstock that measures 5 inches square.
  • Using the 'xxxx' edge from the Decorative Edges 1 die set, place the die so it is on the edge of the cardstock, place a piece of removable tape on the die so it doesn't move. Tip: Before die cutting ensure that the die is centred on the cardstock as you can see in the second photo above.
  • Die cut.
  • Repeat this on other side of card so that the edge is top and bottom of the card.

Step 4 - 
  • Adhere the cream cardstock to the back of the patterned paper panel.
  • Adhere a Glitter Border Peel Off Sticker underneath the die cut edge created in step 3.

Step 5 - 
  • Using the Color My Flowers Clear Stamp set, stamp one large flower; 3 small flowers and three leaves on White Soft Finish Cardstock with black ink.
  • Die cut images using coordinating dies.
  • Color as desired.
  • Arrange flowers to the lower left hand corner of card and adhere in place.
  • Stamp sentiment from the Birthday Sentiments Clear Stamp set to upper right hand corner of card.

Place insert card into pocket and the card is complete.


Thank you for stopping by, I hope you enjoyed my tutorial.

Supplies:
Elizabeth Craft Designs:


Other:
Cardstock - Pink; Cream
Black Ink
Copic Markers
Foam Tape