Wednesday, September 30, 2020

Rebus - Elton John Songs


Hi Crafty Friends,

It's time to share another rebus puzzle swap with you. This month the theme is Songs by Elton John

If you would like to solve my rebus puzzle, why not post a comment on my blog post with your answers. I will let you know what the correct answers are next time I post a rebus card here.

How did you go solving my August Rebus which was "Books written by Janette Oke". Here are the correct answers so you can check how you did.

  1. When Calls the Heart
  2. The Meeting Place
  3. The Tender Years
  4. New Kid in Town
  5. Roses for Mama
  6. Spring's Gentle Promise


You can find all my past Rebus Cards here.


Tuesday, September 29, 2020

Coffee Mugs Slimline


Hi Crafty Friends,

Today I am sharing a coffee themed card in honour of National Coffee Day. My card uses stamps, dies and papers from Divinity Designs.

As you can see I created a Slimline Card. For this I used the new Slimline Rounded Windows and Slimline Bubbles Background die sets. I also used papers from Latte Love to create the Slimline Rounded Windows panel.

I used the Slimline Card Base with Layers die set to create my card base.

To decorate my card I used the the mugs, oval, cream & heart from the Cocoa & Coffee Stamp/Die Duo set. I added the mugs to the two outer windows of the card.

In the centre window I added a sentiment from "But First Coffee" stamp set. This was layered using ovals from the Double Stitched Ovals and Ovals die sets.


I always like to decorate the inside of my card when I am making my cards. I used the leftover rounded rectangles from when I die cut the panel for the front of the card and added them to the inside.

I used the "coffee" die and one of the sentiments from the Perk Up Stamp/Die Duo set. I used the Sentiment Strips die set to die cut the stamped sentiment.

Supplies:
For your shopping convenience, all products are linked below. Compensated affiliate links are used where possible with no extra cost to you. This helps me to continue to share all the projects I include on my blog. For the benefit of my Australia readers, I have started to include some links to Australian stores when available. Please note I only use and share products I love.


Monday, September 28, 2020

Beary Christmas


Hi Crafty Friends,

It's been about 18 months since I have created a Shadow Box card or what I prefer to make ... a Extended Scene Shadow Box card. Since I had ordered the new Lawn Fawn Shadow Box Card  Fireplace Add-on which was release in early September I decided it was time to make another one.


I used Kraft cardstock to create the base of my card and also the fireplace. For the folded card I cut a piece of cardstock the length of my cardstock x 3  inches and folded it in half.

I used Honey Bee Stamps Perfect Brick stencil and Gathered Twigs Distress Oxide ink to ass the brick detail to the fire place after I had die cut the Kraft cardstock using the Shadow Box die 

I added papers from the Let It Shine Paper Pad, to the left and right sides of the inside of the card.

I added the fire, trim around fireplace, stockings, candy canes and the bottom half of Santa, to the fireplace. All these elements are included in the Shadow Box Card Fireplace Add on die set.


I used stamps from the Den Sweet Den and Christmas Dreams stamp sets to decorate the card.

The Christmas Tree was a little too high for my card, so I trimmed off the bottom tier of the tree and add the trunk back to the bottom of the tree.


Here is another view of my card when it is opened. You can see that I also added images to the side of the fireplace too. I also added a sentiment from the Den Sweet Den stamp set to the right side of the card.


I kept the front of the card fairly simple, as the inside of the card is the focal point. I added pattern paper from the Let It Shine Paper Pad to the front of the card.

I added a oval die cut using the same patterned paper I used on the inside. I added the "Have A Beary Christmas' sentiment using one of the sentiment stripes from the Everyday Sentiments die set and adhered it to the oval.

I added two of the bears to the right side of the card and the Christmas tree to the left hand side.

Supplies:

For your shopping convenience, all products are linked below. Compensated affiliate links are used where possible with no extra cost to you. This helps me to continue to share all the projects I include on my blog. For the benefit of my Australia readers, I have started to include some links to Australian stores when available. Please note I only use and share products I love.


Sunday, September 27, 2020

Poinsettia Christmas


Hi Crafty Friends,

Christmas is just under 3 months away, so it's time for me to think about getting a few Christmas cards made each month so I have some in my stash ready for December.

For my card today I used Pinkfresh Studio's Ornate Floral die. This die can be used to create cards for any time of the year, but I wanted to make a Christmas version for my first card. I die cut the design three times, once each from gold, red and green cardstock. I then paper pieced the various colors into the design.

I added a sentiment to the front of the card using The Ton's Easy Expressions Holiday stamp set and coordinating die.

To finish off the card I added three red gems to the card.


For the inside of the card, I die cut just the larger flower/poinsetta from the three colors of cardstock and added it to the lower left hand corner of the card.

I added another of the sentiments from The Ton's Easy Expressions Holiday stamp set.

Supplies:
For your shopping convenience, all products are linked below. Compensated affiliate links are used where possible with no extra cost to you. This helps me to continue to share all the projects I include on my blog. For the benefit of my Australia readers, I have started to include some links to Australian stores when available. Please note I only use and share products I love.


Saturday, September 26, 2020

Christmas Slimline Double Dutch Fold Card


Hi Crafty Friends,

It’s challenge time with the “Crazies” over on the Crazy 4 Challenges blog. As challenge hostess for the month, I finish off the month with one last challenge.

So our final "S" themed challenge is ... 

Slimline Cards- Yes I know we had this theme earlier in the year, but Slimline cards are fun and on trend right now. They are also addictive …. Which is why I created a Facebook Group dedicated to Slimline Cards called Slimline Card Addicts. So this week create a slimline card.

The most popular sizes for Slimline Cards are either 3.5 inches x 8.5 inches or 4 inches x 9 inches. Slimline Cards fit into a standard business size envelope.


One of the things I am enjoying while creating so many Slimline cards lately, is finding old ideas and adapting them to work with Slimline cards. Recently on my Slimline Card Addicts Facebook Group, Judy Lauterbach shared a Slimline Double Dutch Fold Card. Of course I had to put this on my to do list to try, which is what I have done for my card today. 

On a normal Double Dutch Fold card the top panel is the longer one and the two side ones are shorter, but it is the opposite when creating a Slimline version.


To create this style of card, first cut a piece of cardstock which is 4 inches wide by the length of the cardstock (11 inches if you are using US sized card or 12 inches if you want to use 12 x 12). As I was using Australian A4 cardstock, mine measures 11 3/4 inches. 

Score and fold along the long side at 8 3/4 


Cut another piece of cardstock that measures 8 inches x 6 1/2 inches. Score and fold along the 8 inch died at 2 inches on either side.


Now adhered the tall panel to the centre of the two fold panel. Note: For a better fold, trim a sliver of cardstock off the tall panel before adhering to the centre of the other panel.

Now it is just a matter of decorating as desired.


To decorate my card, I added patterned paper to all of the side and top panels.

I used Spellbinders Ornament Glimmer Plate/Die set to decorate the top panel. It hangs down over the side panels when the card is closed which helps keep those panels closed.


For the inside of the card I added a white panel which is die cut using a Slimline die set from Pinkfresh Studio. I added a border along the bottom of the panel using the Slimline Border die set.

I used Yana's Christmas Sentiment Glimmer sent to added the gold foiled Christmas sentiment. This was then die cut using the elongated oval die set. I added another poinsettia from the glimmer set I used on the front of the card.


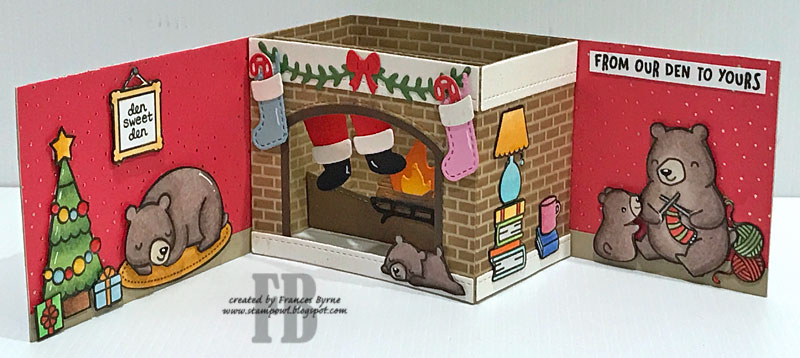
Don't forget to check out the rest of the “Crazies” cards over on the Crazy 4 Challenges blog and also their individual blogs for more details.


Supplies:
For your shopping convenience, all products are linked below. Compensated affiliate links are used where possible with no extra cost to you. This helps me to continue to share all the projects I include on my blog. For the benefit of my Australia readers, I have started to include some links to Australian stores when available. Please note I only use and share products I love.

Mega Ovals Die Set - Spellbinders (discontinued)
Mega Scalloped Ovals Die Set - Spellbinders (discontinued)


Friday, September 25, 2020

Sunflower Accordion


Hi Crafty Friends

Today we are taking a look back at Divinity Designs September Release.Today I have created an accordion card using the new Sunflower Layering Combo die set. For more inspiration using the September Release and to see the other designers projects, be sure to visit the Divinity Designs Blog .


I used Divinity Designs Accordion Card with Layers die set to create the accordion card base. I decorated the layers of the accordion using Follow the Son and Birthday Brights Paper Pads.


For the sunflower I used the new Sunflower Layering Combo die set.  I added a few leaves to the sunflower using the Foliage & Leaves die set. The leaves are a little bit small for the size of the sunflower, but as I didn't have Divinity Designs Rose Leaves die set which works well with the sunflower, I used what I did have. 

I used the Vintage Labels 2 die set to create all the labels for the sunflower & sentiments.

The sentiments used on this card are from the Whole Bunch stamp set.

Supplies:
For your shopping convenience, all products are linked below. Compensated affiliate links are used where possible with no extra cost to you. This helps me to continue to share all the projects I include on my blog. For the benefit of my Australia readers, I have started to include some links to Australian stores when available. Please note I only use and share products I love.


Thursday, September 24, 2020

Hello, You Always Make Me Smile


Hi Crafty Friends,

It's challenge time with my friends over on the CCEE Stampers challenge blog.  As challenge hostess for the month, I finish off the month with one last challenge.

According to the Days of the Year Calendar, September is Mushroom Month. So for our challenge this week, include one or more mushrooms either stamped or die cut on your creation.


I had hope to use one of Hello Bluebird's Slimline dies that have mushrooms included in the dies. These were released 1st August and I ordered straight away, but unfortunately due to COVID19 mail to Australia is SLOW!!!!! So it was plan B for me for this challenge, hopefully they will turn up soon.

EDIT ... Guess what arrived today, the day of the challenge ... my Mushroom Slimline dies I had wanted to use for the challenge LOL! At least they are here now and I will definitely be playing with them soon.

I did at least create a Slimline card, my favorite option right now. I used Slimline dies from Kat Scrappiness called Wonky Stitched Nesting Slimline dies, which did finally show up after a detour to Japan. Yes my dies seem to have fun travelling the world right now haha! 

Along the bottom of the card I added grass using the Wonky Stitched Nesting Slimline die and MFT Stamps Slimline Grassy Hills Die-namics. I added three rows of grass, adding shading to each of the tops of the grass.


To decorate my card, I used MFT Stamps Always Make Me Smile stamp set. I stamped all the images and used my Scan N Cut to cut out all the images and then added them all to the card to create the scene.


I added a die cut sentiment from The Stamp Marker called Hello Serif and then underneath this added a stamped sentiment which is from the stamp set I used on the card.


For the inside of the card I added borders to the right and left edges using Pinkfresh Studio's Slim Lacey Edgers die set.

I created a double pop up card using Karen Burniston's Katherine  Label Pop-up die set to which I stamped sentiments from Catherine Pooler Designs Say It In Diamonds stamp set.


Don't forget to check out the CCEE Stampers blog (goes live 12 AM EST) to see the rest of the creations the CCEE Stampers created this week. You can also see more details of their creations on their individual blogs:


Supplies:
For your shopping convenience, all products are linked below. Compensated affiliate links are used where possible with no extra cost to you. This helps me to continue to share all the projects I include on my blog. For the benefit of my Australia readers, I have started to include some links to Australian stores when available. Please note I only use and share products I love.


Wednesday, September 23, 2020

Ho Ho Ho Santa's Driving


Hi Crafty Friends,

Today I am sharing a Christmas card I created recently.

As you can see I have made another Slimline card, I used three different Slimline die sets from Trinity Stamps. For the base of the card I used the Slimline Stitched Card Panels & Windows, using the largest rectangle in the set. For the curved hill and road, I used the curved border die included in the Slimline Great Outdoor Borders & Banners die set. I added the trees from the Slimline Wonky Stitched die set.

I die cut the rectangle base from blue cardstock and then sponged white ink over the top of it using MFT Stamps Rolling Clouds stencil and then splattered on white ink to create a night sky.

Earlier in the year I purchased Spellbinder's Sunday Drive die set which up until now I hadn't gotten around to using. They recently come out an add-on set for this die set called Sunday Drive with Santa  which I had to buy seeing I had the original die set. Seeing I live in Australia where it is summer at Christmas time, I decided to have grassy hill rather than a snowy one.

For the sentiments I used two Spellbinder's Glimmer Foil Plates ... Yana's Christmas Sentiments and Holiday Sentiments Series 2.


For the inside of the card I created  border using Hero Arts Tri-fold Edge Winter Pine die set. This is supposed to create a tri-fold card, but by putting two side by side I was able to create a border with minimal trimming.

I added a sentiment from Creative Expressions which was a freebie when I placed an order recently.

Supplies:
For your shopping convenience, all products are linked below. Compensated affiliate links are used where possible with no extra cost to you. This helps me to continue to share all the projects I include on my blog. For the benefit of my Australia readers, I have started to include some links to Australian stores when available. Please note I only use and share products I love.

Thinking of You this Season die - Creative Expressions


Tuesday, September 22, 2020

Floral Birthday


Hi Crafty Friends,

Last week I post a birthday card that I had used the Simply Diamonds die to create. Today my card uses the same die and the coordinating stamp set as well.

I die cut the Simply Diamonds die from pink and white cardstock. I then used the stamp to gold emboss the lines onto the pink panel. I adhered this panel to a top folding white card.

I used the white diamonds from the white die cut panel and stamped the flowers to the centre of six of the diamonds, sponging pink ink around the edges of the diamonds.  I also sponged ink around all the border half diamond panels. These diamonds were then adhered to the card using foam tape for dimension.

I used the "Happy Birthday" stamp also included in the stamp set to gold emboss the centre panel.

To finish off my card I added pink sequins.


For the inside of the card I adhered a section of the white Simply Diamonds panel to the bottom part of the card. I then added some of the pink diamonds to fill in the empty spaces. I gold embossed two flowers to the full diamonds.

I gold embossed two sentiments from The Greetery's Sentiment Suite - Birthday stamp set, to the upper portion of the card.


Supplies:
For your shopping convenience, all products are linked below. Compensated affiliate links are used where possible with no extra cost to you. This helps me to continue to share all the projects I include on my blog. For the benefit of my Australia readers, I have started to include some links to Australian stores when available. Please note I only use and share products I love.


Monday, September 21, 2020

Unicorn Cake


Hi Crafty Friends,

Today I am sharing a Birthday Slimline Card I created recently. 

For this card I am using Your Next Stamp's Slim Circle Panel Die, I purchased this a few weeks ago and was surprised when it turned up two weeks later. This year I have been lucky if parcels from the USA & Canada get here within a month or two month due to COVID 19 and the international borders being closed. Of course I couldn't want to play with it.

To decorate my card I used Hero Arts Decorate A Cake which I ordered earlier in the year, being Unicorn themed I had to add it to my stash!

I used Mama Elephant's Big Happy Birthday die to add the sentiment, die cutting it from white glitter card and dark pink card and offsetting the two sentiments.


For the inside of the card I used Catherine Pooler's "Celebrate" die for the sentiment. I added two unicorns from Motion Crafts by Uchi's Design's Unicorn Flipbook stamp set.

I also added a few of the circles that came out of the Slim Circle Panel die randomly over the card.

Supplies:
For your shopping convenience, all products are linked below. Compensated affiliate links are used where possible with no extra cost to you. This helps me to continue to share all the projects I include on my blog. For the benefit of my Australia readers, I have started to include some links to Australian stores when available. Please note I only use and share products I love.