Monday, January 31, 2022

Rebus - Countries Starting with Letters L to N


Hi Crafty Friends,

It's time to share another rebus puzzle swap with you. This month the theme is Name of a Country starting with the letter L; M or N

If you would like to solve my rebus puzzle, why not post a comment on my blog post with your answers. I will let you know what the correct answers are next time I post a rebus card here.

How did you go solving my November Rebus which was "Names starting with the Letter W.". Here are the correct answers so you can check how you did.

  1. Wakeley
  2. Wendy
  3. Wellington
  4. Winifred
  5. William
  6. Whitney
  7. Wade
  8. Wilkins
  9. Wilma


You can find all my past Rebus Cards here.


Friday, January 28, 2022

Butterfly Trio


Hi Crafty Friends,

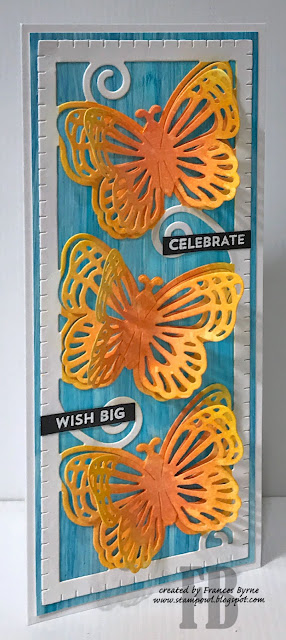
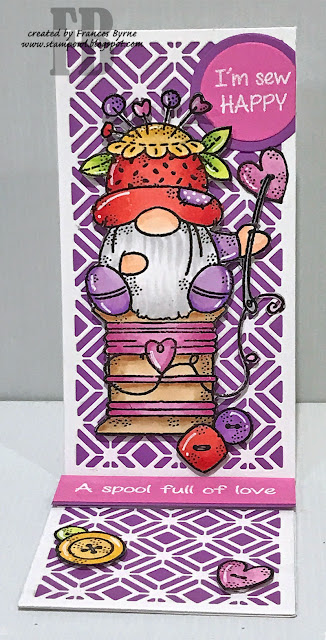
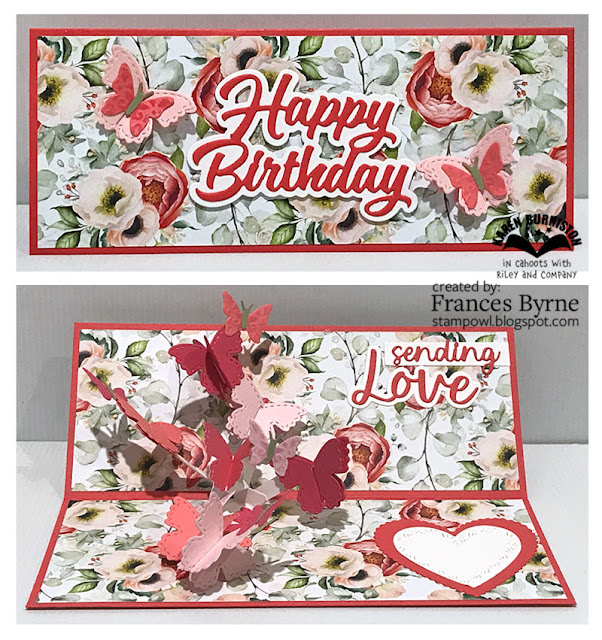
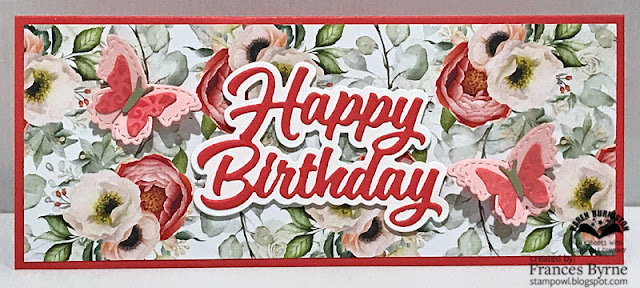
Today I am sharing a Slimline card I created using a slimline die from Lisa Horton Crafts.

I purchased a couple of Lisa Horton's Slimline Embossing Folders and one Slimline die set late last year. The slimline die is slightly shorter than a standard Slimline card measuring 7 3/4 inches x 3 1/4 inches, which means it won't work with other slimline dies out there. But it doesn't look that much different and it will at least still fit in a Slimline Envelope, so I am happy with the die set.

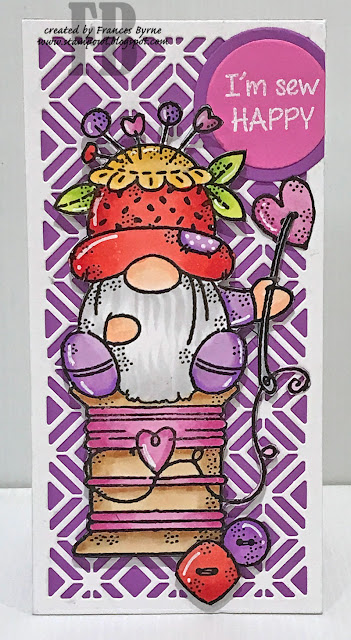
I had a panel of blue alcohol inked yupo paper in my stash which I have had for sometime, so I pulled that out to use for my background. I forget what color alcohol inks were used on this panel, as it was created a long time ago.


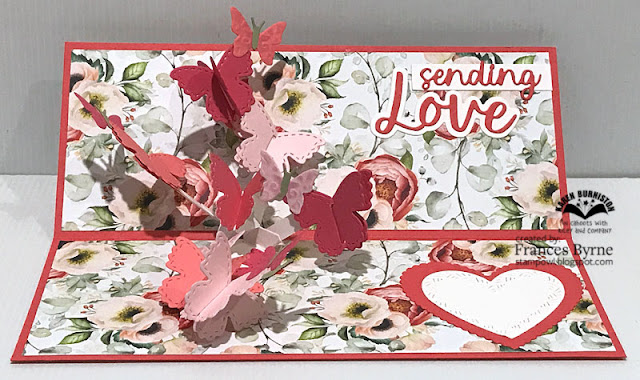
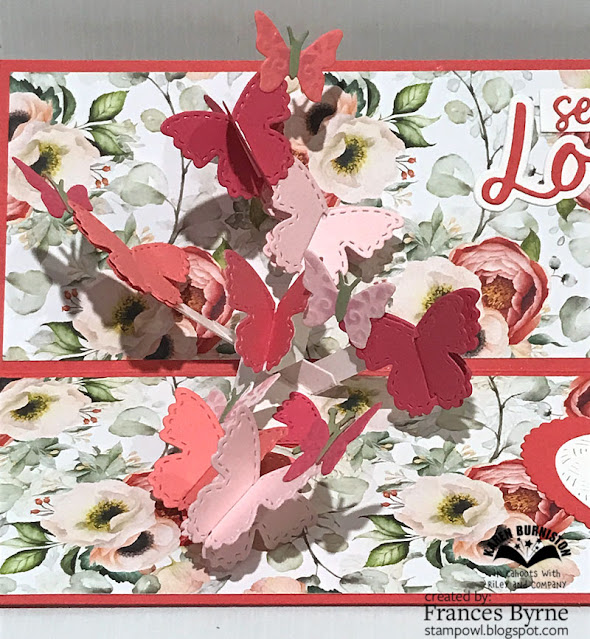
The butterfly die allows the butterflies to be 3D, however I wanted to see wings under the image when the wings were lifted up. So I die cut another butterfly panel and colored all the butterflies using Catherine Pooler Inks in Glitz and Orange Twist. I carefully masked the full panel so that the frame and swirls were still white after ink. I cut out the butterflies from the second panel and adhered them on top of the butterfly slimline frame.

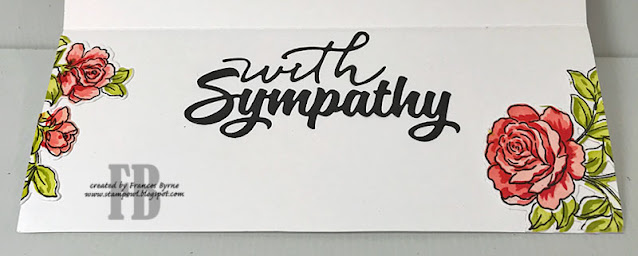
I added two sentiments using MFT Stamps Bitty Birthday Stamp set.


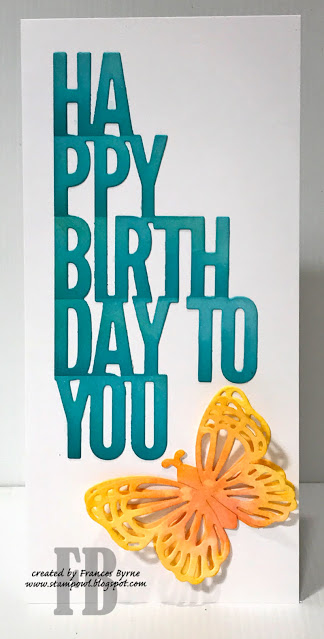
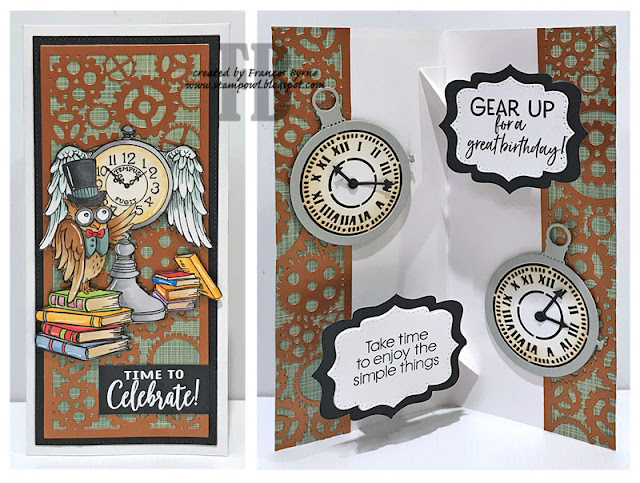
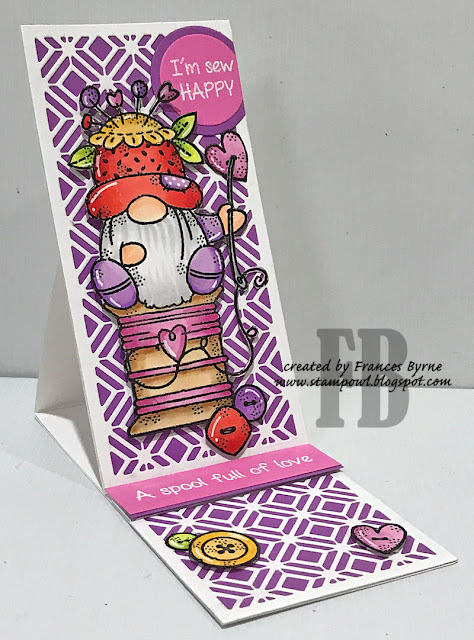
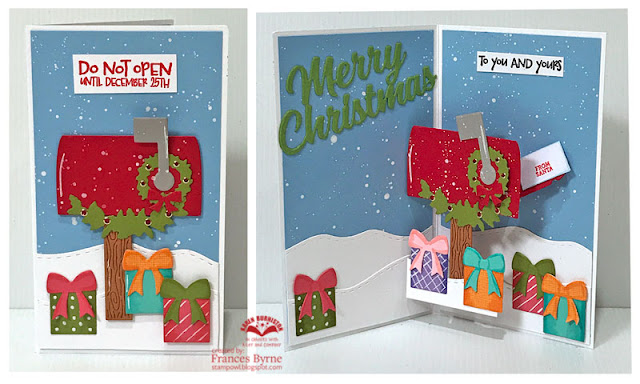
For the inside of my card, I die cut the birthday sentiment from Concord & 9th's Perfect Pairings die set from white cardstock and then applied ink from Catherine Pooler's It's a Boy and All That Jazz.

I die cut two more butterflies, ink blended them and layered them together to add to my card.


Thursday, January 27, 2022

Owl Time to Celebrate!

Hi Crafty Friends,

It's challenge time with my friends over on the CCEE Stampers challenge blog. Lois Bak, our challenge hostess for the month continues to issue the challenges.

Today is Punch the Clock Day.    Put something time-related on your card (a clock, a watch, a calendar, etc.).  If you don’t have any of those things, make a birthday card – that’s time-related!


I pulled out my Owl Clock stamp from Stampendous to create my card today. As the style of clock show in the image uses gears/cogs to work, I decided to also used Dare 2B Artzy's Gears Slimline die set for the background of my card. As the owl image is a little wide, I made my slimline card so it measured 4 inches x 8 1/2 inches.

I added the "Time to Celebrate!" sentiment is from a Stamping Village Birthday stamp set. I masked off the present image that is on the sentiment, as I didn't need that for this card.


For the inside of my card I created a Double Pop-up up card using Karen Burniston's Katherine Label Pop-up die set. On the top label, I added a "gear" themed sentiment, seeing I used the gears slimline background. On the bottom label, I added a "time" themed sentiment using an older Hero Arts stamp set.

I also added two time pieces using an older die set from Elizabeth Craft Designs.

Don't forget to check out the CCEE Stampers blog (goes live 12 AM EST) to see the rest of the creations the CCEE Stampers created this week. You can also see more details of their creations on their individual blogs:


Other Supplies:
Owl Clock unmounted cling stamp - Stampendous
All the Time Stamp set - Hero Arts (discontinued)


Wednesday, January 26, 2022

Thinking of You


Hi Crafty Friends,

Today I am sharing a Slimline card I created recently using some floral stamps, stencils and die combo set from Pinkfresh Studio.

I am loving  all the floral sets from Pinkfresh Studio that includes the option to purchase stamps, dies, stencil and hot foil stamps that all coordinate together. The make quick work of adding color to your images. For this card I used the Garden Roses stamp, die and stencil sets.

For the background, I used Spellbinders Slimline Big Dots Embossing Folder which I embossed onto white cardstock and then adhered to my top folding slimline card that measures 3 1/2 inches x 8 1/2 inches.

I stamped and colored the roses twice onto white cardstock and then arranged them onto my Slimline background panel.

For the sentiment I used Honey Bee Stamps Thinking of You Big Time stamp set with coordinating die. I need to build up my stash of sympathy cards, which is what I will use this card for.


For the inside of my card, I added the "with Sympathy" sentiment using the word die from Karen Burniston.

I added a couple of left over roses along both sides of my card.


Tuesday, January 25, 2022

Karen Burniston - KB Riley LLC January 2022 Release Blog Hop


Hi Crafty Friends, 


Welcome to our Karen Burniston Products - KB Riley LLC January Release Blog Hop. The Design Team have come together with Karen today for a fun blog hop to celebrate the release of 9 new dies. Sneak peeks of the new release started last week, and the dies are available to order NOW!


This release includes:

  • 2 new Slimline Pop-up Die Sets -Heart Collage Pop-Up; Mailbox Pop-up
  • 2 new Add-Ons Die Sets - Balloons Collage Add-Ons; Butterfly Collage Add-Ons
  • 1 new Crosshatch Die Set - Hearts - Crosshatch 
  • 1 new Animals die set - Monkey and Lion 
  • 1 new Charms die set - Good Luck Charms
  • 2 new sentiment sets - Sending Love; Happy St. Patrick's Day


Dies are available to order now on the website. 


GIVEAWAY:


To celebrate the release Karen Burniston and each of the Karen Burniston - KB Riley LLC Design Team members will be giving away a $25 Gift Certificate to some lucky person who comments on our blog posts, so make sure you join the hop and comment on everyone's blog post. Winners will be randomly chosen from ALL of the blog hop comments received on our blog posts by Monday, January 31st  2022. Lots of chances to win some goodies, so just leave a comment on this post or any other blog hop posts to enter! Don't forget to leave some way for us to contact you, in case you are a lucky winner!


Late last year, Karen Burniston shared a card on her blog that she created using the Little Labels Pop-up die set, making a 5 x 7 inch double pop up card. I have been wanting to try this technique since I saw her card, so I decided to try it for my card today. You can see Karen's original card here

For my card I went with a St. Patrick's Day theme, so I could use the two new dies sets ... Good Luck Charms and Happy St. Patrick's Day die sets.

I didn't have any papers in my stash I liked, so I searched online and found some digital papers I was happy with.

The pot of gold, rainbow and clover that are on the labels at the top of the card are all from the Good Luck Charms die set. 


I created two leprechauns using the Gnome and Santa die set, which I attached to the lower pop-up panel.

I added the "Happy St. Patrick's Day" sentiment to the base of my card.


I kept the front of my card simple seeing the focus of this card is the inside.

I used two of the label dies from the Labels - Crosshatch die set. I added the leprechaun, pot of gold and rainbow to the label.

I used one of the borders from the Border Blends - Trims die set which I die cut in yellow cardstock. I then added the smallest clover included in the Good Luck Charms die set.

Well that is about it from me today, thank you for dropping by. To continue on the blog hop, click on the next person on the list which is the wonderful Kelly Booth.

Here is the complete blog hop list if you need it.

Blog Hop List:


Karen Burniston 

Lois Bak

Karen Aicken

Frances Byrne    <<<< You are here >>>>

Kelly Booth

Fran Sabad

Sandy Diller


Monday, January 24, 2022

Hello Swirl Flowers


Hi Crafty Friends,

Today I am sharing a Mini Slimline card using products from Gina K Designs and Pinkfresh Studio.

For the background of my card I used the new Gina K Designs Swirl Flower Mini Slimline Plate. I die cut the cover plate from black cardstock and then layered this onto a panel of cardstock that has been blended using yellow and orange ink.

I layered this panel onto a top folding 3 inch x 6 inch Mini Slimline card base.

For the sentiment I used Pinkfresh Studio's Brushed Sentiments Hot Foil Plate and coordinating die set, foiling the sentiment using black foil.

I added yellow gems to the centre of the flowers.


For the inside of the card, I used the Swirl Flower Mini Slimline Plate to create a stencil to add some of the swirl flowers around the edge of the card.

I added a sentiment using Pinkfresh Studio's Perfect Sentiments Hot Foil Plate and coordinate die set.


Friday, January 21, 2022

Sew Happy Gnome

Hi Crafty Friends,

Today I am sharing a Gnome themed Mini Slimline Easel card that I created recently.

My card when it is closed measures 3 inches x 6 inches. I used Trinity Stamps Mini Slimline Geometric die to create the background of my card.


The gnome is from Woodware Stamp's Sewing Gnome stamp set.

I used Hero Arts Circle Infinity dies to add the sentiment on the top right hand corner of the card.


Here is a photo of my card when it is folded ready to be placed in an envelope.


Thursday, January 20, 2022

You're the Coolest

Hi Crafty Friends,

It's challenge time with my friends over on the CCEE Stampers challenge blog. Lois Bak, our challenge hostess for the month continues to issue the challenges.

Apparently today is Penguin Awareness Day.  Put a penguin or two on your card.


As you can see I created another Building Blocks Card using Studio Light's Building Blocks die set. This time around I didn't add the layers to each of the blocks, so I had more room to create my scene.

I die cut all the individual squares from blue cardstock and then blending Broken China and Prize Ribbon Distress Oxide inks to them.

I used Antique Linen and Vintage Photo on the sand areas, die cutting each of the pieces using Lawn Fawn's Stitched Hillside Borders die set.

To decorate my card I used the penguins and accessories from MFT Stamps BB Penguins in Paradise stamp set. 

To finish off my card, I white embossed two sentiments which were included in the stamp set.


My card, folds flat and will fit inside a 5 inch square envelope.

Don't forget to check out the CCEE Stampers blog (goes live 12 AM EST) to see the rest of the creations the CCEE Stampers created this week. You can also see more details of their creations on their individual blogs:

Other Supplies:
Building Block Die Set - Studio Light


Wednesday, January 19, 2022

Butterfly Love


Hi Crafty Friends, 

Today I am sharing a birthday themed Slimline Pop up card using new dies which will be released by Karen Burniston - KB Riley LLC, next Monday 24th January.

Here is a quick video to see my card in action.


A year of two ago, Karen Burniston released the Photo Collage Pop-up die set.  This time around Karen is releasing three die sets that work along the same way as the Photo Collage Pop-up, but this one is smaller and designed to work in both Slimline and Mini Slimline cards. There are three die sets available ... The Heart Collage Pop-up which includes the main collage mechanism plus 3D heart dies; Butterfly Add-On & Balloon Add-On. The Add-on die sets don't include the collage mechanism, so you do need to order the Heart Collage Pop-up die set and any of the Add-on die sets you want.


For my card today  I created a Slimline card that measures 3 1/2 inches x 8 1/2 inches. I used the Heart Collage Pop-up for the pop-up mechanism and the Butterfly Add-on die set to add the butterflies onto the pop-up mechanism. When adding the pop-up to my card, I positioned it towards the left of my card, to allow plenty of room to add a sentiment and place to write a personal greeting.


The sentiment at the top right hand corner of my card is die cut using the new Sending Love die set. 

The hearts on the base of the card uses dies from the Hearts - Crosshatch die set.


I kept the front of the card simple, as the focus is on the inside for this card. I added the birthday sentiment using the Happy Birthday and Happy Birthday Shadow die sets.

I also added a couple of the butterflies using dies from the Butterfly Collage Add-on die set.


Here is a quick look at the products being released next Monday 24th January, link included in the supply list below.


Tuesday, January 18, 2022

Christmas Mailbox


Hi Crafty Friends,

Have you heard the news???

Today the Karen Burniston Design Team start sharing sneak peeks for the upcoming January release.  Karen Burniston - KB Riley LLC will be releasing 9 new dies which will be available to order on Monday 24th January.

Here is a quick video to see my card in action.

So I know Christmas has been over for nearly a month, however I received my dies about two weeks before Christmas. I had just finished making all my Christmas cards etc and thought I was Christmas Carded out ... and then when I start making my first card using the new Mailbox Pop-up die set, I decided to make a Christmas themed one! I decided to keep going, just to show you that this die set can be used for anytime of the year .


I created a Mini Slimline Card with my final card measuring 3 1/2 inches x 6 inches. The width of this card is probably the narrowest you can go for the mailbox to be hidden when the card is closed. 

I cut two panels of blue cardstock that I splattered with white paint. I then used the Nature Edges die set to add snow along the bottom of the panels before adhering to the inside of my card.

I assembled the mailbox using the Mailbox Pop-up die set and adhered it to my card. As it was Christmas I wanted to add some decoration to the mailbox, but I need to be careful that the decorations didn't impede the movement of the mailbox opening and closing. I die cut the wreath and trim from the Street Lantern Pop-up die set. I adhered the wreath around the circle  that the arm is adhered to and then added the trim along the bottom of the mailbox.

I die cut an envelope using a die included in the Mailbox Pop-up die set, adding a stamped sentiment to the front of the envelope. I then placed this on the pop-up mechanism of the mailbox so my letter can pop out of the mailbox.

I used the presents from the Big Birthday Charms die set, to add the presents around the bottom of the mailbox.

I used the Merry Christmas die to add the sentiment to the left hand side of the card. And then used a stamped sentiment to add the "To You and Yours" on the right hand side of the card.


The front of the card is basically using some of the same elements I used on the inside of the card. I used the Mailbox Pop-up die set to create a flat version of a mailbox. 

I added another sentiment to the top of the card.


Here is a quick look at the products being released next Monday 24th January, link included in the supply list below.