Wednesday, February 28, 2018

Have a Tail Wagging Good Time


Hi Crafty Friends,

Today I am sharing a card I created using Mama Elephant's The Dog's Woof Stamp set ... I have the cat and snowman version of this stamp set, so when the dog one became available I just had to have it.


Today I decided to create a Clean and Simple card using this stamp set. 

I stamped the image onto black card using VersaMark ink and then white embossed it. I added a sentiment onto a strip of red card and white embossed that also. 

To finish off the card I added a white bone brad to the lower right hand side of the card.


For the inside of the card I added a sentiment from DRS Stamps and also added a couple more images from the Mama Elephant stamp set.


Stamps: The Dog's Woof - Mama Elephant; Puppy Pals - MFT Stamps; Hot Diggity Dog - DRS Stamps
Paper: White; Black; Red
Other: VersaMark Ink; White Embossing Powder; Bone Brad; Foam Tape


Tuesday, February 27, 2018

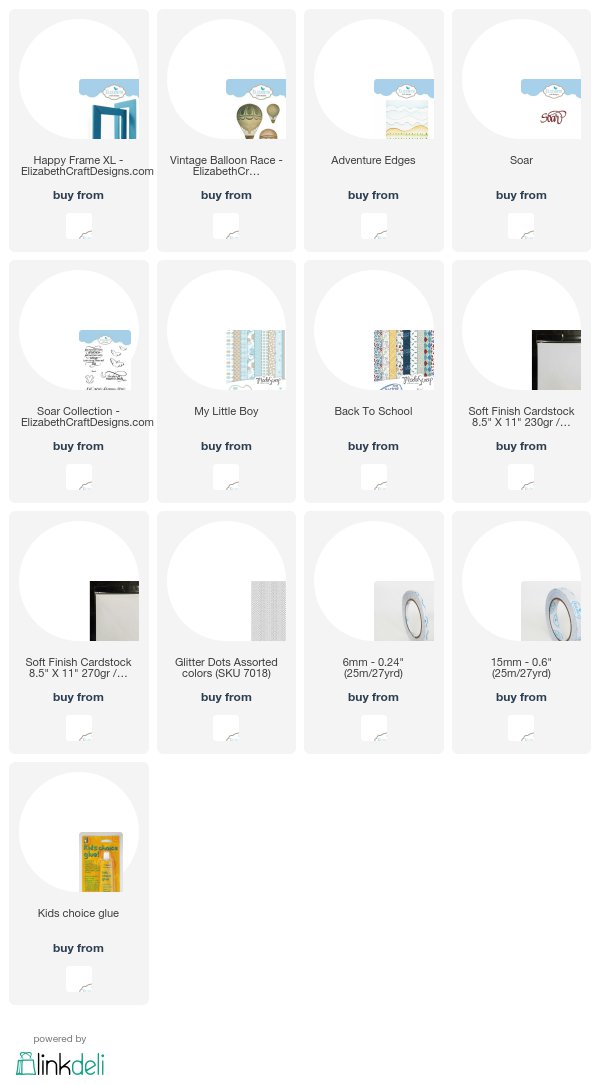
Let Your Dreams Soar Frame


Hi Crafty Fiends,

It's my turn to post a tutorial on the Elizabeth Craft Designs blog today. The new ModaScrap Happy Frame and Happy Frame XL which were released in January are so much fun and versatile. These can be used for cards, frames and lots of other fun things. One of the fun things about these dies is that you can create frames any size you wish up to approximately 8 inches and can be either square or rectangular. All you need to do is cut the die cut pieces to the size you wish to make.

For my project today I decided to create a framed art piece which can be used for a child's room using the Happy Frames XL  and Vintage Hot Air Balloon Race die sets.

Here is how I created my framed art piece:


Step 1 -

  • Using the Happy Frame die, die cut 4 frames from your desired paper or cardstock (ModaScrap Back To School Patterned Paper Pack used here). 
  •  Note if you are using a patterned paper that has a definite direction of the pattern like the one used in the photo above, you need to think before die cutting your papers ... Looking at the photo above, note how each time one of the frames was die cut, the direction in which the frame was placed onto the patterned paper was changed prior to die cutting so that the finished frame would be have the pattern all going in the same direction. Of course using plain or an generic pattern (as I have used for my project today) is much easier to do.

  • Fold each of the frames along the four score lines of each panel. Note - it is easier to fold along each fold line in a valley fold first and then fold it into a mountain fold once you have folded along each fold line.
  • Place a piece of Clear Double Sided Adhesive Tape along the tab (shortest edge).
  • Remove the protective backing from the adhesive and bring the other edge over and secure to the adhesive.
  • Form a box shape with each of the frame panels.
Note - if you were wanting to change the size of the finished frame, you would trim the the straight edge of either two or four of the frame panels before adhering each frame panel to form a box shape.


  • Arrange each of the frames to form a square (or rectangle) so that each of the pointed edges are all going in the same direction. (This is also a good time to make sure the pattern on your paper is all going the correct way if your frame has a pattern).
  • Apply some adhesive to the three inner sides of the pointy end of one of the box frame pieces and place the square end of the other into it. Ensure that you have a neat corner.
  • Repeat the last step until you have all four corners glued to form a frame.
Step 2 -
  • Cut a piece of White Soft Finish Cardstock that 7 3/4 inches square and adhere to the back of the frame.
  • Using the cloud patterned paper from the ModaScrap My Little Boy 6 x 6 Patterned Paper Pack, adhere to centre of frame.

Step 3 - 
  • Using the Vintage Balloon Race die set, die cut two each of the detail balloon layers (one from white cardstock and one from colored cardstock). Color the basket and ropes of each hot air balloons using brown copic markers. 
  • Cut off the rope/basket from the colored cardstock die cut pieces and adhere over the white hot air balloons.
  • Die Cut the large and medium solid balloon dies using coordinating cardstock and adhere to the back of the colored hot air balloons.
  • Stamp the "heart with wings" from the A Way With Words - Soar Collection Clear Stamp set directly onto the small orange hot air balloon using black ink. Color image using colored pencils. 
  • Decorate all balloons with various colors of Glitter Dots.

Step 4 -
  • Using the cloud die from the Adventure Edges die set, die cut a piece of White Soft Finish Cardstock so that the cloud is 6 inches long and approximately 1 1/2 inches in height. 
  • Sponge the edge of the clouds using blue ink.
  • Stamp the sentiment "let your dreams soar" from the  A Way With Words - Soar Collection Clear Stamp set to the centre of the cloud using Black VersaFine Ink, cover sentiment with Clear Embossing Powder and heat set. 
  • Adhere the cloud to the bottom of frame using foam tape.

Step 5 - 
  • Adhere the hot air balloons inside the frame using foam tape.
Step 6 - 
  • Using the A Way With Words - Soar die, die cut the sentiment four times from red cardstock. Adhere each of the sentiments onto each other to form a thick sentiment.
  • Adhere sentiment to lower right hand corner of frame.
Thank you for stopping by, I hope you enjoyed my tutorial.

Supplies:
Elizabeth Craft Designs:


Other:
Cardstock - Red; Yellow; Orange; Blue; Green
Inks - Black VersaFine Ink; Tumbled Glass Distress Ink
Clear Embossing Powder
Heat Gun
Copic Markers
Pencils
Foam Tape


Monday, February 26, 2018

Rebus - Movies Starring Tom Hanks


Hi Crafty Friends,

It's time to share another rebus puzzle swap with you. This month the theme is "Movies starring Tom Hanks"


If you would like to solve my rebus puzzle, why not post a comment on my blog post with your answers. I will let you know what the correct answers are next time I post a rebus card here.

How did you go solving my November Rebus which was "Songs by John Denver ". Here are the correct answers so you can check how you did.

  1. Leaving on a Jet Plane
  2. Pegasus
  3. Amazon
  4. Annie's Song
  5. Farewell Andromeda
  6. Take me home Country Roads


You can find all my past Rebus Cards here.


Sunday, February 25, 2018

Donut Worry Be Happy


Hi Crafty Friends,

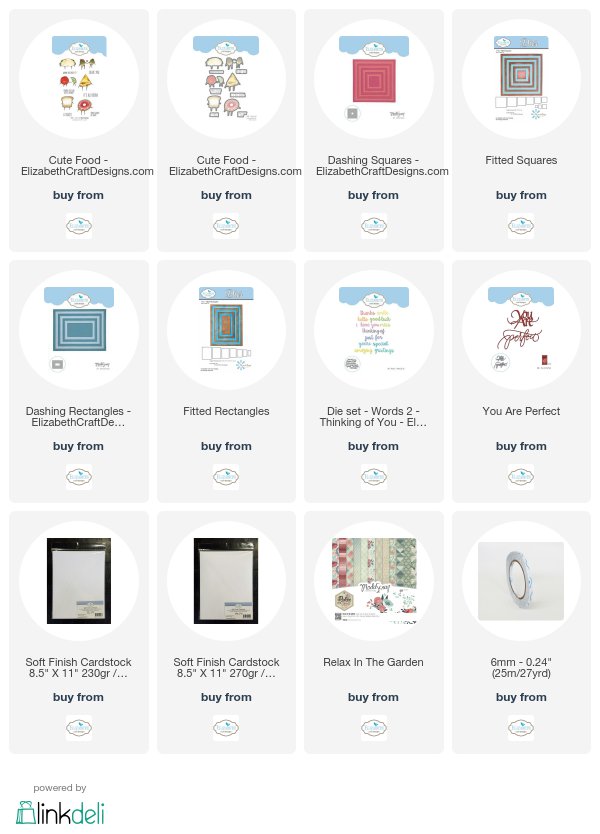
Today I am playing with some of the new products that was released by Elizabeth Craft Designs last month.

The cute donut and sentiment are some of the fun stamps included in the Cute Food Clear Stamp set which also has a coordinating die set, however I didn't use that for this card.

I stamped the donuts onto White Soft Finish Cardstock which were die cut using a square from the ModaScrap Dashing Squares die set and then layered onto brown cardstock using the Fitted Squares die set.

I used one of the beautiful patterned papers from the ModaScrap Relax in the Garden Patterned Paper Pack which was die cut using the ModaScrap Dashing Rectangles and the Fitted Rectangles.


For the inside of the card I added a strip of the same patterned paper I used on the front of the card. I added the "You Are" from the A Way With Words - You Are Perfect die set and the "Special" is from the Words Set 2 - Thinking of You.

To finish the card I added another donut at the bottom of the card.

Supplies:
Elizabeth Craft Designs:


Other:
Cardstock - Brown; Pink
Inks - Black; Brown
Nuvo Dark Walnut Gloss Crystal Drops
Glossy Accents
Foam Tape
Copics


Saturday, February 24, 2018

Happily Ever After


Hi Crafty Friends,

It’s challenge time with the “Crazies” over on the Crazy 4 Challenges blog. Karen Aicken our challenge hostess for the month finishes off the month with one last challenge.

This is Karens Birthday Month and she likes cake. For our project this week, add a cake, cupcake or other yummy. It doesn’t have to be a birthday card - just show us something delicious.


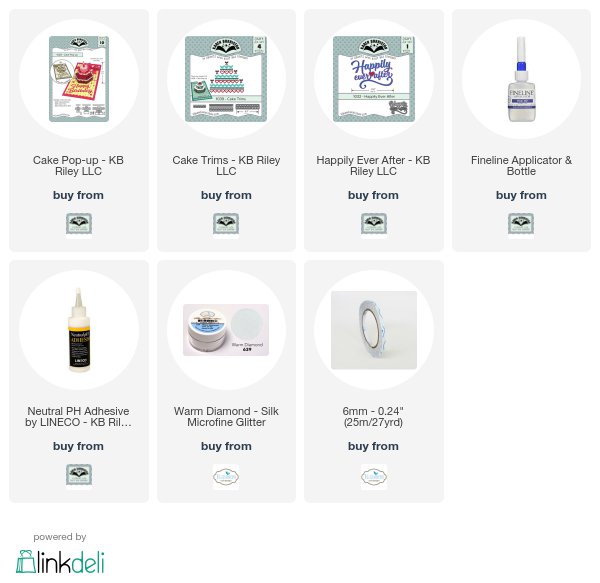
This seemed like the perfect opportunity to play with Karen Burniston's new Cake Pop-up Card die set, I could have made a birthday card, but I have had a wedding card floating in my head for a few weeks now using this die set and the last wedding card I made disappeared not long after I made it as my daughter needed a wedding card so that is the way I went.

As you can see I have kept with a white and gold color theme, the base of the card is White Shimmer cardstock and I had a few sheets of white & gold patterned paper in a 6 x 6 paper pad I have. 


To decorate my card I used the Happily Ever After; Cake Trims and Word Set 1 - Greetings die sets also from Karen Burniston. The hearts are from the heart trim included in the Cake Trims die set.


Here is another view of my card taken at a different angle.


I kept the front of my card fairly simple as the focus is on the inside of the card. I added the "Mr & Mrs" die cut which is from a Tonic Studios die set I have had for a few years.

Don't forget to check out the rest of the “Crazies” cards over on the Crazy 4 Challenges blog and also their individual blogs for more details.


Supplies:


Paper: White Shimmer Cardstock; Gold; Desktop Edition Paper Pad - Project Life
Dies: Cake Pop-up; Cake Trims; Happily Ever After; Word Set 1 Greetings - Karen Burniston; Mr & Mrs Affections Insert - Tonic Studio
Other: Warm Diamond Silk Microfine Glitter; Clear Double Sided Adhesive Tape 101mm


Friday, February 23, 2018

Tee-rific Birthday


Hi Crafty Friends,

Today I am sharing a card I made for a very good friend who celebrated her birthday a couple of days ago. My friend loves playing golf and for as many years as I can remember I have created a golf themed card to give to her for her birthday. After all this time she more or less expects it from me haha!


This year I pulled out a couple of stamps I have had for a while but hadn't gotten around to using to create her card. I used Magnolia Stamps Golf Tilda and Golf Flag stamps for this card. I also found some patterned paper at a local Scrapbook Store last year which is perfect for my card.


For the inside of my card I used Karen Burniston's Spinner Square Pop-up Card die set. The sentiment and large golf ball move up behind the rectangle panel as the card is opened and closed.


Here is a short video so you can see the card opening and closing.


One final photo showing how the sentiment and large golf ball moves behind the rectangle panel.

Supplies:


Stamps: Golf Tilda; Golf Flag - Magnolia Stamps; Fore! Three Two One - Rubbernecker Stamps; Live Laugh Golf - Paper Pretties
Paper: White; Green; Tan; 18 Holes Designer Paper - Karen Foster Design; Class Act Paper Pad - Kaiser
Dies: Spinner Square Pop-up Card - Karen Burniston; Dashing Rectangles - Elizabeth Craft Designs
Other: Black Ink; Broken China Distress Oxide; Peeled Paint Distress Oxide; Lucky Clover Distress Oxide; Foam Tape; Copics

Thursday, February 22, 2018

Hope Your Day Is As Cool As You Are


Hi Crafty Friends,


It's challenge time with my friends over on the CCEE Stampers challenge blog. Kelly McKown-Santi 
our challenge hostess for the month finishes off the month with one last challenge.


Next Tuesday (27th February) is Polar Bear Day! For our challenge this week we are to create a card with a polar bear(s), snow or use white as your cards focal color.


For my card this week I used all three of the options for our challenge ... the polar bears, snow and white. I used the Lawn Fawn Beary Happy Holidays Clear Stamp set along with their Scalloped Box Card Pop-Up die set.


 I used some sentiments from a few other stamp sets, to give the card a winter birthday theme. I also used Clear Glitter for the snowy parts of the card.


On the back of the card I used Simon Says Stamp Wonky Rectangles, added some snow banks, the polar bear and a birthday sentiment.


My Scalloped Box Card Pop-up folds flat so it can be placed in an envelope.


Don't forget to check out the CCEE Stampers blog (goes live 12 AM EST) to see the rest of the creations the CCEE Stampers created this week. You can also see more details of their creations on their individual blogs:

Vicky Gould
Kelly McKown-Santi


Stamps: Beary Happy Holidays - Lawn Fawn; Winter Warmers - Hunky Dory; Penguins in Paradise; Beary Special Birthday - MFT Stamps;
Paper: White; Aqua
Dies: Scalloped Box Card Pop-Up; Birch Trees; Stitched Mountain Borders - Lawn Fawn
Other: Black Ink; Lawn Fawn Minty Fresh Ink Cube; Lawn Fawn Manatee Ink Cube; Clear Double Sided Adhesive Tape; Cool Diamond Silk Microfine Glitter; Nuvo White Gloss Crystal Drops; Foam Tape; Copics


Wednesday, February 21, 2018

Happy Easter Shaker Card and Triangle Box


Hi Crafty Friends,

It's time for our February Elizabeth Craft Designs Design Team Designer challenge. Check out the Elizabeth Craft Designs blog today to see what our talented designers created for the challenge. 

With Easter only about 6 weeks away, out challenge this month is to create something with an Easter theme.


For today's challenge Elizabeth Craft Designs are giving away a $20 Gift Card to use on our website to 3 winners

To enter simply leave a comment on the Elizabeth Craft Designs Challenge post and tell us "What Elizabeth Craft Designs dies or stamp sets would you use to create an Easter Card?

We will select 3 lucky winners in a random drawing 

The winners will be announced on Friday, March 2nd on the Elizabeth Craft Designs blog.


I decided to create a Shaker Card and a Triangle Box for this months challenge.


Here is how I created my card -

Step 1 - Using the largest rectangle from the Dashing Rectangles die set, die cut a piece of White Soft Finish Cardstock. 
  • Using the Dashing Squares die set, die cut a square to the upper section of this card.
  • Sponge Peacock Feathers; Wild Honey and Twisted Citron Distress Oxide over the rectangle and square panels. Spritz with water.
  • Stamps and emboss the "Happy Easter" sentiment from the Spring Sentiments Clear Stamp set to the upper section of the square panel.
  • Using the largest rectangle from the Dashing Rectangles die set, die cut from a piece of White Soft Finish Cardstock. Use the Distress Oxide Rectangle panel as a guide so you can place the square panel to the centre of the rectangle panel.
Step 2 - Adhere a piece of acetate to the back of the square opening to the rectangle panel. 
  • Cover the back of the rectangle panel with two layers of foam tape.
Step 3 - Using the grass edge from the Adventure Edges die set, die cut two grass panels from White Soft Finish Cardstock. Trim the grass edges so that one is about 3/4 inches high and the other 2 inches.
  • Optional - Use the largest rectangle from the Dashing Rectangle to create the dash lines to the sides and bottom edge of the grass edges.
  • Sponge Twisted Citron Distress Oxide to both grass edges.
  • Adhere the taller edge to the bottom of the card and then use foam tape for the shorter grass edge.
Step 4 - Using the Color My Easter Eggs Clear Stamp set, stamp all the eggs onto White Soft Finish Cardstock using black ink.  Use the coordinating dies to die cut all eggs. Color as desired. Trim the bottom of the egg off 4 of the eggs and arrange them along the top the grass edges as per photo above. 
  • Adhere two more of the eggs to the bottom of the square.
Step 5 - Using the Bunny die set, die cut the pieces to create a sitting bunny using White Soft Finish Cardstock. Color the pieces using Copic markers. Assemble bunny and place in the centre of the front of my card.

Step 6 - Turn the rectangle panel over and place colored confetti pieces to the square opening. Cover the rectangle panel with the white panel that has the square attached to it.

Step 7 - Cut a piece of white cardstock so that it measures 4 1/2 inches x 11 1/2 inches. Score and fold along the long side at 5 3/4 inches to create a top folding card.
  • Adhere the decorated shaker panel to the front of the folded card.


Step 8  Inside of Card -
  • Using the Dashing Rectangles die set, die cut the second largest rectangle from White Soft Finish Cardstock.
  • Stamp the "Happy Easter" to the upper part of the rectangle using black ink.
  • Use the grass die from the Adventure Edges die set to die cut a grass panel from White Soft Finish Cardstock. Color using Twisted Citron Distress Oxide. Adhere to the bottom of the rectangle panel.
  • Stamp a couple more Easter Eggs from the Color My Easter Egg Clear Stamp set onto White Soft Finish Cardstock. Die cut using the coordinating dies. Color as desired.
  • Adhere eggs to rectangle panel as per photo above.
  • Attach rectangle panel to the inside of the card.
Step 9 Triangle Box -
  • Using the ModaScrap Triangle Box, die cut from White Soft Finish Cardstock. Color box using the same Distress Oxide inks used for the shaker card. Assemble box.
  • Use the grass die from the Adventure Edges die set to die cut a grass panel from White Soft Finish Cardstock. Color using Twisted Citron Distress Oxide. Adhere to the bottom triangle box using foam tape.

  • Stamp the three smaller Easter Eggs from the Color My Easter Egg Clear Stamp set onto White Soft Finish Cardstock. Die cut using the coordinating dies. Color as desired. Adhere behind the grass border.
  • Using the "Easter" sentiment from the Words Set 3 - Happy Holidays die set, die cut from White Soft Finish Cardstock. Color cardstock using Peacock Feathers Distress Oxide and adhere along the grass border.

  • Use yellow ribbon to die the box shut.

I hope you enjoyed my project today. Don't forget to check out the Elizabeth Craft Designs blog to see all the wonderful creations by our talented designers and for a change to win the giveaway.

Supplies:

Elizabeth Craft Designs:


Other:
White Cardstock
Acetate
Distress Oxide - Peacock Feathers; Wild Honey; Twisted Citron
Black Ink
Porta Craft Glitter Shaker Confetti
Nuvo Glitter Gloss Aqua Shimmer Pen
Yellow Ribbon
Copic Markers
Foam Tape


Tuesday, February 20, 2018

Seas the Day


Hi Crafty Friends,

Today I am sharing a beach themed card with you. Down here in Australia we are enjoying our final month of summer, although it will probably be hot for at least another month or so yet. 

For my card today I thought I would play with a new Stamping Bella stamp set I purchased recently. I have purchased a few new stamps which I thought would work well with some of Karen Burniston's new pop-up dies, but I wanted to make something fairly quick to test out my new Gemini die cutting machine. With the amount of die cutting I do I have been having a few issues with my shoulder, so hopefully having an electric one finally will help my shoulder as I won't be having to continually crank that handle. So for today's card  I pulled out MFT Stamps Beach Scene Builder die set to create my card this time around. But I know I will be pulling it out again shortly to use for the reason I purchased them :)

I used Distress Oxide inks to color the sand, the ocean and sky for my card. The Beach Scene Builder die does come with it's own palm tree, but I decided to use the one that came with the stamp set for this card.


Here is a look at the inside of my card. Both the "sea" theme sentiments used on this card are from Honey Bee stamps and the "Happy Birthday" is from Lawn Fawn. I also added a couple more images which came from another Stamping Bella stamp set.


Stamps: The Littles Palm Tree Set; The Littles Sandcastle Set - Stamping Bella; Waves - Print Blocks; Mermaid Song - Honey Bee Stamps; Happy Happy Happy - Lawn Fawn
Paper: White; Black; Yellow
Dies: Beach Scene Builder - MFT Stamps; Stitched Rectangles - Simon Says Stamp
Other: Black Ink; Salty Ocean Distress Oxide; Broken China Distress Oxide; Fossilized Amber Distress Oxide; Scan N Cut; Black Glaze Pen; White Gel Pen; Foam Tape; Copics