Friday, March 31, 2017

Pencil Day


Hi everyone,

Apparently the 30th March each year is National Pencil Day, to celebrate the day Hymen Lipman received the first patent for attaching an eraser to the end of a pencil in 1858, making the eraser-tipped pencil 159 years old today ... wow! (Technically for me today is the 31st, but it is still the 30th up in the Northern Hemisphere so that's ok).

For some reason I must have discovered this piece of news last year when I was looking up days of the year which I often do for challenges as I found it written in my to do list. So for want of something to blog today I figured why not celebrate the pencil.

Another piece of news I discovered when reading about Pencil Day is that the most common color of pencil in the USA is yellow, no idea why. So I decided to make my pencil today yellow too.

As you can see I created a Pencil shaped card and decorated the front using MFT Stamps Ala Mode Talk Nerdy to Me stamp set, this stamp set has long been retired but it worked well for my card today and it is good getting older stamps out and inky!!!!

I thought I might as well make use of this card as a teacher thank you for one of my Grandchildren's teachers for the end of the year. I normally need a few so might as well make one while I have the opportunity. I just need to make sure I put it in a safe place so it doesn't get lost by December haha!


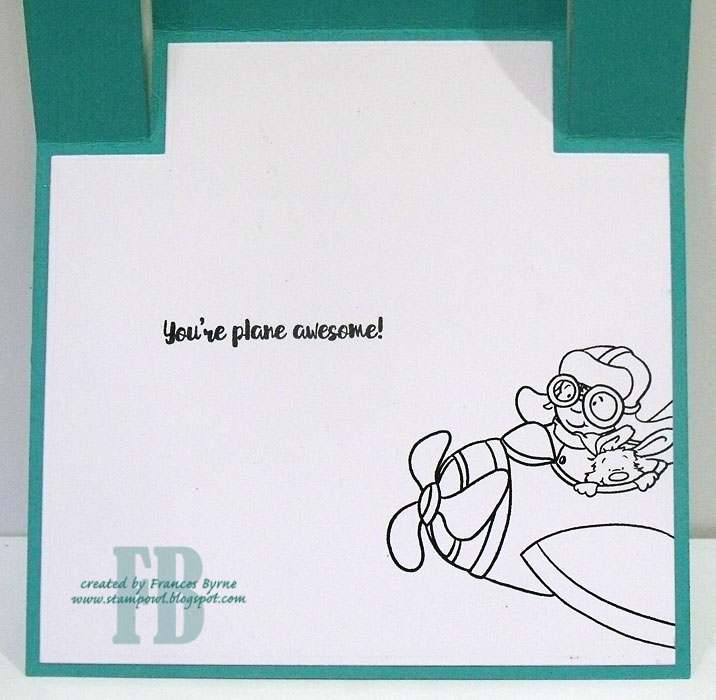
For the inside of the card I decided to use one of the sentiments that is included in the stamp set, I thought this sentiment went well with National Pencil Day, obviously Hymen Lipmen had a dream when he invited the eraser-tipped pencil!  Whether it works for a Teacher's Thank You I am not sure, but I think it does.... Teachers help shape the dreams of our kids by teaching them.

The pencil on the inside is one I have had for years and hardly used, it didn't want to be left out!

Stamps: Ala Mode Talk Nerdy to Me - MFT Stamps: Sentimental - Avery Elle; Pencil - A Stamp in the Hand
Paper: White; Kraft; Pink; Silver; Happy Tails Spots DP - Bo Bunny
Dies: MFT Die-namics Chevron Stripes; Sentimental - Avery Elle; Wonderful Words Teacher - PTI; ModaScrap Stitched Fishtail Banner - Elizabeth Craft Designs
Other: Black Ink; Foam Tape; Copics


Thursday, March 30, 2017

Out of this World

Hi everyone,

It's challenge time with my friends over on the CCEE Stampers challenge blog. Lynn McAuley our challenge hostess finishes off her month with one last challenge.

Today is Vincent Van Gogh's 164th Birthday. For our challenge this week Lynn has asked us to use the lyrics of the song "Vincent" by Don McLean be our inspiration when creating our card.

For my card this week I have made a Double Z Fold Card, I really like this style of card and have been having fun making them, especially this one which has to be my favorite of those I have done so far.

For my inspiration I went with the first line of the song .... "Starry, starry night...". As you can see we are looking at the stars from earth but from somewhere else in space haha. I so wanted to pull out my favorite space stamp set from There She Goes Clear Stamps once more. 

To create the background of my card I used the Galaxy Sky Technique using various colors of distress ink and then flicking Picket Fence Distress Paint over the background to resemble stars.


Here is a photo of my card taken at a different angle so you can see the whole card which includes the corner of the card.

For the moon that has the sentiment "You're out of this world!" I stamped the sentiment onto white cardstock, die cut using the smallest circle from the Fitted Circles from Elizabeth Craft Designs and then used the Stage It Stencil Petite Flourish to add some texture to the circle using Pumice Stone Distress Ink.


Here is a look at my card when it is closed ready to be placed in an envelope.


And finally one last photo, this time so you can see the inserts I added to the square in the corner so I could have my astronaut and space ship floating in space.


Don't forget to check out the CCEE Stampers blog (goes live 12 AM EST) to see the rest of the creations the CCEE Stampers created this week. You can also see more details of their creations on their individual blogs:


Vicky Gould


Stamps: Out of this World - There She Goes Clear Stamps
Paper: White; Black
Dies: Fitted Circles; ModaScrap Stitched Fishtail Banner - Elizabeth Craft Designs
Other: Black Ink; Tumbled Glass Distress Ink; Mustard Seed Distress Ink; Picked Raspberry Distress Ink; Chipped Sapphire Distress Ink; Black Soot Distress Ink; Pumice Stone Distress InkPicket Fence Distress Paint; Stage It Stencil Petite Flourish - ECD; Splatter Brush; MISTI; Foam Tape; Copics


Wednesday, March 29, 2017

Ahoy Matey


Hi everyone,

Today I am sharing a card I created using some of my new stamps and die sets I received for my birthday last week.

For my card I used the Clearly Besotted Pirate Party stamp set, which I received from one of my friends. As you can see I created a Gatefold Card .... but it is more than just that it is a Gatefold Shutter Card as you will see in the photos below.


Here you can see the card starting to open with the black square near the top of the card on the inside.


Here you can see the square starting to open up to reveal the hidden image.


And finally the card and the square fully open. To create the Gatefold Shutter Card I used a new die I received for my birthday Magic Card Die - Square by Nellie Snellen. This makes this style of card pretty easy to create, for my first card I was pretty happy with it. 😀

Stamps: Pirate Party - Clearly Besotted
Paper: White; Black; Red; Skating Wild 1 DP - FabScrap; Rough & Tumble DP - Carta Bella
Dies: Magic Card Die Square - Nellie Snellen; ModaScrap Stitched Fishtail Banners; Stitched Squares; Fitted Squares; Dotted Scallop Squares - Elizabeth Craft Designs
Other: Black Ink; Foam Tape; Copics


Tuesday, March 28, 2017

Plane Awesome


Hi everyone,

Last week I posted a card I created using Kraftin Kimmie Stamps Sky's the Limit stamp set. I had stamped out two of the cute plane, so I decided to make two cards. 


For my card today I decided to create a Centre Step Card using  Centre Step Card die set from Cheery Lynn Designs. 

I used the clouds from the  CountryScapes Clouds & Grass die set, when it is die cut in green it looks a little like bushes.


For the inside of my card I added another sentiment and the plane image which is stamped off the edge of the card.

Stamps: Sky's the Limit - Kraftin' Kimmie Stamps; Sports Boy - Stampendous
Paper: White; Green; Save the Date Collection Banner DP - Kaisercraft; DP - SU
Dies: CountryScapes Clouds & Grass; Pop it Ups Outdoor Edges; Pop it Ups Anita Frames Pop Up Card; ModaScrap Stitched Fishtail Banners - Elizabeth Craft Designs
Other: Black Ink; Peeled Paint Distress Oxide; Foam Tape; Copics


Monday, March 27, 2017

Rebus - Things that are Blue


Hi everyone,

It's time to share another rebus puzzle swap with you. This month the theme is Things that are Blue.


If you would like to solve my rebus puzzle, why not post a comment on my blog post with your answers. I will let you know what the correct answers are next time I post a rebus card here.

How did you go solving my February Rebus which was "Songs by the Beach Boys"Here are the correct answers so you can check how you did. 


  1. Dance, Dance, Dance
  2. I Can Hear Music
  3. Barbara Ann
  4. Good Vibrations
  5. Wouldn't It Be Nice
  6. Kokomo


You can find all my past Rebus Cards here.

Sunday, March 26, 2017

Dream Big


Hi everyone,

My card today is for a challenge I do with a couple of friends of mine. Each month we challenge each other to create a card/project using particular supplies we all own.

As my friends had new Elizabeth Craft Designs to play with and of course I have them too we decided our challenge should be to use any of the new release products from ECD.

For this card I used the Diamond Background from Elizabeth Craft Designs over one of my Distress Oxide Backgrounds, I created a few weeks ago when I first got my ink pads. I also die cut the centre of the dreamcatcher, the strings and feathers from another of the backgrounds I made. I did add a second centre to my card using the Taken with Teal Soft Finish Cardstock that I also used for the base of my card.

The dreamcatcher has been layered onto cardstock die cut using the Stitched Fishtails and Fitted Fishtails die sets. The sentiment is from the Dreams Sentiments Clear Stamp set and is layered using the Stitched Fishtail Banners die set.


For the inside of my card I die cut another of the Diamond Backgrounds which I cut in half and applied the one half to half a Distress Oxide background. I also added another of the sentiments from the Dream Sentiments die set.


Stamps: Dream Sentiments - Elizabeth Craft Designs
Paper: White Soft Finish Cardstock; Time for Teal Soft Finish Cardstock -  - Elizabeth Craft Designs
Dies: Diamond Background; Dreamcatcher; Stitched Fishtails; Fitted Fishtails; Stitched Fishtail Banners - Elizabeth Craft Designs
Other ECD Products - Clear Double Sided Adhesive Tape; Turquoise/Silver Glitter Dots Peel Off Stickers
Other: Black Ink; Fossilized Amber Distress Oxide; Spiced Marmalade Distress Oxide; Broken China Distress Oxide; Peel Paint Distress Oxide; Foam Tape


Saturday, March 25, 2017

Owl's it Going?

Hi everyone,

It’s challenge time with the “Crazies” over on the Crazy 4 Challenges blog. As I am the challenge hostess for the month, I continue to issue the challenges. 

Yesterday was my birthday, as most of you know one of my favorite things are Owls .... so for our challenge this week include an owl on your card. If you don't have an owl no problem, any feathered creature will do.


For my card today I used the Sizzix Owl Label Fold Along die set to create this owl gatefold card. Here is my card when it is closed. Seeing that my favorite color is blue/teal I decided to use that for the colors of this owl this time round.

The 'hello' sentiment is a die from Avery Elle.


When you open up the card it reveals three owls. The two on either side of the card are the same. 

The blue oval part of the owl was created using an oval die and Broken China Distress Oxide and then spritzed. 

I added a stamped sentiment to the middle owl.


Here is another photo of my card this time half open.

Don't forget to check out the rest of the “Crazies” cards over on the Crazy 4 Challenges blog and also their individual blogs for more details.
Birgit Norton (March Guest Designer)


Stamps: Hootie Who? - Fresh Squeezed Stamps
Paper: White; Black; Orange; Teal; Refresh DP; Sea DP - Kaisercraft
Dies: Owl Label Fold Along Die - Sizzix; Sentimental Die - Avery Elle
Other: Black Ink; Broken China Distress Oxide; Foam Tape


Friday, March 24, 2017

Huge Birthday Wishes


Hi everyone,

Today is my birthday and as I didn't have anything particular I had to post on my blog today, I decided to create a birthday card using this cute Party Animal stamp set I purchased recently from Kraftin' Kimme Stamps.

As you can see I have created a Tri Shutter card using the Shutter Card die set from Tattered Lace.

 I used the Stitched, Fitted and Dotted Scallop Circles from Elizabeth Craft Designs for the image. I also added the ModaScrap Stitched Fishtail Banners for the HB2U which I added to the top left hand corner of my card. I added the party hat from the Props 7 die set onto each of the 4 square corners.

To finish off the card I added the "Celebrate" sentiment to the right hand panel.


Here is another photo of my card taken from overhead so you can see the folds of the card a little better.


And finally a look at my card when it is closed ready to be placed in an envelope.

Stamps: Party Animal - Kraftin' Kimmie Stamps
Paper: White; Red; Yellow; Back to School DP - Doodlebug Designs Inc.
Dies: Shutter Card - Tattered Lace; Stitched Circles; Fitted Circles; Dotted Scallop Circles; ModaScrap Stitched Fishtail Banners; Pop it Ups Props 7 - Elizabeth Craft Designs; Sentimental Die - Avery Elle
Other ECD Products:  Clear Double Sided Adhesive Tape 64mm; Cool Diamond Silk Microfine Glitter
Other: Black Ink;  Red Candy Dots; Foam Tape; Copics


Thursday, March 23, 2017

You are Pawesome

Hi everyone,

It's challenge time with my friends over on the CCEE Stampers challenge blog. Lynn McAuley our challenge hostess for the month, continues to issue the challenges.

Lynn asks .... Can anyone resist the cuteness of a puppy, man’s best friend. In honor of National Puppy week, find some of your cutest images of a puppy and feature it on your card this week.


As you can see I have created an easel card for my card this time round. For the background on my card I have used some more of the backgrounds I created when I was playing with my new Distress Oxide ink pads. 

I had the background for the top part of the card made already, but I needed to try and match up the background for the base of the card. One thing I did discover not all white card works as well with these inks. The white card I would normally reach for goes very dull, so I had to re do it using watercolour cardstock or Soft Finish Cardstock works week too.

I purchased these cute digital stamps from Bugaboo stamps earlier in the year and as I had this one all ready to color, it was begging to be used on a card. I layered the dogs onto a fishtail panel using the Fishtail Borders die set from Elizabeth Craft Design. For the other fishtails I used the ModaScrap Stitched Fishtail Banners.


This is a look at the card when it is closed ready to be placed in an envelope. The paw prints were sponged using distress oxide ink using the A Way with Stencils Hearts and Paw Prints stencil from Elizabeth Craft Designs.


Here is a close up of the base of the card. I have also added Black/Silver Glitter Dots Peel Off Stickers to each of the fishtail panels on this card.


Don't forget to check out the CCEE Stampers blog (goes live 12 AM EST) to see the rest of the creations the CCEE Stampers created this week. You can also see more details of their creations on their individual blogs:


Stamps: BugBdayPups Digital Stamp - Bugaboo; You're Pawesome - Simon Says Stamp!; General Sentiments - Elizabeth Craft Designs
Paper: White; Black; Purple
Dies: ModaScrap Stitched Fishtail Banners; Fishtail Borders - Elizabeth Craft Designs
Other ECD Products: Black/Silver Glitter Dots Peel Off Stickers; A Way with Stencils Hearts and Paw Prints
Other: Black Ink; Spiced Marmalade Distress Oxide; Fossilized Amber Distress Oxide; Fired Brick Distress Oxide; Cracked Pistachio Distress Oxide; Wilted Violet Distress Oxide; Walnut Stain Distress Oxide;  Foam Tape; Copics


Wednesday, March 22, 2017

ECD March Coloring Designer Challenge


Hi everyone,

It's time for our March Coloring Design Team Designer challenge. Check out the Elizabeth Craft Designs blog today to see what our talented designed created for the challenge.

The challenge this month is ..... Fabulous Florals - Spring is upon us, so let's see those flowers on our cards this month. 

Of course for me living down here in Australia, it isn't spring at all but autumn ... but I am always happy to make a spring card 😀.

**********************

For today's challenge Elizabeth Craft Designs are giving away a "Fabulous Flowers" prize pack to three winners. This give away will include:  Joset Designs Pinwheel; Els van de Burgt Flower Cluster 1; Susan's Garden Tulip 2; A Way with Stencils -Butterfly Kaleidoscope Stencil; Krista Schneider Spring Blooms Stamp & Die set and ModaScrap Happy Flowers.


To enter simply leave a comment on the Elizabeth Craft Designs Challenge post and tell us "What is your favorite springtime flower?”

We will select 3 lucky winners in a random drawing 

The winners will be announced on Friday, March 24 on the Elizabeth Craft Designs blog.

********************

I forgot to take step by step photos of my card when I was making it, which is probably just as well as it changed so many times along the way haha. But here is how I made it.

Step 1. 
Cut a piece of Sunflower Yellow Soft Finish Cardstock which measures 5 3/4 inches x 11 1/2 inches. Score along the long side at 5 3/4 inches and fold to create a 5 3/4 inch top folding square card.
  • Cut a piece of Bright Orange Soft Finish Cardstock that measures 5 1/2 inches square and adhere on top of the folded card.
  • Using the largest square from the Stitched Squares die set, die cut a square from White Soft Finish Cardstock.
Step 2.
Using the largest of the Entwined Ovals, die cut two ovals from Dark Chocolate Soft Finish Cardstock that has Clear Double Sided Adhesive Tape on the back. Adhere the Entwined Ovals to the centre of the white card offsetting one over the other slightly.
  • Sponge some Fossilizled Amber & Spiced Marmalade Distress Oxide around the outside edge of the white square, spritz the ink with water to distress slightly and dry using a heat gun. 
  • Adhere panel to folded card created in step 1.

Step 3.
Using the Flower Power stamp set, stamp out two flowers onto White Soft Finish Cardstock using black ink.
  • Use the coordinating dies to die cut the flowers. Color as desired.
  • Adhere the flowers to the top left hand corner of the card using foam tape.
  • Using the ModaScrap Leafy Branch 5, die cut two branches from Olive Twist Soft Finish Cardstock. Cut both branches so that you have one branch with three sections and the other with two. Adhere around flowers using the photo above as a guide.
  • Using the smallest flower from the ModaScrap Dandelion Fluff die set, die cut 4 flowers from White Soft Finish Cardstock. Lightly sponge Spiced Marmalade Distress Oxide over the flower section of the die cut and then go over the tips of the flowers using Carved Pumpkin Distress ink. Sponge Peeled Paint Distress Oxide to the stem of the flowers. Adhere the Dandelions to the card using photo above as Guide
  • Die cut A  Way with Words - Hello sentiment from White Soft Finish Cardstock that has Clear Double Sided Adhesive Tape on the front. Remove the protective backing from the adhesive and cover with Sea Glass Silk Microfine Glitter. Polish glitter into adhesive with your fingers. Adhere sentiment inside oval as per photo above.
  • Apply some Kids Choice Glue to the centre of each of the flowers and cover the glue with prills. Allow to dry.

Step 4 Inside of Card - 
Using the largest square from the Stitched Squares die set, die cut a square from White Soft Finish Cardstock.
  • Layer the white panel onto a piece of Bright Orange Soft Finish Cardstock that measures 5 1/2 inches square and adhere panel to inside of card.
  • Die cut the word "Spring" from A Way with Words 4 Seasons die set from Bright Orange Soft Finish Cardstock that has Clear Double Sided Adhesive Tape on the back. Adhere sentiment to sentiment of card.
  • Using the double flower stamp from the Flower Power stamp set, stamp this above and below the sentiment using black ink. Color as desired. Add Orange/Silver Glitter Dot Peel Off Stickers to the centre of the flowers.
That's it from me today, I hope you enjoyed my card and tutorial. Don't forget to check out the Elizabeth Craft Designs blog to see all the wonderful creations by our talented designers and for a change to win the giveaway.

Supplies:

Elizabeth Craft Designs:

Other:
Inks - Black; Fossilized Amber Distress Oxide; Spiced Marmalade Distress Oxide; Peeled Paint Distress Oxide; Carved Pumpkin Distress Ink
Foam Tape
Copics


Tuesday, March 21, 2017

Flying by ....


Hi everyone,

Today I have another Double Z Fold card to share with you, these are so easy to make and lots of fun.

Along the bottom of the card I used the cloud from the CountryScapes Cloud & Grass die set and the grass from the Pop it Ups Outdoor Edges to create the grassy area of the card. 


To decorate my card I used Kraftin' Jimmie Stamps Sky's the Limit stamp set which I purchased recently.


I added the boy to the bottom left hand corner which is a stamp I have had in my stash for years. He looks exciting to see a plane in the sky 😀.


Here is a look at my card when it is closed ready to be placed in an envelope.

Stamps: Sky's the Limit - Kraftin' Kimmie Stamps; Sports Boy - Stampendous
Paper: White; Green; Save the Date Collection Banner DP - Kaisercraft; DP - SU
Dies: CountryScapes Clouds & Grass; Pop it Ups Outdoor Edges; Pop it Ups Anita Frames Pop Up Card; ModaScrap Stitched Fishtail Banners - Elizabeth Craft Designs
Other: Black Ink; Peeled Paint Distress Oxide; Foam Tape; Copics