Tuesday, October 31, 2017

Rebus - Things that are Brown


Hi everyone,

It's time to share another rebus puzzle swap with you. This month the theme is "Things that are Brown".


If you would like to solve my rebus puzzle, why not post a comment on my blog post with your answers. I will let you know what the correct answers are next time I post a rebus card here.

How did you go solving my September Rebus which was Songs by the Beatles. Here are the correct answers so you can check how you did. 

  1. I am a Walrus
  2. Let It Be
  3. Penny Lane
  4. She Loves You
  5. Blackbird
  6. Michelle
  7. Get Back
  8. A Hard Days Night


    You can find all my past Rebus Cards here.


    Monday, October 30, 2017

    Level Up


    Hi Crafty Friends,

    It's my youngest daughter's birthday today, so of course I had to make her a card! She is always fun to make cards for as she has particular likes, so I can make a card to suit what she likes ... normally it is Super Heroes or Doctor Who.  This year though, she decided she wanted the new Nintendo which has all the old video games many of us remember fondly ... including Super Mario. When I saw this stamp set from Kindred Stamps recently I knew I NEEDED it so I could make her card this year (I also grabbed the Time Traveller set (Doctor Who) while I was at it which I will make for her at some other time.


    As I was decorating both the inside and the front of the card, I stamped a ton of images, many duplicates and cut them out using my Scan N Cut. For the path that Mario is following, I used a brick stencil and distress oxides, trimmed that to the side I wanted and then used a cloud die (which I think is now retired) and die cut green cardstock and added it behind the path to create bushes.

    I added various images from the Video Game stamp set from Kindred Stamps to the front of the card.


    For the inside I used the pivot arm from Karen Burniston's Katherine Label Pop-up die set and used the label from the old Pop It Ups Katie Label Accordion (retired) for the sentiment.... I needed something long to fit the sentiment.

    I added more paths and bushes and then added the different images to the card. Mario is on the left side off to try and rescue the Princess and Luigi on the right. 


    Here is another look at the inside of the card ... you can see a few more elements to the card that were hidden by the sentiment in the previous photo. 

    Stamps: Video Game Brothers - Kindred Stamps; Level Up - MFT Stamps
    Paper: White; Blue; Green
    Dies: Katherine Label Pop-up - Karen Burniston; Clouds & Grass; Pop It Ups Katie Label Accordion - Elizabeth Craft Designs (both retired)
    Inks: Black; Fired Brick Distress Oxide; Wild Honey Distress Oxide; Antique Linen Distress Oxide
    Other: English Brick Wall Stencil - MFT Stamps; Foam Tape Copics


    Sunday, October 29, 2017

    A Very Merry Christmas For You


    Hi Crafty Friends,

    I recently managed to purchase a couple of the exclusion stamp sets that Simon Says Stamp offered for their Stamptember celebration ... one of the sets I really was hoping I would be able to get was this Stampers Anonymous Stamptember stamp set. I really loved the diamond background and the tree rings stamps which I thought would make awesome backgrounds for any time of the new.

    Of course since I had the stamp set, I figured I might as well make a Christmas card with it.

    I first created the diamond background, this is a stamp which has about three rows of diamonds, so with the help of my stamping platform I was able to stamp this over the background and white emboss it. Next I used three different colors of Distress Oxides to create an ombre effect.

    For the white panel, I started by die cutting a Stitched Rectangle. I then stamped the snowman and stars using Broken China Distress Oxide, which I again embossed. 

    I placed the white panel onto my card at an angle and trimmed down the top and left hand sides.

    I also wanted to use the candy stripe part of the stencil which was also included in this stamp set which I added to the left side of the card using Candied Apple Distress Oxide. 

    I stamped one of the sentiments which came in the stamp set onto white cardstock and embossed this in white. This was then colored using the Candied Apple Distress Oxide and then cut it down to create a fishtail banner. I added this banner to the lower right hand side of the card.

    To finish off my the front of my card I added three red dots using Nuvo Red Berries Gloss Crystal Drops.


    For the inside of my card I added the red candy stripe down the left hand side of my card and then added a sentiment which is stamped in two different colored blue distress oxide inks.

    Stamps: Stamptember 2017; Handwritten Holidays - Stampers Anonymous
    Paper: White
    Dies: Stitched Rectangles - Elizaberh Craft Designs
    Other: Broken China Distress Oxide; Salty Ocean Distress Oxide; Faded Jeans Distress Oxide; Candied Apple Distress Oxide; VersaMark Ink; White Embossing Powder; Heat Gun, Stamping Platform; Nuvo Red Berry Gloss Crystal Drops; Fun Foam


    Saturday, October 28, 2017

    Hope


    Hi Crafty Friends,

    It’s challenge time with the “Crazies” over on the Crazy 4 Challenges blog. Bonnie Sharp our challenge hostess for the month finishes off the month with one last challenge.


    I'm sure you all know that October is Breast Cancer Awareness month. My challenge to you is to create an inspirational card using pink somewhere on your creation! Bonus points if you send your card to someone needing a hug!

    For my card today I have created a Centre Step Card. I used a die to create the base of my card, but if you don't have a die it is easy enough to create this style of card as you will see in a YouTube video I made about 6 years ago. 

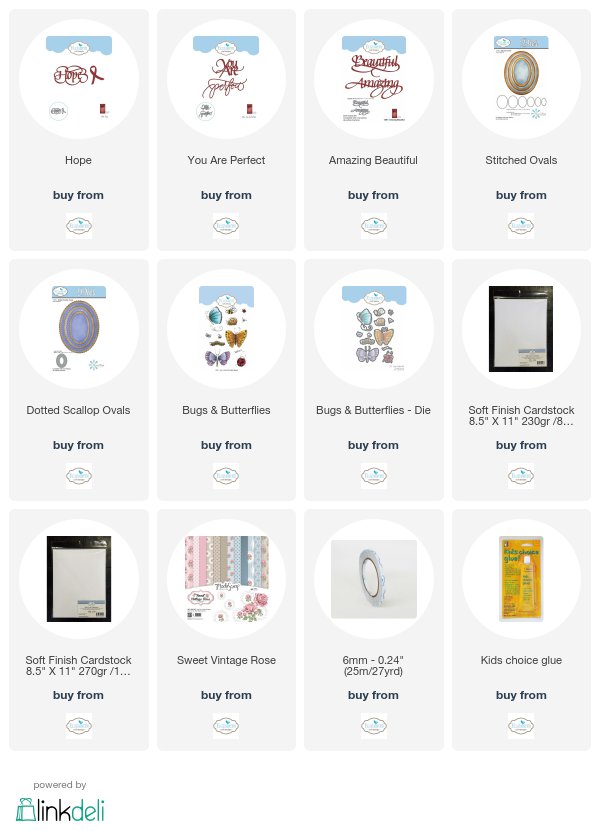
    To decorate my card I have used the A Way with Words - Hope die set which is a brand new die set from Suzanne Cannon available from Elizabeth Craft Designs. I also used the Bugs & Butterflies Clear stamp set with coordinating dies.


    Here is another photo of my card taken at a different angle so you can see the various folds in the card. I added the "pink ribbons" to each of the two side panels.


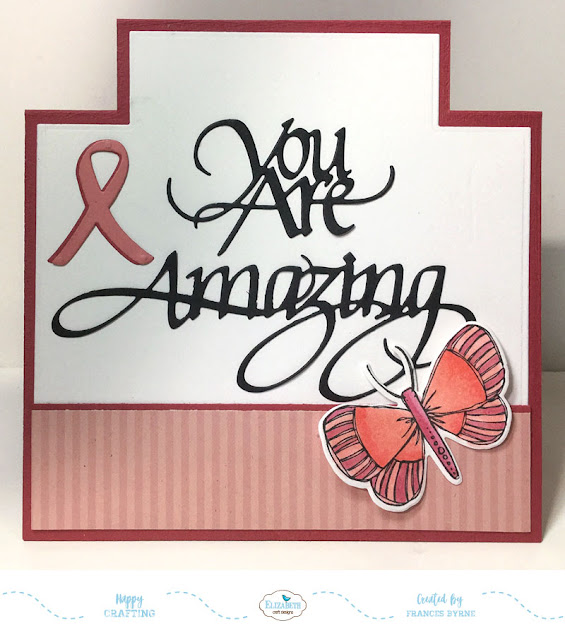
    For the inside of my card I used a few more of the A Way with Words die sets. The "You Are" is from the A Way with Words - You Are Perfect die set. I can see the You Are part of this sentiment being used for many occasions and can be mixed and match with many of the existing and new A Way with Words die sets. The 'Amazing' sentiment is from the A Way with Words - Amazing Beautiful die set.

    As you can see I also added another pink ribbon and butterfly.

    Don't forget to check out the rest of the “Crazies” cards over on the Crazy 4 Challenges blog and also their individual blogs for more details.


    Supplies:

    Elizabeth Craft Designs:


    Other:
    Cardboard - Pink; Dark Pink
    Inks - Black
    Centre Step Die - Cheery Lynn Designs
    Foam Tape
    Copic Markers


    Friday, October 27, 2017

    Christmas Gift Tags


    Hi Crafty Friends,

    Today I am sharing a few Gift Tags I created using the new Holiday Tag Along Kit from Papertrey Ink which was released recently. I spied a sample using this kit before the release and I knew right away that I NEEDED them ... I always make my own gift tags for Christmas and while this kit was a little pricey after exchange rates and postage I knew that it would be something that I would be able to reach for, for many years to come.

    This kit comes with a tag die, a stamp set, stencils and various decorator dies, as well as sequins and twine. It also comes with a set of 32 pre-printed gift tags which you can use either as is or altering using the dies etc. 


    I kept the tags I made today fairly simple using the tag die, the to/from die and four of the stencils that are included in the kit. 

    I was going to use some Nuvo Glitter Paste that I have purchased at a show back in June, but when I opened the green bottle it was as hard as a rock ... disappointing! When I open the red it looked like it had been opened and used before 😞 and a little too thick. After a bit of playing with what I did have I gave up and went to the trusty Distress Inks which always work.


    I wanted to add an embellishment to them ... I am not sure why I added snowflakes seeing it is summer down here at Christmas time! But I do have a ton of them so that is what I used this time.


    I love all the different stencils and how easy they made it to make a simple gift tag which of course could be made simpler by using the stamps rather than the to/from die etc.


    And finally my last tag, seeing this one has stencilled snowflakes on the tag, I decided to add a snowman to it rather than another snowflake, again I have a ton of these.

    I am looking forward to playing with a few of the other things included in the kit next time ... I am sure I still need to make lots more gift tags!

    Paper: White; Red; Green
    Dies: Holiday Tag Along - Papertrey Ink
    Other: Festive Berries Distress Ink; Peeled Paint Distress Ink; Holiday Tag Along Stencils - Papertrey Ink; Red & Green Hemp Cord


    Thursday, October 26, 2017

    You're the Cat's Meow!


    Hi Crafty Friends,

    It's challenge time with my friends over on the CCEE Stampers challenge blog. As the challenge hostess for the month, I finish off the month with one last challenge.

    Apparently tomorrow (27th) is Black Cat Day and Sunday (29th) Cat Day. So for our challenge this week include a cat on your creations … black or not.


    For my card today I decided to pull out my Loralie Designs Spice Cats stamp set ... I love these crazy looking cats!!!!


    For the front of my card I created a window using circle dies.


    For the inside of the card I used Karen Burniston's Katherine Label Pop-up die set to add the pivot arm to which the circle and cat are attached to. When the card is closed the pivot arm goes down so the cat is seen through the circle window, and then when you open the card the arm brings the cat to the top of the card.

    I added a third cat to the top left hand side of the circle window opening.


    Here is one last photo of my card taken at a different angle so you can see the position of the pivot arm a little better.

    I also added a sentiment which was stamped onto one of the labels from the Katherine Label Pop-up die set.

    Don't forget to check out the CCEE Stampers blog (goes live 12 AM EST) to see the rest of the creations the CCEE Stampers created this week. You can also see more details of their creations on their individual blogs:


    Vicky Gould
    Kelly McKown-Santi


    Stamps: Spice Cats - Loralie Designs; Cat's Meow - DRS Designs
    Paper: White; Burgundy;  DP
    Dies: Katherine Label Pop-up; Snowman Twist Circle Pop-up - Karen Burniston; Circle Stax - MFT Stamps
    Other: Black Ink; Nuvo Bottle Green Gloss Crystal Drops; Nuvo Neptune Turquoise Gloss Crystal Drops; Nuvo White Gloss Crystal Drops; Black Glaze Pen; Foam Tape; Copics

    Wednesday, October 25, 2017

    Happy Holidays Penguin


    Hi Crafty Friends,

    As you can see I am still busy making Christmas cards ... it's only 2 months before Christmas Day so I need to start getting myself organised.

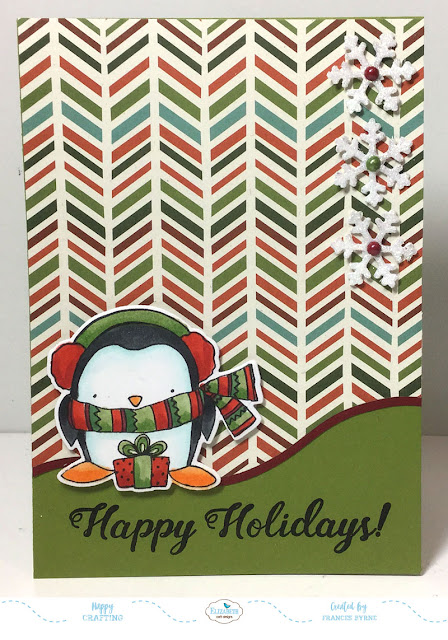
    For my card today I used the cute Penguins Clear Stamp set with coordinating dies. Have you seen the new Christmas ModaScrap Patterned Papers ... they are amazing, this is what I have used on the background of this card. To create the curve at the bottom of the paper  used the snow die from the Adventure Edges die set.

    I added three snowflakes from the Winter Sweater die set to the top right hand corner adding Nuvo Drops to the centre of each snowflake.


    For the inside of my card I added the piece of patterned paper that was let over when I die cut the paper for the front of the card. I added a couple more penguins and also a sentiment.

    Supplies:

    Elizabeth Craft Designs:


    Other:

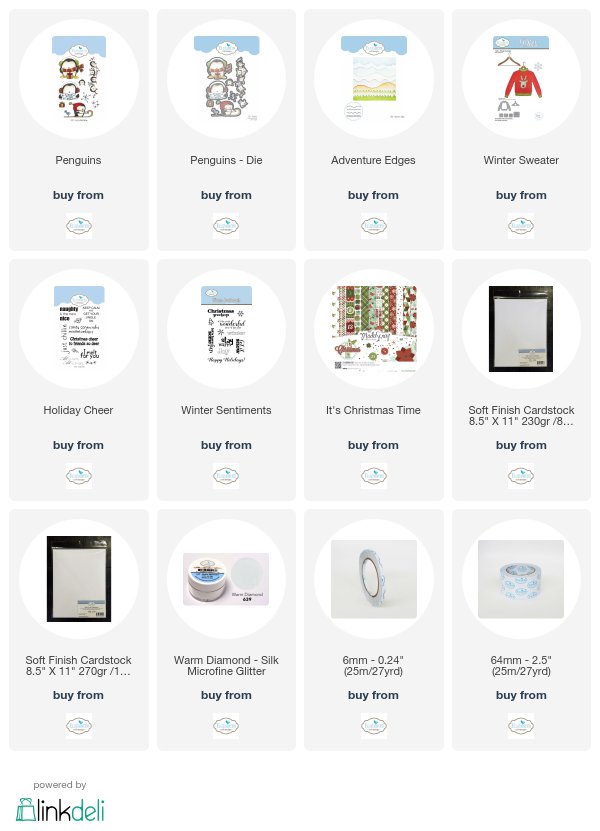
    Stamps: Penguins; Holiday Cheer; Winter Sentiments - Elizabeth Craft Designs;
    Paper: White; Green; Red; ModaScrap It's Christmas Time Patterned Paper - Elizabeth Craft Designs
    Dies: Penguins; Adventure Edges; Winter Sweater - Elizabeth Craft Designs
    Other ECD Products: Warm Diamond Silk Microfine Glitter; 64mm Clear Double Sided Adhesive Tape
    Other: Black Ink; Nuvo Autumn Red Gloss Crystal Drops; Nuvo Bottle Green Gloss Nuvo Drops; Foam Tape; Copics

    Tuesday, October 24, 2017

    Away in a Manger


    Hi Crafty Friends,

    Today I have another Christmas card using the same stamp set I used in the card I shared with you all yesterday which was a freebie set that came with a Stamping Magazine. These stamps were actually designed by Wild Rose Studio.


    For the inside of the card I added the star that is included in the stamp set that I used for the front. The "Peace on Earth" sentiment from an Avery Elle stamp set.

    Stamps:  Away in a Manger - Wild Rose Studio (Freebie Set from Creative Stamping Magazine Issue 48); Snowflakes - Avery Elle
    Paper: White; Red; Blue; Blitzen Collection Paper Pad - Bo Bunny
    Dies: Stitched Circles; Dotted Scallop Circles
    Other: Black Ink; Nuvo Red Berry Gloss Crystal Drops;  Nuvo Midnight Blue Gloss Crystal Drops; Nuvo White Blizzard Glitter Drops; Foam Tape; Copics


    Monday, October 23, 2017

    We Wish You a Merry Christmas


    Hi Crafty Friends,

    Today I am sharing another Christmas card with you using some more freebie stamps I got from a Magazine,  I love this cute image of the boy looking gout the window waiting for Santa to come.

    For this card I created a Centre Step Card. I added two Christmas trees also included in the stamp set to either side of the window. I also added a sentiment from the set.


    Here is another photo of my card taken at a different angle so you can see the folds in the card.

    I added Nuvo Drops to the ornaments on the Christmas tree and also the star. I also added Glossy Accents to the glass areas of the window.


    For the inside of the card I added a die cut image of Santa in his sleigh. I also added another of the sentiments from the stamp set ... this time "Do you hear what I hear?" means something totally different to what it does in the Christmas Carol which is one of my favourites.

    Stamps: Away in a Manger - Wild Rose Studio (Freebie Set from Creative Stamping Magazine Issue 48)
    Paper: White; Red; Retro Three Paper - Authentique
    Dies: Step Card #1 - Cheery Lynn Designs; Oval Dies - Spellbinders; Santa - Impression Obsession
    Other: Black Ink; Red Ink; Nuvo Red Berry Gloss Crystal Drops;  Nuvo Woodland Green Gloss Crystal Drops; Nuvo White Blizzard Glitter Drops; Foam Tape; Copics


    Sunday, October 22, 2017

    Sending Christmas Greetings Across the Miles


    Hi Crafty Friends,

    This past few months, I have noticed some awesome stamp sets coming as freebies included with a Sstamping magazine. Most of these magazines come from the UK, and there have been a few I haven't been able to resist. These days I only buy magazines if I like the freebie included in the mag. I have purchased a couple recently which include Christmas stamps/dies so I figured I better start using one of two of the stamps because Christmas will be here before we know it.


    I just adore this freebie set which came in Papercraft Essentials magazine recently. Not only did they include stamps, but you also got an embossing folder for the postbox and a few dies, to cut out the hole in the mail box, bird and letters.

    I embossed the post box three times, one in red, one in black (for the base) and white (for the centre part). I cut out each postbox and paper pieced them together.

    For the snow I used the snow die from the Nature Edges die set from Karen Burniston.


    When you open the card up it reveals a bigger scene of that shown on the front.

    I used the Katherine Label Pop-up die set from Karen Burniston to create the pivot arm and label the sentiment is on. I kept the sentiment as high as I could to allow room for the scene below. The sentiment is a mix of the freebie die set (Across the miles) and one from MFT Stamps. 

    I added more snow to the bottom of the card and added a few birch trees which are Lawn Fawn dies. 


    One final photo so you can see the pivot arm the sentiment panel is on.


    Stamps:  Sending Christmas Wishes - Practical Publishing/Papercraft Essentials Issue 151; Ornament Banner Builder - MFT Stamps
    Paper: White; Red; Black; DP - Memory Box
    Dies: Katherine Label Pop-up; Nature Edges - Karen Burniston; Birch Trees - Lawn Fawn
    Other: Black Ink; Red Ink;  Postbox Embossing Folder - Practical Publishing/Papercraft Essentials Issue 151; Foam Tape; Copics


    Saturday, October 21, 2017

    Trolls Insanely Happy Birthday


    Hi Crafty Friends,

    It’s challenge time with the “Crazies” over on the Crazy 4 Challenges blog. Bonnie Sharp our challenge hostess for the month continues to issue the challenges.

    Being the third Saturday of the month it is time for a sketch challenge.


    For my card today I have again used the cute Troll characters from Your Next Stamp's Insanely Happy stamp set. I couldn't decide which card to use them for when I was deciding on what to do for both the CCEE challenge and C4C challenge I do every week that I decided to use it for both.


    For the inside of the card I created a Twist Pull Card using the Twist Pull Card die set from Karen Burniston, I just love this fun die set.

    I received some designer paper in a card kit I received a month or two ago which I loved but I only had one piece of each design, so I had to be creative on how to use it  to stretch it out. By piece it on the inside I was able to have enough for both the inside and the outside of this card. Don't worry, I loved the paper so much I had to order a whole paper pack hehe!

    I used the grass from the Nature Edges die set on each of the white panels and stamped some clouds on each panel too.

    Along the bottom edge of the card I added the birthday sentiment included in the stamp set and some Nuvo drops to match the papers.

    Along the top panel I added the number border, highlighting the '5' and adding the 'today' tab. I will probably use this for my Granddaughter's birthday coming up next month as she will be 5!


    Here is a look at my card as it is closing, you can see how the 4 panel fold in the centre folds up and starts to turn to the side.


    And finally a look at my card when it is closed. My card is a little thick when closed because I like to use foam tape on some of the elements of the accordion panel on the inside of the card ... as it will be hand delivered this doesn't matter. However if you don't want a thick card eliminate the foam tape.


    Don't forget to check out the rest of the “Crazies” cards over on the Crazy 4 Challenges blog and also their individual blogs for more details.


    Stamps:  Insanely Happy - Your Next Stamp
    Paper: White; Bright Pink; Green; Black Fairy Tale Paper Pack - Doodlebug Design Inc; Party Patterns Paper Pad - MFT Stamps
    Dies: Twist Panel Pop-up; Nature Edges - Karen Burniston; Blue Prints 11; LLD Border It Numbers - MFT Stamps
    Other: Black Ink; Green Ink; Glossy Accents; Scan N Cut; Foam Tape; Copics