Friday, August 31, 2018

'Tis the Season Polar Bear Christmas Card


Hi Crafty Friends,

It's my turn to post a tutorial on the Elizabeth Craft Designs blog. Today I am sharing Christmas card I created using the new Polar Bear and Snowflakes die sets from the Joset Designs releases earlier this month.

Here is how I created my card:


Step 1 - 
  • Using the 4 3/4 inches square from the Dashing Squares die set, die cut a square from the snowflake patterned paper included in the ModaScrap It's Christmas Time 12 x 12 Patterned Paper Pack.
  • Using the 5 inch square from the Dotted Scallop Squares die set, die cut a square from brown cardstock.
  • Create a card base from red cardstock that measures 5 1/2 inches x 11 inches. Score at 5 1/2 inches and fold in half to create a 5 1/2 inch square top folding card.

Step 2 - 
  • Adhere Clear Double Sided Adhesive Tape to the front of a piece of White Soft Finish Cardstock. 
  • Die cut the large and small snowflakes from the Snowflakes die set. 
  • Remove the protective backing from the adhesive and cover with Warm Diamond Silk Microfine Glitter. Polish the glitter into the adhesive using your finger to bring out the maximum shine of the adhesive.
  • Sponge blue ink around the edges of the snowflake.

Step 3 - 
  • Using the Polar Bear die set die cut the following from White Velvet Adhesive Sheet: Head; Body; Front Legs; Paw Overlay and Snout.
  • Die cut the solid back paws from grey cardstock
  • Die cut eyes and nose from black cardstock
  • Die cut inner ears from pink cardstock
Note: for a stronger image die cut the head, body, front legs. paw overlay and snout again this time from white cardstock and adhere the Velvet sheet die cut to the white cardstock die cuts.
  • Sponge blue ink around all body parts.
  • Assemble Polar Bear using foam tape for the body parts and glue for the eyes, nose and inner ears.
  • Add mouth detail to snout using black marker.

Step 4 - 
  • Adhere the small snowflake to the top right hand side of the card using glue in the centre part of the snowflake
  • Attach the large snowflake to the bottom left hand side of the card using foam tape where the polar bear will be placed so tape won't be seen.
  • Attach the polar bear to the large snowflake using foam tape.
Step 5 - 
  • Using black ink stamp the sentiment from the Classic Christmas Sentiments Clear Stamp set to a strip of White Soft Finish Cardstock. Trim ends at an angle.
  • Sponge blue ink around edges of sentiment strip.
  • Attach over the small snowflake using foam tape.

Step 6 - Inside of Card:
  • Using the 4 3/4 inch square die from the Dashing Squares die set, die cut a square from White Soft Finish Cardstock.
  • Using the 4 3/4 inch square die from the Dashing Squares die set, die cut the snowflake patterned paper included in the ModaScrap It's Christmas Time 12 x 12 Patterned Paper Pack to create a 1 1/2 inch strip.
  • Adhere a strip of brown cardstock to the top of the snowflake patterned paper and then adhere this to the bottom of the white square.
  • Using the 5 inch square from the Dotted Scallop Squares die set, die cut a square from brown cardstock.
  • Layer squares to each other and adhere to inside of card.


    Step 7 - 
    • Create a large snowflake as we did in step 2 for the front of the card. Adhere to the centre of the card.
    • Using the smallest circle from the Dashing Circles die set, die cut a circle from White Soft Finish Cardstock. Sponge around the edges using blue ink.
    • Stamp the "Be Merry" sentiment from the Classic Christmas Sentiments Clear Stamp set using black ink. 
    • Add the three snowflakes to the sentiment panel using blue ink.
    • Adhere sentiment panel to centre of the snowflake.

    Thank you for stopping by, I hope you enjoyed my tutorial.
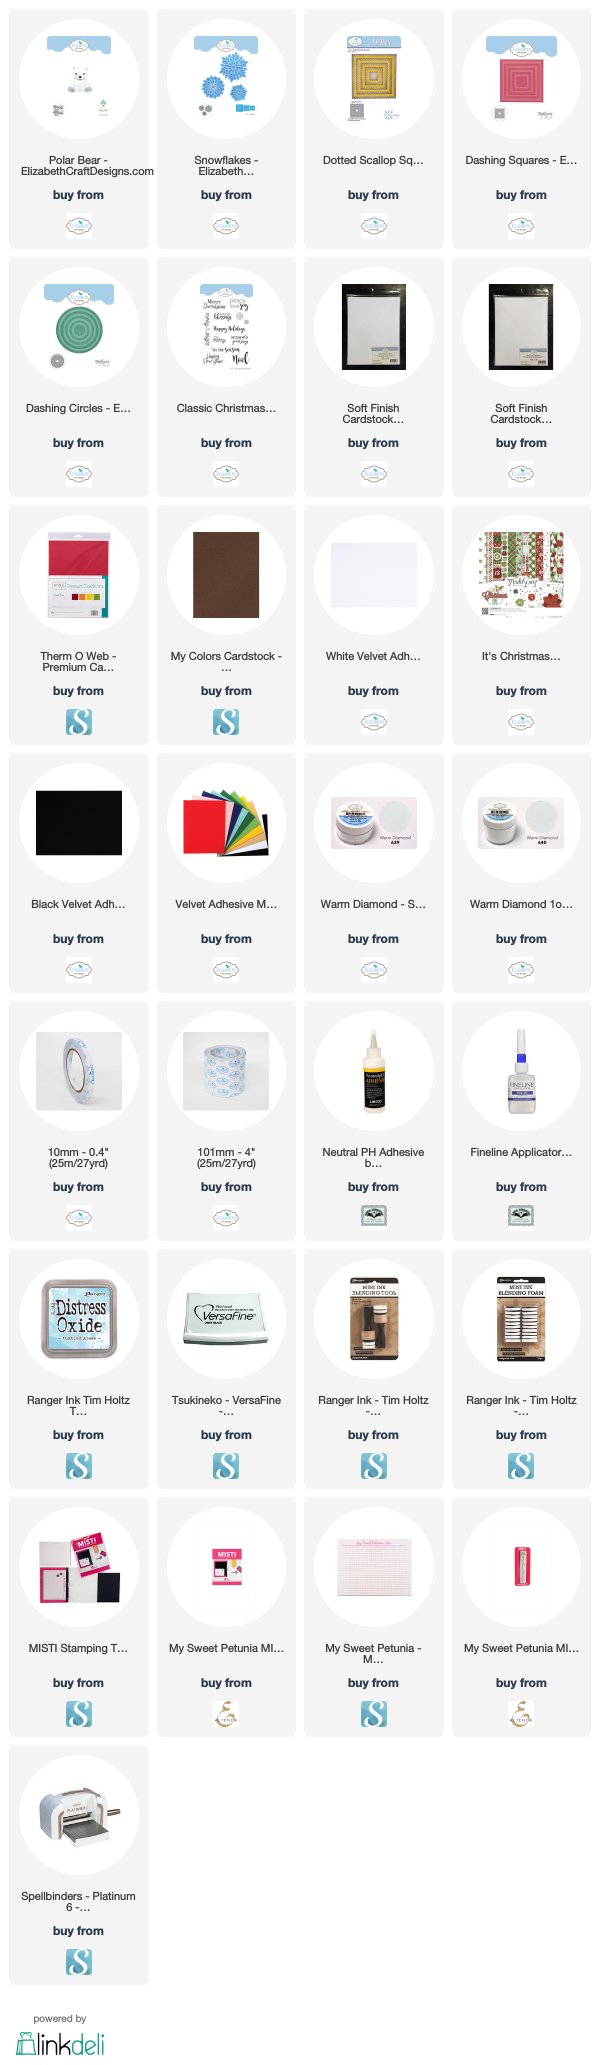


    Supplies:
    Elizabeth Craft Designs:

    For your shopping convenience, all products are linked below. Compensated affiliate links are used where possible with no extra cost to you. This helps me to continue to share all the projects I include on my blog. Please note I only use and share products I love.


    Thursday, August 30, 2018

    Flowers for You


    Hi Crafty Friends,

    It's challenge time with my friends over on the CCEE Stampers challenge blog. As challenge hostess for the month, I finish off the month with one last challenge.

    In my part of the world (Australia), Saturday is the first day of Spring .... Flowers are beautiful at any time of the year so for our challenge this week we are to add some flowers to our card.


    I recently received the Simon Says Stamp August Card Kit which contained a beautiful large  stamp set called Mindy's Flowers which was full of flowers. So I decided to use that for my card today. I stamped the flowers onto watercolor paper and colored them with Zig Clean Color Real Brush Markers.

    For the circle frame, I stamped the flower at the top a second time and cut that and pop it up over the flower of the one on the square panel.

    The card was die cut using Our Daily Bread Designs Tri-fold Card with Layers die set. I die cut the layers using the designer paper I received in the kit, I just love that pretty pink floral paper.

    After adhering everything onto the card, I finished off the card by adding some tiny heart shape sprinkles also included in the kit. I added three pink hearts inside the circle frame and a blue heart on the flower pot.


    Here is one last photo of my card, this time when it is closed ready to be placed in an envelope.


    Don't forget to check out the CCEE Stampers blog (goes live 12 AM EST) to see the rest of the creations the CCEE Stampers created this week. You can also see more details of their creations on their individual blogs:

    Vicky Gould
    Kelly McKown-Santi


    Supplies:


    For your shopping convenience, all products are linked below. Compensated affiliate links are used where possible with no extra cost to you. This helps me to continue to share all the projects I include on my blog. Please note I only use and share products I love.


    Wednesday, August 29, 2018

    Rebus - Things that are Pink


    Hi Crafty Friends,

    It's time to share another rebus puzzle swap with you. This month the theme is "Things that are Pink"

    If you would like to solve my rebus puzzle, why not post a comment on my blog post with your answers. I will let you know what the correct answers are next time I post a rebus card here.

    How did you go solving my July Rebus which was "Names Starting with 'N' ".
     Here are the correct answers so you can check how you did.

    1. Natalie
    2. Nick
    3. Nicolette
    4. Norman
    5. Nancy
    6. Niles
    7. Nikki
    8. Norwell
    9. Narelle
    10. Napier
    11. Nell
    12. Newman
    13. Naomi


    You can find all my past Rebus Cards here.

    Tuesday, August 28, 2018

    Thanks, Teacher Double Slider Surprise


    Hi Crafty Friends,

    Over the last few months, I have purchased a number of teacher themed stamps and dies from various companies so that I can make thank you cards for my grandchildren's teachers at the end of the year.

    I also recently received the Lawn Fawn Double Slider Surprise die set from their August release so I decided to make a thank you teacher card using some of my new supplies.


    Here is a quick video to show my card in action.


    To decorate my card I used Heffy Doodle's Teacher's Pet Clear Stamp set, creating a class room scene. 


    When you pull the two tabs on the side of the card, it reveals to pull out panels with greetings to thank a teacher. The sentiment stamps are from Heffy Doodle's Teach Me Words Clear Stamp set.

    There are a number of different options on how you use the Double Slider Surprise die set. As you can see I used it for this card landscape style and adhered it to a standard sized folded card. 


    For the inside of the card I added the "Thanks, Teacher Line Border" die from Lawn Fawn. I also added a couple more students on either side of the sentiment.

    Supplies:
    For your shopping convenience, all products are linked below. Compensated affiliate links are used where possible with no extra cost to you. This helps me to continue to share all the projects I include on my blog. Please note I only use and share products I love.


    Monday, August 27, 2018

    Blue Painted Flowers


    Hi Crafty Friends,

    My card today is for a challenge I do with a couple of friends of mine. Each month we challenge each other to create something using supplies we all own.

    As my friends have always loved flower stamps and I have been collecting a few in recent months, we decided that our challenge this month would be .... Flowers!


    I recently purchased Altenew's Painted Flowers Clear Stamp set after seeing a few cards being made with it recently. I made a card using this set which I posted last Friday on my blog, but I also had this one I wanted to make. So as I had the stamps out I decided to make it for today's challenge.

    After stamping the flowers over my card I used one of the inks and black ink to create splatters over the background.


    For the inside of my card I added two more panels of flower images on both of the sides of the card.

    I added the sentiment using the Katherine Label Pop-up die set.

    Supplies:
    For your shopping convenience, all products are linked below. Compensated affiliate links are used where possible with no extra cost to you. This helps me to continue to share all the projects I include on my blog. Please note I only use and share products I love.


    Sunday, August 26, 2018

    Evergreen Pivot Panels


    Hi Crafty Friends,

    I am excited to be able to start sharing some sneak peeks of the new dies being released by Karen Burniston next month. Karen is releasing 16 new die sets, two of the die sets being released is the re-release of the Christmas Tree Pop Stand and the Adirondack Pop-up which many customers have been asking for.


    Today I am sharing a card using the new Evergreen Pivot Panels die set. This die set is very versatile in that it can be used inside a card as I have here today, used in conjunction with the Twist Panel Pop-up or in the Tag Book Pop-up die sets.

    To decorate my trees I used Nuvo Drops and also added glitter to the stars. 

    I added a rectangle panel using one of the dies in the Crosshatch Rectangles die set to either side of the card to add my greeting, adding the bow from the Evergreen Pivot Panels die set to make it look like a Christmas Present.


    For the front of my card, I die cut a rectangle panel from patterned paper using the largest rectangle in the Crosshatch Rectangles die set. I used the Crosshatch Ovals die set to die cut the two oval panels and added the Merry Christmas sentiment which is another of the new dies being released next month.

    I die cut three more of the trees and decorated them as I did on the ones on the inside and added them to the bottom of the card.

    Supplies:
    For your shopping convenience, all products are linked below. Compensated affiliate links are used where possible with no extra cost to you. This helps me to continue to share all the projects I include on my blog. Please note I only use and share products I love.


    Saturday, August 25, 2018

    But First .... Beer


    Hi Crafty Friends,

    It’s challenge time with the “Crazies” over on the Crazy 4 Challenges blog. Anja our challenge hostess of the month, finishes off the month with one last challenge.

    Anja's son is turning 21 tomorrow, how did that happen? No little boys card for this one anymore, Anja has challenged us today to make a masculine card.


    Last month I received this amazing layering stamp set from The Ton. As I was making the card I decided that it was perfect for this challenge, so decided to save it for today. I love how realistic that beer looks and you can never have too many male themed stamps can you.

    I had such fun stamping up my first mug of beer that I ended up stamping two more and then die cutting all three for my card.

    I used my Cheery Lynn Designs die to create the Centre Step card base, it has been a while since I have made one of these and they are so easy to make.

    I added a couple of sentiments that come in the Beer Stamp set on the front of my card ... lots of perfect sentiments for male birthdays or Father's Day.

    I added the wood panel paper to the lower part of the card so it resembled a table that the mugs were on.


    For the inside of my card I added two more sentiments from the stamp set. I also added a few more beer mugs, these ones are from a freebie Apple Blossom Stamp set I received from a magazine, but you can also buy them separately.

    Don't forget to check out the rest of the “Crazies” cards over on the Crazy 4 Challenges blog and also their individual blogs for more details.


    Supplies:
    For your shopping convenience, all products are linked below. Compensated affiliate links are used where possible with no extra cost to you. This helps me to continue to share all the projects I include on my blog. Please note I only use and share products I love.
    Centre Step Die - Cheery Lynn Designs


    Friday, August 24, 2018

    Just to Say Hello


    Hi Crafty Friends,

    Today I am sharing a floral card I created recently using Gina K Designs Wreath Builder stencil. This is such an amazing stencil.

    For my card today I used the Altenew Painted Flowers Clear Stamp set to create my flowers. This set is a layering set which contains a solid, overlay and outline stamp of each of the four different flowers and leaves.


    I used Elizabeth Craft Designs Dashing Squares and Dotted Scallop Squares die set to layer all my square panels.

    The "Hello" sentiment is from Altenew's Build - A - Flower Peruvian Lily Clear Stamp set. I found the "Just to Say" from the Altenew's In My Thoughts Clear Stamp set.

    To finish off the card I added Nuvo Drops.


    I added three more of the flowers from the Painted Flowers Clear Stamp set and then adding the sentiment which is from Altenew's Hope Clear Stamp set.

    Supplies:
    For your shopping convenience, all products are linked below. Compensated affiliate links are used where possible with no extra cost to you. This helps me to continue to share all the projects I include on my blog. Please note I only use and share products I love.


    Thursday, August 23, 2018

    Flying By Reveal Wheel Card


    Hi Crafty Friends,

    It's challenge time with my friends over on the CCEE Stampers challenge blog. As challenge hostess for the month, I continue to issue the challenges.

    Today (23rd August) is Ride the Wind Day, this day was created to celebrate the anniversary of the first man powered flight. There are so many things that rely on wind for them to work, so let's include something that needs wind on our cards today. Some examples include kite flying, windsurfing, Hang Gliding; Sailing Boats, Birds Flying, Hot Air Balloons, Balloons, Paper Planes etc.

    As you can see I have created another Reveal Wheel Card using Lawn Fawn's Reveal Wheel; Stitched  Hillside Borders die sets along with La La Land Crafts Sending Smiles Stamp set.

    I had to change the position of the speech bubble for this card, in order for it to work .... the hot air balloon would have covered some if not all of it. So I die cut this area a little further down. It makes it look like the bear holding the globe is talking.


    Here is a quick video to see my card in action.


    Here is a look at the 4 different sentiments which are reveal when you turn the wheel of my card.

    To create the sky background I used Tumbled Glass & Stormy Sky Distress Oxide inks over the background and then stamped clouds over the sky area.

    I paper pieced the hot air balloon using designer paper.


    Here is a look at the inside of the card. I stamped clouds all over the white background. Added the "Hi There" sentiment which finishes off the sentence from the front of the card. I also added the last of the bears from the La La Land Crafts stamp set.

    Don't forget to check out the CCEE Stampers blog (goes live 12 AM EST) to see the rest of the creations the CCEE Stampers created this week. You can also see more details of their creations on their individual blogs:


    Supplies:

    For your shopping convenience, all products are linked below. Compensated affiliate links are used where possible with no extra cost to you. This helps me to continue to share all the projects I include on my blog. Please note I only use and share products I love.


    Wednesday, August 22, 2018

    Elizabeth Craft Designs August Designer Challenge


    Hi Crafty Friends,

    It's time for our August Elizabeth Craft Designs Design Team Designer challenge. Check out the Elizabeth Craft Designs blog today to see what our talented designers created for the challenge. 

    Our challenge this month is ..... 
    Christmas Fun with Character Dies- This month we are making a start on Christmas cards using the new Joset Designs Character dies that were released this month.


    For today's challenge Elizabeth Craft Designs are giving away a $20 Gift Card to use on our website to 3 winners

    To enter simply leave a comment on the Elizabeth Craft Designs Facebook Giveaway Blog Post or the Elizabeth Craft Designs Challenge post and tell us What of the characters from the new Joset Designs collection is your favorite?

    We will select 3 lucky winners in a random drawing 

    The winners will be announced on Friday, August 24th on the Elizabeth Craft Designs blog and our Facebook page.


    It's offical!!! I have finally started on my Christmas cards for 2018, this is my first one although I may have posted others on my blog before this one gets published!

    I just love the new Joset Designs dies which were released at the beginning of this month by Elizabeth Craft Designs and the first thing I did when I receive my dies was to make a cute little penguin. I decided to make a long card rather than the standard sized card for something a little different. This card is about 7 3/4 inches x 3 1/2 inches when folded and will fit in a standard business sized envelope.


    As you can see I have created a pop-up card using the General Pop-ups die set. I used one of the pop -up dies from the set and die cut it three times across the centre fold line of the ModaScrap White Christmas Patterned Paper I used for the inside.  Because of the size of my card, I needed to use my larger die cutting machine as the width of the paper wouldn't go through a standard 6" machine.

    I die cut three penguins using the new Penguins die set, die cutting the scarf in three different colors and adding white gel pen dots over the scarves.

    I added the Snowflake Border to the top and bottom edges of my card. As the width of my card is wider than normal I had to extend the cut of the snowflake border. This was really easy to do as once you have die cut the first border, the last snowflake easily fits into the the snowflake in the die. I added the border to white cardstock that had Clear Double Adhesive Tape on the front and then covered the adhesive with Warm Diamond Silk Microfine Glitter. There is a coordinating die that will cut out a layering border to this die, but seeing I had extended the border at both ends I decided to just trim the edge by hand. I added Glitter Dots to the centres of each of the snowflakes.

    To finish off the inside of the card I stamped the "It''s Penguin-ing to look like Christmas" to white cardstock using black ink and then die cut this using one of the labels from the Labels 1 die set. This is such a fun sentiment and one I think I will be using heaps!!!!


    For the front of the card I added the same patterned paper I used on the inside to the front.

    I used the wavy border from the Adventure Edges die set to create two layers of snow which I have added Warm Diamond Silk Microfine Glitter.

    I used the Igloo and signs from the Igloo die set and added the sentiment from the Cute Winter Sentiments.

    I die cut two more penguins and added them to my card.

    To finish off my card I die cut the dripping hot chocolate die from the Hot Chocolate die set three times and covered those with Warm Diamond Silk Microfine Glitter and added them to the top of the card to resemble icicles.


    I hope you enjoyed my project today. Don't forget to check out the Elizabeth Craft Designs blog to see all the wonderful creations by our talented designers and for a change to win the giveaway.

    Supplies:
    For your shopping convenience, all products are linked below. Compensated affiliate links are used where possible with no extra cost to you. This helps me to continue to share all the projects I include on my blog. Please note I only use and share products I love.