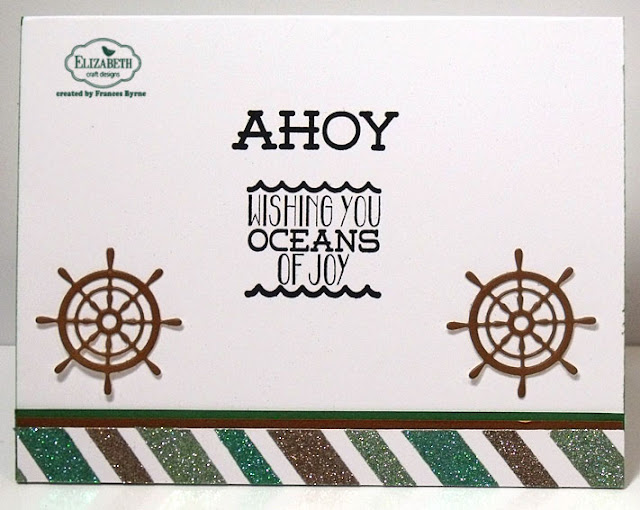
Hi everyone,
Today have a tutorial on how to create the card above using products from Elizabeth Craft Designs. If you haven't heard Elizabeth Craft Designs recently introduced 21 new colors of Silk Microfine Glitter which are just amazing colors and add to the already amazing colors available. You can find all the Elizabeth Craft Designs Silk Microfine Glitters here. Today I am playing with three of the new colors to create my card.
Here's how I created my card:
1. Cut a piece of White Soft Finish Cardstock that measures 5 1/2 inches x 4 1/4 inches.
- Place strips of 10mm and 6mm Clear Double Sided Adhesive Tape diagonally across the card so it is evenly spaced. (Tip - I used my cutting mat to help with spacing).
- Trim off excess tape around edges.
2. Remove the protective backing from every third piece of adhesive tape and cover the adhesive with Light Brown Silk Microfine Glitter. Remove excess glitter and return to the jar. Polish the glitter on your card with your finger.
- Remove the protective backing from every third piece of adhesive tape and cover the adhesive with Dark Mint Silk Microfine Glitter. Remove excess glitter and return to the jar. Polish the glitter on your card with your finger.
- Remove the protective backing from the remainder of the adhesive tape and cover the adhesive with Sea Glass Silk Microfine Glitter. Remove excess glitter and return to the jar. Polish the glitter on your card with your finger.
- Trim down card so it measures 5 inches x 3 3/4 inches. (Reserve the long offset for the inside of the card).
3. Layer the glittered card to a piece of Rust Soft Finish Cardstock that measures 5 1/4 inches x 4 inches.
- Cut a piece of True Green Soft Finish Cardstock that measures 11 inches x 4 1/4 inches. Fold along the long side at 5 1/2 inches to create a top folding card.
- Adhere the glittered panel to the front of this folded card.
4. Using the Boat Die die set, die cut the following:
- (1) Set of Sails using Dove Gray Soft Finish Cardstock
- (1) Set of Stars using True Green Soft Finish Cardstock (that has Clear Double Sided Adhesive Tape on the back)
- (1) Boat using Rust Soft Finish Cardstock
- (1) Set of Portholes using Dark Chocolate Soft Finish Cardstock (that has Clear Double Sided Adhesive Tape on the back)
- (1) Set of Flags using Dark Fuchsia Soft Finish Cardstock
- Assemble boat using photo above as a guide.
5. Counting from the small centre die, die cut the fourth die from the Stitched Circles die set from White Soft Finish Cardstock.
- Counting from the small centre die, die cut the fourth die from the Dotted Scallop Circles die set from Rust Soft Finish Cardstock.
- Layer the white circle to the rust circle and attach to the right hand side of the front of the card using foam tape.
- Adhere the boat to the circles using foam tape.
6. The Inside of the Card:
- Using the offset glittered piece from the front card panel, adhere this to a piece of Rust Soft Finish Cardstock so that there is about 1/8 inch showing along the top edge.
- Next layer this to a piece of True Green Soft Finish Cardstock so that there is about 1/8 inch showing along the top edge.
- Adhere this panel along the bottom edge of the inside of the card.
7. Stamp the sentiments "Ahoy" and "Wishing you Oceans of Joy" from the Ahoy Sentiments Clear Stamp set using black ink.
- Die cut two ships wheels from the Boat die set from Rust Soft Finish Cardstock that has Clear Double Sided Adhesive Tape on the back of the card. Adhere these wheels to either side of the lower part of the card. (Refer to photo above for placement.)
Thanks for visiting my blog today, I hope you enjoyed my tutorial.
Supplies:
Elizabeth Craft Designs:
Other:
Ink - Black
Die Cutting Machine


2 comments:
Beautifully done - inside and out.
what a great ship......and the glittering is fabulous
Post a Comment