Showing posts with label Els van de Burgt Studio. Show all posts

Tuesday, August 1, 2017

Floral Happy Birthday


Hi Crafty Friends,

Today I am sharing another card using one of the new Krista Schneider stamps coming soon to Elizabeth Craft Designs. This one is from the Blooms & Leaves Clear Stamp set with coordinating dies.

For the background of my card I have used my Go Press & Foil machine and gold foil to foil the ModaScrap Leaf Pocket for the background. This was done on White Soft Finish Cardstock and then colored using distress oxide inks.

In the centre of the flowers I added some Dandelion Yellow Nuvo drops.


For the inside of my card I added another floral image from the stamp set and a sentiment.


Supplies:

Elizabeth Craft Designs:

Blooms & Leaves Clear Stamp Set - COMING SOON
Blooms & Leaves coordinating die set - COMING SOON
Stamps: Blooms & Leaves - Elizabeth Craft Designs
Paper: White Soft Finish Cardstock - Elizabeth Craft Designs; Purple
Dies: ModaScrap Leaf Pocket; Postage Stamp Rectangles; Stitched Rectangles; Blooms & Leaves; Happy Birthday - Elizabeth Craft Designs
Other: Black Ink; Peeled Paint Distress Ink; Cracked Pistachio Distress Ink; Fossilized Amber Distress Ink; Couture Creations Go Press and Foil Machine; Gold Foil; Dandelion Yellow Nuvo Drops;  Foam Tape;  Copics


Sunday, July 23, 2017

Rose Dress


Hi everyone,

Have you heard the news???? Elizabeth Craft Designs have some new stamps and coordinating dies from Krista Schneider coming soon!

For my card today I have used one of the dresses from the Fashion Set 2 Clear Stamp set and coordinating dies.

For the background of my card I used the ModaScrap Rose Pocket with the Go Press & Foil Machine to add the gold foiled image to the background. I love how you can turn your dies into stamps using this machine and foil. After adding the foiled image to white cardstock, I then added orange and red inks to add color to the background.


For the inside of my card I added a sentiment and rose from the new Fashionable Phrases Clear Stamp set.


Stamps:  Fashion Set 2; Fashionable Phrases - Elizabeth Craft Designs
Paper: White; Red; Orange
Dies: ModaScrap Rose Pocket; Fashion Set 2; Stitched Fishtail Flags; Stitched Rectangles; Dotted Scallop Rectangles; Stitched Ovals; Dotted Scallop Ovals - Elizabeth Craft Designs
Other: Black Ink; Red Ink; Orange Ink; Couture Creations Go Press and Foil Machine; Gold Foil; Foam Tape; Copics


Tuesday, July 11, 2017

Flower Power Trifold Card


Hi Crafty Friends,

It's my turn to post a tutorial today for the Coloring Design Team on the Elizabeth Craft Designs blog. This time round I decided to create a trifold card using the Krista Schneider Flower Power Clear Stamp set and coordinating dies as well as the ModaScrap Leafy Branch 3.


Here is how I created my card:

Step 1 - 
  • Cut a piece of White Soft Finish Cardstock so it measures 10 1/2 inches x 6 1/4 inches. 
  • Measure along the left hand side and make a mark at 2 1/4 inches up from the bottom of the card. 
  • Use a paper trimmer and cut from the 2 1/4 inch mark up to the 6 1/4 inch side to create a diagonal top edge.
  • Score along the long side of the card at 3 1/2 inches and 7 inches.
  • Create a mountain and valley fold referring to photo above.
Step 2 - 
  • Cut a piece of yellow and green polka dot patterned paper from the ModaScrap Thinking About Rio de Janeiro 12 x 12 Patterned Paper Pack so that they measure 3 1/4 inches wide.
  • Place the patterned paper to the section that it will be placed on the card so that the top edge of the patterned paper is slightly over the edge of the card. Make a pencil mark on the top and bottom edges of the paper. 
  • Use paper trimmer to trim along these points. Making the bottom of the paper 1/4 inch shorter than the pencil mark at the bottom.
  • Adhere all patterned paper panels to the card referring to photo above for placement.
Step 3 -
  • Using the flower from the Flower Power Clear Stamp set, stamp onto White Soft Finish Cardstock using black ink.
  • Use coordinating die to die cut all flowers.
  • Color the flowers using copic markers.
  • Using the "Thinking of You" sentiment from the General Sentiments Clear Stamp set, stamp to the lower left hand corner of the front card panel using black ink.
  • Adhere flowers to card using foam tape, referring to photo above for placement.
  • Optional: As the orange flower will be seen when the recipient opens the card to read the sentiment in the centre panel. Die cut an additional flower using the coordinating die from White Soft Finish Cardstock and color the back of the flower the same color as you colored the centre flower. Adhere this piece to the flower before adhering the flower to the card.
Step 4 -
  • Using the ModaScrap Leafy Branch 3, die cut 6 sets of leaves from White Soft Finish Cardstock.
  • Color leaves using Peel Paint and Twisted Citron Distress Inks.
  • Adhere to card.

Step 5 -
  • Using the "Good Luck" sentiment from the General Sentiments Clear Stamp set, stamp onto White Soft Finish Cardstock using black ink.
  • Die cut around sentiment using a circle from the Stitched Circles die set.
  • Using a circle from the Dotted Scallop Circles die set, die cut a circle from Spring Green Soft Finish Cardstock.
  • Layer circles together and adhere to centre inside panel.


Thank you for stopping by today, I hope you enjoyed my tutorial.

Supplies:

Elizabeth Craft Designs:


Other:
Inks - Black; Peeled Paint Distress Ink; Twisted Citron Distress Ink
Blending Tool
Copics
Foam Tape


Wednesday, July 5, 2017

Rose Gatefold Petal Fold Card


Hi Crafty Friends,

It's my turn to post a tutorial today for the Die Cut Design Team on the Elizabeth Craft Designs blog. This time round I decided to play with the ModaScrap Gatefold - Elegant Roses die to create a "Petal Fold Card". Using this die makes for an elegant card which would be suitable for weddings, invitations or any occasion where you wanted something a little big different. 

As the cardstock I selected to use for my card was two tones a dark red on the front and a light red on the back I decided to keep to the three colors of white; dark red and light red for my card. By keeping the insert loose I could turn it upside down when I closed the card so you could see the second light color red through the openings of the "petals". 

Here is how I created my card:


Step 1 - 
  • Cut a base from dark red cardstock that measures 5 3/4 inches square
  • Cut a base cover from light red cardstock (this will cover the base card when sides have been attached) that measures 5 12/16 inches square
  • Cut 4 sides from dark red cardstock that each measure 3 1/2 inches x 6 inches.
  • Using the ModaScrap Gatefold - Elegant Roses die, place it on one of the pieces of dark red cardstock cut for the sides, so that the straight edge is approx 1/2 inch away from edge of cardstock. Run through die cutting machine. Repeat for all 4 sides.
  • Use a scoring tool to reinforce the score line created by the die, fold and attach Clear Double Sided Adhesive tape to each of the tabs.
  • Trim the sides of each tab at an angle. 

Step 2 - 
  •  Remove the adhesive from one of the tabs from the Gatefold - Elegant Roses die cut and carefully line the fold of the die cut with the edge of the base card (Photo A above).
  • Repeat this on all four sides (refer to photos above.
  • Adhere the base cover we cut in step one over the inside of the base card so it hids the tabs from the side panels. (Photo D above.
  • The sides should be able to fold down onto the base now.


Step 3 - Create the Card Insert:


  •  Cut the base of the inside from light red cardstock that measures 5 1/4 inches square.
  • Using the largest square from the Dotted Scallop Squares die cut a square from dark red cardstock.
  • Using the second largest square from the Stitched Squares die set cut a square from White Soft Finish Cardstock. 
  • Layer all pieces to form insert (refer to photo above)
Step 4 - 
  • Die cut two hearts from the A Way with Words - Calligraphic Ellements 2 die set from dark red cardstock that has Clear Double Sided Adhesive Tape on the back. Adhere hearts to lower corners of insert.
  • Using the A Way with Words - Always die set, die cut from white cardstock that has Clear Double Sided Adhesive Tape on the front. Remove protective backing from the adhesive and cover the adhesive with Light Gold Silk Microfine Glitter. Return excess glitter to the jar and polish the glitter with your finger. Adhere sentiment to centre of card.
  • Using the second smallest fishtail banner die from the ModaScrap Stitched Fishtail Banners die set, die cut a banner from light red cardstock. Gold emboss the "happiness" sentiments from the Dream Sentiments Clear Stamp set. Adhere to top left hand side of card.
  • Place insert into the centre of the petal card (upside down if you want a solid color showing through the holes in the sides).

Step 5 - Folding the Card:
  • To close the card, first fold down one of the sides into the centre and then fold the second side so it is on top of the first side (photo A)
  • Next fold the third side down so it is is laying down on top of side 2. (photo B).
  • To close the card  .... lift up the edge of side 1 which is closest to the remaining side not folded down yet and slip the remaining unfolded side so it is under side 1 and over side 4. (See photo C)
  • To finish the card die cut a small heart from the Scalloped Hearts die set from White  Soft Finish Cardstock.
  • Die cut the XOXO from the Love Sentiments die set from white cardstock that has Clear Double Sided Adhesive Tape on the front. Add Light Gold Silk Microfine Glitter to sentiment as we did to the sentiment in Step 4. Adhere to heart.
  • Punch a hole in the heart and thread onto ribbon.
  • Thread the ribbon through two of the holes in the "petals" and tie into a bow.
Thank you for stopping by today, I hope you enjoyed my tutorial.

Supplies:

Elizabeth Craft Designs:


Other:
Cardstock: Red two toned cardstock
Inks - VersaMark Ink
Gold Embossing Powder
Sheer Ribbon
Hole Punch


Wednesday, June 28, 2017

Dahlia Hugs


Hi Crafty friends,

I recently acquired a Couture Creations Go Press & Foil Machine and of course I wanted to play with it. You are supposed to be able to use dies you own with this machine, so of course I had to try it.

For my first attempt I used the ModaScrap Leaf Pocket die and used this to foil a piece of white cardstock with gold foil. I really love how it turned out. I then added color to the cardstock using various greens and yellow inks.The foil resists the inks.

To decorate my card I used the Susan's Garden Dahlia ... I had one sitting around waiting to be used on a card. As I didn't want to hid too much of the background I added the flower to a circle layer which I adhered to the lower corner of my card.


As you can see I have kept the inside of the card simple by adding the sentiment "Love You" which could be for any occasion. To give the sentiment a little bit of sparkle I added Desert Gold Silk Microfine Glitter to it.


Paper: White; Gold Mirror Card; Spring Green Soft Finish Cardstock - Elizabeth Craft Designs
Dies: ModaScrap Leaf Pocket; Susan's Garden Dahlia; Stitched Circles; Dotted Scallop Circles; Stitched Rectangles; Dotted Scallop Rectangles; Love Sentiments - Elizabeth Craft Designs
Other: Couture Creations Go Press and Foil Machine; Gold Foil; Susan's Garden Tool Kit; Bright Gold Nuvo Drops;  Green Inks; Foam Tape;  Copics


Wednesday, June 21, 2017

ECD June Coloring Designer Challenge


Hi everyone,

It's time for our June Coloring Design Team Designer challenge. Check out the Elizabeth Craft Designs blog today to see what our talented designed created for the challenge.


Clean & Simple Card Set - create a set of three Clean & Simple cards. Select a stamp set and use a different image from this set on each of the cards. The card should include one colored image and a sentiment.

**************************

For today's challenge Elizabeth Craft Designs are giving away a Krista Schneider Jungle Cuties Clear Stamp set with coordinating dies; a pack of Dusky Lavender Soft Finish Cardstock and a pack of White 100lb 8.5" x 11" Soft Finish Cardstock to 3 winners. 

To enter simply leave a comment on the Elizabeth Craft Designs Challenge post and tell us "Describe your crafting style

We will select 3 lucky winners in a random drawing 

The winners will be announced on Friday, June 23 on the Elizabeth Craft Designs blog.

*************************


For my cards today I decided to use the Krista Schneider Bird-day Party clear stamps with coordinating dies.


For the sentiments on each card I used the "happy bird-day" sentiment from the stamp set and layered this using circles from the Stitched Circles and Dotted Circles die sets. I added some twine underneath the sentiment for some added interest.


Here is a close up of my third card is the card series.


I used the new ModaScrap Thinking About ... Polinesia and Rio De Janeiro 6 x 6 Paper Packs for my designer paper, using the straight die from the Fishtail Borders die set. I positioned the die a little off from the centre to get an interesting shape and die cut this and then used my trimmer to cut the remaining edge on the right hand side.

I did the same thing with Soft Finish Cardstock which matched the colors of designer paper I used and layered the solid panel under the designer paper before attaching to the card.


For the inside of my cards I used the negative off cut from when I die cut the designer paper for the front of the card. I trimmed it down slightly and then added it to the lower part of my card.

I added sentiments from the General Sentiments and Occasions clear stamp sets using black ink.

I hope you enjoyed my project today. Don't forget to check out the Elizabeth Craft Designs blog to see all the wonderful creations by our talented designers and for a change to win the giveaway.


Stamps: Bird-day Party; General Sentiments; Occasions Sentiments - Elizabeth Craft Designs
Paper: White; Sunflower; Misty Mauve;  Brick Red Soft Finish Cardstock; Thinking About Polinesia; Thinking About Rio De Janero - Elizabeth Craft Designs
Dies: Bird-day Party; Fishtail Borders; Stitched Circles; Dotted Scallop Circles  - Elizabeth Craft Designs
Other: Black Ink; Hemp Cord; Clear Double Sided Adhesive Tape  - Elizabeth Craft Designs; Foam Tape; Copics

Friday, June 2, 2017

Lovebirds Lace Corner Birthday


Hi everyone,

It's my turn to post a tutorial today for the Die Cut Design Team over on the Elizabeth Craft Designs blog. Today I decided to play with some of the new ModaScrap products, the Lace Corner and the  Color of Puppies Girl Papers, I just love this new range of papers.

Here is how I created my card:


Step 1 - 
Cut a piece of pink cardstock that measures 11 inches x 5 1/2 inches. Score along the 11 inch side at 5 1/2 inches to create a top folding card.
  • Using the largest square from the Stitched Squares die set die cut a square from brown cardstock.
  • Using the largest square from the Fitted Squares die set die cut a square from patterned paper.
  • Die cut the ModaScrap Lace Corner die from dark pink cardstock. Fold along score lines and attach to the lower right hand corner of the card.
  • Adhere the layers to the pink card base.

Step 2 -
Die cut the Lovebirds using White Soft Finish Cardstock. Color the image using Copic markers.
  • Use the second smallest oval from the Stitched Ovals die set to die cut an oval from White Soft Finish Cardstock.
  • Use the third smallest oval from the Dotted Scallop Ovals die set to die cut an oval from Brown Cardstock.
  • Layer the lovebirds to the oval layers using foam tape.
  • Adhere a black prill to the lovebirds eyes.
  • Adhere to the left side of the card using photo below as a guide.


Step 3 - 
Use the middle circle from the Entwined Circles die set, die cut two circles from brown cardstock.
  • Cut the circles in half and arrange around the oval. One half circle on the left side and three half circles on the right side of the oval. (Trim circles as necessary so that they are at varying sizes.)
  • Add Pink/Silver Glitter Dots Peel Off Stickers to the circles.
Step 4 - 
Using the "Happy Birthday" sentiment from the General Sentiments Clear Stamp set, stamp onto a piece of brown cardstock using VersaMark ink, cover with white embossing powder. Emboss using heat gun.
  • Die cut sentiment using the smallest fishtail banner from the Stitched Fishtail Banners die set.

Step 5 - The Inside of the Card:

  • Using the largest square from the Stitched Squares die set die cut a square from brown cardstock.
  • Using the largest square from the Fitted Squares die set die cut a square from White Soft Finish Cardstock.
  • Die cut the ModaScrap Lace Corner die from dark pink cardstock. Fold along score lines and attach to the lower right hand corner of the card.
  • Adhere the layers to the inside of the card.
Step 6 -
Die cut the A Way with Words - Happy Birthday 2 sentiment using brown cardstock. Adhere to the upper part of the card using photo above as a guide.

Step 7 -
Die cut the Lovebirds using White Soft Finish Cardstock. Trim off the top lovebird/branches and color using Copic markers.
  • Adhere the lovebird to card using photo above as a guide.
  • Adhere a black prill to the lovebirds eye.
Thanks for stopping by today, I hope you enjoyed my tutorial.
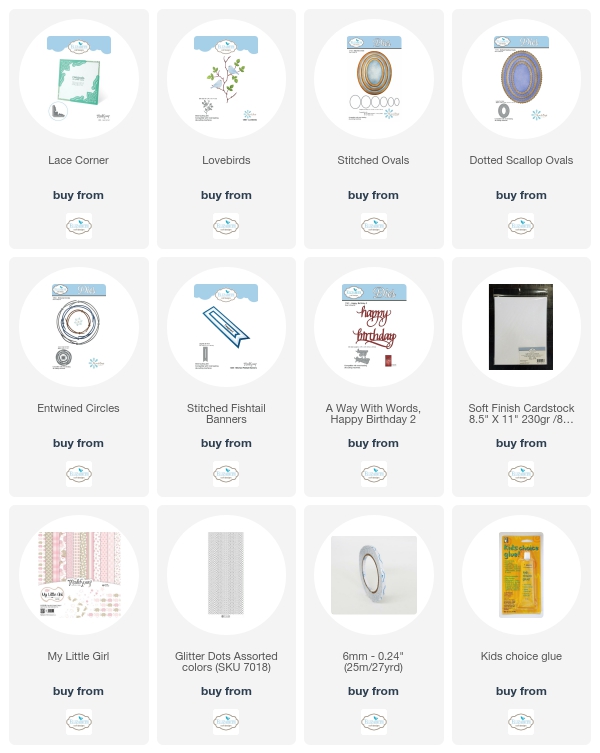
Supplies:
Elizabeth Craft Designs - 


Other: 

Cardstock - Pink; Dark Pink; Brown
VersaMark Ink
White Embossing Powder
Heat Gun
Copics

Foam Tape


Sunday, May 28, 2017

Birthday Bears


Hi everyone,

Today I am sharing a birthday card I created using products from Elizabeth Craft Designs.


I have created another pull card using the Pop it Ups Circle Spiral Pull Card for the base of my card. I added one of the new papers from the  ModaScrap Color of Puppies Girl Paper Pack to the sides of my card. 

I used the Krista Schneider Teddy Bear Picnic and Bird-day Party Clear Stamp set with coordinating dies to decorate the card.

I added two border stripes along the right hand side of my card using the Bead Strings 2 die set, to which I added Pink/Silver Glitter Dots Peel Off Stickers.


When you 'pull' the card open it reveals a sentiment which is from the Occasions Clear Stamp set.


Stamps: Teddy Bear Picnic; Bird-Day Party;  Occasions - Elizabeth Craft Designs
Paper: White; Dark Pink; Purple; ModaScrap Color of Puppies Girl Paper Pack
Dies: Pop it Ups Circle Spiral Pull Card; Teddy Bear Picnic; Bird-Day Party; Bead Strings 2 - Elizabeth Craft Designs
Other: Black Ink; Pink/Silver Glitter Dot Peel Off Stickers - ECD; Foam Tape; Copics