Showing posts with label A6 Window Card. Show all posts

Thursday, December 28, 2023

Let the Adulting Begin


Hi Crafty Friends,

Today I am sharing the first of two eighteenth birthday cards I needed to make for my daughter, as she has two nieces turning 18 in January.

For both cards I have used Creative Craft Products 18 from their Numbers Galore Collection.


 For this card, I added the "18" to the front of Creative Craft Products A6 Window Card die set.

I added the "Congrats" and "Let the adulting begin!" to the front of the number "18".

I added the hands & wine glasses to the panels on the outer portion of the card, which are both using dies from MFT Stamps.


Here is a look at my card when it is closed ready to be placed in an envelope. It measures 6 inches square when closed.


Here is a look at my card from the back, the panels are easier to see in this view as the "18" hides a lot on the front.

I added a white panel to the centre so I can add the sentiment and a hand written greeting to the recipient.


Friday, November 24, 2023

Reindeer Mug


 Hi Crafty Friends,

Today I am sharing another Coffee themed Christmas card, that I created recently.

For the base of the card, I used the A6 Window Card die set from Creative Craft Products Fancy Folds Collection. 


To decorate my card, I used Trinity Stamps Freezin' Season & Beary Cute Layered Mug die sets.


Here you can see the card when it is folded ready to be placed in an envelope.


Here is a look at the back of my card, I added the "Season's Greetings sentiment at the top of the panel. I then added the "cup of Cheer" sentiment which is a digital sentiment I got from Verve Stamps some years ago.


Wednesday, August 2, 2023

Lettuce Celebrate


Hi Crafty Friends,

Today I am sharing a fun kinetic card using products from Made To Surprise by Sam Calcott and Creative Craft Products, both of these are available from Craft Stash.


Here is a quick video to see my card in action.


My card uses another of the cute pets from the It's Only More Puppets Collection that was released by Made To Surprise a couple of months ago. This time around I am using the Terrific Tortoise die set, along with the It's Only More Puppets A2 Mechanism.


When these were released, I debated whether I needed to order the A2 Mechanism die set, seeing I was ordering the 5 x 7 mechanism and already had the 6 x 6 mechanism from a previous release. As it came in a bundle, I decided I would order it and I am glad I did as it made it easy to incorporate it in this Fancy Fold Card which uses the A6 Window Card die set from Creative Craft Products. All I needed to do was trim the sides down of the A2 Mechanism so it would fit into the width of the front of the card.


I used papers from the It's Only A Puppet 5 x 7 paper pack for the background of my card. As I didn't need the full height of the paper, I cut out the clouds and added them to the top of the panel on the front.

On the side panels and the hand on the right, I added some lettuce leaves. I also stamped some tortoise prints to the upper portion of the end panels.

The "Lettuce Celebrate" sentiment is from the Terrific Tortoise coordinating stamp set, which is also included with the dies.


Here you can see the card when it is folded ready to be placed in an envelope.


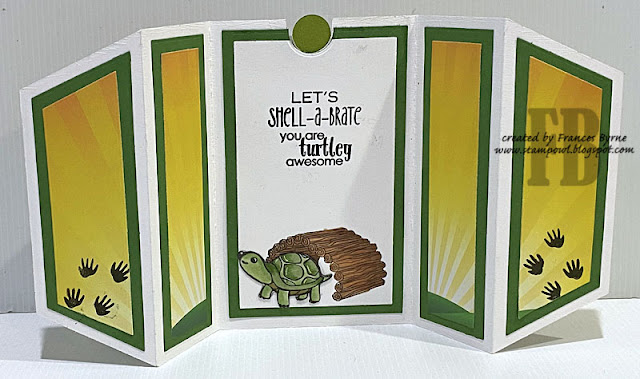
Here is a look at the back of my card. I added a white panel to the centre to add the sentiments and write a personal greeting. 

The top sentiment is again from the It's Only A Puppet Terrific Tortoise die/stamp set, along with the tortoise shelter stamped at the bottom of the card.

I also added a turtle and turtle sentiment to this panel. These are both from a Hero Arts stamp set.


Thursday, April 27, 2023

Sugar Pug Fairy


Hi Crafty Friends,

Last week I shared a card using Creative Craft Products A6 Window Card from their Fancy Folds Collection, today I am sharing another card using this die, folding the card the opposite way, so you have a double gatefold on the front.


To decorate my card I used the pug and sentiment from Pink Ink Designs Pawsome Pooch stamp set. I just love that cute pug wearing the tutu, it reminds me of a pug I know LOL!


Here is a look at my card when it is fully opened. I added the "Sugar Pug Fairy" sentiment to the inside panel as well as the wand and paw print which are also included in the stamp set.

I used pink woodgrain paper for my layered panels which I found as a digital paper on Etsy.


Here is a look at the back of my card, I added a birthday sentiment combining sentiments from an older There She Goes Pugalicious stamp set and a birthday sentiment from Card Making Magic.

I also stamped the top half of the pug in the lower left hand corner.


Thursday, April 20, 2023

All That Jazz


Hi Crafty Friends,

Today I have another "Roaring Twenties" themed card to share with you using stamps and dies from Crafter's Companion and dies from Creative Craft Products.

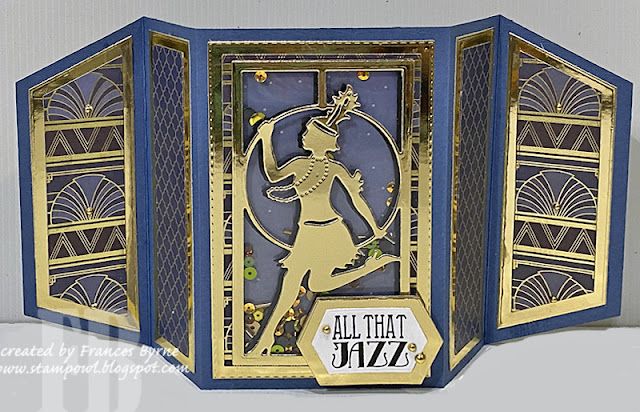
The base of my card uses one of the new die sets from Creative Craft Products Fancy Folds Collection, this one is the A6 Window Card die set. This card folds down to a card that measures 4 1/4 inches x 6 inches.


To decorate my card I used Crafter's Companion's Showgirl die set. I die cut this image from both gold mirror and black cardstock, offsetting the black behind the gold slightly to create a shadow. I turned this into a shaker card before adding it to the centre of the card.

I used the "All That Jazz" sentiment from Crafter's Companion's All That Jazz stamp set. I die cut the sentiment using the label dies included in the A6 Window Card die set. The label was a little longer than the sentiment, so after die cutting the label once, I then repositioned the label so it was closer to the other side of the words and die cut again.

I added a few gold metallic pearls to the card.


Here you can see the card when it is folded ready to be placed in an envelope.


Here is a look at the back of my card, as I have the 12 x 12 Roaring Twenties Paper Pad, I decided to decorate the panels on the back of the card. 

I added a birthday sentiment using the Shine Like The Stars stamp set.