Showing posts with label Karen Burniston. Show all posts

Wednesday, September 3, 2025

50th Anniversary Card


Hi Crafty Friends,

A friend asked if I would make an Anniversary card for friends of hers who are celebrating their 50th Wedding Anniversary this month. As you can see, I said yes! I drew inspiration from a card I created earlier in the year making a few changes and adding gold, seeing the 50th anniversary is also known as the golden wedding anniversary.


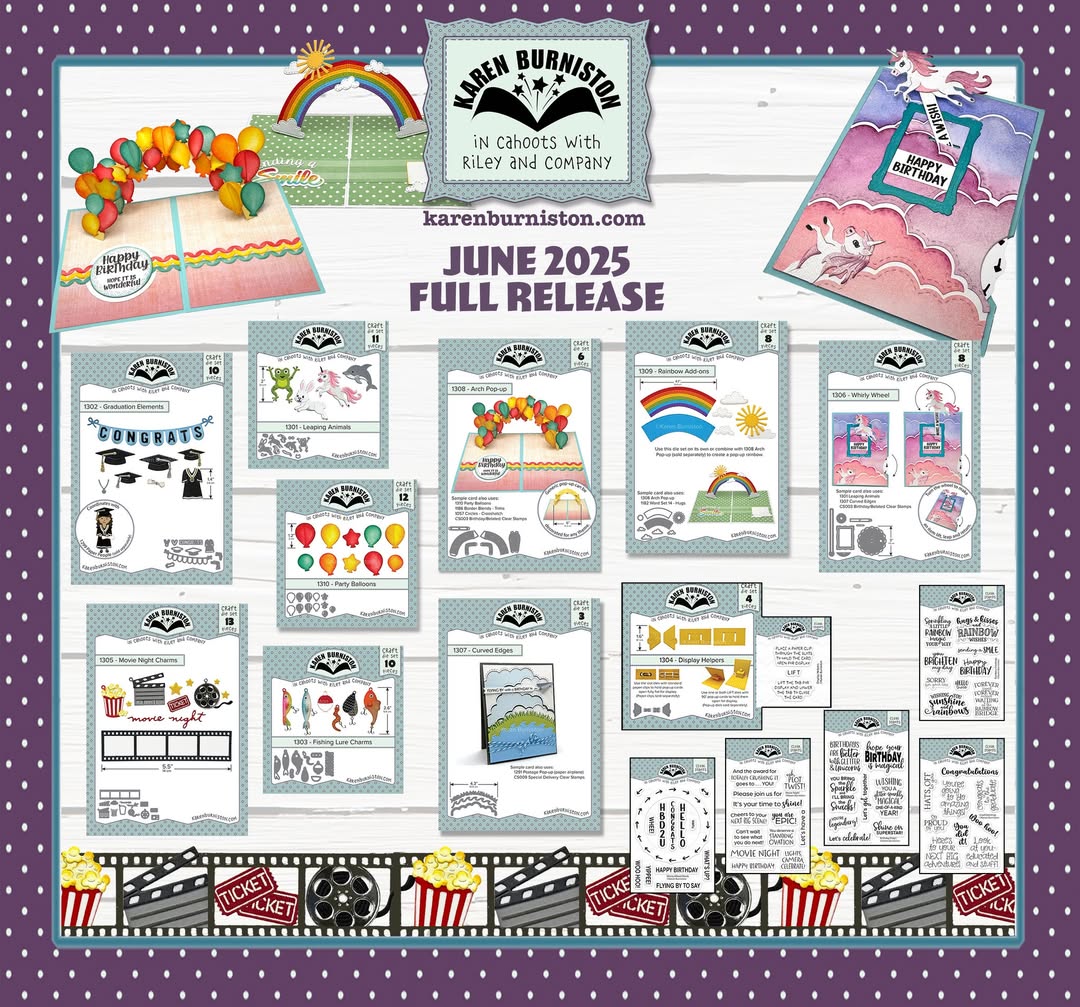
As you can see I used Karen Burniston's Arch Pop up die set. Like the card I made back in June, I pulled out a number of different heart die sets to create a love themed card. I added the gold hearts in the centre of the arch, again to indicate the Golden Wedding Anniversay.


Along the bottom portion of the card, I added the Anniversary sentiment using the Word Set 12 - Anniversary and the Numbers die sets. I die cut this from gold and red cardstock and offset the gold over the red.

On the other side of the card I added a red heart and then added the names "Mary, Bill" the names of the couple celebrating.


As the focus of this card is on the inside, I kept the front of the card simple. I added a few hearts and then a couple of sentiments.


I added a panel on the back of my card, for a place to write a personal message.


Tuesday, September 2, 2025

September 2025 Karen Burniston Designer Challenge


Hi Crafty Friends,

Welcome to our September Karen Burniston Designer Challenge.

Check out Karen Burniston's blog on Wednesday (US Time) when you will be able to see what all the designers created for the challenge this month, plus Karen will have an amazing video tutorial to share with us all.

Our challenge theme this month is ... "LETTER" - How will you interpret this challenge? Does "letter" meana piece of mail? Or does "letter" mean an actual letter? You decide!


As you can see I decide to opt for the "Piece of Mail" definition for this challenge. I pulled out both the Postage Pop-up and Mail Box Pop-up die sets to create a large pop-up postage stamp which features a mail or letter box which ever you prefer to call it.

I die cut the main die from the Postage Pop-up from white cardstock and also sky patterned paper, trimmed around the edge of the sky panel and layered the two together.

After adding my mailbox decoration to this panel, I decided to add some of the faux post stamps from the Special Delivery Clear Stamp set.


To decorate the card a little further, I added the fence from the Fence Add-ons die set and the fence along the edge of all three red polka dot panels. I added the grass from the die set and also added a row of envelopes/letters along the bottom of the card.

I added the sentiment to another panel from the postage pop-up die set adding the heart wings to the corner. I also added a paper airplane to the top right hand corner of the card.


For the front, I echoed much of what I did on the inside, adding the mail box behind the fence and changing up the colour, so it looked like another mailbox. I added another of the sentiments from the Special Delivery Clear Stamp set, to the fence.

I added another couple of envelopes/letters to each side of the fence and added another paper plane so it would appear to be landing on the mailbox.


Tuesday, August 5, 2025

August 2025 Karen Burniston Designer Challenge


Hi Crafty Friends,

Welcome to our August Karen Burniston Designer Challenge.

Check out Karen Burniston's blog on Wednesday (US Time) when you will be able to see what all the designers created for the challenge this month, plus Karen will have an amazing video tutorial to share with us all.


Our challenge theme this month is ... "BOTTOM FOLD CARDS" - Let's flip things up and make some pop-ups in bottom fold cards.


For my card for this challenge I decided to create something that is a blast from the past… a file folder card. I made my card so the finished card measures 5 x 7 inches. I trimmed 1/2 inch from the top of the front of the card before adding my tabs. For the tabs I used my Envelope Punch Board from We R Memory Keepers, punching at the edge and then at 2 1/2 inches on both the front & the back.


For the inside of my card I added the Little Labels Pop-up die to create the pop up portion of the card. I madded the presents from the Big Birthday Charm die set to mimic the patterned paper on the front. The sentiment on the centre label is from the Seasons of Cheer Clear Stamp set.


On the lower panel on the inside I added the poinsettia using the Poinsettia die set. I added a large label from te Lorna Labels die set to add a personal message. 


To finish off my card I added the Merry Christmas sentiment using the Merry Christmas Lorna Add-ons die set.


Friday, August 1, 2025

Fa La La La La


Hi Crafty Friends,

Today I am sharing a pop up themed Christmas card I created recently. This card was inspired by a card I made a number of years ago, but with completely different products.


The carol singing snowmen & the door are all from Spellbinders, wouldn’t it be fun having Carol singing snowmen at your front door1 It definitely won’t happen here as it’s summer at Christmas time for me1

For the brick background of my card, I used an old MFT Stamps Brick stencil, using Antique Linen & Rusty Hinge Distress Oxide inks for colouring.

The greenery at the top of the card is an old die from Memory Box, a very well used die from my stash.  The snowy border at the bottom is also from the same company. I used white glitter Cardstock for the base of the card.

To create the pop up, I used Karen Burniston’s Lorna Label Pop-up die set, this gives a nice high support for the door. I did need to trim off the sides of the label, so they didn’t peek out the sides.

To finish off the inside I added the two lamps and a sentiment.


For the front of the card I used Spellbinders Snowball Shimmer Betterpress Plate to white glimmer a piece of dark blue cardstock. I added snowy hills at the bottom.

I added one snowman and a lamp and finished off by adding the Fa La La La La sentiment also included with The Snow Notes die set. 


Other Supplies: 
Carol Singers Die Set - Tonic Studios
Pine Needle Border - Memory Box
Open House Side Panel - Spellbinders
Open House Stair Sentiments - Spellbinders


Tuesday, July 1, 2025

July 2025 Karen Burniston Designer Challenge


Hi Crafty Friends,

Welcome to our July Karen Burniston Designer Challenge.

Check out Karen Burniston's blog on Wednesday (US Time) when you will be able to see what all the designers created for the challenge this month, plus Karen will have an amazing video tutorial to share with us all.


Our challenge theme this month is ... "RAINBOW" - This can be an actual rainbow, or you can use it as a colour or shape prompt.


For my card today it wasn't hard to decide to use the new Arch Pop-up die set with the Rainbow Add-ons die set to create my rainbow themed card. As my previous card I made using this set was an A6 card, I decided to make a Slimline card this time around 4 inches x 8 1/2 inches. Last time I also created a pastel rainbow, so this time I went for the more traditional bright rainbow.

As suggested by Karen's Rainbow Assembly video, I create three rainbows using all my die cut pieces, I used the rainbow with the correct order for the pop-up on the inside of the card. I used the other two to decorate the back of the rainbow pop-up and the front of the card.


I used cloud patterned paper that I found in my stash recently for the base of my card. I used the grass die from the Curved Edges die set to create the grass along the bottom of the card.

The large clouds that have my sentiments were created by using the cloud die included in the Curved Edges die set. After die cutting the card once, I then repositioned the die to the bottom and kept diecutting until I got the shape I wanted.

As I wanted to make this a birthday card, I added presents using the present dies included in the Gift Pivot Panels die set which I added to the grass area.

I also added a few party hats using the Birthday Charms die set which i added to a few of the clouds.


Here is a few of my card when it is partly open, you can see how I used one of the other rainbows I created to decorate the back of the pop-up rainbow. It looks so much nicer than having a white backing piece.


For the front of the card, I used pretty much the same layout that I used on the inside, adding the cloud patterned paper and grass. 

I added one of the rainbows I created when I die cut all the rainbow pieces so it stretched from the sky to the grass. I decorated the rainbow with the sun and clouds included in the Rainbow Add-ons die set.

I added another rainbow themed sentiment using the Rainbow Greetings die set. The large cloud is another I created by diecutting the cloud die from the Curved Edges die set twice (top and bottom).

Finally to finish off the card, I added some presents to the bottom of the rainbow. If it's not a pot of gold, why not presents for a birthday!


Monday, June 16, 2025

Karen Burniston - KB Riley LLC June 2025 Release Blog Hop


Hi Crafty Friends, 


Welcome to our Karen Burniston Products - KB Riley LLC June Release Blog Hop. The Design Team have come together with Karen today for a fun blog hop to celebrate the release of 10 new dies and 5 new stamp sets. Sneak peeks of the new release started last week, and the dies are available to order NOW!


This release includes:

  • 1 new Pop-up Die Sets
  • 1 new Interactive Die Set
  • 1 new Pop-up Add-ons Die Sets
  • 2 new Charm Die Sets
  • 4 new Stand Alone Die Sets
  • 5 new Clear Sentiment Stamp Sets


Dies are available to order now on the website. 


GIVEAWAY:


To celebrate the release Karen Burniston and each of the Karen Burniston - KB Riley LLC Design Team members will be giving away a $25 Gift Certificate to some lucky person who comments on our blog posts, so make sure you join the hop and comment on everyone's blog post. Winners will be randomly chosen from ALL of the blog hop comments received on our blog posts by Monday, 23rd June 2025. Lots of chances to win some goodies, so just leave a comment on this post or any other blog hop posts to enter! Don't forget to leave some way for us to contact you, in case you are a lucky winner!


This card uses the new Arch Pop-up and the coordinating Rainbow Add-ons die sets to create the fun pop up rainbow at the top of the card. I used pastel colours to create my rainbow opting for pink rather than red.

Along the bottom edge of my card, I used the cloud die from the Curved Edges die set. I die cut the edges twice for each side of the card. I added two sentiments from the Rainbow Greetings Clear Stamp set.
 

I die cut three unicorns from the Leaping Animals die set, die cutting the mane, tail etc from different colours. I also assembled one of the unicorns so it was facing the opposite direction. 


I kept the front of the card fairy simple, repeating elements that I had used on the inside of my card ... the rainbow, unicorn and a sentiment.

I used the Oval Crosshatch die set to layer my sentiment.

Well that's about it from me today, thank you for dropping by. To continue on the blog hop, click on the next person on the list, which is Jennifer Webster


Here is the complete blog hop list in case you need it.


Blog Hop Order


Karen Burniston

Lois Bak

Sue Small-Kreider

Frances Byrne  <<<you are here>>>

Jennifer Webster

Suzanne Smit

Nicky Foden

Sandy Diller


Thursday, June 12, 2025

Love You


Hi Crafty Friends,

Today I am sharing another card I created using one of the new dies from Karen Burniston’s June release. The new dies & stamp sets will be available on Monday 16th June.


This time round I am playing with the new Arch Pop up die sets. There are also two add on die sets that coordinate with this set .. balloons & rainbow, however for my card I pulled out a number of different heart die sets to create a love themed card.


The “love you” sentiment is from the Word Set 9 - Love die set.


As the focus of this card is on the inside, I kept the front of the card simple. I added a few hearts and then a couple of sentiments.


Wednesday, June 11, 2025

Flying By To Say


Hi Crafty Friends,

Today I am excited to start sharing some of the new dies which are being released by Karen Burniston next Monday 16th June, 

As tomorrow (12th June) is the 5th anniversary of when I started the Slimline Card Addicts Facebook Group which now has over 9000 members, I decided to create a Slimline card. 

Here is a quick video to see my card in action.


I created a Whirly Wheel Slimline Card using the new Whirly Wheel die set & Whirly Wheel Words stamp set. I was excited when I discovered that the Whirly wheel would inside a slimline card, This card measures 4 inches x 9 inches. 

To decorate my card I created a space scene using the Rocket Pop up & Space Charms die sets. The background paper is from Whimsy Stamps.


For the inside of the card I used the new Curved Edges die set to create the planet ground, I added the spaceman & alien from the Space Charms die set. I also added the big rocket flame from the Rocket Pop up die set.

The sentiment is from the new Birthday Magic stamp set, which I layered using the frame included in the Whirly Wheel die set.