Showing posts with label Barn Pop Stand. Show all posts

Saturday, April 4, 2020

From My Barn To Yours


Hi Crafty Friends,

It’s challenge time with the “Crazies” over on the Crazy 4 Challenges blog. Being a brand new month it is time to introduce our new challenge hostess which is Nicky Foden. 

April is Autism Awareness Month, so for our challenge this week we are to use their logo as inspiration. It could be a color challenge, theme, challenge, design challenge, however this image speaks to you.


For my card today, I decided to use the colors in the logo in my card ... red, blue, green, yellow and black.

I created a pop up card using the pop-up die from Karen Burniston's Explosion Pop-up die set. I used the barn from the Barn Pop Stand die set to add to the pop-up portion of the card.

I used Mama  Elephant's Zodiac Horse stamp set to decorate my barn.

The fence behind the barn is from Divinity Designs.


I used a cloud border die to add clouds at the top of the card and bushes at the bottom of the card. 

I also used Hero Arts 12-Point Stars Infinity die set to create the sun in the top right hand corner of my card.

The sentiment used on this card is from MFT Stamps The Whole Herd stamp set.


For the front of my card I used one of the border dies from Karen Burniston's Nature Edges die set. I also used the Howdy sentiment which I added to the top left hand corner of my card.

Don't forget to check out the rest of the “Crazies” cards over on the Crazy 4 Challenges blog and also their individual blogs for more details.


Supplies:
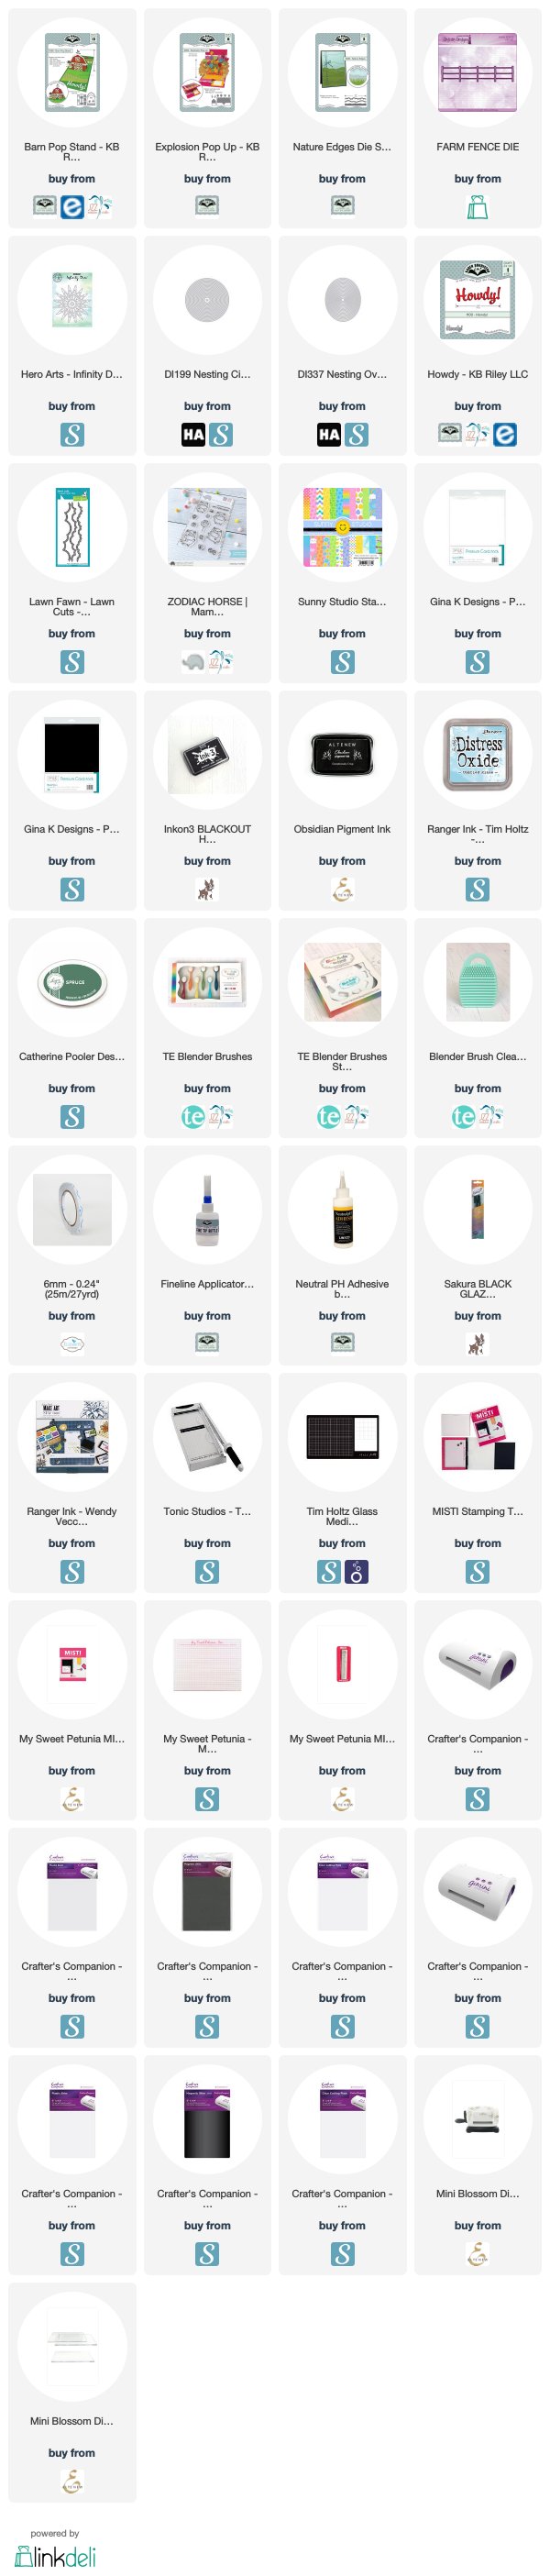
For your shopping convenience, all products are linked below. Compensated affiliate links are used where possible with no extra cost to you. This helps me to continue to share all the projects I include on my blog. For the benefit of my Australia readers, I have started to include some links to Australian stores when available. Please note I only use and share products I love.

The Whole Herd Clear Stamp set - MFT Stamps (discontinued)


Friday, September 6, 2019

You're Moo-Velous!


Hi Crafty Friends,

Today I am sharing an interactive card I created recently using products from Karen Burniston (KB Riley) and Riley and Company. 

I love paper dolls of any type, and have a large collection of the stamped version in my stash that I have accumulated over the years. Recently I purchased a few of the new cow and some of the dress  up sets which are all part of the Dress Up Riley range from Riley and Company. Up until recently there was only Riley the Moose to dress up, but they have now included a fun cow as well. As Karen Burniston recently released her barn pop stand die set along with some other farm related dies, I decided to add the dress up cow and some of the dress up sets, including the farm set to my stash.


I was originally planning on creating a pop-up card using these stamps, but in the end I decided to pull out the Triple Flip die set to create a single flip card. This is a technique that my friend Karen Aicken came up with a little while ago and it gives more options on using this die set.

I used one of the rectangle panels from the Crosshatch - Rectangles die set, die cutting this twice (for either side of the flip). I then also die cut the rectangle using blue designer paper and brown cardstock to create the background.

I stamped, colored and cut out the cow, tractor, shirt, hat and straw from the Dress Up Riley - Farm Clear Stamp set and adhered them to the front of my card.


When you pull the tab, it reveals the back of the rectangle panel. I created another scene here using another cow, the dress, chickens and eggs from the Dress Up Riley - Farmer Clear Stamp set.

I added the barn to the centre of the cow print panel, which hides the other two holes the Triple Flip die cuts into the panel when die cutting. I added a sentiment to the top of the barn.

All sentiments used on this card are from Newton's Nook Designs You're Moo-velous Clear Stamp set.


On the inside of the card, I added another rectangle panel with another scene and sentiment.

Supplies:
For your shopping convenience, all products are linked below. Compensated affiliate links are used where possible with no extra cost to you. This helps me to continue to share all the projects I include on my blog. For the benefit of my Australia readers, I have started to include some links to Australian stores when available. Please note I only use and share products I love.


Sunday, July 7, 2019

All Aboard It's Circus Time!


Hi Crafty Friends,

Today I am excited to share a card I created using some of the new Karen Burniston dies which are being released this month. As well as many new dies making an appearance this release, there is one die making a comeback which is the Barn Pop Stand die set.

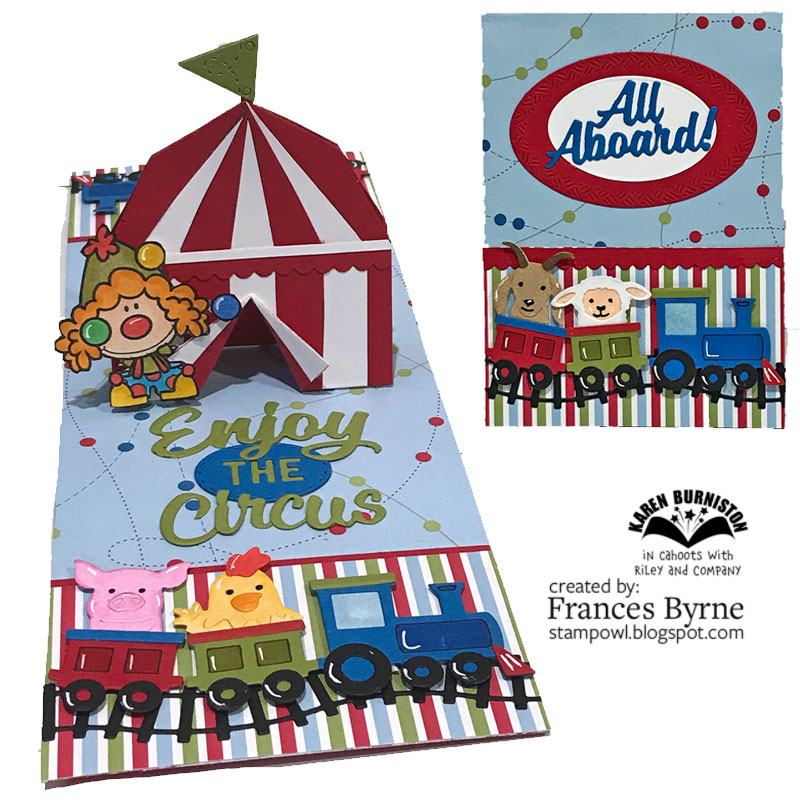
About 4 years ago, I created a card where I changed the Barn into a Circus Tent, so I decided to do that for my card today. I always love being able to do more than one thing with a die set.


I used 13 die sets to create this card because I have all of Karen Burniston's die sets. But this design is easy to adapt so you can use what you do have. 


Here is how to convert the Barn into a Circus Tent
  • Die cut  the barn from cardstock and then drew a line at the point where the roof starts to form a triangle (of sorts). This will be your pattern.
  • Measure in from the left side 1/4 inch and make a mark on the line you created above, then at every 1/2 inch until you are left with 1/4 inch on the right hand side of the barn. Do the same at the bottom of the barn and join up these marks as per my photo above. 
  • Next take a ruler and line up each mark with the centre point of the top of the roof and draw a line.
  • Die cut 3 barns - one in white; 1 in red and another in red which has double sided adhesive tape added to the top of it.
  • Use the pattern above to cut the red and white barns and adhere them to the barn with the adhesive.
  • Die cut the scallop edge from the Border Blends - Argyle die set. (Tip: I positioned the die a little from the edge of the cardstock and used the negative part of the scallop, this way I could make it the depth I wanted to suit my tent. Adhere across the room line. 
  • Cut a strip of white card approx 1/8 inch wide and adhere there to the top of the scallop border we attached in the above step.
  • Cut up the middle of the 'tent' to approx 1/4 inch from the roof line and fold back the card to create the tent flap. 
  • Use left over white pieces to add white to the inside of the tent flaps.
  • If you are creating a Pop Stand Card you will need to repeat these steps to create a second tent, but for this one you don't need to create a tent flap.


Because Karen is also releasing a train die set too, I decided to incorporate that into my card too adding various animals to the carriages. I used the train from the Train Pivot Panels die set and the train tracks are from the Train Elements die set.  The animals are from the Chicken, Pig and Lamb; Cow and Goat & Dog and Cat die sets.

I also added a few clowns to my card to give it a circus feel using an older stamp set in my stash .... CC Designs Clownin' Around.

The flag on the circus tent is from the Tag Book Pop Up die set, however there are a number of die sets that contain flags of various types which could be used.


Here is an overhead shot of my card, so you can see the whole inside of my card at once.

I used the "Enjoy The Ride" die set, substituting the word "ride" with the word "Circus" which was made up using letters from the following die sets: Celebrate (C); Happy Birthday (ir); Congrats (c, u and s). 


For the front of the card, I added another train filled with animals ... I guess my circus has farm animals instead of the normal circus animals haha! 

 I also added the "All Aboard!" sentiment which is another of the dies from the Train Elements die set. This was layered using the Crosshatch Ovals die set.

Supplies:
For your shopping convenience, all products are linked below. Compensated affiliate links are used where possible with no extra cost to you. This helps me to continue to share all the projects I include on my blog. Please note I only use and share products I love.


Saturday, July 6, 2019

Howdy Just Chicken In


Hi Crafty Friends,

It’s challenge time with the “Crazies” over on the Crazy 4 Challenges blog. Being a brand new month it is time to introduce our new challenge hostess which is Karen Ostergard.

Apparently today is National Fried Chicken Day in the U.S.  For today's challenge, create a card with a bird on it.


Seeing it is National Fried Chicken Day, I decided the bird I would use on my card would be Karen Burniston's new chicken die from the Chicken, Pig and Lamb die set. 

I have created a pop stand card using the Barn Pop Stand Card die set, which is being re-released. For something different I decided to create a pink barn. Karen Burniston recently shared with the Design Team an idea of using the fence from the Farm Edges die set on either side of the barn. As I was adding chickens to my card I decided to add the chicken wire instead of the fence.


The barn doors open up to reveal another chicken inside the barn which is behind some chicken wire.

I added the fence from the Farm Edges die set. I added another chicken on the left hand side of my card and a sentiment on the right which is layered onto the rectangle from the Rectangles - Crosshatch die set.


This is a view of the back of my card. I used the tractor border which is also from the Farm Edges die set and a sun which is from the Tropical Scene die set.


One last photo of the inside of the card showing an overhead shot of my card, so you can see the whole card at one time.


For the front of the card I added two of the papers I used on the inside. I also added the fence to separate the two papers.

On the lower left hand corner I added another chicken to which I added a hat and pitchfork which are from the Accessories 3 die set.

On the top right hand side of the card I added the "Howdy" sentiment from the Howdy die set. I then added the "Chicken In" sentiment which is from an old stamp set in my stash which unfortunately is no longer available. After stamping the sentiment onto my cardstock, I then used one of the arms from the Photo Collage Pop-up to die cut the sentiment. I love when you find another use for a die.

Don't forget to check out the rest of the “Crazies” cards over on the Crazy 4 Challenges blog and also their individual blogs for more details.


Supplies:
For your shopping convenience, all products are linked below. Compensated affiliate links are used where possible with no extra cost to you. This helps me to continue to share all the projects I include on my blog. Please note I only use and share products I love.


Monday, September 5, 2016

Happy Birthday to Ewe


Hi everyone,

Today I have a birthday card to share with you using the Twist Circle Pop Up Card die set designed by Karen Burniston for Elizabeth Craft Designs.


To decorate my card I have used Snowball the Sheep and the Barn from the Barn Pop Stand die set. The sentiment is from the Homegrown Greetings Clear Stamp set.


Here is a look how the card looks when it is half open, so that you can see how the circle twists when the card opens and closes.


And finally the front of my card. I added another sheep and also added a sentiment to the top right hand corner of the card.


Stamps: Homegrown Greetings Clear Stamps - Elizabeth Craft Designs
Paper: White; Black; Pink; Green; Yellow; Candy for Max DP - Nikki Sivils
Dies: Twist Card Pop Up; Barn Pop Stand Card; Snowball the Sheep; Outdoor Edges - designed by Karen Burniston for Elizabeth Craft Designs
Other: Black Ink; Shabby Shutters Distress Ink; Clear Double Sided Adhesive Tape - ECD


Monday, June 15, 2015

Karen Burniston June Designer Challenge Day 1


Hi everyone,

It's time for our June Karen Burniston Designer Challenge. This time around the theme for our challenge is WHAT'S IN A NAME? - Oh this is a doozy! Everyone has to incorporate two Pop it Ups dies according to your first and last initials.

This is definitely one of those times when I am grateful for the name I was given and married into as I had a number of options to select from. 


Of course as my name is Frances Byrne, I had to use something starting with the letter 'F' - Flies from the Hoppy the Frog set and the letter 'B' - Brownie the Cow of the barn from the Barn Pop Stand Card ... either work.

I decided to create a pop up card and I used the Lots of Pops Pop Up Card set for my base card. I added the hay stacks and pitchforks to the barn which are from the Hay There Pop Stand Card set. 

Leading from the barn to the edge of the card I have created a path using the Pebbles die set, I had all these pieces left from another card I created recently. The clouds on the blue panel are from the All Seasons Tree die set. 

As I wanted this to be a birthday card and I didn't have a lot of room for a sentiment, I decided to use the Alphabet 1 Caps set to create the greeting HB2 Moo. 

I added the flies to around my card, including one on Brownie's face.


Brownie the Cow is attached to my card using the spinner from the Rectangle Pull Card. I made the spinner blend into the card by gluing a piece of blue card to some green card as I used for the pop up card and then die cutting the spinner so the centre of the die was on the centre where the two colors joined. I also cut another so I could back the middle sections only.


And finally the front of my card. I decided to trying combining two of the sentiments blocks from the Farm Greetings Clear Stamp set. I combined the birthday (which is pig related) and the thank you (which is cow related). I used my MISTI and masking tape to stamp various parts of each stamp to make a new sentiment. I had a gap in between the finished sentiment so I stamped the cow from the cow related sentiment onto white card and cut that out and adhered to my sentiment. I did have a few misses before I got the final complete sentiment, but I think that was mostly because the ink pads I was using were either too wet or too dry. Once I grabbed my trusting black ink pad, it didn't take long at all.

If you are looking to purchase Karen's Pop It Ups dies in Australia you can find them at Craft Giraffe (formerly Photo Continental).

Don't forget to check out the Elizabeth Craft Designs blog on Wednesday when you will be able to see what all the designers created for the challenge this month, plus an amazing card/video tutorial from Karen Burniston.

I will be back tomorrow with another card I created for this challenge.


Stamps: Farm Greetings Clear Stamps - Elizabeth Craft Designs
Paper: White; Black; Brown; Latte Stack - DCWV
Dies: Lots of Pops; Barn Pop Stand Card; Brownie the Cow; Rectangle Pull Card; All Seasons Tree; Hay There Pop Stand Card; Hoppy the Frog - designed by Karen Burniston for Elizabeth Craft Designs; Pebbles; Alphabet 1 Caps - Elizabeth Craft Designs
Other ECD Products: Transparent Double Sided Adhesive Tape 64mm
Other: Black Ink; Silver Glitter Wink of Stella Pen; Foam Tape; Copics


Sunday, May 31, 2015

Elizabeth Craft Designs May Designer Challenge


Hi everyone,

It's time for our  May Elizabeth Craft Designs Designer Challenge. Check out the Elizabeth Crafts Designs blog today at 8AM MST when you will be able to see what all the designers created for the challenge this month.

For our challenge this month the Designers were asked to use one of the new Brick, Pebbles or Circles dies which have recently been released by Elizabeth Craft Designs. 


Els recently suggested to those of us who are also on the Karen Burniston Design Team that the Pebbles die would also work well with the Barn Pop Stand Card set. As no-one had used that idea yet, I decided to create a card combining both for my card today.

Rather than creating a Pop Stand Card, I have created a Pop Up Card using the Lots of Pops Pop Up Card set and attached the barn to that. I inlaid the pebbles into the designer paper on the base of my card, but you could also just add the pebbles on to of the designer paper if you preferred. I did take the time to add shading to the edges of each pebble before I adhered it to my base. To make it easier to adhere all the pieces from the Pebbles die to my card, I adhered Transparent Double Sided Tape to the back of my card before die cutting the pebbles die.


One of the fun things about the Barn is that you can make the doors open and close, which is what I did for this card. I added a hay bale and also the "Hay There" sentiment which are both from the Hay There Pop Stand Card die set. The flowers on either side of the path are from the  Garden Patch 1 inch & Mini Daisy & Chrysanthemum die set. I added Gold/Silver Glitter Dot Peel Off Stickers to the centre of each of the flowers.


Here is a side on view of my card so you can see the pop up portion of my card a little easier.


And a close up of the path which was created using the Pebbles die. 


For the front of my card I decided to add another path Pebbles die, this time going across my card. And this time rather than inlaying the die I just added it on top of my card. (I couldn't inlay it as the card was already attached to the inside of the card). 

I added the fence (Country Scapes - Country Fence 1) towards the top of the path and added a few pieces of hay from the Hay There Pop Stand Card die set. I then added Brownie the Cow in front of the fence. 

To finish off the card I added the sentiment which is from the new Farm Greetings Clear Stamp set.

That's it from me today, thanks for visiting my blog.

Stamps: Farmyard Greetings - Elizabeth Craft Designs
Paper: White; Black; Red; Tan; Beige; Brown; Cocoa; Yellow; Farm Words DP - Best Creations Inc; Back to School - Doodlebug Designs Inc
Dies: Barn Pop Stand Card; Hay There Pop Stand Card; Lots of Pops Pop Up Card Brownie the Cow - designed by Karen Burniston for Elizabeth Craft Designs; Pebbles; Garden Patch 1 inch & Mini Daisy & Chrysanthemum; Country Scapes Country Fence 1 - Elizabeth Craft Designs
Other ECD Products: Transparent Double Sided Tape 64mm; Gold/Silver Glitter Dot Peel Off Stickers
Other: Yellow Ink; Foam Tape