Showing posts with label Circus. Show all posts

Sunday, July 7, 2019

All Aboard It's Circus Time!


Hi Crafty Friends,

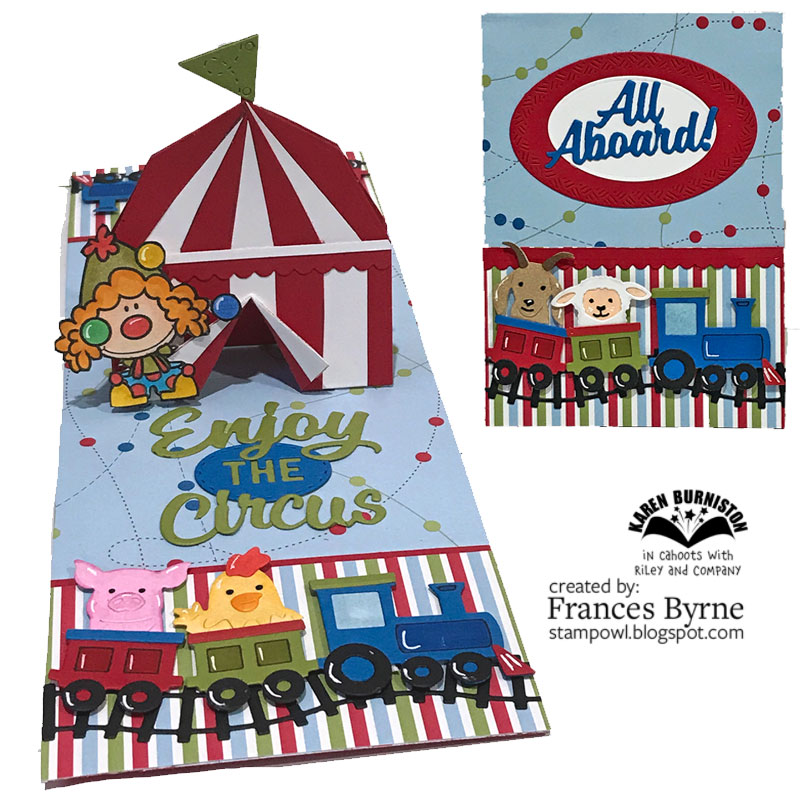
Today I am excited to share a card I created using some of the new Karen Burniston dies which are being released this month. As well as many new dies making an appearance this release, there is one die making a comeback which is the Barn Pop Stand die set.

About 4 years ago, I created a card where I changed the Barn into a Circus Tent, so I decided to do that for my card today. I always love being able to do more than one thing with a die set.


I used 13 die sets to create this card because I have all of Karen Burniston's die sets. But this design is easy to adapt so you can use what you do have. 


Here is how to convert the Barn into a Circus Tent
  • Die cut  the barn from cardstock and then drew a line at the point where the roof starts to form a triangle (of sorts). This will be your pattern.
  • Measure in from the left side 1/4 inch and make a mark on the line you created above, then at every 1/2 inch until you are left with 1/4 inch on the right hand side of the barn. Do the same at the bottom of the barn and join up these marks as per my photo above. 
  • Next take a ruler and line up each mark with the centre point of the top of the roof and draw a line.
  • Die cut 3 barns - one in white; 1 in red and another in red which has double sided adhesive tape added to the top of it.
  • Use the pattern above to cut the red and white barns and adhere them to the barn with the adhesive.
  • Die cut the scallop edge from the Border Blends - Argyle die set. (Tip: I positioned the die a little from the edge of the cardstock and used the negative part of the scallop, this way I could make it the depth I wanted to suit my tent. Adhere across the room line. 
  • Cut a strip of white card approx 1/8 inch wide and adhere there to the top of the scallop border we attached in the above step.
  • Cut up the middle of the 'tent' to approx 1/4 inch from the roof line and fold back the card to create the tent flap. 
  • Use left over white pieces to add white to the inside of the tent flaps.
  • If you are creating a Pop Stand Card you will need to repeat these steps to create a second tent, but for this one you don't need to create a tent flap.


Because Karen is also releasing a train die set too, I decided to incorporate that into my card too adding various animals to the carriages. I used the train from the Train Pivot Panels die set and the train tracks are from the Train Elements die set.  The animals are from the Chicken, Pig and Lamb; Cow and Goat & Dog and Cat die sets.

I also added a few clowns to my card to give it a circus feel using an older stamp set in my stash .... CC Designs Clownin' Around.

The flag on the circus tent is from the Tag Book Pop Up die set, however there are a number of die sets that contain flags of various types which could be used.


Here is an overhead shot of my card, so you can see the whole inside of my card at once.

I used the "Enjoy The Ride" die set, substituting the word "ride" with the word "Circus" which was made up using letters from the following die sets: Celebrate (C); Happy Birthday (ir); Congrats (c, u and s). 


For the front of the card, I added another train filled with animals ... I guess my circus has farm animals instead of the normal circus animals haha! 

 I also added the "All Aboard!" sentiment which is another of the dies from the Train Elements die set. This was layered using the Crosshatch Ovals die set.

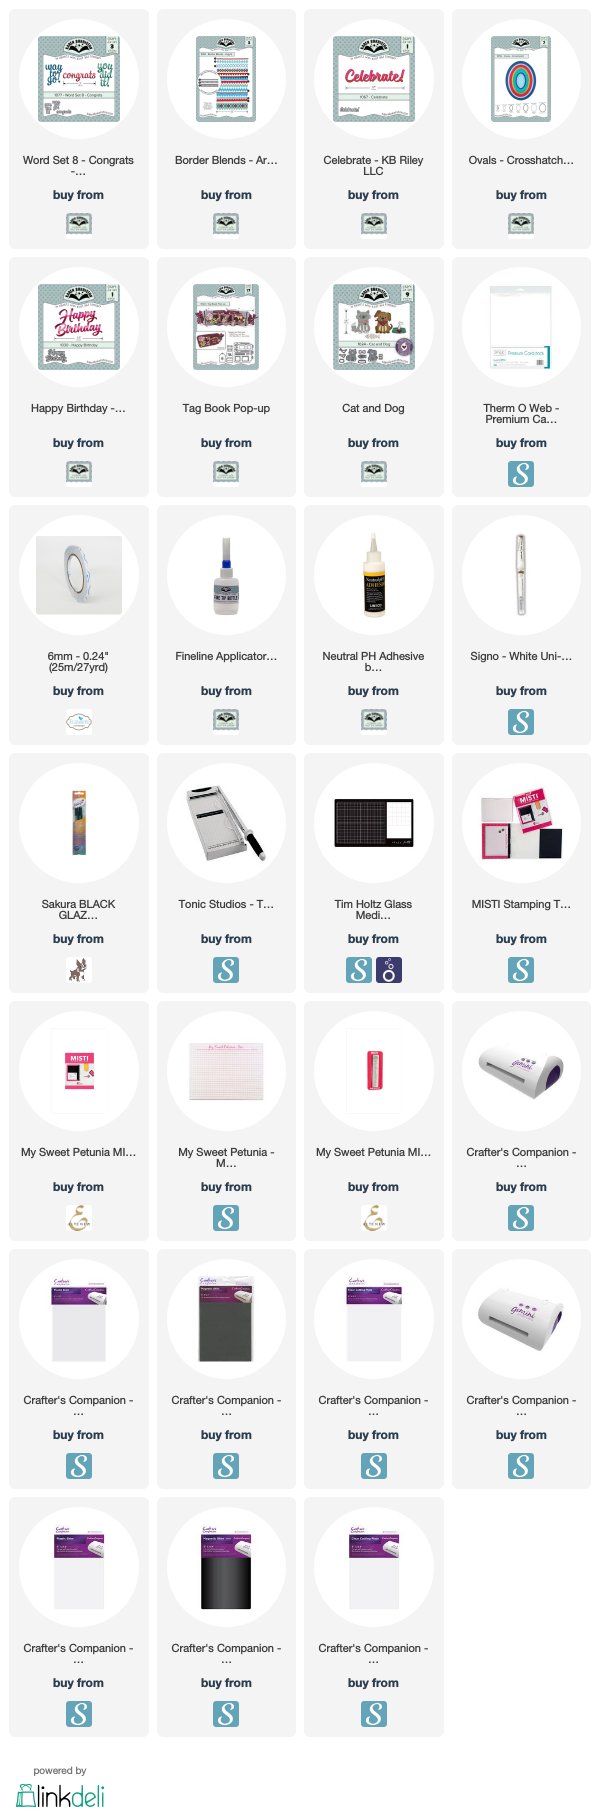
Supplies:
For your shopping convenience, all products are linked below. Compensated affiliate links are used where possible with no extra cost to you. This helps me to continue to share all the projects I include on my blog. Please note I only use and share products I love.


Wednesday, September 16, 2015

Send in the Clowns!


Hi everyone,


It's our Riley and Company Design Team challenge time again over on the Riley and Company blog. This time round our challenge is hosted by Heather!

For our challenge this week Heather has challenged us to Send in the Clowns  .... create a card using a funny sentiment, funny pictures, circus themed, etc


I created a Tri Shutter Card using the Tattered Lace Shutter die.


Here is an overhead view of my card so you can see the different panels in action.


Here is the front of my card when it is closed ready to be placed in an envelope.


Don't forget to check out the Riley and Company Design Team's cards on their blogs:


Heather Bolli
Joy Stagg
Kelly Santi
Kendra DeCota
Monica Taylor
Sandye Curry

Stamps: Clown Car Riley; Clown Riley; Stilts Riley; Circus Accessories; Circus Words - Riley and Company
Paper: White; Blue; Red; Yellow; Orange; Going Places DP - Sugar & Spice Studio
Dies: Shutter Card - Tattered Lace; Stacking Stars - MFT Stamps
Other: Black Ink; Foam Tape; Copics


Monday, May 11, 2015

Karen Burniston May Designer Challenge Day 1


Hi everyone,

It's time for our May Karen Burniston Designer Challenge. This time around the theme for our challenge is BARNS, BARNS, BARNS - Time to show off the new Collins dies with a designer challenge in their honor. The only requirement is that you use the new Barn Pop Stand die. You do not have to use it with the enclosed Pop Stand (if, for instance, you prefer using the barn on a card front or on one of the other PIU dies) and you do not have to style it as a barn.

I love when you can use a die for more things than what it was intended, and that is what I wanted to do for this challenge. So I decided to turn the Barn into a Circus Tent to make a Circus themed Pop Stand Card. 


For my card I have used the Barn Pop Stand Card die set to create the circus tent and the base of my card. The little lion which you can see peeking out from inside of the tent is on another pop stand from the Hay There Pop Stand Card set. The lion was a little tall, so I cut around his head and then glued it back onto his body so you could see his face peeking out.

I pulled out my Taylored Expressions Life is a Circus stamp set to decorate my card. The elephant is attached to my card using the Spiral from the Rectangle Pull Card set. 

I used the Katie Label Pivot Card set to layer my sentiments which were both computer generated. 

The flag on the top of the tent was created using the banner from the Lots of Pops Pop Up Card set.


Here is how I turned the barn into a circus tent: 
  • Die cut  the barn from cardstock and then drew a line at the point where the roof starts to form a triangle (of sorts). This will be your pattern.
  • Measure in from the left side 1/4 inch and make a mark, then at every 1/2 inch until you are left with 1/4 inch on the right hand side of the barn. Do the same at the bottom of the barn and join up these marks as per my photo above. 
  • Next take a ruler and line up each mark with the centre point of the top of the roof and draw a line.
  • Die cut 3 barns - one in white; 1 in red and another in red which has Transparent Double Sided Adhesive added to the top of it.
  • Use the pattern above to cut the red and white barns and adhere them to the barn with the adhesive.
  • Die cut the scallop edge from the Paris Edges set and trim off the border so it is approx 1/4 inches in width and adhere across the room line. 
  • Cut a strip of white card approx 1/8 inch wide and adhere there to the top of the scallop border we attached in the above step.
  • Cut up the middle of the 'tent' to approx 1/4 inch from the roof line and fold back the card to create the tent flap. 
  • Use left over white pieces to add white to the inside of the tent flaps.
  • If you are created a Pop Stand Card you will need to repeat these steps to create a second tent, but for this one you don't need to create a tent flap.


Here you can see the back of my Circus tent. I have again added the Seal by attaching it to the spiral from the Rectangle Pull Card .


Here is an overhead view of my card, so you can see the whole of the Pop Stand Card.


And finally the front of my card. The oval is from the Oval Accordion Card set and the rectangle layer is from the Rectangle Pull Card. The sentiment banner is hand cut.

If you are looking to purchase Karen's Pop It Ups dies in Australia you can find them at Craft Giraffe (formerly Photo Continental).

Don't forget to check out the Elizabeth Craft Designs blog on Wednesday when you will be able to see what all the designers created for the challenge this month, plus an amazing card/video tutorial from Karen Burniston.

Stamps: Life is a Circus - Taylored Expressions
Paper: White; Red; Teal; Boy Birthday Dots DP; Boy Stripes DP- Echo Park
Dies: Barn Pop Stand Card; Paris Edges; Katie Pivot Card; Rectangle Pull Card; Lots of Pops Pop Up Card; Oval Accordion Card - designed by Karen Burniston for Elizabeth Craft Designs
Other ECD Products: Transparent Double Sided Adhesive Sheet;
Other: Black Ink; Foam Tape; Copics


Tuesday, August 14, 2012

Step Right Up to a Creative Challenge!

 MFT CDBook wm

Hi everyone,

The MFT Design Team Creative Challenge is a monthly feature, where we are challenged to explore our creative side using a specific theme, product, or technique. This month, we were challenged to create a mini-book.  Be sure to check out the MFT Stamps Blog for a list of all participating designers who have put their MFT stamps and/or Die-namics dies to work to create a mini book for you today!

Print

For my project today I decided to create a CD Envelope Album, it has been a while since I have created one of these and they are lots of fun to make. I used 6 paper CD Envelopes to create this book/album, when I first started creating this I didn’t have a specific plan as to what the album was going to be used for, but as you will see as you see all the pages below it has ended up being for my Grandson William … I guess for his 3rd birthday next year.

I have used a number of different MFT stamp sets to create this album, but the main set I used throughout the album is Lisa Johnson’s Circus Spectacular Die-namics and Stamp set.
 
The circus tent was stamped in red and layered using Die-namics Circle STAX Set 1 and Die-namics Circle STAX Set 2 . The ticket along the bottom of the cover was created using two stamps from the Circus Spectacular stamp set and the Die-namics Ticket Strip. The circle and arrow on the left side of the cover was created using the Die-namics Lead the Way set, you will see this die used throughout the album.

MFT CDBook2 wm

Here are the first pages of my book/album, on the inside cover I used the Die-namics Just the Ticket and Stamp Set for the ticket embellishment at the top left corner, this set works so well with the Circus Spectacular stamp set. I also used the Die-namics Star STAX to create the star on the bottom corner.

To decorate the first CD envelope I used the Die-namics Retro Squares along the bottom edge. The Die-namics Lead the Way is used on the top left hand corner and on the top right hand corner I used one of the animals (monkey) from the Lisa Johnson’s Circus Spectacular Die-namics and Stamp set. All three of these elements are repeated throughout the album, the only thing changing is which animal is featured in the right hand corner as all of the animals from the set was used.

In the pocket of the CD envelope I used one of the sentiments from the My Favorite Sentiments 6th Birthday Celebration Set.

MFT CDBook3 wm

Here is the next page of the album, in the centre of this pocket I have added a photo of my Grandson, William. I will probably replace these photos with better ones closer to when I need to use this, but these were the best I had at the time of photographing the album.

The only other thing different from the front page is the cage on the back of the first CD envelope and the lion is the animal featured on this page.

MFT CDBook4 wm

Moving onto the next page the only thing different here other than the seal, is the sentiment in the centre of the CD envelope. This is another sentiment from the My Favorite Sentiments 6th Birthday Celebration Set, and of course my Grandson is most definitely one of my favorite things Smile. The sentiment was stamped and layered using the Die-namics Fishtail Flags STAX .

The words love and star on the arrow on this page are from the Die-namics Pretty Pocket Die & Stamp Set

MFT CDBook5 wm

On the next page I have again added a photo of my Grandson. The word Grandson on the arrow from the Die-namics Lead the Way was created using two sentiments from the Die-namics First Place Award Ribbon Die & Stamp Set. I used the “grand” from the word “grandpa” and then added the word “son” at the end.

MFT CDBook6 wm

On this page I used the Die-namics Masculine Graphic Tee Die & Stamp Set and also some of the sentiments from the Die-namics Baby Onesie Die & Stamp Set Combo. The Grandma’s and Boy are both from the Baby Onesie stamp set and the #1 is from the Masculine Graphic Tee stamp set.

The wow on the arrow is from the Die-namics Say What Die & Stamp Set.

MFT CDBook7 wm

And finally the last pages of the book, the images and dies used on these pages are a repeat of what was on the first envelope, as there are 5 animals in the Circus Spectacular stamp set and I have 6 envelopes in my book. Of course that is another photo of my Grandson.

Here are all the Die-namics I used for this project:

MFT_OwnYourStory_PreviewGraphic

MFT_OwnYourStory_PreviewGraphic

MFT_OwnYourStory_PreviewGraphic

129454244

MFT_OwnYourStory_PreviewGraphic


MFT_OwnYourStory_PreviewGraphic

MFT_OwnYourStory_PreviewGraphic

MFT_OwnYourStory_PreviewGraphic

MFT_OwnYourStory_PreviewGraphic

MFT_OwnYourStory_PreviewGraphic

Well that is it from me today, I hope you enjoyed my project today, I know I enjoyed creating it. One of the things I love about challenges is that they make you do things you mightn’t do if you weren’t challenged.

Be sure to check out the MFT Stamps Blog for a list of all participating designers who have put their MFT stamps and/or Die-namics dies to work to create a mini book for you today!

Stamps: Circus Spectacular; Just the Ticket; My Favorite Sentiments 6th Birthday Celebration Set; First Place Award; Masculine Graphic Tee; Say What; Pretty Pocket – MFT Stamps
Paper: White; Burgundy; Tan; Chipboard; CD Envelopes; On the Move DP – Kaisercraft; Wellington DP – Dovecraft
Die-namics: Circus Spectacular; Circle Stax 1 & 2; Ticket Strip; Lead the Way; Retro Squares; Just the Ticket; Star Stax; Fishtail Flags Stax; Masculine Graphic Tee – MFT Stamps
Other: Black Ink; Red Ink; Antique Linen Distress Ink; Button; Hat Elastic; Foam Tape

#aa-owl-signature

Friday, April 6, 2012

Take Time for Fun!

Circus wm

Hi everyone,

Just a quick one today using a stamp set from Taylored Expressions … love this circus train!

Circus 2 wm

Of course I couldn’t forget the inside of my card too, I added a sentiment and an image from the stamp set.


Stamps: Life’s A Circus – Taylored Expressions
Paper: White; Black; Orange; Party Animals DP – Kaisercraft
Other: Black Ink; MFT Die-namics Crown Border; Long Oval Nestabilities; Foam Tape; Copics

#aa-owl-signature

Tuesday, May 31, 2011

It’s Riley Challenge Time!

Riley Stilts wm

Hi everyone!

It’s challenge time again over on the Riley and Company blog. This week our challenge hostess is Cindy Haffner who has challenged us to create a Party theme card/project for a child's Birthday.

I thought a circus theme would be fun for a child’s birthday so I used one of the new circus theme stamps Stilts Riley to create my card.

Riley Stilts3 wm

I decided to make another Centre Step card, I so love making these cards and they are so easy to create!

Riley Stilts2 wm

I love those new Circus word sentiments!!!!!!!!

Don’t forget to check out the rest of the Design Teams blogs today so see what they created for this challenge, I am sure they will also be using some of the new stamps that are being released this week.

  • Cindy Haffner
  • Heather Prince
  • Jovita Torres
  • Joy Stagg
  • Juliet Huang
  • Kelly Santi
  • Laurie Clout
  • Margie Cortina
  • Michele L
  • Sarah Gough
  • Silke Kittmann
  • Therese Boyd

    Stamps: Stilts Riley; Circus Word Sentiments – Riley and Company
    Paper: White; Black; Orange; Party Animal DP – Kaisercraft
    Other: Black Ink; Oval Punches; Buttons; Twine; Scorpal; Foam Tape; Copics

    aa-owl-signature

  • Saturday, May 28, 2011

    “Mane” Attraction!

    Riley LionTamer wm

    Hi everyone!

    It’s Saturday which means it’s challenge time with the “Crazies” over on the Crazy 4 Challenges blog. Joanne Grzelak finishes off her month as challenge hostess with another fun challenge.

    Now that the weather is sunny and clear (hopefully), we often start planning vacations. Create a card showing a favorite vacation spot or activity.

    Of course it is always the opposite for me Down Under!!! Winter will be officially here in a few days!

    I don’t have too many vacations, but I did think going to see a circus would be a fun activity to do while on vacation. My card uses one of the new circus Riley stamps that were released by Riley and Company yesterday.

    In case you haven't heard the Riley & Company site had a "moosehap" this morning, but it's all fixed now! You can order your Riley Goes To The Circus stamps HERE.


    And as a thank you for your patience while we were having technical difficulties -
    we will ship your order FREEEEE! Simply put "SHIPFREE" in the comments section when you check out. This offer is only good until Sunday, so hurry! (domestic orders only - sorry)

    Don't forget to check out the rest of the “Crazies” cards over on the Crazy 4 Challenges blog and also their individual blogs for more details.

    Stamps: Ringmaster Riley with Lion; Circus Word Sentiments; Circus Accessories – Riley and Company
    Paper: White; Black; Red; Blast Off DP – Bo Bunny
    Other: Black Ink; Oval Punches; Foam Tape; Copics

    aa-owl-signature

    Friday, May 27, 2011

    Life Is A Circus …. It’s A Riley Blog Hop!

    Riley CircusStairStep2

    Hi everyone!

    Welcome to Riley and Company’s blog hop! Come join us as the Riley and Company Design Team take you on a journey discovering all sorts of Riley fun! If you didn’t start at the beginning of this hop, you might want to head on over to the Riley and Company blog so that you don’t miss out on anything.

    Be sure to leave a comment on everyone’s blog as you travel from blog to blog as each of the Riley and Company Design Team members will be giving away one new Riley stamp to a random person who leaves a comment on their blog!

    This is a massive release, our biggest ever! The circus is coming to town! We have 16 new Riley images; 22 accessory images and 21 sentiments, all with a circus theme. All are NOW available from the Riley and Company Store.

    Riley CircusStairStep wm

    For my first card I created a stair step card, this is a hard card to take a good photo of, it looks so much better in real life. I used 5 of the new Circus Riley stamps on my card …. Ringmaster Riley; Clown Riley in Car; Clown Riley; Riley with Seal and Stilts Riley. I have also used a number of the circus accessory stamps from the Circus Accessory set.

    I again used the Cricut Carousel Cartridge to create the big top at the back of my stair step card.

    Riley CircusHorse wm

    For my second card I used Sophie on her horse, doesn’t she look so pretty! I don’t even like sitting on a horse let alone standing on one LOL!

    Well that is about it from me for today, now it is time to hop on over to the blog of Heather Prince and see what stunning creations she has install for you today.

    Enjoy the rest of the hop and thanks for dropping by! Don't forget to leave comments on all the blogs, so that you have a chance to win some blog candy.

    Stamps: Ringmaster Riley; Clown Riley; Clown Riley with Car; Riley with Seal; Slilts Riley; Sophie on Horse; Circus Words Sentiments; Circus Accessories – Riley and Company
    Paper: White; Red; Orange; Yellow; Party Animals DP – Kaisercraft
    Other: Black Ink; Cricut; Cricut Carousel Cartridge; MFT Die-namics Star Die; Rhinestones; Ribbon; Foam Tape; Copics

    aa-owl-signature