Showing posts with label Pop It Ups. Show all posts

Wednesday, April 6, 2022

Mr & Mr Wedding Accordion Card

Hi Crafty Friends,

I was recently asked if I would make a Mr & Mr Wedding Card, which I was happy to do.

One of my favourite styles of cards for weddings is Accordion Cards, and as I wanted to fit the long sentiment and the two Tuxedo Jackets onto my card, I opted to pull out an older Accordion Card die set designed by Karen Burniston for Elizabeth Craft Designs. This die set has long been discontinued, but it is still a favourite of mine. I used the Oval Accordion and Oval Flourish Frame Edges die sets to create the base for this card.

If in doubt of what colours to use on my wedding card, you can never go wrong with black & white and I thought it would work very well for this card.


The first oval panel of my card can be view from the front and also when the card was opened. I used Spellbinders Paper Arts Wedding Dress & Tux die set to create the Tuxedo jackets. 

The sentiment on the centre oval is an older sentiment which I love and is from Paper Inspirations, called Marriage Calligraphy.
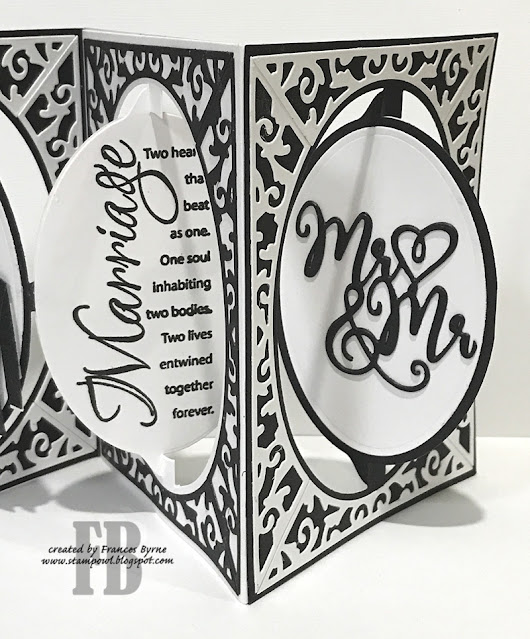

For the last oval I added the "Mr & Mr" die cut sentiment which is from another Spellbinders die set called Mr. & Mrs. Wedding Cake, this set seems to be discontinued even though it was only released a few years ago.


I don't normally decorate the back of an accordion card, as there is enough happening on the front of the card, however for weddings I often do.

On the far left oval I added the "Congratulations" sentiment from The Rabbit Hole Designs Happily Ever After stamp set.

The "love" die cut on the centre oval is from the True Love die set designed by ModaScrap for Elizabeth Craft Designs, this is also another older die set from my stash.

Finally I used the "Wishing You A Lifetime" sentiment from Craft Desert Divas' Hitched stamped set, this company closed a few years ago.


Here is the front of my card when it is closed ready to be placed in an envelope.
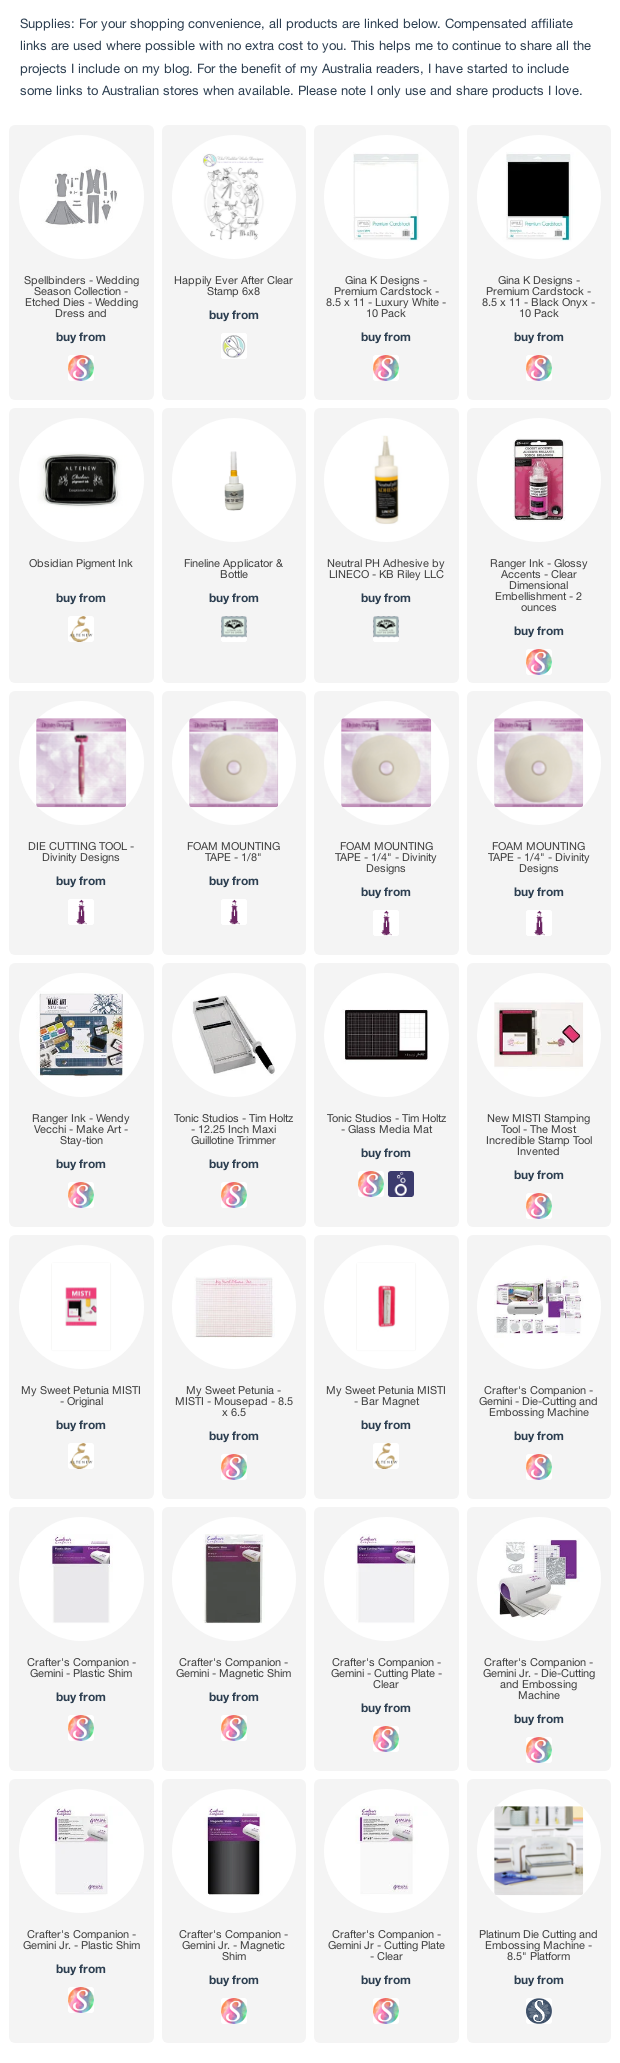
Other Supplies:

  • Oval Accordion Card Die Set - Karen Burniston for Elizabeth Craft Designs (discontinued)
  • Oval Flourish Frame Edges Die Set - Karen Burniston for Elizabeth Craft Designs (discontinued)
  • True Love Die Set - ModaScrap for Elizabeth Craft Designs (discontinued)
  • Mr. & Mrs. Wedding Cake Die Set - Spellbinders Paper Arts (discontinued)
  • Marriage Calligraphy Stamp - Paper Inspiration (discontinued)
  • Hitched Stamp Set - Crafty Desert Divas (discontinued)


Thursday, March 31, 2022

Bonjour


Bonjour Crafty Friends,

It's challenge time with my friends over on the CCEE Stampers challenge blog. As challenge hostess for the month, I continue to issue the challenges.

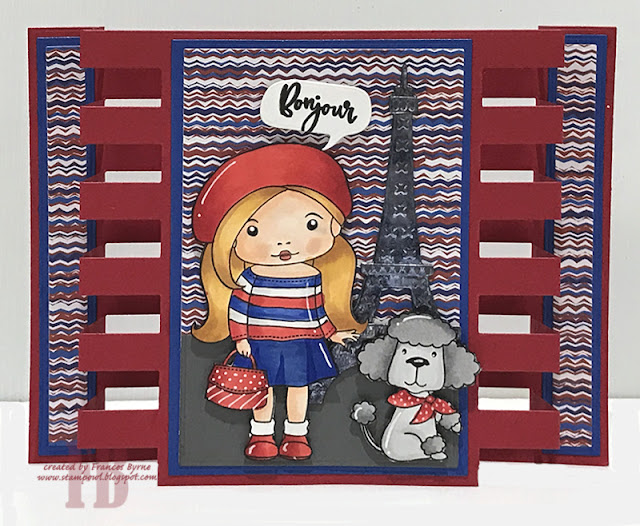
Apparently today is Eiffel Tower Day - create a card with a French theme, bonus points if you include the Eiffel Tower. 


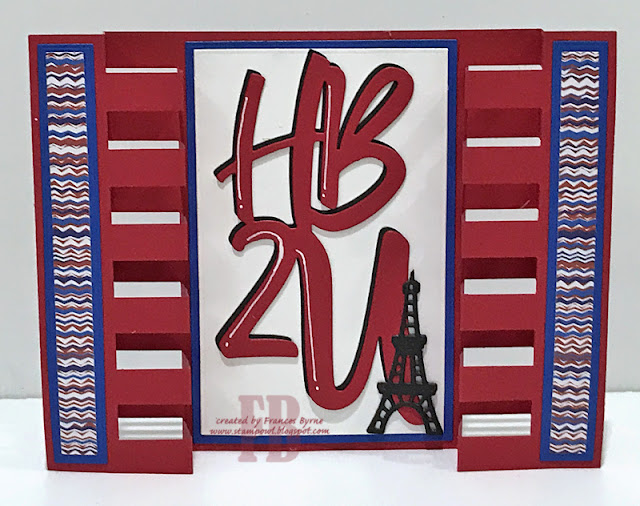
For my card today, I pulled out a couple of Paris/Eiffel Tower themed stamps and dies. For the girl and poodle, I used stamps from La-La Land Crafts Marci in Paris stamp set, this was previously the April 2019 club kit which I was lucky to purchase back then.

The Eiffel Tower in the background uses Karen Burniston's Eiffel Tower Pop Stand die from her Pop-It-Ups collection when she was designing for Elizabeth Craft Designs. I die cut the Eiffel Tower from Shimmer Sheetz, I found this one already die cut in my die set and as the color worked I made use of it.


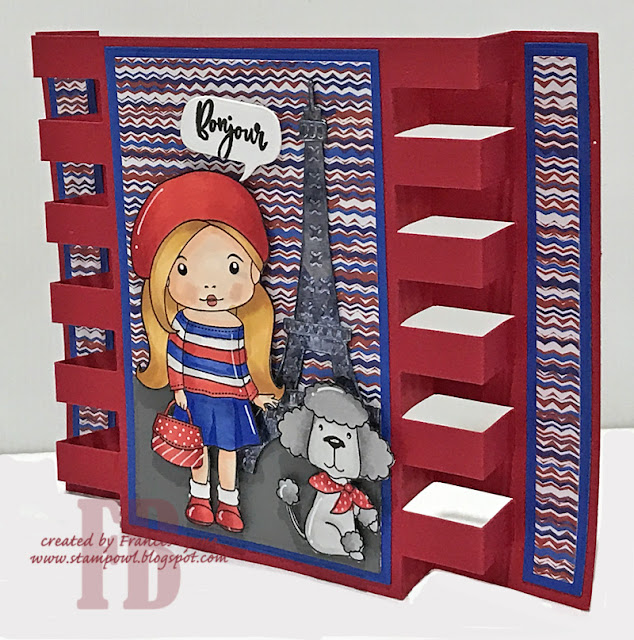
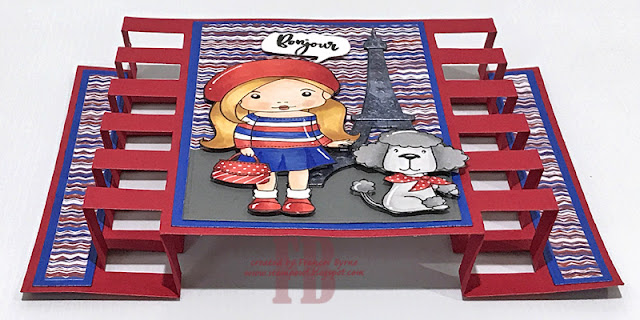
I created a Terrific Tower Card using the 6" x 6" Terrific Tower die set from Made To Surprise by Sam Calcott. 

For the "Bonjour" sentiment I used a stamp from the Marci in Paris stamp set and a speech bubble from Whimsy Stamps Comic Speech Bubbles die set.


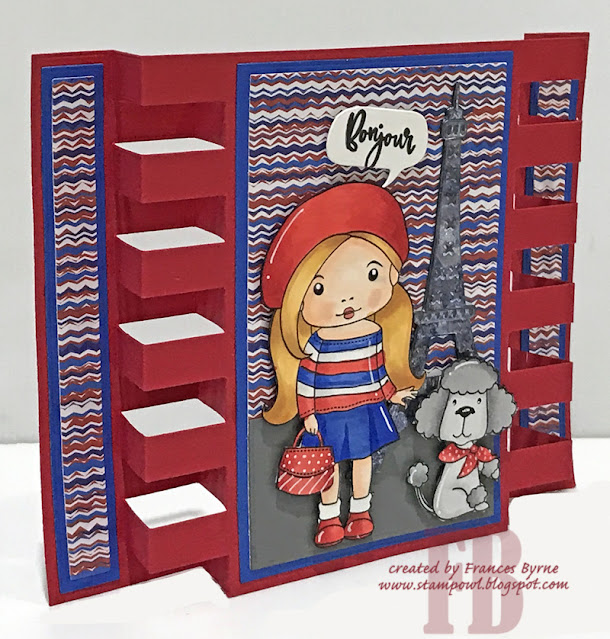
Here is another view of the card, this time when it is lying on the desk. Hopefully you can see the side panels a little better.


On the back of the card, I added another of the large panels I used on the front. I added Picket Fence Studios HB2U die set for the sentiment.

To keep with the Paris/Eiffel Tower theme, I added the Eiffel Tower from La-La Land Crafts Paris Die set.

Don't forget to check out the CCEE Stampers blog (goes live 12 AM EST) to see the rest of the creations the CCEE Stampers created this week. You can also see more details of their creations on their individual blogs:


Other Supplies: 
Eiffel Tower Pop Stand Die Set - Karen Burniston for Elizabeth Craft Designs (discontinued)


Wednesday, January 8, 2020

Happiness is a Cup of Coffee


Hi Crafty Friends,

Today I have pulled out an older Karen Burniston die from a few years back which is no longer available. This is the Oval Pull Card die set. I don't use it much seeing it isn't available anymore, but I do like to get it out and play every so often.

To decorate my card I used two coffee themed stamps from Picket Fence Studios which I picked up recently at a craft show. The Brew A Cup Stamp, which is the coffee cup background, is a square stamp which is approximately 3 1/2 inches square. The pattern is repetitive, so with careful lining up, you can stamp the image to cover a larger piece of cardstock, which is what I did to create my side panels on this card.

This owl stamp was on special when I purchased it, so of course I needed to add it to my stash, seeing it was owl and coffee themed!


When you "pull" the card open, it reveals to oval panels. The one on the left, I stamped a coffee themed sentiment which is from La-La Land Crafts Coffee Marci which was part of one of the monthly kits last year. I left the oval on the right blank, to allow a personal greeting.

Supplies:
For your shopping convenience, all products are linked below. Compensated affiliate links are used where possible with no extra cost to you. This helps me to continue to share all the projects I include on my blog. For the benefit of my Australia readers, I have started to include some links to Australian stores when available. Please note I only use and share products I love.

Coffee Marci - La-La Land Crafts (only available through their Monthly kit)
Pull Card Die Set - Elizabeth Craft Designs (retired)


Saturday, December 2, 2017

Hi, Welcome to the Silly Season


Hi Crafty Friends,

It’s challenge time with the “Crazies” over on the Crazy 4 Challenges blog. Being a brand new month it's time to introduce our new challenge hostess which is Anja de Regt.


Colour your day!

Anja tells us that December is a busy month for most of us, it is always good to sit down and do something relaxing , for her that is what colouring is....For today, Anja challenges us to colour something on your card/project. It does not have to be a big, just something. You don’t colour, try using some different colours of ink, or even some accents....


As mentioned in my blog post yesterday I recently attended a local craft show. While there I discovered a new Aussie Stamp company with some adorable clear stamp sets. Being a local of course I had to buy a couple of sets and yes the two sets I purchased both happened to be Christmas themed haha ... so much for not buying any more this year! 

While making another card, I discovered an already die cut base for the Rectangle Pull Card, I must have die cut it some time ago and then changed my mind and did something else. Rather than waste it I decided to use that for my card base. Unfortunately this die set has been discontinued.

I added all three of the cute gingerbread men to my card. I also added some texture to the gingerbread men by adding Nuvo drops in various colours to the icing, buttons, nose and pudding.


When you 'pull' the card open it reveals to rectangle panels with a sentiment.

Don't forget to check out the rest of the “Crazies” cards over on the Crazy 4 Challenges blog and also their individual blogs for more details.


Stamps: Sugar and Spice - Beccy's Place; Puffy Holiday Greetings - Mama Elephant
Paper: White; Red; Green; Always Christmas Paper Pad - Craft Smith
Dies: Pop it Ups Rectangle Pull Card (retired) - Elizabeth Craft Designs
Other: Black Ink; Nuvo Drops (White; Bottle Green; Oyster Grey; Autumn Red; Morning Dew); Foam Tape; Copics


Thursday, November 2, 2017

Teacher Thanks


Hi Crafty Friends,

It's challenge time with my friends over on the CCEE Stampers challenge blog. Being a brand new month it is time to introduce our challenge hostess for the month which is Joanne Grzelak.

This month Joanne is going to keep it simple. The holidays are coming, and times will be busy. This will be a month of celebrations. So for our challenge this week we are to make a Thanksgiving card OR a card of thanks. 


Seeing we don't celebrate Thanksgiving in Australia, I decided to create another Teacher thank you card. The end of the school year is fast approaching down here (ours finishes up in December which is our summer), and I like to make a few teacher thank you cards so my daughter can use them for my grandchildren teachers. 

I recently discovered this fun pencil pattern paper in a paper pad I have in my stash, so wanted to use some of that on my card and as I only have two sheets on didn't want to use it all I decided to make a Pull Card using the Pop it ups Oval Pull Card die set which unfortunately is now discontinued. 

To decorate my card I used a couple of owl images from Pink & Main and added the #1 Teacher die cuts to the sides of my card.


When you "pull" the card open, it reveals the second owl standing on a pencil and a thanks sentiment which is an edge die. I die cut the sentiment in both yellow and black cardstock.


Don't forget to check out the CCEE Stampers blog (goes live 12 AM EST) to see the rest of the creations the CCEE Stampers created this week. You can also see more details of their creations on their individual blogs:


Vicky Gould
Kelly McKown-Santi


Stamps: Owl Nerds - Pink and Main
Paper: White; Green; Yellow; Project Life Desktop Edition DP - American Crafts
Dies: Pop it Ups  Oval Pull Card (Retired) - Elizabeth Craft Designs; #1 Teacher - Papertrey Ink; Thanks - Simon Says Stamp
Other: Black Ink; Nuvo English Mustard Gloss Crystal Drops; Foam Tape; Copics


Saturday, October 14, 2017

Wishing You All Good Things


Hi Crafty Friends,

It’s challenge time with the “Crazies” over on the Crazy 4 Challenges blog. Bonnie Sharp our challenge hostess for the month continues to issue the challenges.


Did you know that today is national dessert day?! So you know what that means?....please make a card with any sort of yummy dessert on it!  Ice cream, cake, cookies, tarts, pie, popsicles...whatever you deem to be dessert!!


For my card today I decided to create a "Pull Card" using the retired Pop It Ups Rectangle Pull Card die set, it's been a while since I have made a Pull Card and I have been missing doing them.

For the "dessert" part of the challenge I pulled out an older Stampendous stamp called Tier of Treats, look at all those yummy goodies!

On each edge of the card I added a border die from Magnolia ... I really like how it finishes off the edges and think I may need to add it more often.


When you "pull" the card open it reveals a sentiment which is also from Stampendous.

Don't forget to check out the rest of the “Crazies” cards over on the Crazy 4 Challenges blog and also their individual blogs for more details.


Stamps: Tiers of Treats; All Good Things - Stampendous
Paper: White; Pink; Brown; Sugar & Spice DP - Dovecraft
Dies: Pop It Ups Rectangle Pull Card (retired) - Elizabeth Craft Designs; Berry Lace DooHickey - Magnolia
Other: Black Ink; Nuvo Dark Walnut Gloss Crystal Drops; Foam Tape; Copics

Sunday, September 17, 2017

Fall Coffee Lovers Blog Hop


Hi Crafty Friends,

Today I am playing along in the  Fall Coffee Lovers Blog Hop which is being held from Friday 15th September to Friday 22nd September.

For my card today I have used a digital image from Mo's Digital Pencil, I have been thinking about getting this stamp for a while now and hadn't gotten around to it, so I decided to get the digital version instead.

I have used the Pop it Ups Oval Pull Card for my card base, it has been a while since I have played with this die set, unfortunately it has now been discontinued. To decorate my card I used Susan's Garden Woodland Leaves which I colored using Distress Oxides. 


When you "pull" the card open it reveals the sentiment and coffee cup with is included in a new sentiment stamp set from Elizabeth Craft Designs.

Supplies:

Elizabeth Craft Designs:


Other:

Stamps: Coffee Digital Stamp - Mo's Digital Pencil; Home Sweet Home - Elizabeth Craft Designs
Paper: White; Orange; Brown; A Perfect Autumn Paper Pad - Carta Bella
Dies: Pop it Ups Oval Pull Card (discontinued); Susan's Garden Woodland Leaves
Distress Oxides: Wild Honey; Fossilized Amber; Spiced Marmalade; Fired Brick; Peeled Paint; Walnut Stain
Other: Black Ink; Clear Glitter Wink of Stella Pen; Nuvo Dark Walnut Gloss Crystal Drops; Foam Tape; Copics


Thursday, August 3, 2017

Hello Little Birdy


Hi everyone,

It's challenge time with my friends over on the CCEE Stampers challenge blog. Being a brand new month it is time to introduce our new challenge hostess which is Anne Harmon.

For our challenge this week Anne has given us the theme ... Emboss! Use any technique that involves embossing - wet, dry, resist. Whatever appeals to you.

I wanted to play with my Concord & 9th Hello Turnabout stamp which I have had for a month or so and hadn't had a chance to use it as yet and also the new Distress Oxides. So I used the inks to stamp my background and the layers of the bird. For the fourth stamping on my Hello Turnabout background I stamped it using VersaMark ink and then gold embossing powder.

As you can see I have created a Pull Card using the Pop it Ups Oval Pull Card from Elizabeth Craft Designs. The bird is a freebie I got from a magazine which includes the outline of the bird and then the stamps to add the colored details to the inside of the image.


When you "pull" the card open it reveals a message and another bird which is attached to a spinner from the Rectangle Pull Card die set.

I also added a Nuvo Drop to the closure tab of the card.


Don't forget to check out the CCEE Stampers blog (goes live 12 AM EST) to see the rest of the creations the CCEE Stampers created this week. You can also see more details of their creations on their individual blogs:


Vicky Gould
Kelly McKown-Santi


Stamps: Hello Turnabout - Concord & 9th;  Little Bird - Practical Publication
Paper: White; Green; Teal
Dies: Pop It Ups Oval Pull Card; Pop it Ups Rectangle Pull Card - Elizabeth Craft Designs; Little Bird - Practical Publications
Other: Black Ink; Twisted Citron Distress Oxide; Peacock Feathers  Distress Oxide; Salty Ocean  Distress Oxide; VersaMark Ink; Gold Embossing Powder; MISTI; Apple Green Gloss Nuvo Drops; Foam Tape


Thursday, June 22, 2017

Enjoy Your Day Cup Pop Stand Card


Hi everyone,

It's my turn to post a Pop it Ups Wednesday tutorial on the Elizabeth Craft Designs blog today. This will be my final Pop it Ups Wednesday post, but of course I will still be continuing with the other Elizabeth Craft Designs tutorials I create.

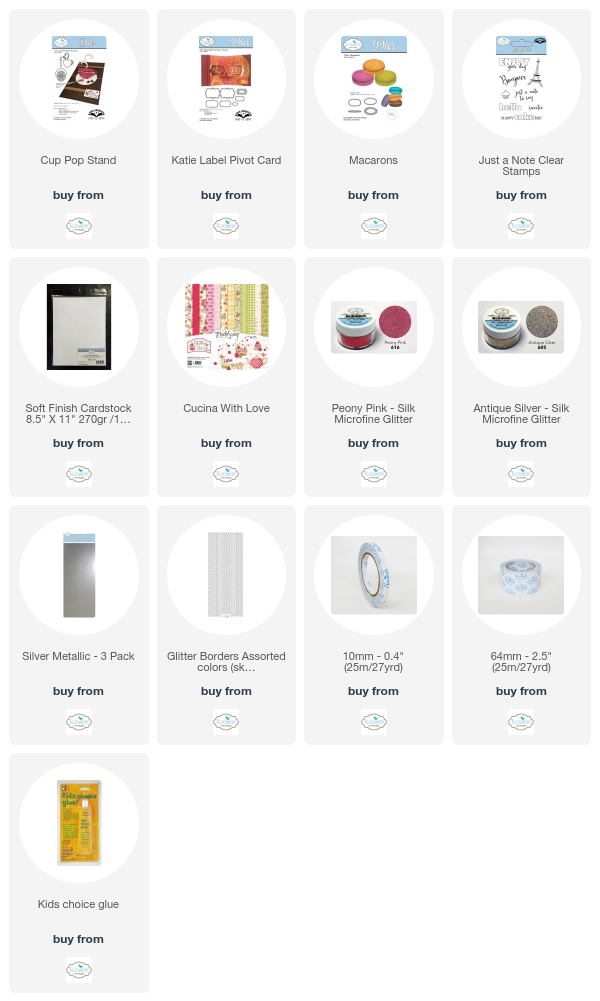
This time round I decided to pull out my Pop it Ups Cup Pop Stand Card dies set combining it with the new Moda Scrap Patterned Paper and Joset Designs Macaron die set.

Here's how I created my card:


Step 1 -  
  • Cut a piece of green cardstock so it measures 4 1/4 inches x 11 inches. Score and fold along the 11 inch side at 5 1/2 inches to create a top folding card.

  • Cut two pieces of patterned paper (ModaScrap Cucina with Love used here) that measures                                                           4 1/4 inches x 5 inches. Adhere panels to either side of the inside of the green card base, so that the paper it up close to the fold line.

  • Cut two pieces of red polka dot patterned paper that measures 4 1/4 inches x 3/4 inches and adhere to each end of the card so there is a 1/4 inch gap between the patterned paper and edge of card.
  • Adhere Gold/Silver Glitter Border Peel Off Stickers to each of the edges of the red patterned paper.
Step 2 -
  • Using the Cup Pop Stand Card die set, die cut two cups from patterned paper (note - you will need to place the die on the back of the cardstock for one of the cups so that you have a mirror image of the cup to enable to have them be placed back to back on the card).  To make the card a little strong die cut additional cups from green cardstock and adhere the patterned paper cups to cardstock cups.
  • Create the "pop stand" panel from green card (refer to Karen Burniston's video on how to create the Cup Pop Stand Card for how to do this.
  • Adhere cup pop stand panel to centre of card.
  • Attach the two cups to the tabs of the pop stand panel, leaving the top of the cups open for now.
Step 3 - 
  • Using the steam flourish included in the Cup Pop Stand Card die set, die cut two from white cardstock that has Clear Double Sided Adhesive Tape on the front. (Note - you will be die cutting one steam flourish so that the adhesive is on the front and one where the adhesive is on the back. 
  • Remove the protective backing from the adhesive and cover adhesive using Antique Silver Silk Microfine Glitter. Return excess glitter to the jar and then polish the glitter into the adhesive with your finger.
  • Glue the two flourishes together so you have glitter on either side. attach this to the inside of one of the cups and then place Clear Double Sided Adhesive Tape to the top of the cup to join both cups together.

Step 4 - 
  • Die cut a spoon from Silver Metallic Shimmer Sheetz that has Clear Double Sided Adhesive Tape on the back (note - you will need to use a Metal Adaptor plate for your die cutting machine to cut the Shimmer Sheetz). For extra strength, die cut an additional spoon from green cardstock and layer the two together.
  • Adhere the spoon in the front of the cup using foam tape (Note - make sure the spoon does not interfere with the card opening and closing by overlapping the fold).
Step 5 - 
  • Using the Macarons die set, die cut one of the scallop ovals from white cardstock that has Clear Double Sided Adhesive on the front. 
  • Remove the protective backing from the adhesive and cover adhesive with Peony Pink Silk Microfine Glitter. Return excess glitter to the jar and then polish the glitter into the adhesive with your finger.
  • Die cut two of the ovals from dark pink cardstock. 
  • Create the macaron by sandwiching the glittered panel between the two pink ovals. (refer to photo above as a guide)
Step 6 - 
  • Using the "Enjoy the Day" sentiment from the Just a Note Clear Stamp set, stamp the sentiment onto white cardstock using black ink. Color sentiment as desired.
  • Use the small label die from the Katie Labels Pivot Card die set to die cut the sentiment. Sponge around edge of label.
  • Place on the front part of the inside of card.
  • Die cut an additional label using the same die to cut a second label which is left blank and adhere to the back panel to be used for the hand written sentiment.

Step 7 - Front of Card
  • Cut a piece of patterned paper that measures 4 1/4 inches x 4 inches and adhere to the centre of the front of card.
  • Cut two pieces red polka dot patterned paper 4 1/4 inches x 1/2 inch and adhere to each edge of the patterned paper on card. 
  • Adhere Gold/Silver Glitter Border Peel Off Stickers to each of the edges of the red patterned paper.
Step 8 - 

  • Die cut a label from white cardstock using the second largest label in the Katie Label Pivot Card die set.
  • Die cut a label from green cardstock using the largest label in the Katie Label Pivot Card die set.
  • Stamp the "Just a Note to Say" from the Just a Note Clear Stamp set onto the white label using black ink.
  • Adhere to centre of front of card.
Step 9 - 
  • Die cut and create an additional spoon and macaron that we created for the inside of the card (steps 4 & 5) and attach to the card using foam tape.
Thanks for stopping by today, I hope you enjoyed my tutorial.


Supplies:

Elizabeth Craft Designs - 


Other:
Cardstock - White; Green; Dark Pink
Inks - Black; Worn Lipstick Distress Ink; Peeled Paint Distress Ink
Foam Tape