Showing posts with label Valentines Day. Show all posts

Friday, January 31, 2025

Monster Love Valentine


Hi Crafty Friends,

Today I am sharing two super cute Valentine platform cards I created recently which I will give to my grandchildren. 


Both these cards use products from Spellbinders December 2024 Club kits. For this card I used the Large Die of the month, which includes the die for the platform card; the Clear Stamp of the month & 3D Embossing Folder of the month.

Assembly instructions for the platform can be found here.


The card folds flat so that it can easily be placed in an envelope.


Both cards are the same other than using a different monster and the colours used. After embossing the large red heart using the Tiny Heart Scallop 3D Embossing Folder, I used a white pigment ink to add colour to the hearts.


Here’s a look at the pink monster card when it is lying flat ready to be placed in an envelope.


Here is a back view of my cards. I die cut an additional red heart and attached it to the back of the embossed heart, so I had a place to add a personal message. 


Monday, March 4, 2024

Love You Always


Hi Crafty Friends,

Today I am sharing two Gumball Machine Shaped card I created recently to give to my grandchildren for Valentine's Day. I haven't used the word "Valentine" on the cards, so they could be used for any occasion.


My February Papercraft Society Box arrived the week before Valentine's Day, so I decided to pull out some of the supplies included in the kit to make two Gumball machine shaped cards to give to my two grandchildren for Valentine's Day.

These are cute little cards, measuring approximately 3 1/4 inches wide by 5 inches tall.


The gumball machine was made using dies included in the kit. I used designer papers and papers which were also from the kit.

It may be hard to see, as the sentiment kind of hides it, but these are both shaker cards.


I added two of the "Love You Always" sentiments which are both from the ephemera pack also included in the kit.


Both these cards are top folding cards.


Here is a look at the inside of the cards, I decorated them both the same just changing up the colours.


Thursday, February 9, 2023

Valentine Money Cards


Hi Crafty Friends,

Welcome to my blog, today I am sharing two Money Cards I created as Valentine gifts for my Grandchildren.

At the beginning of December, MFT Stamps released a Christmas Cash Card Kit which included stamps and dies to create money holders. The stamps and dies available allow you to make holders to use with either notes or gift cards. Of course just before Christmas there was a Christmas theme, but these can be used for so many occasions including birthday, tooth fairy, gas money, coffee etc. As I sometimes give money for birthday gifts it was definitely something I needed to add to my stash.


My first money holder is for my granddaughter. I used an older Penny Black stamp set to help decorate the money holder. The "I Heart You" sentiment was included in the Penny Black stamp set,  The other sentiment is from MFT Stamps Giftable Greetings stamp set.

The money is rolled up and fits into a lip balm holder.


For the money holder for my grandson, I pulled out Concord & 9th's Monster Love stamp set. I also added the "Love You" sentiment included in the stamp set.

The papers used on this money holder is from Whimsy Stamps' Rainbows Paper Pad.


For the back of the money holders I added a heart, using Creative Craft Products Torn Nested Hearts die set. I added two sentiments to the heart both of which are from Divinity Designs Fill My Heart Stamp set.


At the bottom of the back of the money holder, there is a slit so that the money can be removed without ruining the money holder.

Other Supplies:
I Heart You Stamp Set - Penny Black (retired)


Friday, February 3, 2023

Heart Birthday


Hi Crafty Friends,

Thanks for visiting my blog. With Valentine's Day just over a week away I decided to pull out my Creative Craft Products Heart Perfect Flips die set, I got this when I ordered the other two die sets in the range but hadn't used it as yet. As I don't really need a Valentine's Card I turned mine into a birthday card, but it would be easy to just change the sentiments to use it for Valentine's Day.


There is also a coordinating stamp/die set called Heart Elements which I used to help decorate the card. That is what I used for the heart centres.

I white embossed the birthday sentiment to the right side of the bow. The pink heart is embossed using Made To Surprise's Linen Embossing Folder. 


When you pull the card open, the heart in the centre of the card, flips to show another decorative heart and sentiment on the other side of the heart.

On the lower right hand side of the card, I added the pink strip with three jewels. 


I don't usually decorate the back of this style of card, but as I had plenty of the patterned paper I decided I would. I added the white panel to the left side of the card for a place to write a personal message. On this white panel I added two sentiments using a sentiment stamp set from Made To Surprise. I also added another bow/ribbon to the lower portion of the card.


Thursday, February 10, 2022

Sending Love Hearts

Hi Crafty Friends,

It's challenge time with my friends over on the CCEE Stampers challenge blog. Liz Williams, our challenge hostess for the month continues to issue the challenges.

Valentine’s Day is a big card sending holiday, so make a special Valentine’s card or a friendship card using a style you love and mail in to someone you love.

Here is a quick video to see my card in action.


For my card today, I created a Mini Slimline pop-up card using Karen Burniston's new Heart Collage Collage Pop-up. I decorated the pop-up using the hearts included in the die set, die cutting the hearts from various colors of cardstock; glitter cardstock and patterned paper.

I also used the Hearts - Crosshatch die set, which I placed at the top right hand corner of my card. This is a place to add a hand written sentiment.

For the sentiment I used the new Sending Love Word die set, adding the "sending" to the top hearts and the "Love" to the bottom left hand corner of my card.


I kept the front of my card fairly simple as the focus is on the inside of the card. I added hearts using the Hearts - Crosshatch die set and the "Hugs" sentiment from the Word Set 14 - Hugs die set.


Don't forget to check out the CCEE Stampers blog (goes live 12 AM EST) to see the rest of the creations the CCEE Stampers created this week. You can also see more details of their creations on their individual blogs:


Tuesday, February 1, 2022

February 2022 Karen Burniston Designer Challenge


Hi Crafty Friends, 

Welcome to our February Karen Burniston Designer Challenge.

Check out Karen Burniston's blog on Wednesday (US Time) when you will be able to see what all the designers created for the challenge this month, plus Karen will have an amazing video tutorial to share with us all.

Our challenge theme this month is ... "MOD VALENTINES" - make a Valentines or Love-themed card WITHOUT using red or pink as the primary colors. Think blues, greens, oranges, yellows, browns, purples, grays, black and white, etc.

Here is a quick video to see my card in action.


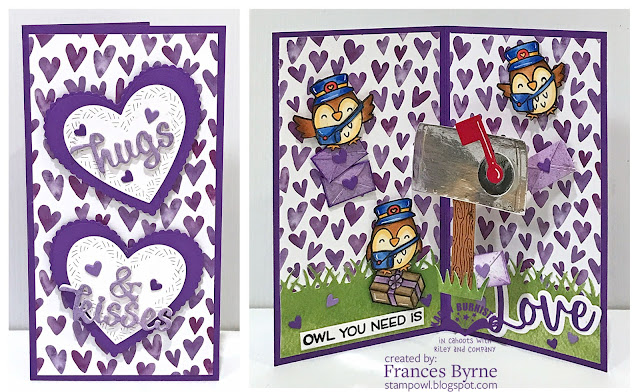
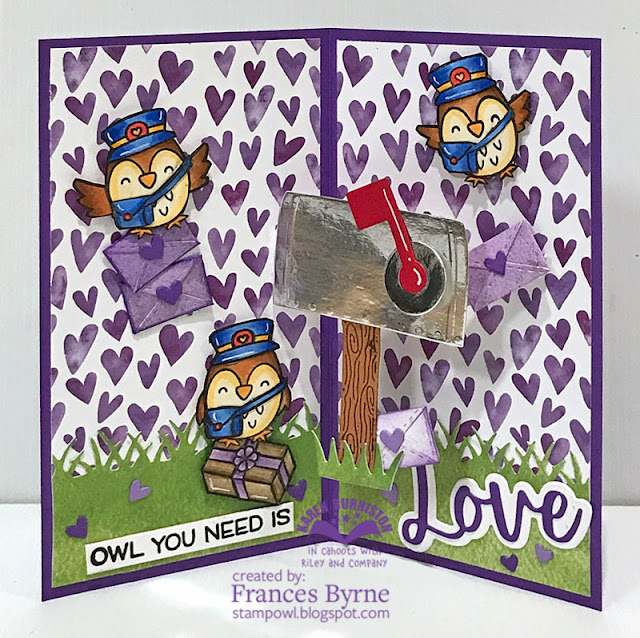
For my card today I went with a love mail theme using Karen Burniston's new Mail Box Pop-up die set. As you can see I went with a mostly purple and green color combo.

I used purple heart patterned paper from Paper House, for all the layers of my card. The grass along the bottom of the card uses Lawn Fawn's Watercolor Wishes Patterned Paper.

I die cut the mail box using silver mirror cardstock, the mail box looks a lot better in real life then it does on the photo above. I used the envelope and hearts included in the Mail Box Pop-up die set to add all the envelopes and hearts. I die cut most of the envelope from the reverse side of the purple heart paper.
The "Love" sentiment is from the Sending Love die set.

To decorate my card I added the "owl posties", parcel and the stamped sentiment from two Lawn Fawn stamp set.


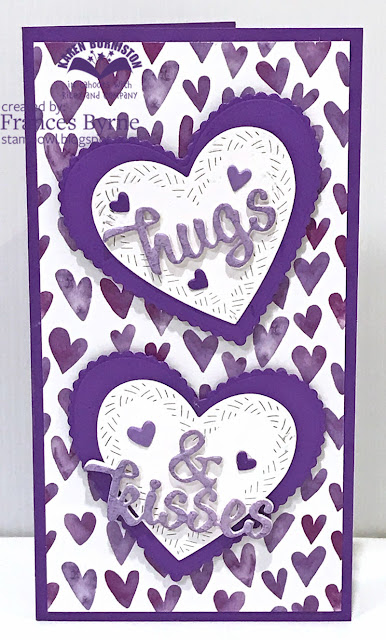
I kept the front of my card simple, as the focus of the card is on the inside. 

I added the hearts using the Hearts - Crosshatch die set. The sentiment is included in the Word Set 9 - Love die set.


Thursday, February 11, 2021

I Love You Slimline


Hi Crafty Friends,

It's challenge time with my friends over on the CCEE Stampers challenge blog.  Manal Habib our challenge hostess for the month, continues to issue the challenges. 

As Valentine’s Day is just a few days away, let’s make a project featuring love! 


I have created a Slimline card today with a red and white color combo using Slimline Dies from Divinity Designs ... Slimline Heart Background; Slimline Rectangles; Slimline Curvy Slopes and Slimline Card Base.


To decorate my card I used the Heart Layering Combo 2 die set to create two red and white hearts. I added the "I Love You" sentiment in between the two hearts, layering the sentiment using one of the rectangles from the Sentiment Strips 2 die set.


To decorate the inside of the card I used the Slimline Curvy Slopes die set to create the two curved borders for the top and bottom edges of the card.


This isn't actually a pop-up card, but I wanted something that looks like it might be. So I added a sentiment from the Be Devoted stamps set to a white heart which was die cut using the solid heart from the Layering Hearts Combo 2 die set. I adhered this to the back panel of the card using foam tape.


I added another sentiment to the card base which is also from this stamp set.


Don't forget to check out the CCEE Stampers blog (goes live 12 AM EST) to see the rest of the creations the CCEE Stampers created this week. You can also see more details of their creations on their individual blogs:


Saturday, January 30, 2021

Sending Wishes


Hi Crafty Friends,

It’s challenge time with the “Crazies” over on the Crazy 4 Challenges blog. Karen Ostergard our challenge hostess for the month, finishes off her month with one last challenge.

Get a jump start on those cards of love today. Create a card with the word "Love" or a heart on it.


For my card today I created a Slimline card using Lawn Fawn's Scalloped Slimline with Hearts - Portrait die set. I also used the Scalloped Slimline with Hearts Landscape die set for the hearts in the centre of the card. The sentiments in the Landscape set suited the challenge theme better than the Portrait set as they were more love related.

I used Distress Oxide inks in Spun Sugar, Worn Lipstick and Picked Raspberry to create an ombre background. I then splattered on white paint and some Picked Raspberry ink all over the background. 

I used the scalloped slimline rectangle panel from the Scalloped Slimline with Hearts Landscape die set to layer the pink heart panel onto. These layers were then adhered to a side folding red slimline card base. My finished card measured 3 1/2 inches x 8 1/2 inches.

To decorate my card I used the a sentiment and images from Lawn Fawn's Dandy Day stamp set.


For the inside of the card I created a pop up card using Karen Burniston's Katherine Label pop-up die set. I added a sentiment from Word Set 6 - Love die set.

On the edges of the card I adde a panel of card using the inks that I used on the front of the card. I also added a scalloped border using Sunny Studio Stamps Basic Slimline Borders die set.

To finish off the card I added a few more of the images from the Dandy Day stamp set.

Don't forget to check out the rest of the “Crazies” cards over on the Crazy 4 Challenges blog and also their individual blogs for more details.


Friday, January 22, 2021

Be Mine


Hi Crafty Friends,

Today I am sharing other card using some of the stamps and dies from the Divinity Designs January 2021 Release.

For my card today I used the Pierced Heart Background die which I die cut from white cardstock, this was layered onto another panel of white cardstock to give a white on white background.

I cut a panel of patterned paper from the Landscapes Paper Pad (April 2020 Blessings Box) which I cut to the width of the Pierced Heart Background. I added a black border to the top and bottom of this panel and adhered it to the centre of the card.

I die cut the couple and bench from black cards stock (April 2020 Blessings Box) and added  them to the patterned paper. 

I added the "Be Mine" sentiment from the Be Devoted stamp set layering the sentiment using the Sentiment Strips 2 die set.

The card was then adhered to the card using the Matting Rectangle die set and the A2 Portrait Card Base with Layer die set.


For the inside of the card I used the layering panels from both the A2 Portrait Card Base with Layer & Matting Layer die sets.

I added the bench and tree from the Park Silhouettes die set.