Showing posts with label Shimmer Sheetz. Show all posts

Thursday, March 31, 2022

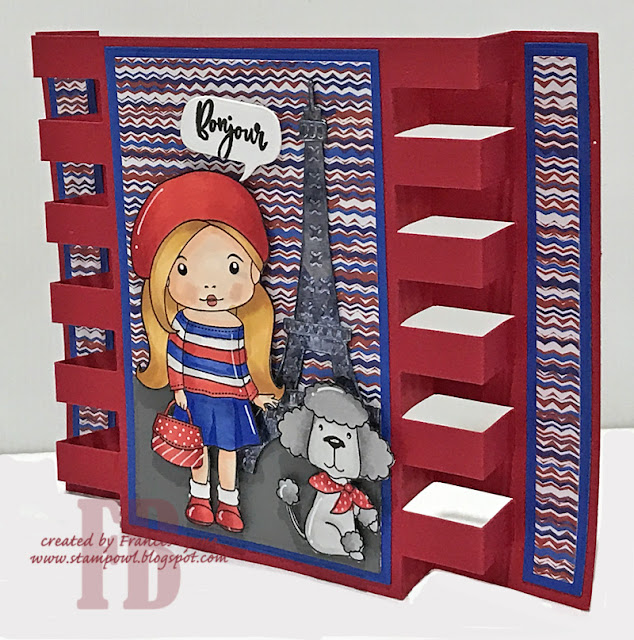
Bonjour


Bonjour Crafty Friends,

It's challenge time with my friends over on the CCEE Stampers challenge blog. As challenge hostess for the month, I continue to issue the challenges.

Apparently today is Eiffel Tower Day - create a card with a French theme, bonus points if you include the Eiffel Tower. 


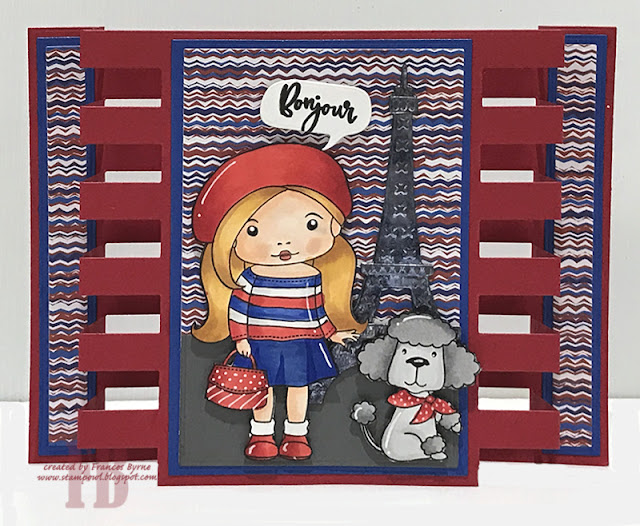
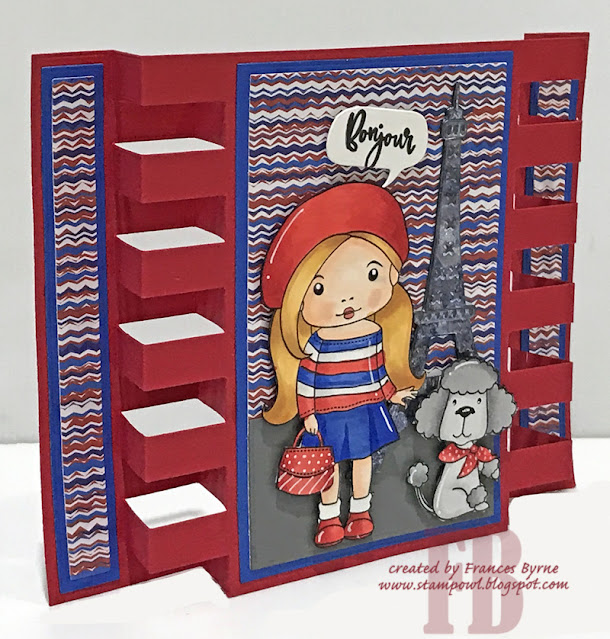
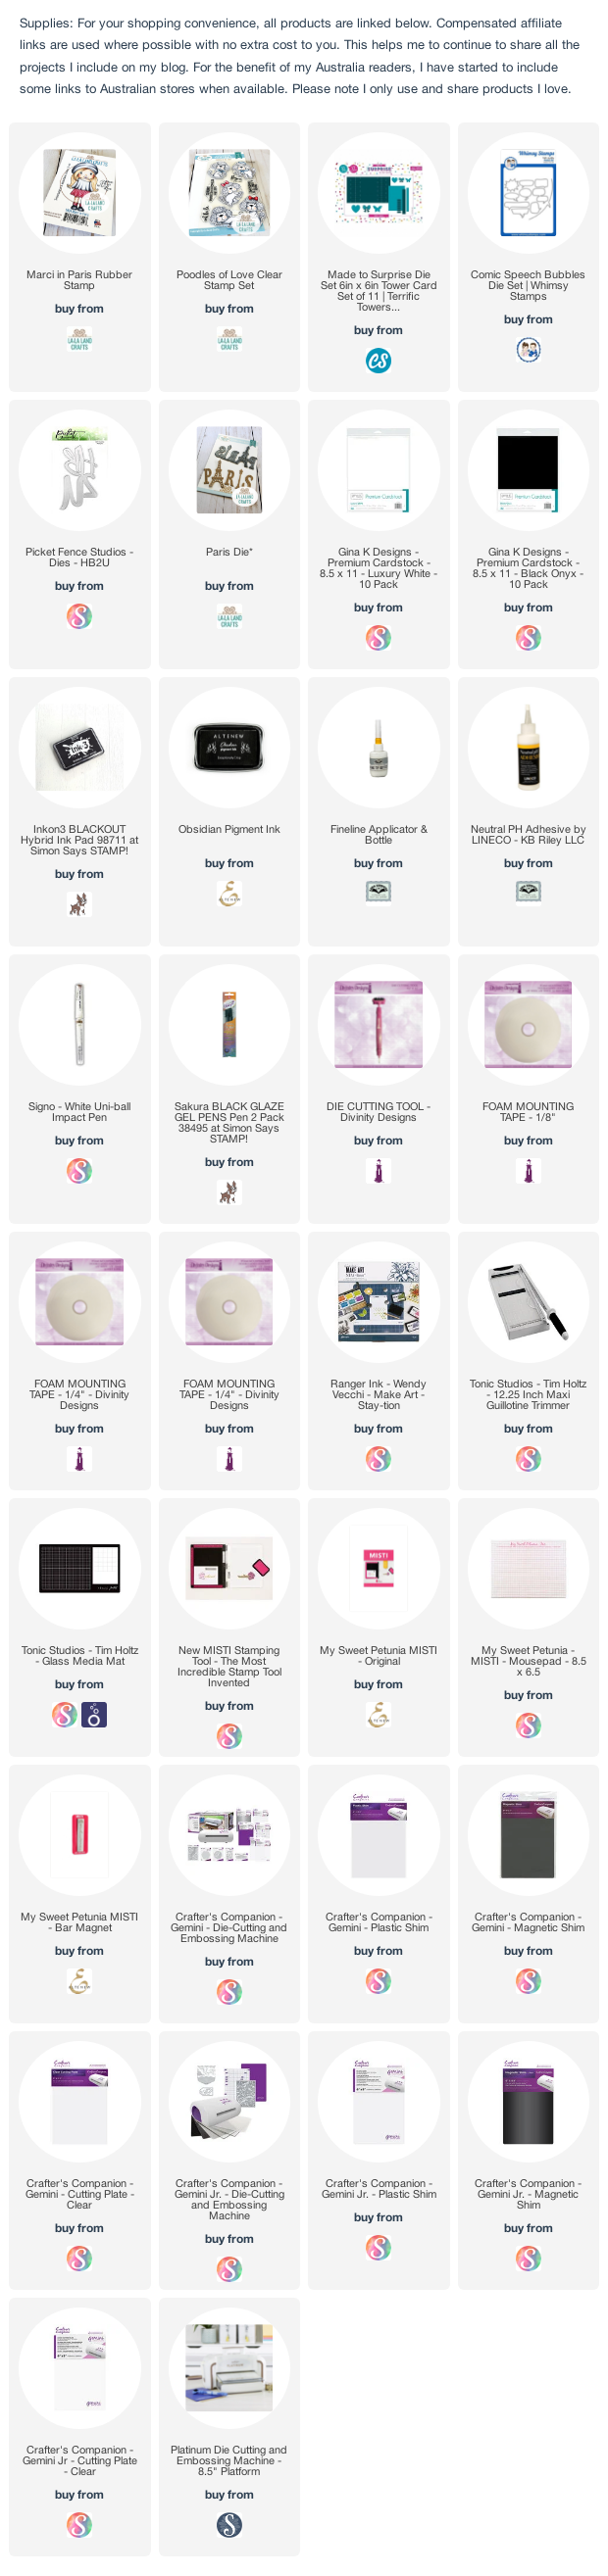
For my card today, I pulled out a couple of Paris/Eiffel Tower themed stamps and dies. For the girl and poodle, I used stamps from La-La Land Crafts Marci in Paris stamp set, this was previously the April 2019 club kit which I was lucky to purchase back then.

The Eiffel Tower in the background uses Karen Burniston's Eiffel Tower Pop Stand die from her Pop-It-Ups collection when she was designing for Elizabeth Craft Designs. I die cut the Eiffel Tower from Shimmer Sheetz, I found this one already die cut in my die set and as the color worked I made use of it.


I created a Terrific Tower Card using the 6" x 6" Terrific Tower die set from Made To Surprise by Sam Calcott. 

For the "Bonjour" sentiment I used a stamp from the Marci in Paris stamp set and a speech bubble from Whimsy Stamps Comic Speech Bubbles die set.


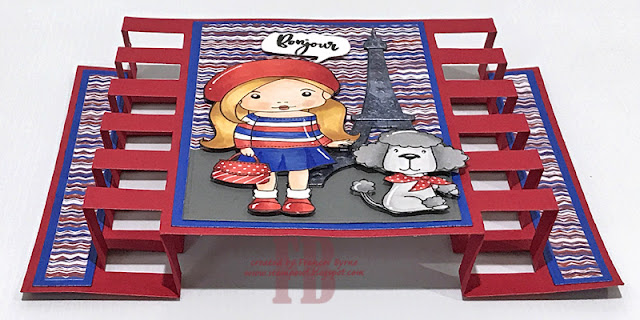
Here is another view of the card, this time when it is lying on the desk. Hopefully you can see the side panels a little better.


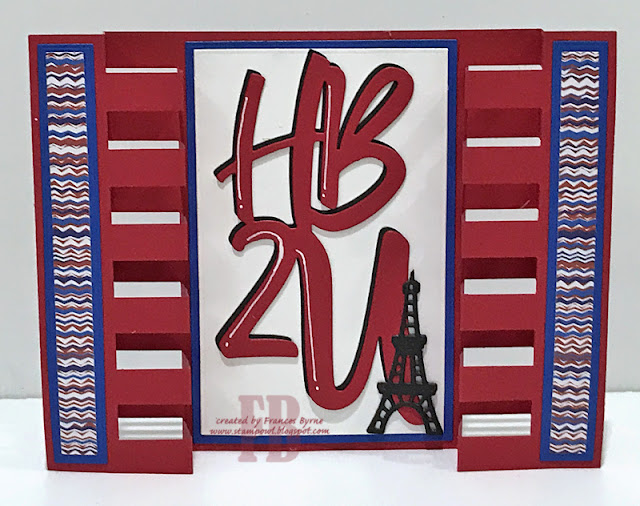
On the back of the card, I added another of the large panels I used on the front. I added Picket Fence Studios HB2U die set for the sentiment.

To keep with the Paris/Eiffel Tower theme, I added the Eiffel Tower from La-La Land Crafts Paris Die set.

Don't forget to check out the CCEE Stampers blog (goes live 12 AM EST) to see the rest of the creations the CCEE Stampers created this week. You can also see more details of their creations on their individual blogs:


Other Supplies: 
Eiffel Tower Pop Stand Die Set - Karen Burniston for Elizabeth Craft Designs (discontinued)


Sunday, August 27, 2017

All is Calm


Hi Crafty Friends,

Today I am sharing another Christmas card using some of the new dies released this month from Elizabeth Craft Designs. The candle is one of the new dies from Elizabeth Craft Designs newest licensed designer Becky Seddon and is called Festive Glow. 

To create the candle I die cut the decorative overlay layer using White Iridescent Shimmer Sheetz. I used Cool Diamond Silk Microfine Glitter to the base layer of the candle.

After assembling the candle, I adhered it to the lower right hand corner of the card using foam tape.

To the top left hand corner of my card I added the "All is Calm ..." sentiment from the Holiday Cheer Clear Stamp set to a piece of red cardstock and gold embossed it. I then die cut the sentiment using one of the label dies from the Labels 1 die set.


For the inside of my card I added the A Way with Words - Merry Christmas 2 to the upper section of the card.


Paper: White; Red; Green; 25th and Pine Paper Pad - Basic Grey
Inks: Peel Painted Distress Ink; Versamark Ink; 
Other: Gold Embossing Powder; Foam Tape


Monday, July 10, 2017

Happy Birthday


Hi Crafty Friends,

Today I am sharing another card I created while playing with my new Couture Creations Go Press & Foil ... I have been having lots of fun using dies I own to foil using this machine.

This time round I decided to use the ModaScrap Gatefold - Elegant Roses die and foiled it using silver foil onto purple cardstock ... I then cut it out by hand.

To create my card I used distress oxides on some white cardstock (White Soft Finish Cardstock from Elizabeth Craft Designs is perfect for this) to create my background panel.

I decorated my card using the A Way with Words - Happy Birthday 2 die set and some flowers.


For the inside of my card I added two sentiments and a flower that I had left over from the flowers on the front of the card.


Stamps: Dream Sentiments; General Sentiments - Elizabeth Craft Designs
Paper: White; Pink; Pale Pink; Purple
Dies: ModaScrap Gatefold Elegant Rose; A Way With Words Happy Birthday 2; Bunch of Flowers 4 - Elizabeth Craft Designs
Other ECD Products: Coral Sea Prills; Light Pink Shimmer Sheetz; Clear Double Sided Adhesive Tape; All Metal Tool Kit
Other: Black Ink; Worn Lipstick Distress Ink; Wilted Violet Distress Ink; Couture Creations Go Press and Foil Machine; Silver Foil


Tuesday, September 27, 2016

Let it Snow


Hi everyone,

Today I have a tutorial on how to create the card above using Elizabeth Craft Designs products.
This time round I having been playing with a few of the winter themed dies to create my card.

I have never tried ice skating, but I love watching it on tv whenever it comes on. I know I was pretty hopeless as a child roller skating, so presume I would have been even worse at ice skating :(.

Here's how I created my card:

1. Cut a piece of white card so that it measures 5 1/4 inches x 10 1/2 inches. Score along the 10 1/2 inch side at 5 1/4 inches and fold to create a 5 1/4 inch square top fold card.
  • Cut a piece of Dusky Sky Soft Finish Cardstock approximately 5 inches square. Die cut the card using the second largest square from the Postage Stamp Squares die set.
  • Cut another piece of scrap card approximately  5 inches square that has Clear Double Sided Adhesive Tape on the front. Die cut this card using the second largest square from the Postage Stamp Squares die set. 
  • Carefully adhere the piece of card with the adhesive on the front to the Dusky Sky postage stamp square card.

  • Take the snowflake dies from the Snowflakes die set and lay them fairly close together without them touching on the Dusky Blue square and run through the die cutting machine. Because you have two layers of card, the snowflakes will leave an impression without actually cutting the card. 
  • Remove the dies from the card and place in another position on the card and continue doing this process until you have covered the card completely with snowflakes.
  • Using the second largest square from the Stitched Squares die set, die cut a square from Bonnie Blue Soft Finish Cardstock.
  • Layer the Dusky Sky Square panel to the Bonnie Blue Square and then adhere this to the front of the folded white card.


2. Using the Skates die set, die cut the following:
  • (2) Boots from White Cardstock
  • (2) Base of Boot from Through the Lens Wood Designer Paper that has Clear Double Sided Adhesive Tape on the back.
  • (2) Skate Blades from Silver Metallic Shimmer Sheetz
  • Adhere the base of the boot to the white boot and then attach the blade to the bottom of the boot. (Note: I found it easier to die cut just the lower portion of the boot again, that had Clear Double Sided Adhesive Tape on the front. I then adhered the blade to this piece and then adhered that to the back of the full sized boot.)
  • Cut a piece of White Hemp Cord and thread through the holes in the boots and tie into a bow at the top of the boot.
  • Attach the two skates to the card using foam tape. Refer to the photo at the top for placement.
3. Using the Sprig with Berries die set, die cut two Sprigs from white cardstock that has Clear Double Sided Adhesive Tape on the front. Remove the protective backing from the Adhesive and cover the adhesive with Warm Diamond Silk Microfine Glitter. Remove excess glitter and return to the jar and polish the glitter into the adhesive using your fingers.
  • Adhere the Sprigs to the top of the card.
4. Using the Snowflakes die set, die cut a medium snowflake from Bonnie Blue Soft Finish Cardstock that has Clear Double Sided Adhesive Tape on the front. Remove the protective backing from the Adhesive and cover the adhesive with Faded Denim Silk Microfine Glitter. Remove excess glitter and return to the jar and polish the glitter into the adhesive using your fingers.
  • Adhere the snowflake to the centre of the Sprigs you added in step 3 using foam tape.
  • Add a Silver/Gold Glitter Dots Peel Off Sticker to the centre of the snowflake.
5. Cover the back of a scrap of Bonnie Blue Soft Finish Cardstock with Clear Double Sided Adhesive Tape. Die cut the A Way with Words - Let it Snow sentiment.
  • Attach the "Let It" part of the sentiment to the centre left of the card (refer to card above for placement)
  • Attach the "Snow" part of the sentiment to the blade of the right skate.

6. The Inside of the Card:
  • Using the second largest square from the Postage Stamp Squares die set, die cut a square from white card.
  • Using the second largest square from the Stitched Squares die set, die cut a square from Bonnie Blue Soft Finish Cardstock
  • Layer the white square to the blue square.
7. Using the Winter Sentiments Clear Stamp set, stamp the sentiment "Let's have some fun" and the three small snowflakes using blue ink.
  • Using the Snowflakes die set, die cut a medium snowflake from Bonnie Blue Soft Finish Cardstock that has Clear Double Sided Adhesive Tape on the front. Remove the protective backing from the Adhesive and cover the adhesive with Faded Denim Silk Microfine Glitter. Remove excess glitter and return to the jar and polish the glitter into the adhesive using your fingers.
  • Adhere snowflake to the bottom right hand corner of card.
  • Adhere the panel to the inside of  the card.
Thanks for visiting my blog today, I hope you enjoyed my tutorial.

Supplies:

Elizabeth Craft Designs:


Other:
Cardstock - White
Inks - Faded Jeans Distress Ink
White Hemp Cord
Foam Tape
Die Cutting Machine

Wednesday, June 22, 2016

You, Me and Coffee


Hi everyone,

Today I am playing along with the Summer Coffee Lovers Blog Hop which is being held from Saturday 17th June to Friday 24th June.


I decided to create another 'flat' card using the Cup Pop Stand Card die set designed by Karen Burniston for Elizabeth Craft Designs.

For the background of my card I used the Glitter and Lace Technique using a couple of the new Silk Microfine Glitters which are being released by Elizabeth Craft Designs soon. I also used a piece of lace which Els from ECD purchased while she was out our local Papercrafts Show a fortnight ago when she was done here in Australia.

For the spoon I used Silver Shimmer Sheetz and I also added one of the borders from the Bead Strings 1 die set to embellish the coffee cup.


For the inside of my card I added a couple more of the borders from the Bead String 1 die set on the left side of my card. I added a coffee sentiment I found in my stash and a few coffee beans which are also included in the Cup Pop Stand die set.


Stamps: Coffee & Tea - designed by Karen Burniston for Elizabeth Craft Designs; Coffee Break - Whimsy Stamps
Paper: White; Black; Pink
Dies: Cup Pop Stand Card - designed by Karen Burniston for Elizabeth Craft Designs; Stitched Circles; Dotted Scallop Circles; Bead Strings 1 - Elizabeth Craft Designs
Other ECD Products: Clear Double Sided Tape 64mm; Black Silk Microfine Glitter; Copper Rose Silk Microfine Glitter; Light Brown Silk Microfine Glitter; Paisley Stage It Stencil; Black/Silver Glitter Dots;  Silver Shimmer Sheetz
Other: Black Ink; Blending Tool; Foam Tape


Friday, December 18, 2015

Poinsettia Christmas Card


Hi everyone,
It’s my turn to post a tutorial over on the Elizabeth Craft Designs blog today. Christmas Day is now just over a week away, most of my Christmas cards have been sent. But it never hurts to have a few extras just in case you receive a card from someone you haven’t sent a card too. You can never have too many Christmas cards, what you don’t use this year just starts the stash for next year! For my card today I have used the Poinsettia die from Els van de Burgt Studio, it’s one of my favorites for Christmas.


Variation: If you have finished making your Christmas cards for the year, this would also make a great card for any occasion, either change the color of the poinsettia or substitute with the Crystal Flower Set & Crystal Flower Overlay sets and the Leafy Branch.
Here’s how I created my card:
  1. Cut a piece of White Soft Finish Cardstock 100lb so it measures 4 1/4 inches x 11 inches. Score at 5 1/2 inches to make a top folding card.
2. Cut a piece of designer paper 1 1/2 inches x 5 1/2 inches. Adhere this to the left hand edge of the white folded card.
3. Cut a piece of White Soft Finish Cardstock 100 lb so it measures 3 inches x 5 1/2 inches.
  • Cut a piece of green Cardstock 1 inch x 5 1/2 inches and adhere this to the back of the 3 inch x 5 1/2 inch panel so approx. 1/8 inch is seen from the front.
  • Using black ink, stamp the Merry Christmas sentiment from the Merry & Bright Clear Stamp set to the lower right hand side of this panel.
  • Adhere panel to card using foam tape so the right hand edges of the panel and folded card line up.
4. Apply a piece of Transparent Double Sided Adhesive Tape to the front of a piece of red cardstock which measures 3 1/2 inches x 5 1/2 inches.  Die cut the large solid poinsettia flower and the small poinsettia flower so that the adhesive is on the front of the flower.
  • Remove the protective backing from the die cut pieces. Cover the adhesive with True Red Silk Microfine Glitter, polish glitter with your finger and brush excess off.
  • Die cut the detail poinsettia flower from Red Metallic Shimmer Sheetz.
  • Die cut the flower centre from Gold Metallic Shimmer Sheetz.
  • Assemble flower using foam tape between each of the flower layers.
  • Adhere flower to card referring to photo above for placement.
5.  Apply a piece ofTransparent Double Sided Adhesive Tape to the front of a piece of green card approx. 5 inches square. Using the Sprig with Berries die, die cut twice so that the adhesive is on the front of the sprig.
  • Remove the protective backing from the die cut pieces. Cover the adhesive with Forest Green Silk Microfine Glitter, polish glitter with your finger and brush off excess.
  • Apply adhesive to the bottom end of the one of the sprigs and attach it to the card so the bottom end is under the poinsettia. (the middle sprig on card above).
  • Trim the second sprig so it is shorter and in two pieces and adhere these on either side of the larger spring so that the bottom of spring is under the poinsettia.

6. The inside of the card:
  • Cut a piece of designer paper 1 1/2 inches x 5 1/2 inches.
  • Cut a piece of green Cardstock 1 inch x 5 1/2 inches and adhere this to the back of the designer paper panel so approx. 1/8 inch is seen from the front.
  • Adhere designer paper panel to the left edge of inside of card.
7. Using green ink, stamp the “May Your Days Be Merry and Bright” sentiment from the Merry & Bright Clear Stamp set so that it is centred on the right hand side of the inside of card.

Thanks for stopping by today. I hope you enjoyed my tutorial.
Supplies:
Elizabeth Craft Designs:
1067 Poinsettia 
765 Sprig with Berries
614 True Red Silk Microfine Glitter
633 Forest Green Silk Microfine Glitter
SS0214 Red Metallic Shimmer Sheetz
SS0212 Gold Metallic Shimmer Sheetz
PSF102 Soft Finish Cardstock 8.5″ x 11″ 270gr/100lb 10 Pack
510 Transparent Double Sided Tape 101mm
 
Other:
Cardstock: Green
Designer Paper: Carta Bella Have a Merry Christmas 6 x 6 Paper Pad
Inks: Black; Green
Foam Tape
Die Cutting Machine


Saturday, October 31, 2015

Elizabeth Craft Designs October Designer Challenge


Hi everyone,

It's time for our September Elizabeth Craft Designs Designer Challenge. Check out the Elizabeth Crafts Designs blog today where you will be able to see what all the designers created for the challenge this month.

Our challenge this month was to create a holiday gift and a coordinating gift tag using Shimmer Sheetz and at least one die and one embossing folder.


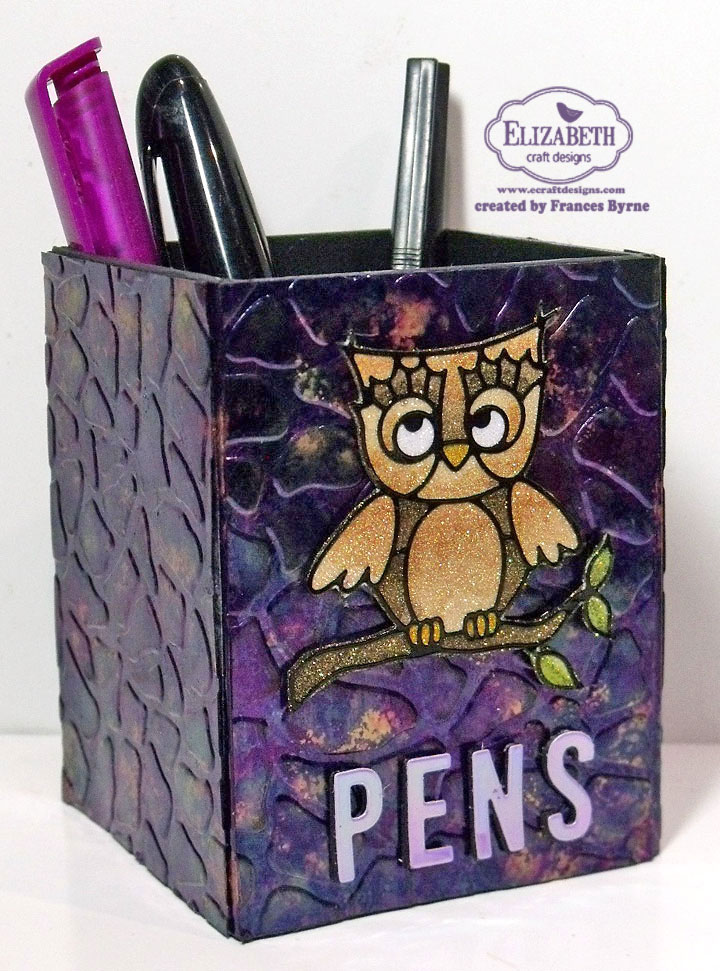
While out shopping recently I found a pen holder which I thought would be fun to alter for this challenge. The first thing I did was paint the pen holder inside and out using black paint.

I cut four pieces of Black Iridescent  Shimmer Sheetz to fit the size of my pen holder and also cut four addition pieces the height of the holder but only 2 inches wide. I scored and folded these narrow pieces in half.

Next I used my alcohol inks to color my Shimmer Sheetz pieces. For this project I used Stream; Wild Plum and Gold Metallic Adirondack Alcohol Inks. 

Once the pieces where all dry I added Transparent Double Sided Adhesive Tape to the back of the larger pieces and embossed these pieces using the Sea Glass Embossing Folder.


I added  Transparent Double Sided Adhesive Tape to the scored pieces and then attached these to my Pen Holder on each corner. Once these were in place I then attached the four embossed pieces to each side of the Pen Holder.

As this Pen Holder had originally be decorated with owls, I decided to keep with that theme and hey I like owls so why not haha!

 The owl is from the Lots of Owls Peel Off Stickers.  I adhered the owl on branch onto Transparent Double-Sided Adhesive Tape which had been attached to card and then covered this with Warm Diamond Silk Microfine Glitter and then colored with Copics. For more details on how to do this technique you can see a video Els created using this technique here.

Finally I die cut the letters "P E N S" from black card and Purple Iridescent Shimmer Sheetz which had Transparent Double-Sided Adhesive Tape adhered to the back and layered together and added to the bottom of my Pen Holder.


For my coordinating gift tag, I selected another of the owls from the Lots of Owls Peel Off Stickers. I added the owl onto Transparent Double-Sided Adhesive Tape which had been attached to card and then covered this with Warm Diamond Silk Microfine Glitter and then colored with Copics.

I cut a piece of Soft Finish Cardstock 100b to 2 1/4 inches and scored the card in half. Next I positioned the tag shaped die from the Tags and More 6 - Daisy die set at the top of the open end of the card and ran this through my die cutting machine.

I then opened up the tag/card and positioned the decorative edge so it would only die cut on the front and die cut this too.


I sponged around the edge of the front of the card using the Violet Tint PanPastel from the Susan's Garden PanPastel Flower Coloring Kit 2.

To finish off the front I die cut the Merry Christmas (944) from Purple card and added it to the front.


For the inside of my gift tag I used the tag shape die from the Tags and More 6 - Daisy die set to cut a piece of purple card. I trimmed it down to approx 1 3/4 inches and adhered it to the inside of my card. I added a Gold Ribbon Fantasy Peel Off Stickers Border to the edge of the purple card.

To create the "To:" and "From:" I used the Black Alphabet 1 Upper Key Peel Off Stickers.

That's it from me today, thank you for visiting my blog. To see what the other designers created for this challenge don't forget to check out the Elizabeth Craft Designs blog post which goes live 8AM MT.


Supplies:

Elizabeth Craft Designs:


Other:
Adirondack Alcohol Inks - Stream; Wild Plum; Gold Metallic and Blending Solution
Black Acrylic Paint
Purple Ribbon
Foam Tape


Friday, September 4, 2015

Merry Christmas


Hi everyone,
It’s my turn to post a project on the Elizabeth Craft Designs blog today. Today I am sharing a Christmas card I created using the new Tags & More 9 – Sparkle die set along with one of the new Way with Words sentiment dies from Quietfire Designs. The width of the Tags & More 9 – Sparkle die set is 4 1/4 inches and of course can be any length, so it is perfect to use for creating cards.

The layout of this card can be adapted for any occasion just by changing the colors, sentiment die and dies used to decorate the card.
Here’s how I created my card:
1. Creating the base card –
  • Cut a piece of red card 4 1/4 inches x 11 inches. Score the card along the 11 inch side at 5 1/2 inches (do not fold yet).

  • Line up the main tag die from the Tags & More 9 – Sparkle at the top of the red card stock so that the edges of the die will line up on the edge of the card and die cut.
  • Place the swirls decorative overlay die from the same die set at the top of the tag so that the rounded shape of the overlay lines up with the rounded shape of the tag and die cut.
  • Fold the card along the score line we created early to create a side folded A2 card as per the photo above.
2. Cut a piece of Gold Shimmer Sheetz large enough to cut the A Way with Words Merry Christmas sentiment die. Adhere Transparent Double Sided Adhesive Tape to the back of the Shimmer Sheetz and die cut the sentiment. Make sure to use the metal adaptor plate when die cutting Shimmer Sheetz.
  • Adhere the Gold Shimmer Sheetz Merry Christmas word to the front of the card. The flourish at the bottom of the sentiment should be as close to the bottom of the card as possible.

3.  From green card die cut three holly leaves using the Holly Leaves & Berries die set. Shade the edges of the leaves using Bright Yellow Green & Turquoise Pan Pastels from the Susan’s Garden PanPastel Flower Coloring Kit 2.
  • Attach a piece of Transparent Double Sided Adhesive Tape to the front of a piece of red card large enough to die cut the four berry cluster from the Holly Leaves & Berries die set. Remove the protective backing from the adhesive and cover with True Red Silk Microfine Glitter. Polish the glitter with your finger.
  • Attach the Holly Leaves & Berries to the top of the card as per photo.

4. The inside of the card:
  • Cut a strip of green card 2 inches x 4 1/4 inches. Attach to the right hand edge of the inside of the card, so that the green with show through the die cut swirls when the card is closed.
  • Adhere a Gold/Silver Glitter Border Peel Off Sticker to the edge where the red and green card join.
  • Stamp the sentiments “Merry Christmas” and “and Happy New Year!” from the Merry & Bright Clear Stamp set using black ink to the red portion of the card.
  • Die cut two more holly leaves from green card using the Holly Leaves & Berries die set. Sponge the edges using the PanPastels as per the front of the card in step 3.
  • Attach a piece of Transparent Double Sided Adhesive Tape to the front of a piece of red card large enough to die cut the three berry cluster from the Holly Leaves & Berries die set. Remove the protective backing from the adhesive and cover with True Red Silk Microfine Glitter. Polish the glitter with your finger.
  • Adhere the Holly Leaves & Berries to the bottom of the inside of the card underneath the sentiment.
Thanks for stopping by today. I hope you have enjoyed my tutorial.
Supplies:
Elizabeth Craft Designs:
1056 Quietfire “Merry Christmas”
1077 Tags & More 9 – Sparkle
926 Holly Leaves & Berries
0212 Gold Metallic Shimmer Sheetz
509 Transparent Double Sided Tape 152mm
614 True Red Silk Microfine Glitter
30116 Susan’s Garden PanPastel Flower Coloring Kit 2
CS003 Merry & Bright Clear Stamp Set
7010 Gold/Silver Glitter Borders Peel Off Stickers
 
Other:
Cardstock: white, red, green
Foam Tape
Scoring Tool
Black Ink