Showing posts with label Book Card. Show all posts

Friday, July 18, 2025

Nativity Open Book


Hi Crafty Friends,

Today I have three Nativity themed Mini Slimline cards I created for Christmas in July.


For this card I used Waffle Flower Crafts Open Book die set along with the Open Book Nativity Stencil.

The background was created using Trinity Stamps Time Warp Letterpress Plate which I gold foiled onto white cardstock. I die cut the panel using Waffle Flower Crafts Mini Slimline Layers die set. 

The sentiment is from the Open Book Holiday sentiment stamp set. 


For the inside I added another sentiment from the stamp set. I added a star above using one of the stencils.


Wednesday, August 9, 2023

Dragons and Fairy Tales


Hi Crafty Friends,

According to the Days of the Year website, today (9th August) is National Book Lovers Day. As I have been wanting to make an easel card using the Made To Surprise by Sam Calcott's Pop Up Wiper Book die set, I thought it was the perfect time to pull the die out and play.

To decorate my card, I used two dragon themed stamp sets from MFT Stamps to create my dragon themed fairy tale book.


I used Creative Craft Products Birthday Card Inside Out Sentiments die set to add the stopper to the base of my card. I also used a sentiment from an older Hero Arts Monthly kit to add the stamped sentiment underneath the stopper.


Here is a look at my card when it is folded. There is a fair bit of bulk to this card, approximately 3/4 - 1 inch depth, so it would need to either be hand delivered or placed in a box for mailing.


Here is a look at the base of my card, when the top portion is lifted up. There is plenty of room on the white area to write a personal greeting. 


On the back portion of the card, I added a panel so I could add another sentiment. This sentiment is from a stamp set from Scrappy Tails Craft.


Wednesday, May 22, 2019

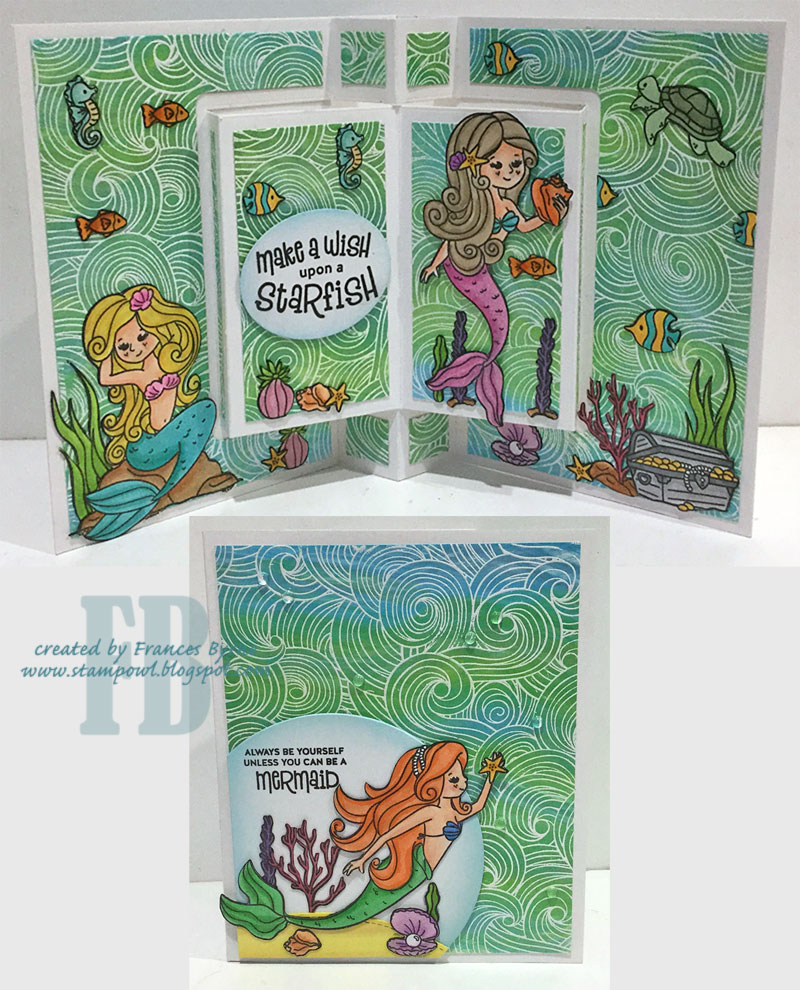
Make A Wish Upon A Starfish


Hi Crafty Friends,

My card today is for a challenge I do with a couple of friends of mine. Each month we challenge each other to create something using supplies we all own.

This month our challenge is to create a card using any Tim Holtz product. This could include Distress Inks, Distress Oxides, Alcohol Inks, Stencils, Stampers Anonymous Stamps etc etc .... lots of options for this one.


As I recently received my order of the new Alcohol Pearl inks, I decided to use those for the challenge this month. I love the pearl finish these have on a card and I can already tell I will be using these a lot!

So far I have been having fun playing with a technique that Jennifer McGuire shared back in March where she applied a long piece of felt to a protractor or stamp block and added the alcohol pearl ink to the edge of the felt and then swiped it over the card a number of times until you get the look you want. You can see her tutorial here. When I was making a card recently for an upcoming challenge, I noticed that I could apply the alcohol pearl inks to normal cardstock using this method. As I had so many panels to ink up for the card I was creating today, I decided to use normal white cardstock rather than Yupo Paper to save my Yupo. Please note that the inks don't move on this cardstock for other alcohol ink techniques, just the swiping method.


For my card today I decided to pull out my Crafter's Companion Square Twist Card which makes a Pop Up Book Card. 

For my background panels, I applied Tranquil, Celestial & Sublime Alcohol Pearl Inks to a long piece of felt attached to a protractor and swiped it over my cardstock continually until I got the look I wanted. I then used the large background stamp from the Honey Bee Stamps Ocean Borders Clear Stamp set using white embossing powder. These were then die cut using the layering dies from the Square Twist Card.

To decorate my card I used Simon Says Stamp Beautiful Mermaids Clear Stamp set.


For the front of my card I added another background panel and then added a circle to the lower left hand corner of the card.

I added a sand base to this circle using Lawn Fawns Stitched Hillside Border. This was colored using Alcohol Pearl Inks in Alchemy and Mineral.

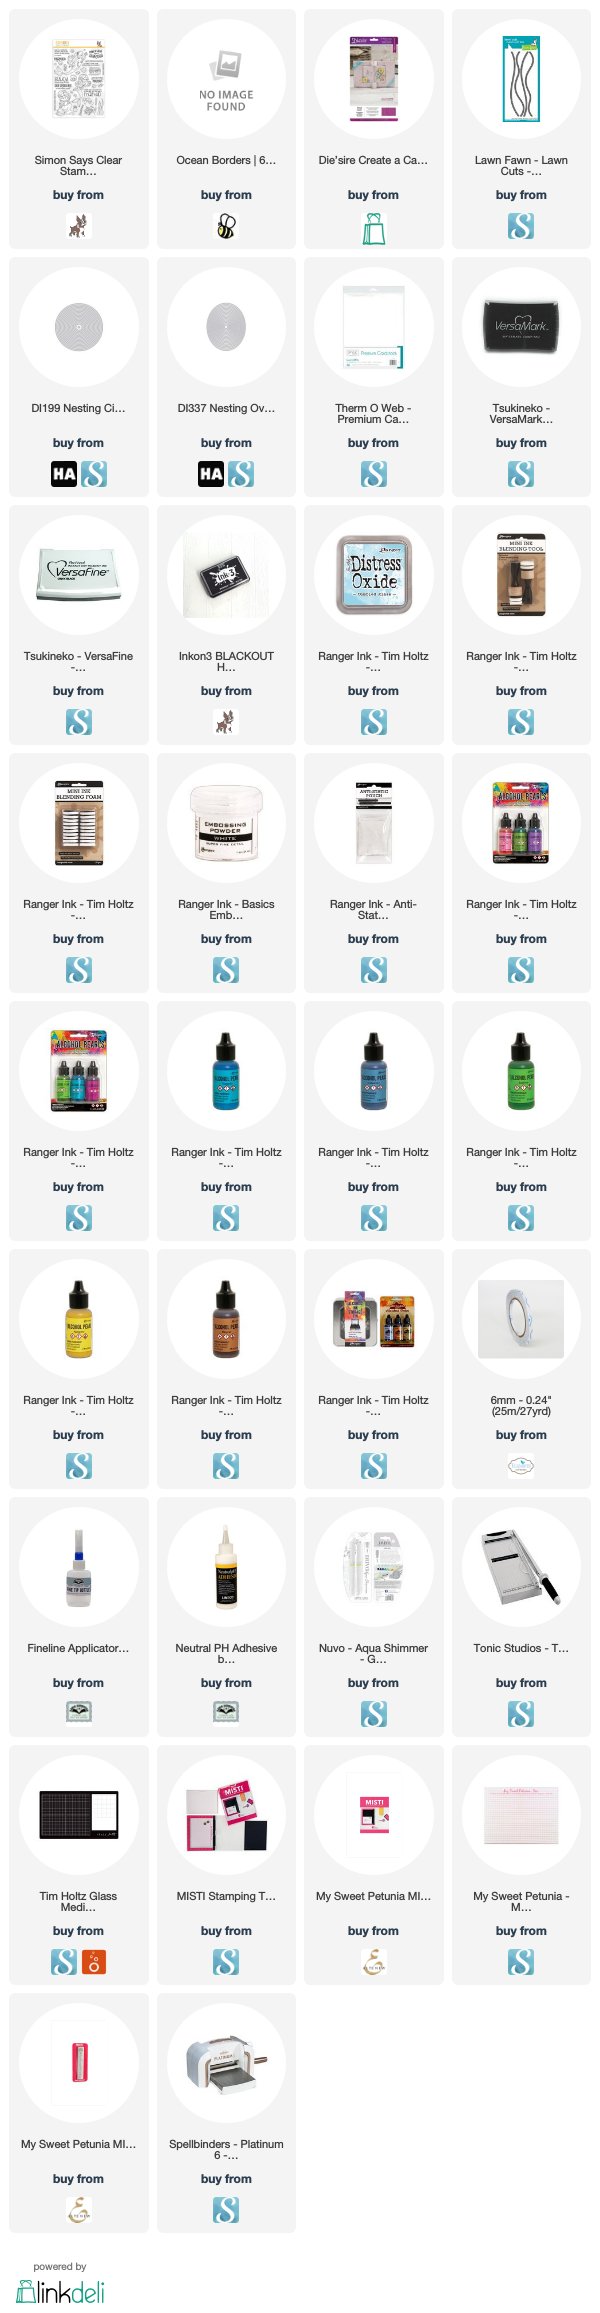
Supplies:
For your shopping convenience, all products are linked below. Compensated affiliate links are used where possible with no extra cost to you. This helps me to continue to share all the projects I include on my blog. Please note I only use and share products I love.


Saturday, November 3, 2012

Howdy!

C4C161 CowboyBook2 wm

It’s challenge time with the “Crazies” over on the Crazy 4 Challenges blog. Being the beginning of a new month it is time to introduce our November hostess which is Joycelyn Pelkey.

For her first challenge Joycelyn has challenged us to create Anything but a Card.

C4C161 CowboyBook3 wm

For my project today I decided to create another book card, these are so much fun to make … although called a Book card it isn’t really a card but a book … so I am covered for this challenge.

To decorate my book I used MFT Stamps LJD Howdy and LJD Western Backgrounds. The base of the book is made using Kraft cardstock, I also used Hot Fudge, Whip Cream and Wild Cherry card stock.

To layer the horse I used Die-namics Circle Stax 1 & 2 and the Die-namics Award Seal . Along the left side of the front of my book I added the Die-namics Western Star Border Duo . On the lower right hand side I added one of the signs from the Die-namics LJD Howdy Frames too add my sentiment.

On the spine of the book I used the Die-namics By the Letters to create the word “Howdy”

C4C161 CowboyBook4 wm

Here is the inside of my book, I used a variety of stamps from LJD Howdy and LJD Western Backgrounds sets.

C4C161 CowboyBook5 wm

Here is a closer look at the left side of the inside of my book. The boot on the lower left is from the Die-namics Country Charms set.

C4C161 CowboyBook6 wm

And finally a close up of the right side of my book. I added some more sentiments onto one of the labels from the Die-namics LJD Howdy Frames

Here are the Die-namics that I used to create my book.

MFT_OwnYourStory_PreviewGraphic

MFT_OwnYourStory_PreviewGraphic

MFT_OwnYourStory_PreviewGraphic

MFT_OwnYourStory_PreviewGraphic

MFT_OwnYourStory_PreviewGraphic

MFT_OwnYourStory_PreviewGraphic

MFT_OwnYourStory_PreviewGraphic

Don't forget to check out the rest of the “Crazies” cards over on the Crazy 4 Challenges blog and also their individual blogs for more details.

Stamps: LJD Howdy; LJD Western Backgrounds – MFT Stamps
Paper: Whip Cream; Kraft; Wild Cherry; Hot Fudge – MFT Stamps
Die-namics: Circle Stax 1 & 2; Award Seal; Howdy Frames; Western Star Border Duo; By the Letters; Country Charms
Other: Creamy Brown Fluid Chalk; Dark Brown Fluid Chalk; Red Brads; Brown Brads; Scor-Pal

#aa-owl-signature

Friday, July 27, 2012

Life is a Fairy Tale …. It’s A Riley Blog Hop!

Riley Wonderland1 wm

Hi everyone!
Welcome to Riley and Company’s blog hop! Come join us as the Riley and Company Design Team take you on a journey discovering all sorts of Riley fun! If you didn’t start at the beginning of this hop, you might want to head on over to the Riley and Company blog so that you don’t miss out on anything.

Here are this month’s specials:

Special 1

If you order any full set (wood, cling or unmounted) within the first 24 hours - we will send you a "Life is a Fairy Tale" word set absolutely FREE!!!!!!!!!!!!! That's a $17.50 savings! (One per customer please.)

Special 2

But wait - there's more! As an added bonus, we are giving EVERYONE FREE SHIPPING from Thursday night at 9 pm CST until Sunday night at midnight CST! Just enter FREESHIP in the coupon code section!

Be sure to leave a comment on everyone’s blog as you travel from blog to blog as each of the Riley and Company Design Team members will be giving away one new Riley stamp to a random person who leaves a comment on their blog!

This month we have 16 new Riley images and one sentiment set being released that have a Fairy Tale / Nursery Rhyme theme.
I have had so much fun with this release, so much so that I have managed to use EVERY stamp in my projects during this release. I have a few more projects that I want to share with you all today, so let’s get started!

Riley Wonderland wm

For my first project today I created a Book Card.

Riley Wonderland3 wm

On the front of my book I used have used Sophie in Wonderland, don’t you just love her!! The sentiment is from the Life is a Fairy Tale word set.

Riley Wonderland2 wm

Here is another view of my book card this time so you can see the spine of my book…. I used my computer to create the title for my book.

Riley Wonderland4 wm

Here is the inside of my book card. On the left hand cover page I added another sentiment.

Riley Wonderland5 wm

I decorated the inside ‘pages’ of my book using The Mad Moose-atter and one more sentiment from our new sentiment set. I also added die cut cups and saucers around the edge.

Stamps: Sophie in Wonderland; The Mad Moose-atter; Life is a Fairy Tale word set – Riley and Company
Paper: White; Yellow; Blue; Hello Spring DP – Doodlebug Designs
Other: Black Ink; Blue Ink; MFT Die-namics Oval Stax 1 & 2; MFT Die-namics Circle Stax 1; MFT Die-namics Designer Labels 3 Stax; MFT Die-namics Jumbo Cloud Stax; MFT Die-namics Time For Tea Die; ScorPal; Brads; Flowers; Foam Tape; Copics

Riley CinderellaCarriage wm

For my second project today I have used Cinderella Sophie. Now we all know Cinderella needed her coach/carriage to get her to the ball so I created one my Cinderella using an SVG file and my Sizzix Eclips.

Riley CinderellaCarriage2 wm

Here is another view of my 3D Cinderella scene.

Riley CinderellaCarriage3 wm

Here is my scene again but this time so you can see the sentiment.

Stamps: Cinderella Sophie; Life is a Fairy Tale word set – Riley and Company
Paper: White; Pink; Purple; Green;
Other: Black Ink; Creations by AR – Once Upon a Carriage SVG File; ECAL; Sizzix Eclips; Spellbinders Label Die; Pearls; Flowers; Copics

Riley FrogPrince wm

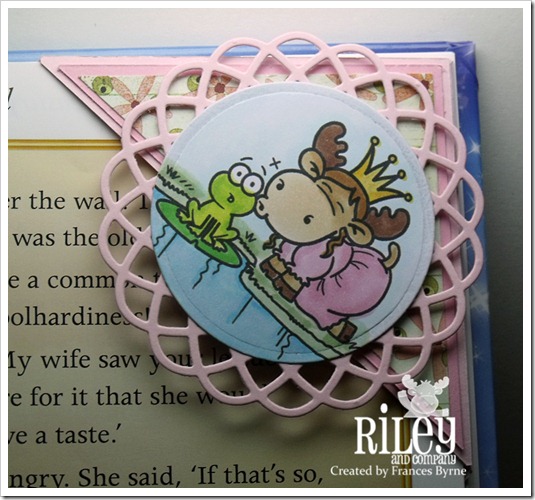
For my final project I have created a corner bookmark using Waiting for A Prince.

Riley FrogPrince2 wm

Here is another view of my corner bookmark.

Well that is about it from me for today, now it is time to hop on over to the blog of Kelly Santi and see what stunning creations she has install for you today.

Enjoy the rest of the hop and thanks for dropping by! Don't forget to leave comments on all the blogs, so that you have a chance to win some blog candy.


Stamps: Waiting for a  Prince – Riley and Company
Paper: White; Pink; Dark Pink; Kioshi DP – Basic Grey
Other: Black Ink; MFT Die-namics Dizzy Doily Duo; MFT Die-namics Circle Stax; ScorPal; Foam Tape; Copics

#aa-owl-signature