Showing posts with label Glitter & Lace Technique. Show all posts

Wednesday, July 19, 2017

ECD July Designer Challenge


Hi everyone,

It's time for our July ECD Design Team Designer challenge. Check out the Elizabeth Craft Designs blog today to see what our talented designed created for the challenge.


Technique Friday with Els Inspiration - Every Friday Els inspires us with a new Technique Friday video to share all the wonderful ways to use ECD products. Take your inspiration to create your card for our challenge using one of these techniques. You can find a list of all the Technique Friday with Els videos here … Technique Friday with Els.


**************************


For today's challenge Elizabeth Craft Designs are giving away a $20 Gift Card to use on our website to 3 winners. 


To enter simply leave a comment on the Elizabeth Craft Designs Challenge post and tell us " "What your favorite technique learned from the Technique Friday With Els series". 

We will select 3 lucky winners in a random drawing 

The winners will be announced on Friday, July 21 on the Elizabeth Craft Designs blog.

*************************


I took my inspiration from one of Els' videos from earlier in the year Sparkling Lovebirds Birthday Cards. I wanted to make my card a little masculine so it could be given to a male for a birthday so decided to go with Faded Jeans and Basic Black Silk Microfine Glitters rather than the Cool Diamond Silk Microfine Glitter that Els used in her video.

Here is how I created my card - 
Step 1 -
  • Using the ModaScrap Dandelion Fluff die set, die cut one large and two small flowers using the protective back from a piece of Clear Double Sided Adhesive to create masks.
  • Using the third largest rectangle from the Stitched Rectangles die set die cut a piece of White Soft Finish Cardstock that has Clear Double Sided Adhesive Tape on the front.
  • Remove the protective backing from the rectangle panel and place the dandelion masks we created earlier onto the adhesive. Make sure these masks are secured well to the adhesive so glitter does not get underneath.
  • Cover the exposed adhesive with Faded Jeans Silk Microfine Glitter. Brush off excess glitter and return to the jar and polish the glitter into the adhesive using your finger.
  • Remove the dandelion masks from the adhesive carefully (so you can use them another time) and cover the remaining exposed adhesive with Basic Black Silk Microfine Glitter. Return excess to the jar and polish glitter with your finger.
  • Layer panel onto a Dotted Scallop Rectangle.
Step 2 -
  • Cut a piece of patterned paper from the ModaScrap Sweet Vintage Rose 6 x 6 Patterned Paper Pack so it measures 5 3/4 inches x 5 1/2 inches.
  • Layered to a black fold card which measures 6 inches x 5 3/4 inches when folded.
  • Adhere glittered Dandelion Panel to the top portion of the card.
Step 3 -
  • Die cut two fishtail banners using the ModaScrap Stitched Fishtail Banners die set, Cut so they are both approximately 2 inches long from the point to end of banner. Adhere each banner to either side of bottom section of card.
  • Add Nuvo Drops to each banner.
Step 4 - 
  • Add the sentiment "Thinking of You" from the General Sentiments Clear Stamp set to the card so it is centred between the banners.

Step 5 Inside of Card - 
  • Cut a piece of White Soft Finish Cardstock that measures 5 3/4 inches x 5 1/2 inches and adhere to inside of card.
  • Cut a piece of patterned paper from the same pack as the front so it is 5 3/4 inches x 1 3/4 inches. 
  • Cut a thin strip of black cardstock and adhere under the patterned paper to create a border.
  • Adhere to bottom of inside panel.
  • Stamp sentiments from the General Sentiments Clear Stamp set.


I hope you enjoyed my project today. Don't forget to check out the Elizabeth Craft Designs blog to see all the wonderful creations by our talented designers and for a change to win the giveaway.
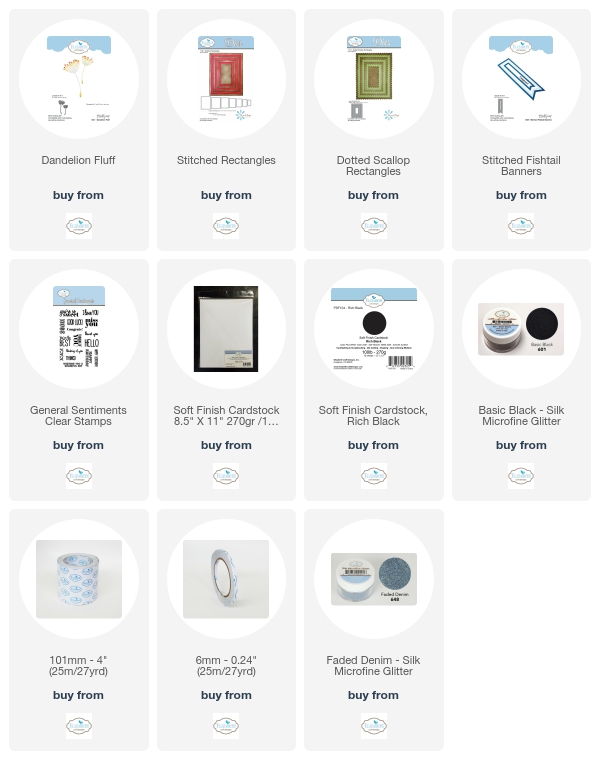


Stamps: General Sentiments - Elizabeth Craft Designs
Paper: White; Black; ModaScrap Sweet Vintage Rose 6 x 6 Patterned Paper Pack - Elizabeth Craft Designs
Dies: Stitched Rectangles; Dotted Scallop Rectangles; ModaScrap Dandelion Fluff; ModaScrap Stitched Fishtail Banners - Elizabeth Craft Designs
Other ECD Products: Clear Double Sided Adhesive Tape 6mm; Clear Double Sided Adhesive Tape 101mm; Faded Jeans Silk Microfine Glitter; Basic Black Silk Microfine Glitter
Other: Black Ink; Neptune Turquoise Nuvo Drops; Foam Tape


Wednesday, August 17, 2016

Merry Christmas


Hi everyone,

Today I have a tutorial on how to create the card above using products from Elizabeth Craft Designs. Elizabeth Craft Designs recently released 21 new colors of Silk Microfine Glitter, so for my card today I am using 3 of the brand new colors. I have also used the Christmas Tree die from the Holiday Charms sentiments from Karen Burniston's Pop It Ups Collection and the new Merry Christmas from Suzanne Cannon's A Way with Words Collection.

Here's how I created my card:


1. Cut a piece of white cardstock which measures 3 3/4 inches x 5 7/16 inches. 
  • Cut a piece of Clear Double Sided Adhesive Sheet approximately 5 inches square. Position the Adhesive sheet onto the cardstock without removing the protective backing so that you can work out roughly were you want the Adhesive to go. You will be positioning the Adhesive Sheet at an angle so it only will be adhered to one half of the card.
  • Without removing the Adhesive Sheet turn the card stock over and roughly mark the edge of the card.
  • Cut the Adhesive Sheet so it is just slightly larger than where you will be adhering onto the card.
  • Remove the protective backing from one side of the Adhesive Sheet and adhere to the card as per photo above.


2. Remove the protective backing from the Adhesive Sheet attached on the card and cover the adhesive with a piece of lace which is large enough to cover all the adhesive. Place protective backing sheet back over the lace and press down firmly to ensure that the glitter does not go where it should.
  • Pour Bright Cranberry Silk Microfine Glitter over the adhesive, brush off excess and and return glitter to the jar. Polish the glitter into the adhesive using your finger. (Note: before removing the lace from the adhesive ensure there is no glitter on the card under the lace which may end up on the adhesive).
  • Remove the lace and cover the adhesive which is remaining with Light Gold Silk Microfine Glitter.  Brush off excess and and return glitter to the jar. Polish the glitter into the adhesive using your finger.
3. Cut a piece of scrap card that is large enough to fit the Christmas Tree included in the Holiday Charms die set. Adhere a piece of Clear Double Sided Adhesive Tape on the front.
  • Die Cut the Christmas Tree using die cutting machine.
  • Lift up the protective backing from the trunk of the Christmas Tree and cover this adhesive with Chocolate Silk Microfine Glitter.  Brush off excess and and return glitter to the jar. Polish the glitter into the adhesive using your finger.
  • Remove the protective backing from the Christmas Tree and cover the adhesive with Go To Green Silk Microfine Glitter. Brush off excess and and return glitter to the jar. Polish the glitter into the adhesive using your finger.
  • Decorate the Christmas Tree using Gold/Silver and Red/Silver Glitter Dot Peel Off Stickers. 
  • Thread a piece of gold thread through the hole in the charm and adhere the charm to the top left hand corner of the card using foam tape.
4. Layer the white card to a piece of gold cardstock that measures 4 inches x 5 11/16 inches.
  • Cut a piece of red cardstock that measures 4 1/4 inches x 11 3/4 inches. Fold along the 11 3/4 inch side at 5 3/4 inches to create a top folding card. Layer white card to red folded card.

5. Cut a piece of white card that has Clear Double Sided Adhesive Tape on the front, that is large enough to cut the A Way with Words Merry Christmas. Die cut sentiment.
  • Remove the protective backing from the sentiment and cover the adhesive with Go To Green Silk Microfine Glitter. Brush off excess and and return glitter to the jar. Polish the glitter into the adhesive using your finger.
  • Adhere the sentiment to the lower part of the card as per photo above.
Thanks for visiting my blog today, hope you enjoyed my tutorial.

Supplies:

Elizabeth Craft Designs:
A Way with Words - Merry Christmas 2

Other:
Cardstock - White; Gold; Red
Lace
Gold Cord
Die Cutting Machine


Wednesday, June 22, 2016

You, Me and Coffee


Hi everyone,

Today I am playing along with the Summer Coffee Lovers Blog Hop which is being held from Saturday 17th June to Friday 24th June.


I decided to create another 'flat' card using the Cup Pop Stand Card die set designed by Karen Burniston for Elizabeth Craft Designs.

For the background of my card I used the Glitter and Lace Technique using a couple of the new Silk Microfine Glitters which are being released by Elizabeth Craft Designs soon. I also used a piece of lace which Els from ECD purchased while she was out our local Papercrafts Show a fortnight ago when she was done here in Australia.

For the spoon I used Silver Shimmer Sheetz and I also added one of the borders from the Bead Strings 1 die set to embellish the coffee cup.


For the inside of my card I added a couple more of the borders from the Bead String 1 die set on the left side of my card. I added a coffee sentiment I found in my stash and a few coffee beans which are also included in the Cup Pop Stand die set.


Stamps: Coffee & Tea - designed by Karen Burniston for Elizabeth Craft Designs; Coffee Break - Whimsy Stamps
Paper: White; Black; Pink
Dies: Cup Pop Stand Card - designed by Karen Burniston for Elizabeth Craft Designs; Stitched Circles; Dotted Scallop Circles; Bead Strings 1 - Elizabeth Craft Designs
Other ECD Products: Clear Double Sided Tape 64mm; Black Silk Microfine Glitter; Copper Rose Silk Microfine Glitter; Light Brown Silk Microfine Glitter; Paisley Stage It Stencil; Black/Silver Glitter Dots;  Silver Shimmer Sheetz
Other: Black Ink; Blending Tool; Foam Tape


Monday, January 12, 2015

Glitter and Lace Birthday


Hi everyone,

It's my turn to post a project on the Elizabeth Craft Designs Blog today.  Now that I don't need to worry about making Christmas cards for a while, I figured it was time to build up my birthday card stash.

Today I am sharing a fun technique I used to do years ago which I was reminded about recently by Els. This technique uses Silk Microfine Glitter and lace, when looking for lace to use for this technique, don't just look for the thinner laces which you might find with ribbons. Look also at lace curtaining, you should find some fun designs which will also work with this technique if you look around and you only need to purchase the minimum amount if you are buying curtaining. I once found lace curtaining which had an owl on it and if you know me ... that is important haha!

Here is how I created my card:


1. Cut a piece of white card which has Transparent Double Sided Tape Sheet adhered to the front of it so it measures 5 inches x 3 3/4 inches. I have selected a piece of floral lace curtaining and you will also need two contrasting colors of Silk Microfine Glitter. NOTE: in the photo above I show two different colored pink glitters, but the lighter pink wasn't enough contrast for the look I wanted so I used Warm Diamond Silk Microfine Glitter in it's place. 


2. Remove the protective backing from the adhesive paper which is adhered to your card and place the lace curtaining over the adhesive. Use your bone folder to smooth out the lace so it is attached well to your adhesive tape and that there are not bumps where glitter can go where you don't want it.


3. Pour over the lace/adhesive piece Peony Silk Microfine Glitter so it covers all the card. Use a brush to remove all excess glitter and return this to your container. Polish in the glitter with your finger while the lace is still in place. Brush off any loose glitter again if necessary. Carefully remove the lace from your card making sure you don't touch the white areas on the card.

4. With the lace remove add the Warm Diamond Silk Microfine Glitter, only apply enough of this glitter so you can use it to cover the card as this may get contaminated with the dark glitter so shouldn't be put back into the container. You can always add more to your card as needed. Remove access glitter and polish the glitter with your finger.

5. Layer glittered background onto a piece of white card which is 5 1/4 inches x 4 inches and then onto a folded pink card that is 5 1/2 inches x 4 1/4 inches when folded.

6. From white card die cut a medium sized tag from the Tags die set.

7. Adhere a piece of ECD Transparent Double Sided Adhesive Tape 64mm to the back of a piece of pink card and use the Happy Birthday (783) die to die cut the sentiment. Attach sentiment to tag as shown in photo.

8. Use the Small Dragonfly die to die cut a piece of Gold Metallic Shimmer Sheetz (main body) and White Iridescent Shimmer Sheetz (accessory pieces) assemble pieces and attach dragonfly over the hole on the tag. NOTE: if you apply ECD Transparent Double Sided Adhesive Tape to the back of the Shimmer Sheetz before die cutting, this makes it easier to assemble pieces.

9 Use double sided foam tape to attach tag to the lower right hand side of card.

Thanks for stopping by today!

Supplies: 
Elizabeth Craft Designs
Tags (763)
Happy Birthday (783)
Small Dragonfly (712)
Warm Diamond Silk Microfine Glitter (639)
Peony Pink Silk Microfine Glitter (616)
Gold Metallic Shimmer Sheetz (SS 0212)
White Iridescent Shimmer Sheetz (SS  0102)
Transparent Double Sided Tape Sheet (502)
Transparent Double Sided Tape 64mm (508)
 
Other
White Card
Pink Card
Lace Curtaining
Foam Tape