Showing posts with label Stairstep Card. Show all posts

Friday, October 23, 2020

Sparkling Snowflakes


Hi Crafty Friends

Today we are taking a look back at Divinity Designs October Release. For more inspiration using the October Release and to see the other designers projects, be sure to visit the Divinity Designs Blog .

For my card today I created a Stair Step Pop Out card, using Divinity Designs Stair Step Pop Out Card with Layers die set. For the layers of my card I used papers from the Serenity Snowflakes Slimline Paper Pad.

To decorate the card I used the Sparkling Snowflakes Stamp/Die Duo Set and the Joy To the World Script die set.

adhered the Stair Step card into a side folding card using the A2 Landscape Card Base with Layers die set.


To decorate the front of the card, I white embossed the two larger snowflakes included in the Sparkling Snowflakes Stamp/Die Duos and layered them on top of each other.

I then used the Merry Christmas with Layers die set to add the Christmas sentiment to the card.

Supplies:

For your shopping convenience, all products are linked below. Compensated affiliate links are used where possible with no extra cost to you. This helps me to continue to share all the projects I include on my blog. For the benefit of my Australia readers, I have started to include some links to Australian stores when available. Please note I only use and share products I love.






Wednesday, August 7, 2019

Sending You A Smile


Hi Crafty Friends,

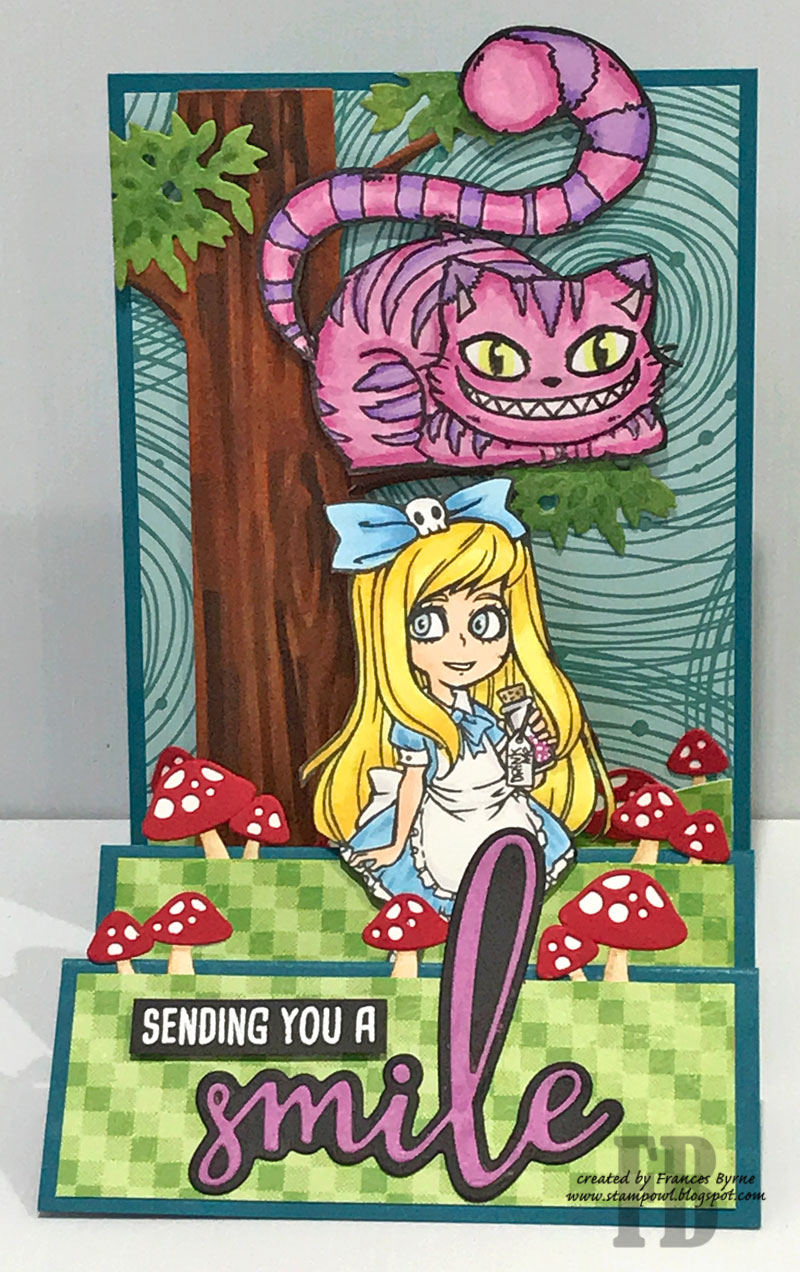
Today I am sharing a Stairstep Card I created recently, it's been a while since I have made this style of card and have had it on my to do list for some time.

As this was an Alice in Wonderland themed card I decided to use papers with a fun design on them. 

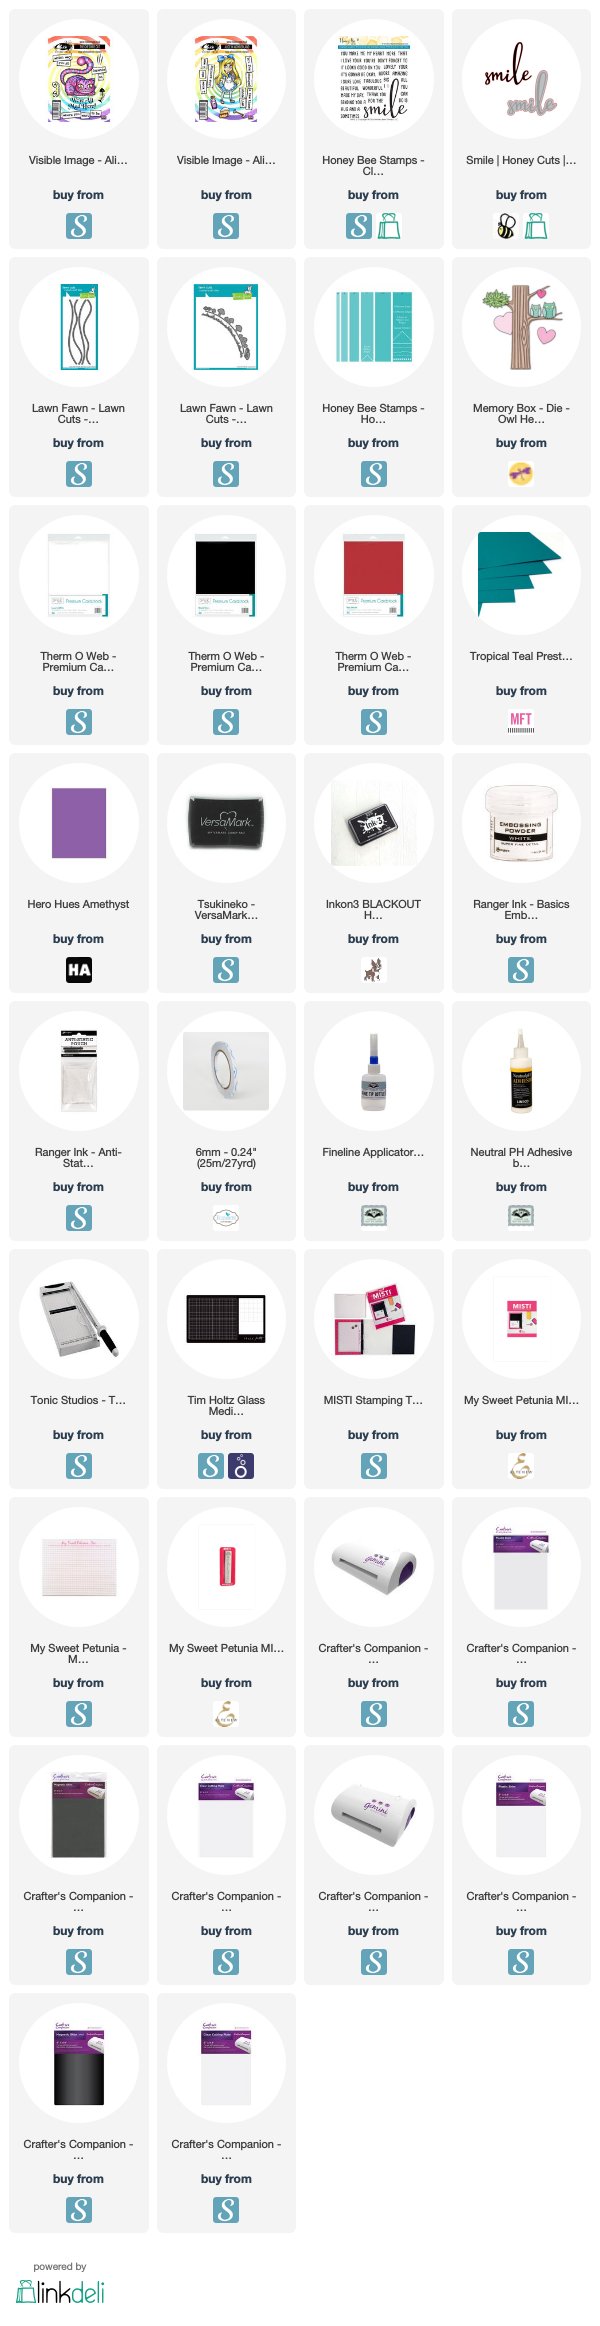
For the back panel I used the tree from Memory Box Owl Heart Tree die set, coloring the tree with Copic markers. Sitting in the tree I added the Cheshire Cat from Visible Image.

On the middle panel I added Alice also from Visible Image.


I added mushrooms using the Lawn Fawn Mushroom Border die set which I added randomly on each of the three panels.

For the front panel I used the Smile stamp and die set from Honey Bee Stamps for the sentiment.


For the inside of the card I added some grass and mushrooms from the Lawn Fawn Mushroom Border die set. 

The sentiment is an older Riley & Company stamp which I think is no longer available. 

Supplies:
For your shopping convenience, all products are linked below. Compensated affiliate links are used where possible with no extra cost to you. This helps me to continue to share all the projects I include on my blog. For the benefit of my Australia readers, I have started to include some links to Australian stores when available. Please note I only use and share products I love.

You Always Seem To Make Me Grin Sentiment Stamp - Riley and Company (retired)


Wednesday, May 9, 2018

ECD Design Team Focus on New Release - Joset Designs


Hi Crafty Friends,

It's time for a new release over at Elizabeth Craft Designs, this is the first of three releases which will be happening over the next month. 

Today the Elizabeth Craft Designs Design Team are doing Focus on New Release blog post on the Elizabeth Craft Designs blog. This time around we are focusing on Joset van de Burgt or Joset Designs, there are 12 new die sets and 2 new sentiment stamps being released.

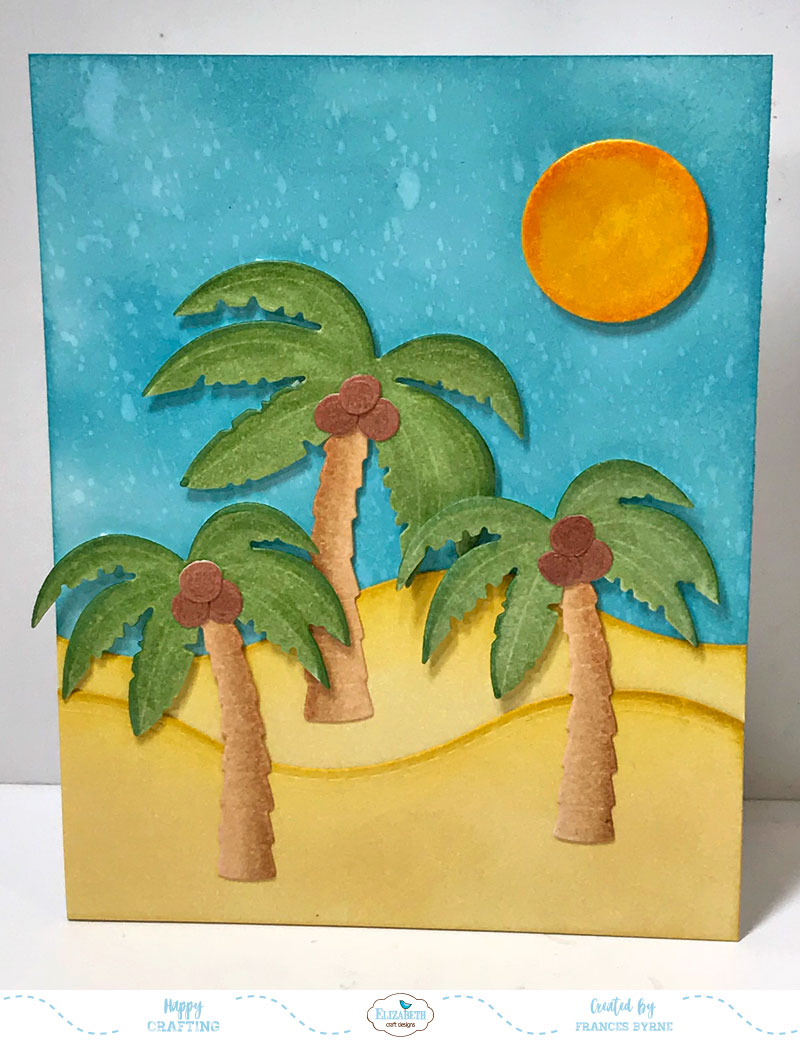
For my card today I created a Stair Step Card using two of Joset's new die sets and one of the stamp sets. Here I have used the Sand Castle; Palm Trees and Summer Fun Clear Stamps sets along with the Adventure Edges die set.

Here is how I created my card:


Step 1 - 
  • Cut a piece of white cardstock to measure 4 1/4 inches x 11 inches.
  • Score along the long edge at 2 3/4 inches; 5 1/2 inches; 7 1/4 inches; 8 3/4 inches and 9 3/4 inches.
  • Starting with the 2 3/4 inch score line alternate folding with mountain and valley folds starting with a mountain fold.
  • Sponge color onto the back of the 2nd and 4th panels (the ones not seen from the front) to match the color used on the sand of the panels adhered to the finished stair step card.
Step 2 - 
  • Using the sand/hill border from the Adventure Edges die set, die cut 4 sand borders which are 4 1/2 inches wide by a little higher than the panel the sand will be adhered too. (Tip: make them higher as you can always trim them down if too high).
  • Sponge a sand colored ink over all sand panels (Gina K Designs Sweet Corn ink used here).
  • Adhere two of the sand panels to the "stair steps" on the front of the Stair Step Card.

Step 3 - 
  • Cut a piece of white cardstock to measure 4 1/4 inches x 5 1/2 inches.
  • Sponge Broken China Distress Ink over the whole panel and spritz with water using a Distress Sprayer.
  • Arrange the remaining two sand panels you created in step 2 on top of each other to get a look you like. (Trim bottom if necessary).
  • Adhere the sand to bottom of panel.
Step 4 - 
  • Using the Palm Trees die set, die cut one large palm tree and two small palm trees from white cardstock. Color pieces using Copic markers. (If preferred you can die cut pieces from colored cardstock).
  • Assemble palm trees and adhere to panel as per photo above.
Step 5 - 
  • Using the circle from the Sand Castle die set, die cut one solid circle and color yellow for the sun.
  • Stamp the sunglasses from the Summer Sentiments Clear Stamp set onto the sun. Draw in a mouth using a black marker. 
  • Adhere sun to top left hand corner of cardstock panel.
Step 6 - 
  • Stamp the sentiment "Soak Up The Sun" to top left hand corner of card.
Step 7 - 
  • Adhere the bottom half of the decorated card panel to the back part of the Stair Step Card.


Step 8 - 
  • From the Sand Castle die set die cut one of everything from white cardstock.
  • Sponge a darker colored ink to all the sand castle pieces than the one you used for the sand (Catherine Pooler Shea Butter used here).
  • Assemble sand castle and adhere to the left side of the middle step.
  • Color bucket and spade in colors of your choice and adhere next to sand castle.
  • Color the solid circle and beach ball overlay in colors of choice. Layer together and adhere to the left side of the front step.
Step 9 - 
  • Stamp the sentiment "Happy Summer" from the Summer Sentiments Clear Stamp set onto white cardstock using black ink.
  • Die cut sentiment using the pinked circle from the labels die set. Adhere to front step and trim off the bottom edge of circle.

Step 10 - 
  • A sentiment can be added to the inside of the back panel if desired. For my card I added a sentiment and two more images from the Summer Fun Clear Stamp set.
Don't forget to visit the Elizabeth Craft Designs blog to see what the other Design Team have created using the Joset Designs new release dies.


Supplies:
Elizabeth Craft Designs:


Other:
Shea Butter Ink Pad - Catherine Pooler

Thursday, September 14, 2017

Here's the Story


Hi Crafty Friends,

It's challenge time with my friends over on the CCEE Stampers challenge blog. Kelly McKown-Santi our challenge hostess for the month continues to issue the challenges.

 We are celebrating Roald Dahl Day! Yesterday was Roald Dahl Day so for our challenge create a card using any one of his book as inspiration. There are so many!


This girl sitting reading a book, reminded me of the cover on Roald Dahl's Matilda book ... on the illustration Matilda is sitting on a wooden box surrounded by books, but it is similar so I decided to go with this image for my card this week. I also found some book designer paper which I thought might resemble a library.

For the base of my card I have used the Spellbinders Happy Day die set to create a Vertical Stair Step Card. I used the "stairs" to stamp out a birthday greeting, seeing I normally need more birthday cards than anything else.


Here is a look at my card when it is closed ready to be placed in an envelope.

Don't forget to check out the CCEE Stampers blog (goes live 12 AM EST) to see the rest of the creations the CCEE Stampers created this week. You can also see more details of their creations on their individual blogs:


Vicky Gould
Kelly McKown-Santi


Stamps: a la modes Here's the Story - MFT Stamps; Happy Happy Happy - Lawn Fawn
Paper: White; Pink; Designer Paper - Bo Bunny
Dies: Happy Days - Spellbinders; Stitched Fishtail Banners - Elizabeth Craft Designs
Other: Black Ink; Foam Tape; Copics


Tuesday, July 25, 2017

Congrats on your new Baby Boy


Hi Crafty Friends,

My niece recently gave birth to a baby boy, so of course I needed to create a card to celebrate his arrival.

For the base of my card I have used Spellbinders Happy Day die set to create a Vertical Stair Step Card.


To decorate my card I used Eline's Stork & Baby die set from Marianne Designs. I added the letters "B A B Y" down the steps and added the "Boy" circle sentiment to the right hand side of the card.


And finally my card closed ready to be placed in an envelope.

Stamps: Baby - Elizabeth Craft Designs
Paper: White; Snips & Snails DP - Doodlebug Design Inc
Dies: Happy Days Pop Up - Spellbinders; Eline's Stork & Baby - Marianne Design; By the Letter Upper Case Alphabet - MFT Stamps;  Round  Vignette Boy Insert - Frantic Stamper Inc. ; ModaScrap Stitched Fishtail Banners - Elizabeth Craft Designs
Other: Black Ink; Foam Tape


Friday, October 7, 2011

Welcome Little One!

BabyDresser2-wm

Hi everyone,

My card today is a project that I made at a stamp club that I attend each month. This time round our project was given to us by my friend Tracy who showed us how to create this in baby dresser card.

My original card I made had a punched bear on it, but when I came home and looked for something to stamp onto the tiny onesie I discovered a cute bear and giraffe stamp which I had to use on my card.

BabyDresser-wm

Here is another view of my baby dresser … I had a lot of fun creating this and I am sure I will make more in the future.

Stamps: Sentiment – SU; Bear & Moon – Hero Arts; Giraffe – Fiskars
Paper: White; Blue
Other: Black Ink; Pearls; Modern Label Tab Punch; Word Window Punch; Hanger Paper Clip; Foam Tape; Copics

aa-owl-signature

Tuesday, August 9, 2011

I’ve Got My Eye On You!

MFT ISee wm

Hi everyone,

It’s time for another MFT Stamps Creative Challenge. For the August Design Team Creative Challenge the theme is....  "Fun Folds” Now I am a big fan of fun fold type of cards, so I loved it when I saw this month’s challenge.

I decided to create a Double Sided Stair Step card this time round, this is something we were playing with recently at a club I attend each month so wanted to play. This is another variation of the stair step card.

MFT ISee1 wm

For my card I used one of the new MFT Stamps à la modes I Spy stamp set. The numbers down the sides of the card are from the By The Numbers Die-namics & Stamp Set. The sentiment was stamped and layered using the Die-namics Sweet Stack Labels, it looks a little different because I cut the bottom off to make it flush with the bottom of my card. If you look at the top photo of my card you can also see that I used the Die-namics Oval Chain Border in the middle stair in front of the à la modes girl. I added an epoxy sticker over the glass portion of the magnifying glass.

MFT_OwnYourStory_PreviewGraphic

MFT_OwnYourStory_PreviewGraphic

OvalChainBorder

MFT ISee2 wm

Here is the inside of my card, sorry it was very hard to take a photo of this. I used two more of the sentiments from the set.

In 2011, MFT is working harder than ever to inspire you, and we have come up with something we think you'll really enjoy. Our Design Team Creative Challenge is a new monthly feature, where we challenge our design team to explore their creative side using a specific theme, product or technique. This month, we're On a Roll! Visit Kim's Blog for a full list of designers that have taken up the challenge!

Stamps: à la modes I Spy – MFT Stamps
Paper: White; Black; Red; Lost & Found DP – My Mind’s Eye
Die-namics: By The Numbers; Sweet Stack Labels; Oval Chain Border
Other: Black Ink; Epoxy Sticker; Copics

aa-owl-signature

Friday, May 27, 2011

Life Is A Circus …. It’s A Riley Blog Hop!

Riley CircusStairStep2

Hi everyone!

Welcome to Riley and Company’s blog hop! Come join us as the Riley and Company Design Team take you on a journey discovering all sorts of Riley fun! If you didn’t start at the beginning of this hop, you might want to head on over to the Riley and Company blog so that you don’t miss out on anything.

Be sure to leave a comment on everyone’s blog as you travel from blog to blog as each of the Riley and Company Design Team members will be giving away one new Riley stamp to a random person who leaves a comment on their blog!

This is a massive release, our biggest ever! The circus is coming to town! We have 16 new Riley images; 22 accessory images and 21 sentiments, all with a circus theme. All are NOW available from the Riley and Company Store.

Riley CircusStairStep wm

For my first card I created a stair step card, this is a hard card to take a good photo of, it looks so much better in real life. I used 5 of the new Circus Riley stamps on my card …. Ringmaster Riley; Clown Riley in Car; Clown Riley; Riley with Seal and Stilts Riley. I have also used a number of the circus accessory stamps from the Circus Accessory set.

I again used the Cricut Carousel Cartridge to create the big top at the back of my stair step card.

Riley CircusHorse wm

For my second card I used Sophie on her horse, doesn’t she look so pretty! I don’t even like sitting on a horse let alone standing on one LOL!

Well that is about it from me for today, now it is time to hop on over to the blog of Heather Prince and see what stunning creations she has install for you today.

Enjoy the rest of the hop and thanks for dropping by! Don't forget to leave comments on all the blogs, so that you have a chance to win some blog candy.

Stamps: Ringmaster Riley; Clown Riley; Clown Riley with Car; Riley with Seal; Slilts Riley; Sophie on Horse; Circus Words Sentiments; Circus Accessories – Riley and Company
Paper: White; Red; Orange; Yellow; Party Animals DP – Kaisercraft
Other: Black Ink; Cricut; Cricut Carousel Cartridge; MFT Die-namics Star Die; Rhinestones; Ribbon; Foam Tape; Copics

aa-owl-signature

Tuesday, June 1, 2010

Cute As A Bug!

Alota-Bug-Stair-Step2-wm

Hi All!

It’s time for another challenge over on the  Alota Rubber Stamps blog. Our challenge hostess this week is Susan Uncle.

Susan challenge us to FOLD FOLD  (Lots of folding) Challenge. A Double Stair Step card has lots of folds so I decided to create one of those as it has been a while since I have. I used 2 of the new Alota Stamps that were released in May to create my card. These are “Andrea & Ria Make Up Bugs” and “Millie L. Dress Up Bug” . The sentiment is from the “Dress Up Words” set.

Besides all the folds on my card, I also added folds to my ribbon on the front of my card as I wanted it pleated … so I think I have well and truly covered this challenge hehe!

Alota-Bug-Stair-Step-wm

Here is another view of my card.

Do you want to play along???? you can use any stamps you want, although if you have Alota Rubber Stamps we would love to see them on your cards.

You have until the 15th June to complete this challenge, you can enter as many entries as you wish for a better chance of winning!!! You have a chance of winning some wonderful stamps if you card/project is selected randomly from all the entries received.


Stamps: Andrea & Ria Make Up Bugs; Millie L. Dress Up Bug; Dress Up Words – Alota Rubber Stamps
Paper: White; Black; Red; DP – Basic Grey
Other: Black Ink; Yellow Ribbon; Foam Tape; Copics

aa-owl-signature

Monday, March 8, 2010

It’s A Surprise Party!

MFT-BIrthday-Girl-Invite-wm

Hi everyone,

It’s challenge time over on The Pink Elephant blog. This week the challenge is to create an Invitation.

Of course I just had to grab my new MFT Stamps for this challenge, Invitation Only, Who’s That Birthday Girl both of which were released last week. I also used Make the Date, which was released earlier in the year.

MFT-Birthday-Girl-Invite3-w

My card is a Side Stair Step card, which are a lot of fun to create. I paper pieced the girls skirt and the birthday cake.

Don’t forget to check out The Pink Elephant blog to see what the rest of the design team have created this week.

Stamps: Who’s That Birthday Girl; Make The Date; Invitation Only – MFT Stamps
Paper: White; Pink; Purple; DP
Other: Black Ink; Pink Grosgrain Ribbon; Purple Button; Pink Brads; Copics

 aa-owl-signature

Tuesday, December 22, 2009

Hi Buglet!

alota-hi-buglet-wm

Hi everyone,

I hope you are all enjoying your weekend. My card today is a “Side Step Card” these are so much fun to create and pretty easy too. Today I am using one of my favorite Alota bug stamps … this one is called “Cutie in Mirror” and what a cutie it is too!

I have had this image stamped and colored sitting in the box of scraps on my desk for the past couple of months, so I thought it was about time I did something with it.

alota-hi-buglet2-wm

Recipe:

Stamps: Cutie In Mirror; Sentiment – Alota Rubber Stamps

Paper: White; Black; Red; DP

Other: Black Ink; Black Brads; Black Grosgrain Ribbon; Copics

aa-owl-signature

Wednesday, December 16, 2009

Little Princess!

PP-Princess-Castle-wm

Hi everyone!
It is time for another Pretties Wednesday Challenge & Blog Hop. If you didn't hop onto my blog via Christi Thorsen's blog then you might want to hop back over to the very start of the blog hop which is at Christie Ortman's blog.

This week the challenge is hosted by Christi Thorsen and she challenged us to use eyelets in our creations …. not too difficult this week *smile*. Although I must admit my poor eyelets have become very neglected since the introduction of brads, so it is good to have challenges like this.

PP-Princess-Castle2-wm

I used Paper Pretties “Lady Sophia” to create my card. I decided to create a Side Stair Step card …. a princess needs a castle right! I seem to be having a run of making these type of cards this week …. especially after I created the Double Sided Stair Step card that I posted on my blog yesterday. I decided to create this one so it looked a little like a castle, so I also cut down at the top fold and then folded those pieces in to resemble the top of the castle.

I still need to work out how I was going to use my eyelets on my card, and I found these cross eyelets that I got from a Papercrafts show earlier in the year so decided to use those.

PP-Princess-Castle1-wm

Want to play along with us
How to Enter: Create a card using the challenge above and any Paper Pretties stamp set(s) you have. Upload your project to the Paper Pretties gallery. Please include it in the Weekly Challenges category and use keyword PWC82.
Deadline: 6pm EST Tuesday, December 22nd.
Prize: $15.00 coupon to the Paper Pretties Boutique.

************

Paper Pretties is launching it brand new web site today .... so to celebrate the launch and Christmas it is time for a Sale! 35% everything in the store. Just use the coupon code newsite when you check out ... no space and it is case sensitive.

The sale will run from Tuesday at Midnight until Saturday night at 11:59pm.

************

Don’t forget to check out the rest of the Paper Pretties Design team to see what they came up with for this challenge.

Now to continue on the hop you need to head on over to Heather Lee-Reppen’s blog to see what she has created for this week’s challenge.

Recipe:
Stamps: Lady Sophia – Paper Pretties
Paper: White
Other: Black Ink; Fancy Tags Die; Cross Brads; Grosgrain Ribbon; Foam Tape; Copics

aa-owl-signature