Monday, July 21, 2025
Christmas Mugs

Friday, February 21, 2025
Time For A Little Something
Wednesday, September 6, 2023
Just for You
Wednesday, June 28, 2023
Birthday Wishes
Hi Crafty Friends,
My card today is a Birthday themed Mini Slimline Pop-up card that I created recently.
My Mini Slimline card measures 3 1/2 inches x 6 inches. I used Mini Slimline dies from Divinity Designs to cut the card base and the layers.
To decorate my card I used Waffle Flower Crafts new Stacking Box die and the coordinating stencil set. I die cut the box lids from white glitter cardstock and the bows from holographic card.
For the background of my card I used Made To Surprise's Ditsy Embossing Folder.
For the sentiment I used Honey Bee Stamps Birthday Wishes stamp/die set embossing both sentiments using silver embossing powder.
Finally I added some matte silver pearls randomly around the card.
For the inside of my card I created a pop-up card using Waffle Flower Crafts Inside Pop-up Stacks die set. I again used the coordinating stencil to decorate the layers and the Stacking Box die set to add the white glitter lids and holographic bows to each of the presents.
I added a birthday sentiment to the top right hand corner.
Finally I added a strip of holographic card to each side edge of the card.
Wednesday, February 8, 2023
Concertina Birthday
As there is not much room on the inside to write a personal greeting, I added a panel on the back of my card. I added a stamped sentiment and there is plenty of room for a hand written message.
Tuesday, November 29, 2022
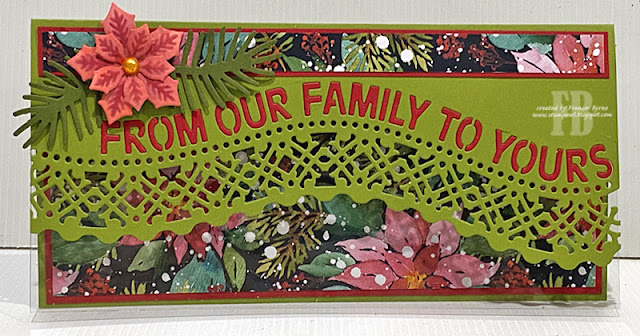
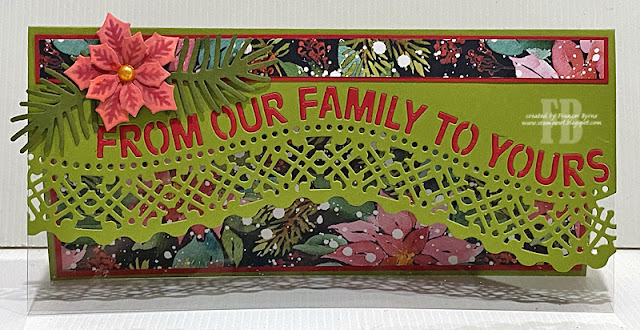
From Our Family To Yours
Hi Crafty Friends,
I have two Christmas themed Slimline cards to share with your today.
For this Slimline card, I used the width of a A4 card to determine the width of my card. This makes the most of my cardstock. I completed card is 8 1/4 inches x 4 inches.
I used different patterned papers for my cards, but they are both from the same pad. I paper pieced the letters to create the sentiment using red cardstock, which makes it easier to read.
To finish off the front of my card, I added the pointsettia and branches using two die sets from Divinity Designs ... Peaceful Poinsettias and Pinecone & Pine Branches die sets.
Thursday, November 24, 2022
Warm Wishes
It's challenge time with my friends over on the CCEE Stampers challenge blog. Maryann Einam our challenge hostess for the month finishes off the month with one last challenge.
For our challenge this week, Maryann tells us ... What ever the season it is great to get away, celebrate the day with a seaside holiday.
Right now I am in Christmas card making mode, the majority of my cards between now and Christmas will be Christmas themed where possible. So when I was thinking about the beach I was thinking how I can adapt this for Christmas. Living where I do in Australia, we don't get snow and of course it is summer for us at Christmas time. I love snowmen, but of course the closest we get to snowmen here is either a bucket of water with some bits floating in it, or a sand version. So I decided to create sand snowmen or sandmen I guess they are.
As you can see I created a Centre Step Card using Divinity Designs Centre Step with Layers die set. For the background and sand for the bottom of the card and sandmen, I used the Beautiful Beaches patterned paper also from Divinity Designs.
To decorate my card I created two palm trees using an older palm tree die set from MFT Stamps, I added Christmas lights to the trunk using a Christmas light die also from MFT Stamps.
The sandmen or sand snowmen were created using Karen Burniston's Snowman die set.
I added a sun using a circle die to the top left corner of the centre panel and added some seagulls using an older Couture Creations die set.
Finally I added a sentiment to the bottom right using Waffle Flower Crafts Merry Christmas duo stamp/die set.
For the inside of the card, I added a white panel, adding sand to the bottom of the panel.
I used the Hot Foil plate that coordinates with the Merry Christmas Duo set to create the foiled sentiment, using the Solid Foil Plate so I could use the negative image of the sentiment. I also added the "Happy New Year" sentiment underneath.
Friday, October 14, 2022
Quilted Tile Fall
I am sharing two fall themed cards with you today, sharing products from Divinity Designs.
For my first card, I created an A2 Landscape card using Divinity Designs A2 Landscape Card Base with Layer die set. For the background I used the Quilted Tile Background which I adhered over a checked paper from the Thanksgiving Gnomes Paper/Die Duo set.
I added a sentiment from the Let's Celebrate stamp set, which I layered using the Double Stitched Ovals and Ovals die set.
To decorate the card, I added the gnomes and leaves from the Thanksgiving Gnomes Paper/Die Duo set.
For my second card, I created a Portrait style A2 Card using the A2 Portrait Card Base with Layer die set. I have again used the Quilted Tile Background, which this time I layered over one of the plaid papers from the Autumn Plaid Paper Pad. I layered this panel onto a black rectangle using the Matting Rectangle die before layering it onto my card base.
To decorate my card I added the scarecrow from the Happy Fall Stamp set. The sentiment is also included in the stamp set and I layered this using the Double. Stitched Circles and. Circles die sets.


