Showing posts with label Concord & 9th. Show all posts

Monday, October 2, 2023

It's Your Birthday


Hi Crafty Friends,

Thanks for stopping by my blog today. Today I am sharing a Slimline Pop-up card I created recently using stamps, dies and foil plates from various companies.


For the front of my card, I pulled out my Studio Katia Dotted Slimline 2 die set, to create all the layers of my card. I used a rainbow coloured patterned paper for the scallop layer.

The girl is die cut using Concord & 9th's Celebration Squad die set. I love all the different options you have in this die to create girl images.

I added a balloon to the girls hand, using a Lawn Fawn die set ... Outside In Stitched Balloon Stackables.

The sentiment is from Alex Syberia, a new company for me. It is a foil plate with a coordinating die to die cut out the sentiment. The sentiment was a little smaller than I was excepting, but I am more than happy with it. I foiled the sentiment with black foil and used a foiled foil plate so I could get the reverse image of the sentiment where the letters are white and the outline black.


For the inside of my card, I created a pop-up card, using Karen Burniston's new Stocking Pop-up die set. The pop-up mechanism in this die set, is generic and can be used with whatever you wish, in my case I added balloons using balloon dies from the same set that I used on the front. When you open the card, the balloons move up.

To finish off the card, I added a stamped sentiment using a Honey Bee Stamps Birthday Bliss stamp/die sets.


Wednesday, September 6, 2023

Just for You


Hi Crafty Friends,

Today I am sharing a Mini Slimline card I created recently.

I used Mini Slimline dies from Divinity Designs to die cut all the layers and card base for this card.

To decorate my card I used Concord & 9th's Weekend Market die set. 


I kept the inside of this card simple, just adding a few layers and a stamped sentiment.


Thursday, August 3, 2023

For the Record


Hi Crafty Friends,

Thanks for visiting my blog, today I am sharing a music themed card.

A few weeks ago, Sam Calcott shared a tutorial on how to use the Creative Craft Products High Centre Stepper Card from the Step on Up 2 Collection, and turn it into a Inside Out Stepper Card.This is done by using two card bases and folding the bottom fold lines in the opposite direction. You can see her tutorial here. I hadn't planned on buying this die set as it is a smaller stepper card die, and I have others I do use a lot. But when I saw this card by Sam, and I was placing an order anyway, I added it to my cart. I will probably use it in this way when I use it again.

To decorate my card I used Concord and 9th's For the Record stamp and coordinating die sets. 

Here is a look at my card when it is folded ready to be placed in an envelope. When closed the card measures approximately 5 3/4 inches x 7 1/4 inches.


As you can see I decorated the inside of my card. I used two music themed sentiment stamp sets from Honey Bee Stamps to add both sentiments.

I die cut a few of the records from my left over background panel for the front and added them. around the sentiments.

For the centre of the card, I added a panel with the You Rock symbol from MFT Stamps.

Other Supplies:

  • For the Record Stamp Set - Honey Bee Stamps (retired)
  • Rock Star Stamp Set - Honey Bee Stamps (retired)


Wednesday, May 17, 2023

Record Shop


Hi Crafty Friends,

Today I am sharing a fun 3D card I created recently using dies from Concord & 9th.

I have been loving the cute little shops I have been seeing online using the cute Window Shoppe Card Base die from Concord & 9th, so I decided to purchase the die along with a few other things from a recent release. As one of the other things I purchased was record themed, I decided to use the Window Shoppe Card Base die set to create a record shop. Apparently the day I made this card was actually "Record Shop Day", yes it is a thing I remember my husband and I going to a few some years back. I have had so many things to post on my blog, that it has taken almost a month to get it posted on here.


I love the "record" sentiment and the tiny record that comes in Concord & 9th's For the Record die set, it was perfect to use for the sign of my shop ... the shop word came from the Window Shoppe Base die set.


The die set also included a die to make a 3D crate and a record cover, so I die cut them three dies to add to the inside of my store, I added a brown panel under the crates to look like a table/bench. I added a couple more records to the wall.


For the inside of the card, I added the ovals using dies also included in the For the Record die set. I added a stamped sentiment from Honey Bee Stamps For the Record stamp set, which is no longer available. Concord & 9th did release a record themed stamp set, but as I have so many other stamp sets of this theme I decided not to get it.

I then die cut a larger record using dies and stamps from Sugar Pea Designs, this is probably also no longer available as it's pretty old.

I used hands from MFT Stamps In Good Hands die set to make it look like someone holding the record.

Other Supplies:

For the Record Stamp Set - Honey Bee Stamps (discontinued)


Thursday, February 9, 2023

Valentine Money Cards


Hi Crafty Friends,

Welcome to my blog, today I am sharing two Money Cards I created as Valentine gifts for my Grandchildren.

At the beginning of December, MFT Stamps released a Christmas Cash Card Kit which included stamps and dies to create money holders. The stamps and dies available allow you to make holders to use with either notes or gift cards. Of course just before Christmas there was a Christmas theme, but these can be used for so many occasions including birthday, tooth fairy, gas money, coffee etc. As I sometimes give money for birthday gifts it was definitely something I needed to add to my stash.


My first money holder is for my granddaughter. I used an older Penny Black stamp set to help decorate the money holder. The "I Heart You" sentiment was included in the Penny Black stamp set,  The other sentiment is from MFT Stamps Giftable Greetings stamp set.

The money is rolled up and fits into a lip balm holder.


For the money holder for my grandson, I pulled out Concord & 9th's Monster Love stamp set. I also added the "Love You" sentiment included in the stamp set.

The papers used on this money holder is from Whimsy Stamps' Rainbows Paper Pad.


For the back of the money holders I added a heart, using Creative Craft Products Torn Nested Hearts die set. I added two sentiments to the heart both of which are from Divinity Designs Fill My Heart Stamp set.


At the bottom of the back of the money holder, there is a slit so that the money can be removed without ruining the money holder.

Other Supplies:
I Heart You Stamp Set - Penny Black (retired)


Monday, September 19, 2022

From The Whole Herd


Hi Crafty Friends,

Thanks for visiting my blog today. I have a fun birthday card to share with your today using products from Made To Surprise and MFT Stamps.

Here is a quick video to see my card in action.


Earlier in the year I purchased the Made To Surprise By Sam Calcott's 5 x 7 Fabulous Flip die set. As I had enjoyed making the cards I created with that die set I decided to purchase the 6 x 6 version as well which has four smaller squares on the front. 

I had also recently purchased MFT Stamps SY Happy Birthday Herd stamp set, which includes six cute square animal scenes similar the the selfie stamp sets they have sold in the past. Of course I decided to combine the two sets to create my card.

For my card I decided to include two of the images on the front squares and have the other two for a sentiment. The "Howdy" and hoof prints are from Elizabeth Craft Designs Life is Better on the Farm stamp set. The birthday sentiment is from an older MFT Stamps stamp set called The Whole Herd.

I added a strip of cardstock scored to form an "M" shape to the inside of the card, to make this card into a tent style card. This makes it easier to display the card.


When you pull the right side of the card where it says "Pull",  the front of the card flips to reveal the other side of each panel. As you can see I added more of the images and two more sentiments. This time I used sentiments from both of the MFT Stamp stamp sets ... SY Happy Birthday Herd and The Whole Herd. 

I also added the large Happy Birthday die cut sentiment onto the pink panel underneath the frame which is from Concord and 9th.


I added a card panel to the back of my card, for a place to add a personal sentiment when I am ready to give this away. I added two more of the images to the card, seeing I had them already coloured and layered.

I added the "Holy Cow" sentiment which is another sentiment from the Elizabeth Craft Designs stamp set that I used on the front of my card. The "You're how Old?" sentiment is an older wood mounted I have had in my stash for years from Stamp It (Australia).

Other Supplies:

You're How Old? Wood Mounted Stamp - Stamp It Australia (discontinued)


Thursday, July 14, 2022

Seams Impossible!


Hi Crafty Friends,

It's challenge time with my friends over on the CCEE Stampers challenge blog. Lois Bak our challenge hostess for the month, continues to issue the challenges. 

Apparently today is National Tape Measure Day. My challenge to you is to make a card incorporating a tape measure or something else used in sewing on your card – either some kind of a sewing-related image or perhaps stitching.


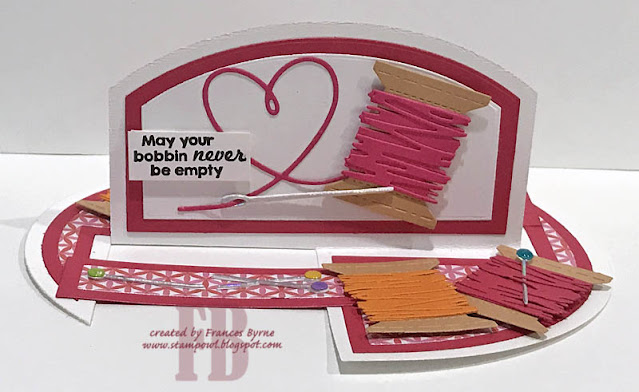
My card today is one that is called an Impossible Card. I made a few of these about 4 years ago, however I always had trouble getting the centre upright portion of the card to stay upright, so I didn't bother making any more since. I recently came across four sets of dies from Creative Craft Products that make this style of card, one of the sets was an oval shape so I decided to give it a try. I have to say I am more than happy with the die and how it works and the centre panel has stayed upright, like it is supposed to so I guess I will be making more.

To decorate my card used a stamp set from Your Next Stamp ... Sprinkles Sew Cute stamp set and also a die set from Concord and 9th ... Sew Lovely.


I decorated the back of my card using more die from the Sew Lovely die set from Concord and 9th. The sentiment is from an older Art Impressions stamp set called Quilt Set.

Don't forget to check out the CCEE Stampers blog (goes live 12 AM EST) to see the rest of the creations the CCEE Stampers created this week. You can also see more details of their creations on their individual blogs:


Other Supplies:
Quilt Set Stamp Set - Art Impressions (discontinued)


Monday, April 4, 2022

Pink Floral Slimline


Hi Crafty Friends,

Today I am sharing a floral birthday Slimline card using products from Pinkfresh Studio and Concord and 9th.

For the background of my card, I used Concord and 9th's Quilted Card front die to create the stitched diamond design on the white rectangle panel. After running the design through my die cutting machine once, I then repositioned the background carefully and die cut a second time to create the slimline background. I then used Pinkfresh Studio's Slim Diagonal Stitched Rectangles die set.

For the flowers I used Pinkfresh Studio's In The Meadow Washi Tape. I layered the washi tape onto white cardstock and then used the coordinating die to die cut the panel. I layered the washi flowers onto the to and bottom of the white slimline panel. Some of the flowers I glued directly to the slimline panel and others I added using foam tape.

The birthday sentiment was created using Pinkfresh Studio's Brushed Sentiments Hot Foil Plate using gold foil and also the Solid Hot Foil Plate which allows us to use the left over foil to create a negative sentiment with a gold outline and white centre. 

To finish off the front of my card I added some of the Gold Metallic Pearls to the card.

The slimline panel was layered onto dark pink cardstock and then a Side Folding 4 inch x 9 inch card front.


For the inside of my card I die cut a piece of white cardstock using the Slim Diagonal Stitched Rectangle die set. I also used the Concord and 9th's Quilted Card Front die to add the stitched diamond design on another piece of white cardstock. I used the Slimline die again to die cut the panel, this was cut down to about 3 inches and then added to the bottom of the slimline panel.

I stamped the birthday sentiment to the top portion of the card using Stampendous' Joy On Birthday Cling stamp using gold embossing powder.

I then used a few more of the washi flowers to decorate the panel.


Monday, March 7, 2022

Cards for Ukraine


Hi Crafty Friends,

The Cardmaking community world wide have been showering social media with yellow and blue cards as a way to show our support for what is happening in Ukraine. My thoughts are especially with Yana Smakula and her family at this time and I hope they will all be safe along with everyone else in that country.

Many paper crafters are using the sunflower which is Ukraine's national flower, however I decided to use one of the die sets decided by Yana Smakula for Spellbinders for my card. I used the Magnolia Blooms die set which is a set Yana released earlier this year. I die cut the outline from gold mirror cardstock and the solid portion of the die from white and used blue inks to add colour to the flower.

For the background of my card I die cut Concord and 9th's Quilted Card Front die from white cardstock. I then blended various shaded of yellow inks to create an ombre effect. I die cut the panel using Heffy Doodles Metric Stitched Rectangles die set and adhered it to a top folding card.

For the sentiment I used a Hot Glimmer Plate/Die set also designed by Yana Smakula. I used gold foil on the sentiment and then used the Solid foil plate from Pinkfresh Studio to create the negative version using the leftover gold foil. This is the one I used for my card.

To finish off the front of my card, I added Gold Metallic Pearls also from Pinkfresh Studio.


For the inside of my card, I die cut the magnolia again using the same colours I used for the front. I trimmed off one of the flowers and then adhered the flowers to the lower portion of my card.

I used Pinkfresh Studio's Brushed Sentiments Hot Foil Stamp/Die sets for the sentiment, using the Solid Foil Plate to get the negative image.


Monday, January 17, 2022

Hey There Friend


Hi Crafty Friends,

Today I am sharing a Slimline card I created using stamps and dies from Hello Bluebird. The tree is a Slimline die called High Rise Scene and I added the cute animals using stamps from the Tree Neighbours stamp set.

I used Distress Oxide inks to add color to the sky, grass and tree areas of my slimline die.

My scene was adhered to a 3 1/2 inches x 8 1/2 inches side folding slimline card.


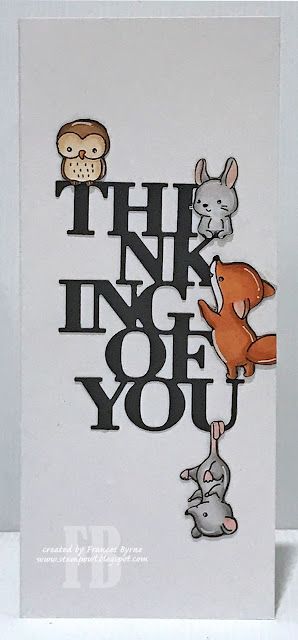
For the inside of my card, I used Concord and 9th's Thinking of You Perfect Pairings die set. I added a few more of the animals from the Tree Neighbors stamp set around the sentiment.