Showing posts with label Cupcake Pop-up. Show all posts

Wednesday, February 22, 2023

Fore! Three Two One


Hi Crafty Friends,

Today I am sharing a card I made for a good friend who celebrated her birthday last week. My friend loves playing golf, and for as many years as I can remember I have created a golf themed card to give to her for her birthday. After all this time she more or less expects it.

it's getting harder as the years go by, as I haven't purchased new golf theme stamps in years and they are hard to find, especially ones to suit a female golfer.


This year I created a pop-up card using Karen Burniston's Cupcake Pop-up die set, to hide the cupcake I added a rectangle panel which was decorated the same as the background. 

I used Magnolia stamps Golf Flag stamp and Kraftin Kimmie Stamps Good Sports stamp set to add the girl on the golf green.

The sun and clouds are from Karen Burniston's Landscape Scene die set.


I added the diagonal stripe paper along the bottom edge of my card. I then added the circle border from Karen Burniston's Border Blends - Trims die set. This looks like a row of golf balls.

For finish off the inside of a card I added a golf themed birthday sentiment.


I kept the front of the card simple, as the focus is on the inside. I created the golf green scene using papers from Lawn Fawn's Watercolor Wishes 12 x 12 Paper, it's the same paper I used on the inside.

I added the golf ball and tee from Karen Burniston's Sports Charms die set. The sentiment is an older one from Rubbernecker Stamps.



Other Supplies:

Good Sports Stamp Set - Kraftin' Kimmie Stamps (discontinued)
Golf Flag Rubber Stamp - Magnolia Rubberstamps
Fore! Three Two One ... - Rubbernecker Stamps (discontinued)




Friday, January 27, 2023

Zest Wishes


Hi Crafty Friends,

Today I am sharing a birthday themed pop-up card I created recently.


 I used Karen Burniston's Cupcake Pop-up die set for the pop-up portion of the card. While this die is an actual cupcake image on the pop-up it also makes a fabulous generic pop-up like I've used on my card today.

I adhered the lemon patterned paper to the centre of my card base and then used the pop-up die included in the Cupcake Pop-up die set to die cut the pop-up art of the card.

I added coordinating patterned paper on the outer edges of my card adding a border between the two patterned papers using one of the border dies included in the Border Blends - Party die set also from Karen Burniston.

To decorate the inside of my card I used Lawn Fawn's Fruit Basket which I die cut from Silver Holographic Cardstock and the lemons using the Zesty Lemons die set.

I added a few of the mice to my card, using mice from two Lawn Fawn stamp sets which I have listed in the supply list below.


For the sentiment I first added the oval layers using the Ovals - Crosshatch die set. The "Zest" Word was created using Karen Burniston's Alphabet die set.

I added the stamped sentiment above the "Zest" word using two sentiments from MFT Stamps Bitty Birthday Sentiments stamp set.


For the front of my card, I used the same papers as I used on the inside changing which of the papers was in the centre. 

I again used the Lawn Fawn Zesty Lemons die set to add the lemons to my card.

For the sentiment I again created the word "ZEST" this time using Karen Burniston's Mini Alphabet & Numbers die set. I added the "Wishes" using another stamp from the Bitty Birthday stamp set.


Tuesday, January 4, 2022

January 2022 Karen Burniston Designer Challenge

Welcome to our January Karen Burniston Designer Challenge.

Check out Karen Burniston's blog on Wednesday (US Time) when you will be able to see what all the designers created for the challenge this month, plus Karen will have an amazing video tutorial to share with us all.

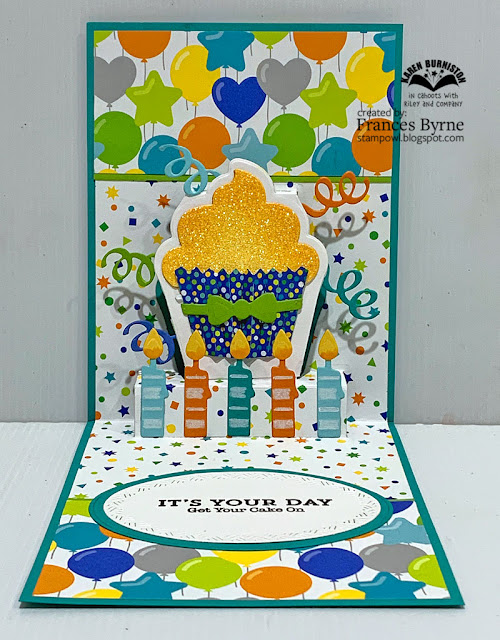
Our challenge theme this month is ... "BIRTHDAY CAKE" - make a birthday card featuring cake or cupcakes.


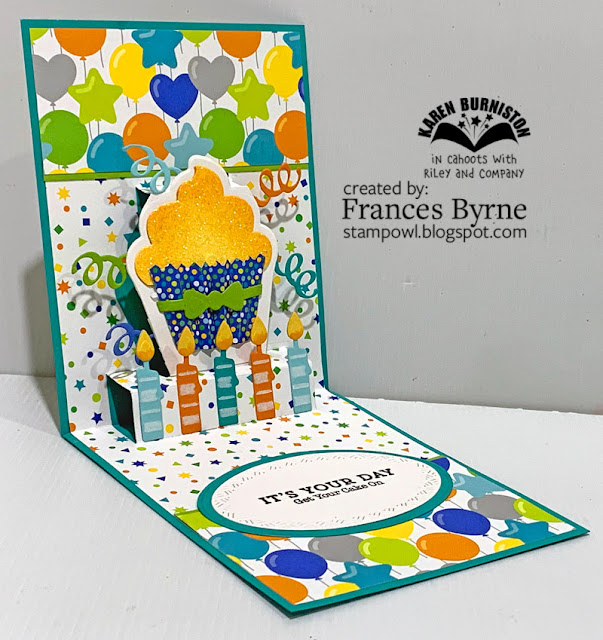
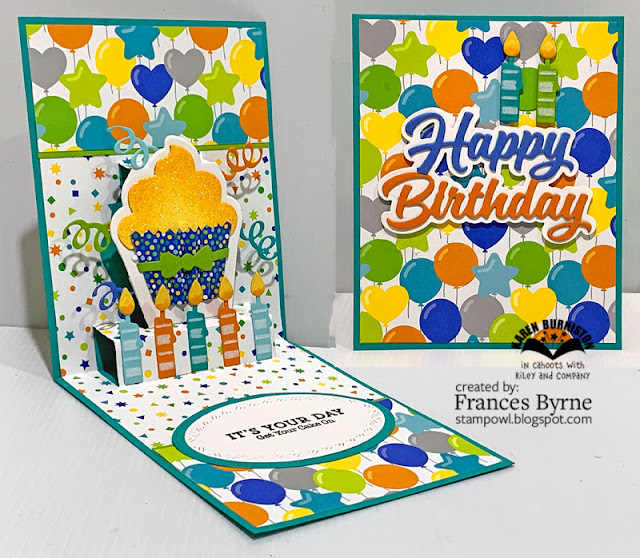
For my card today, I pulled out the Cupcake Pop-up die set to create my card. I die cut the pop up mechanism from the die set from the patterned paper. I also die cut the pop-up from white cardstock and trimmed out the cupcake portion of the white card and adhered it over the patterned paper.

I added the balloon paper to the top and bottom portions of the card, this is the reverse of the patterned paper the cupcake was die cut from.


I decorated the cupcake using yellow glitter cardstock and patterned paper.

Along the bottom of the pop-up, I added five candles which are from the Big Birthday Charms die set. I also added a few streamers which is another die included in the die set.

I used the Crosshatch - Ovals die set to add the sentiment which is from MFT Stamps LLD Delicious Birthday stamp set.


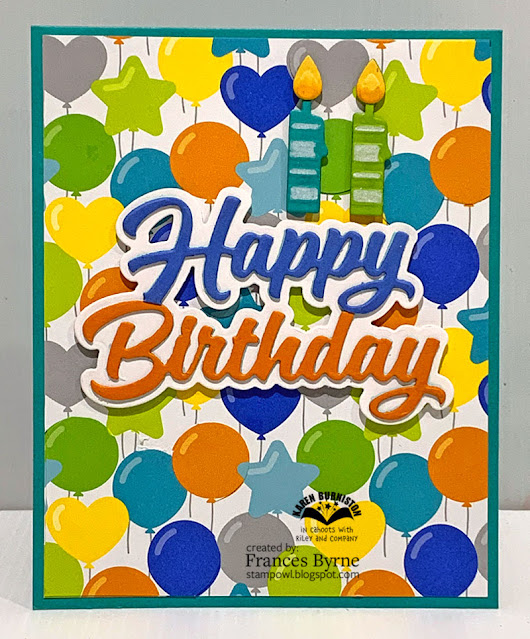
I kept the front of the card fairly simple,  as the focus is on the inside of the card. I added the birthday sentiment using the Happy Birthday and Happy Birthday Shadow die sets. I also added two candles to the top right of the sentiment using dies from the Big Birthday Charms die set.


Other Supplies:

LLD Delicious Birthday Stamp Set - MFT Stamps (discontinued)


Friday, April 2, 2021

Baby Girl Pop-up


Hi Crafty Friends,

A friend recently asked me to make a baby girl card for a new baby girl, so I decided to create a pop-up card.


For the pop-up card I used Karen Burniston's Cupcake Pop-up die set, this make great base for a generic pop-up card.

To decorate my card I used the elephant from Honey Bee Stamps Safari Babies stamp set. I adhered this to the cupcake pop-up using Karen Burniston's Squares Crosshatch and Nature Edges die set.

I used Karen Burniston's Alphabet die set to add the word "GIRL" to the pop-up rectangle panel under the elephant image.

Along the top of the card I used Taylored Expression's Block Party - Baby die set.


To the bottom panel of the card, I added the circles from the Circles Crosshatch die set. I also added a border using one of the dies from the Border Blends Argyle die set. 

The sentiment is from an older MFT Stamps stamp set.


As the focus of this card is on the inside of the card I kept the front of the card fairly simple.

I used the Crosshatch Circles to add my sentiment which is from Verses Stamps.

I adde a border along the bottom of the card.

To finish off the card I added two baby safety pins to the card which are also from an MFT stamp.


Other Supplies:

LJD Beautiful Baby Stamp Set - MFT Stamps (discontinued)

Block Party Baby Die Set - Taylored Expressions (discontinued)

Wee Bit of Heaven Stamp Set - Verses


Thursday, September 17, 2020

STAMPtember - Riley and Company


Hi Crafty Friends,

As many of you probably know this month is "STAMPtember" over on Simon Says Stamp. During this month Simon Says Stamp collaborates with other stamp manufacturers to bring you special limited edition collaboration sets. These sets are only available through Simon Says Stamp and as they are limited edition, once they are sold out, they are not available anymore. STAMPtember stamps are only available for the month of September.


Available now from Simon Says Stamp is today's STAMPtember Limited Edition Collaboration set from Riley and Company. You can purchase either the  True Friends stamp set or the True Friends stamp and die set for a limited time, while supplies last.  The exclusive collaborations are selling out in record time this year, so act fast if you can.


I am excited to see "Riley" featured in this years STAMPtember, especially since I have been involved with Riley since he first made his debut many years ago. 

I especially love that the image not only includes Riley, but also Simon (from Simon Says Stamp) and Burt (the cat).

For my card today I created a pop-up card using Karen Burniston's Cupcake Pop-up die set.  Rather than using this die set to create a cupcake pop-up, I used it to create a double pop-up base.


I used the frame from the Flip Frame Pop-up die set to showcase my image and the birthday sentiment, I just love that sentiment.

I used stars from the Surprise Ball Pop-up to decorate the card.


For the frame featuring Simon, Riley and Burt, I added blue cardstock and a piece of green cardstock that had been die cut using the border from the Nature Edges die set. 


For the front of the card I added the frame from the Flip Frame Pop-up die set to the lower right hand corner of the card. I also added the Happy Birthday sentiment to the frame.

I added three more of the stars from the Surprise Ball Pop-up die set to the top left corner of the card.

Supplies:
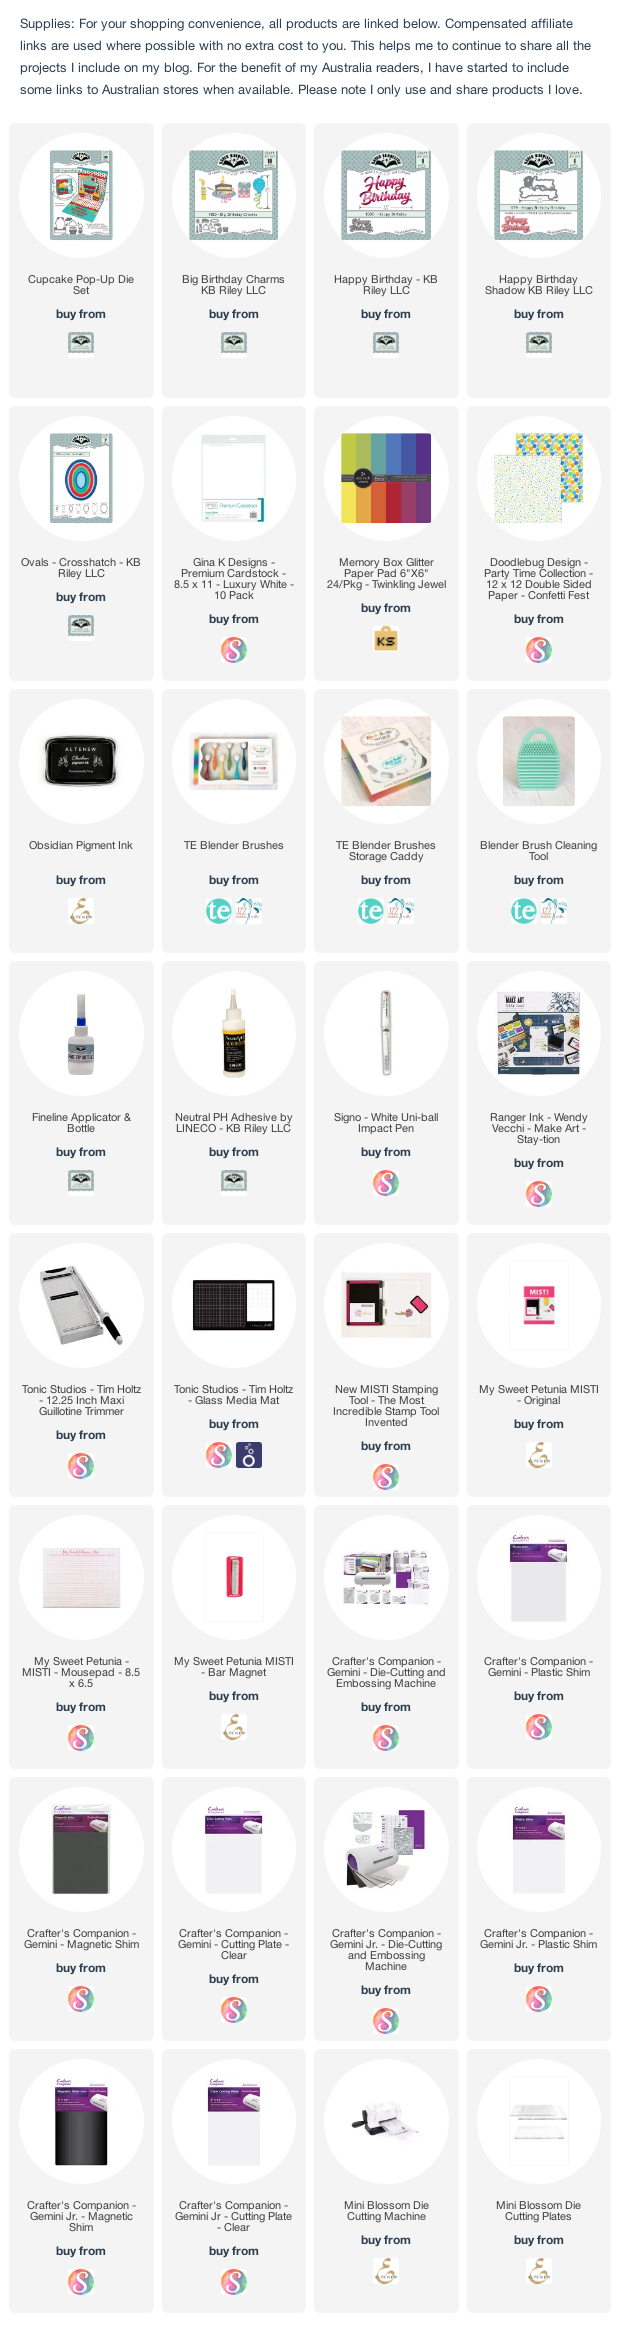
For your shopping convenience, all products are linked below. Compensated affiliate links are used where possible with no extra cost to you. This helps me to continue to share all the projects I include on my blog. For the benefit of my Australia readers, I have started to include some links to Australian stores when available. Please note I only use and share products I love.


Saturday, June 27, 2020

Father's Day Double Cupcake Card


Hi Crafty Friends,

It’s challenge time with the “Crazies” over on the Crazy 4 Challenges blog. Maryann Einam our challenge hostess for the month continues to issue the challenge.

Maryann tells us that she has spent some time lately taking stock of her supplies and ways to use them. There are so many videos out there which help us to revisit some of these techniques. For our challenge this week we are to create a card using any technique that was inspired by a video.

A few weeks ago on the Karen Burniston Pop up Peeps Facebook page, someone was asking about whether the Cupcake Pop-up die could be used as a double pop-up similar to how we used to do it using the Lorna Label Pop-up that Karen Burniston designed when she was with Elizabeth Craft Designs.

I remembered that Karen Aicken had done this with the Cupcake Pop-up die set a few months ago and went to look for the blog post to let the person asking know the information.  I had created a number of cards using the Double Lorna Label Pop-up technique, and had been wanting to play with the Cupcake Pop-up since seeing Karen's card but it had slipped my mind. She does have a video showing the movement of the card, so I decided that I would use that for my challenge this week. You can see Karen Aicken's cards here.


I created a card recently using Waffle Flower Craft's Be A Panda die, at the time I didn't have the Be Accessories die set so I decided to pull both sets out today to make a Father's Day card. Father's Day isn't until September here so I am slowly building my stash up.

I added the "DAD" to the side of the card using alphabet dies from Lawn Fawn.


As mentioned above, for the inside of the card I created a Double Pop-up card using the Cupcake Pop-up die set. For this technique you need to fold your pattern paper in half with the pattern on the inside. With the patterned paper still folded, position the cupcake pop up on the fold so that the centre  nubs of the die are on the centre fold and run through the die cutting machine.

I added labels to each of the cupcake panels which are from an older MFT Stamps Labels 1 Die-namics. I added sentiments to each labels using stamp sets from Waffle Flower Crafts and Honey Bee Stamps.


Here is a close up look at the left hand side of my card. I decorated this side using the Top Hat and Crown from the Be Accessories die set.


And finally a close up photo of the right side of my card. I added another panda to the bottom corner of the card. I also added the moustache and tie also from the Bee Accessories die set.

Don't forget to check out the rest of the “Crazies” cards over on the Crazy 4 Challenges blog and also their individual blogs for more details.


Supplies:
For your shopping convenience, all products are linked below. Compensated affiliate links are used where possible with no extra cost to you. This helps me to continue to share all the projects I include on my blog. For the benefit of my Australia readers, I have started to include some links to Australian stores when available. Please note I only use and share products I love.

Labels 1 Die-namics - MFT Stamps (retired)


Wednesday, June 24, 2020

Just Chicken In


Hi Crafty Friends,

"Just Chicken In" with you today to share a pop-up card I created.

I recently added Mama Elephants Zodiac Rooster and Little Chickie Agenda stamp sets to my stash, so for my card today I decided to create a Chicken Coop pop-up card.


I used Karen Burniston's Cupcake Pop-up die set for the pop-up portion of the card. While this die is an actual cupcake image on the pop-up it also makes a fabulous generic pop-up like I used on my card today. I die cut the pop up from white cardstock and then another from patterned paper for the upper portion of the card. For the lower portion I used yellow inks and a blender brush to added color, and then splattered dark yellow and brown inks over the panel. 

I also stamped a few chicken footprints over the sides of the base of the card.

I used Mama Elephant's Ornate Grid House for the Chicken Coop. I die cut the house from white & red cardstock. I then colored the white house using brown markers and used Honey Bee Stamps Shiplap Stencil to add the lines for the wood of the coop. I then trimmed the roof off the red house and added it to the decorated chicken coop. I used the house to trace out a solid panel and colored that with dark brown inks. Before adhering the two together, I die cut some grass panels from white cardstock and colored them with yellow/orange inks and added behind the openings of the house/coop. 


I added some of the chickens from the Zodiac Rooster and Little Chickie Agenda stamp sets to the chicken coop, before adhering it to the pop-up panel.

I added a fence and grass to the back of the chicken coop, which is adhered to the back panel. I also added a sun to the top right corner of the card.

I used Lawn Fawn's Oliver's ABCs to spell out the word "Chicken" onto a white panel and adhered this to the lower portion of the card. I added a couple more of the chickens from the Zodiac Rooster stamp set. I stamped the "Just" and "In" which is part of the sentiment included in the stamp set onto black cardstock and added these two words to the chickens above and below the large "Chicken" word.


I used some of the same elements on the front of the card that I used on the inside. 

I colored a white panel with yellow inks and splattered with yellow and brown inks and then stamps the chicken footprints all over the panel.

I added a few of the chickens from both of the stamps sets to an oval panel which is attached to the top portion of the card.

I added the word "Hi" to the oval panel above the chickens. I then added the word "Chickie" to the lower portion of the card.

Supplies:
For your shopping convenience, all products are linked below. Compensated affiliate links are used where possible with no extra cost to you. This helps me to continue to share all the projects I include on my blog. For the benefit of my Australia readers, I have started to include some links to Australian stores when available. Please note I only use and share products I love.

Sun Moon and Stars - MFT Stamps (retired)
Fence - Marianne Designs (retired)
Chicken Prints stamp - Rubbernecker stamps (retired)


Sunday, January 5, 2020

Baaah-Lated Happy Birthday To You


Hi Crafty Friends,

Today I am sharing a belated birthday card, it doesn't hurt to have one or two of these in your stash just in case!!!


For my card today I decided to pull out Honey Bee Stamps Lily The Lamb stamp set, this is an older stamp set, but only fairly new for me. 

As you can see I created a pop-up card, I used Karen Burniston's Cupcake Pop-up die set for the pop-up portion of the card. It is amazing just how generic this die can be if needed.

I adhered to different patterned papers to each other and then used that to die cut the cupcake pop-up, scoring the fold about 3/4 inch below the top of the green paper.

I used an older fence die to die cut my fence from white cardstock, and after a little trimming to the centre of the fence, I adhered it to the back panel.

I added cloud die cuts to the blue paper panel.

I stamped the lamb from the Lily the Lamb stamp set, colored her in and die cut her and adhered her to the pop-up panel.


I stamped the "Baaah-Lated" sentiment onto white cardstock, and then used one of the banner dies from Honey Bee Stamps Banner Builder die set to die cut the sentiment.

I stamped the "Happy Birthday To Ewe" onto white cardstock and used Hero Arts Oval Infinity dies to die cut the white oval and the green oval underneath.


I kept the front of the card simple as the focus in on the inside, adding a "Happy Birthday" sentiment from Karen Burniston which is layered onto an oval panel.

Supplies:
For your shopping convenience, all products are linked below. Compensated affiliate links are used where possible with no extra cost to you. This helps me to continue to share all the projects I include on my blog. For the benefit of my Australia readers, I have started to include some links to Australian stores when available. Please note I only use and share products I love.