Showing posts with label Pop It Ups Wednesday With Blog Post. Show all posts

Thursday, June 22, 2017

Enjoy Your Day Cup Pop Stand Card


Hi everyone,

It's my turn to post a Pop it Ups Wednesday tutorial on the Elizabeth Craft Designs blog today. This will be my final Pop it Ups Wednesday post, but of course I will still be continuing with the other Elizabeth Craft Designs tutorials I create.

This time round I decided to pull out my Pop it Ups Cup Pop Stand Card dies set combining it with the new Moda Scrap Patterned Paper and Joset Designs Macaron die set.

Here's how I created my card:


Step 1 -  
  • Cut a piece of green cardstock so it measures 4 1/4 inches x 11 inches. Score and fold along the 11 inch side at 5 1/2 inches to create a top folding card.

  • Cut two pieces of patterned paper (ModaScrap Cucina with Love used here) that measures                                                           4 1/4 inches x 5 inches. Adhere panels to either side of the inside of the green card base, so that the paper it up close to the fold line.

  • Cut two pieces of red polka dot patterned paper that measures 4 1/4 inches x 3/4 inches and adhere to each end of the card so there is a 1/4 inch gap between the patterned paper and edge of card.
  • Adhere Gold/Silver Glitter Border Peel Off Stickers to each of the edges of the red patterned paper.
Step 2 -
  • Using the Cup Pop Stand Card die set, die cut two cups from patterned paper (note - you will need to place the die on the back of the cardstock for one of the cups so that you have a mirror image of the cup to enable to have them be placed back to back on the card).  To make the card a little strong die cut additional cups from green cardstock and adhere the patterned paper cups to cardstock cups.
  • Create the "pop stand" panel from green card (refer to Karen Burniston's video on how to create the Cup Pop Stand Card for how to do this.
  • Adhere cup pop stand panel to centre of card.
  • Attach the two cups to the tabs of the pop stand panel, leaving the top of the cups open for now.
Step 3 - 
  • Using the steam flourish included in the Cup Pop Stand Card die set, die cut two from white cardstock that has Clear Double Sided Adhesive Tape on the front. (Note - you will be die cutting one steam flourish so that the adhesive is on the front and one where the adhesive is on the back. 
  • Remove the protective backing from the adhesive and cover adhesive using Antique Silver Silk Microfine Glitter. Return excess glitter to the jar and then polish the glitter into the adhesive with your finger.
  • Glue the two flourishes together so you have glitter on either side. attach this to the inside of one of the cups and then place Clear Double Sided Adhesive Tape to the top of the cup to join both cups together.

Step 4 - 
  • Die cut a spoon from Silver Metallic Shimmer Sheetz that has Clear Double Sided Adhesive Tape on the back (note - you will need to use a Metal Adaptor plate for your die cutting machine to cut the Shimmer Sheetz). For extra strength, die cut an additional spoon from green cardstock and layer the two together.
  • Adhere the spoon in the front of the cup using foam tape (Note - make sure the spoon does not interfere with the card opening and closing by overlapping the fold).
Step 5 - 
  • Using the Macarons die set, die cut one of the scallop ovals from white cardstock that has Clear Double Sided Adhesive on the front. 
  • Remove the protective backing from the adhesive and cover adhesive with Peony Pink Silk Microfine Glitter. Return excess glitter to the jar and then polish the glitter into the adhesive with your finger.
  • Die cut two of the ovals from dark pink cardstock. 
  • Create the macaron by sandwiching the glittered panel between the two pink ovals. (refer to photo above as a guide)
Step 6 - 
  • Using the "Enjoy the Day" sentiment from the Just a Note Clear Stamp set, stamp the sentiment onto white cardstock using black ink. Color sentiment as desired.
  • Use the small label die from the Katie Labels Pivot Card die set to die cut the sentiment. Sponge around edge of label.
  • Place on the front part of the inside of card.
  • Die cut an additional label using the same die to cut a second label which is left blank and adhere to the back panel to be used for the hand written sentiment.

Step 7 - Front of Card
  • Cut a piece of patterned paper that measures 4 1/4 inches x 4 inches and adhere to the centre of the front of card.
  • Cut two pieces red polka dot patterned paper 4 1/4 inches x 1/2 inch and adhere to each edge of the patterned paper on card. 
  • Adhere Gold/Silver Glitter Border Peel Off Stickers to each of the edges of the red patterned paper.
Step 8 - 

  • Die cut a label from white cardstock using the second largest label in the Katie Label Pivot Card die set.
  • Die cut a label from green cardstock using the largest label in the Katie Label Pivot Card die set.
  • Stamp the "Just a Note to Say" from the Just a Note Clear Stamp set onto the white label using black ink.
  • Adhere to centre of front of card.
Step 9 - 
  • Die cut and create an additional spoon and macaron that we created for the inside of the card (steps 4 & 5) and attach to the card using foam tape.
Thanks for stopping by today, I hope you enjoyed my tutorial.


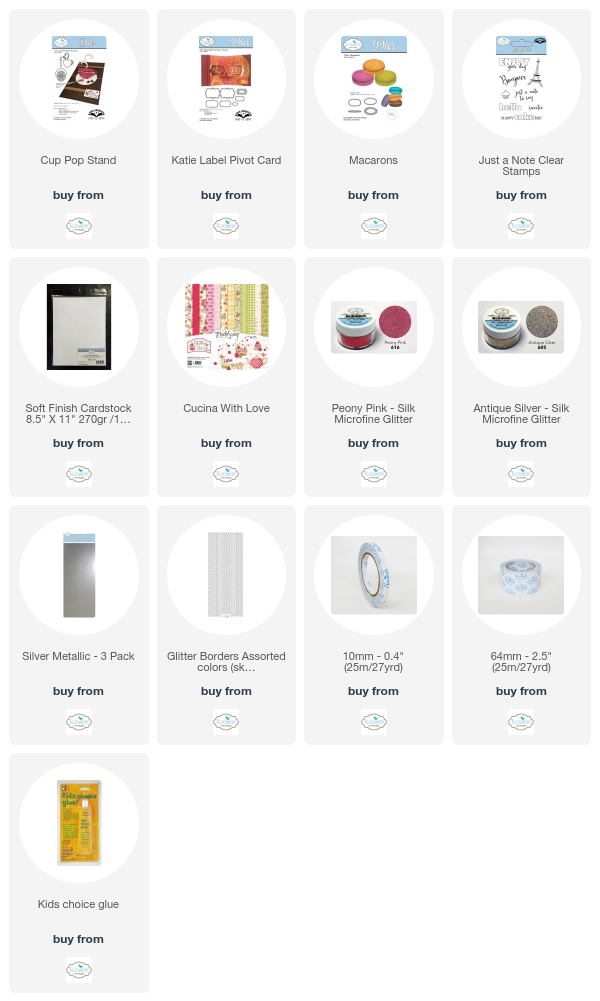
Supplies:

Elizabeth Craft Designs - 


Other:
Cardstock - White; Green; Dark Pink
Inks - Black; Worn Lipstick Distress Ink; Peeled Paint Distress Ink
Foam Tape


Thursday, May 11, 2017

Owl Flying Easel Card


Hi everyone,

It's my turn to post a Pop it Ups Wednesday tutorial on the Elizabeth Craft Designs blog today. Some years ago Karen Burniston shared how to create a Flying Easel Card which is what I have created for my card today using Poppy the Owl, Labels & Circles; Iron Fence Pop-Up and the All Seasons Tree.


Here is how I created my card:


Step 1 -
Using the Poppy the Owl die set, die cut the following:
  • (2) Solid Owl Bodies from Rich Black Soft Finish Cardstock
  • (2) Detail Owl Bodies from Designer Paper which has Clear Double Sided Adhesive Tape on the back.
  • (2) Sets of Eyes from White Soft Finish Cardstock that has Clear Double Sided Adhesive Tape on the back.
  • (1) Set of Solid Owl Feet from Black Soft Finish Cardstock.
  • (2) Sets of Detail Owl Feet from orange cardstock which has Clear Double Sided Adhesive Tape on the back.
  • (2) Owl's Beaks from orange cardstock that has Clear Double Sided Adhesive Tape on the back.
  • Assemble both owls, using photo above as a guide. Place the orange feet on either side of the back feet.


Step 2 -
  • Using the two largest labels in the Labels & Circles die set,  nest the smaller label inside of the larger one making sure they are evenly spaced. Use tape to temporarily hold the dies together. 
  • Die cut two frames using these dies from blue cardstock.
  • Place one of the frames on your workspace so that the front of the frame is facing down.
  • Place a piece of Clear Double Sided Adhesive Tape to the top and bottom edges of the frame.
  • Secure a piece of white twice so it is centred in the frame.
  • Adhere the second frame over the top of the first frame so it hides the twine on the frame.
  • Place a piece of Clear Double Sided Adhesive Tape to the centre back of one of the owls. Place the owl so it is centred onto the twine.
  • Add more Clear Double Sided Adhesive Tape to either side of the owl and place the second owl over the top of the first, so you have a two sided owl.


Step 3 -
  • Cut a piece of green cardstock that measures 5 1/2 inches x 11 inches. Score along the 11 inch side at 2 3/4 inches and 5 1/2 inches. 
  • Cover the front half of card with designer paper.

  • Line up the second largest label from the Labels & Circles die set so that it is centred on the score line on the front of the card. Run through die cutting machine.
  • Remove the label from the centre and fold card using photo above as a guide.
  • Apply adhesive to the lower half of the frame we created in step 2 and adhere to the window on the card.


Step 4 - 

  • Die cut the fence from the Iron Fence Pop-Up twice from White Soft Finish Cardstock that has Clear Double Sided Adhesive Tape on the back.
  • Die cut the fence also from white fun foam twice.
  • Time both ends from the fences on both the cardstock and fun foam pieces.
  • Join the two cardstock fences together to form one large fence.
  • Adhere cardboard fence to fun foam fences.
  • Adhere fence to the base card using photo above as a guide.
  • Stamp the sentiment from the Occasions Clear Stamp set onto White Soft Finish Cardstock using brown ink. Cut out the sentiment, leaving a thin strip of white around the sentiment. There to the centre of the fence.
Step 5 - 
  • Using the tree from the All Seasons Tree die set, die cut a tree from brown cardstock.
  • Die cut the leaves from the Curvy Leaves die set two times, add shading to the leaves using Copic markers.
  • Adhere the leaves to the tree.
  • Adhere the tree to the card using foam tape, so that the tree is towards the left side of the card.
Step 6 - 
  • Die cut the "Hi Circle" sentiment from the Twist Circle Pop-Up card from green cardstock that has Clear Double  Sided Adhesive Tape on the back. 
  • Die cut a second "Hi Circle" sentiment from brown cardstock that has Clear Double Sided Adhesive Tape on the back.
  • Die cut the larger the next sized circle from the Twist Circle Pop-Up card from brown cardstock. 
  • Adhere the brown "Hi Circle" sentiment to the solid brown circle.
  • Adhere the "Hi" from the green "Hi Circle" sentiment to the centre.
  • Trim around the larger circle so it is level with the smaller circle.
  • Adhere to the right side of card using foam tape. Refer to photo below for placement.


Here is a look at my card when it is closed ready to be placed in an envelope.

Thanks for stopping by today, I hope you enjoyed my tutorial.

Supplies:
Elizabeth Craft Designs:

Poppy the Owl
Labels & Circles
Iron Fence Pop-Up
All Seasons Tree
Twist Circle Pop-Up (Hi)
Curvy Leaves
Occasions Clear Stamp Set
White Soft Finish Cardstock
Rich Black Soft Finish Cardstock
Clear Double Sided Adhesive Tape 64mm
Clear Double Sided Adhesive Tape 3mm

Other:

Cardstock - Green; Blue
Designer Paper - Kaisercraft Redwood 12 x 12 Paper; DCWV Latte Stack 12 x 12 Paper
Inks - Brown
Twine
White Fun Foam
Foam Tape
Copics


Thursday, April 13, 2017

Pop It Ups Wednesday with Frances – Steampunk Birthday

Hi everyone,

It's my turn to post a Pop it Ups Wednesday tutorial on the Elizabeth Craft Designs blog today. This time around I decided to pull out my steampunk themed dies and stamps combined with the Oval Pull Card and Jinks the Monkey to create a birthday card. I have to admit, that steampunk is a little out of my comfort zone, but it can be fun to sometimes play with something that you wouldn't normally do. 

Here is how I created my card:


Step 1 - Creating the Glitter Background:
  • Attach a piece of Clear Double Sided Adhesive Tape to a piece of White Soft Finish Cardstock that is the same size as the Stage It Stencil - Gears.
  • Turn the stencil so that the side which will be attached to the adhesive is facing up and cover all over with Versamark Ink. Adhere Stencil over the adhesive on cardstock. (NOTE: This is an important step so that the stencil can be removed easily from the adhesive)
  • Cover the stencil with the release paper that you would have removed from the adhesive tape you added to the cardstock. Use a bone folder or brayer to make sure the stencil is attached so that no glitter can get under the stencil when we start adding it.
  • Use Copper Silk Microfine Glitter to cover the stencil attached to the cardstock. Remove any excess glitter and return to jar. Polish the glitter into the adhesive using your finger. (For best results, use a swiffer to remove any excess glitter that may be clinging to the stencil or cardstock.
  • Carefully remove the stencil to expose the remaining adhesive on the cardstock being carefully not to touch the adhesive. Cover the adhesive with Basic Black Silk Microfine Glitter. Remove any excess glitter and return to jar. Polish the glitter into the adhesive using your finger. 
  • Cut the glittered background piece so you have one piece that measures 2 1/2 inches x 6 inches and another piece which measures 1 1/4inch x 6 inches.

Step 2:
Cut a piece of metallic copper cardstock that measures 8 1/2 inches x 6 inches. Score along the long side 4 1/4 inches.
  • Using the main die from the Oval Pull Card die set, centre the centre nubs of the die on the fold of the card and run through die cutting machine.
  • Cut two pieces of Rich Black Soft Finish Cardstock so they are 3/4 inches x 6 inches and attach to the side of each of the glitter background panels we created in step 1.
  • Adhere panels to both the left and right sided of the Pull Card using photo above as a guide.

Step 3:
Using the Jinks the Monkey die set cut the following:
  • (1) Solid Body from black cardstock.
  • (1) Detail Body from brown cardstock.
  • (1) Solid Tail from black cardstock.
  • (1) Detail Tail from brown cardstock.
  • (1) Face from flesh/tan cardstock.
  • (1) Chest from flesh/tan cardstock.
  • (1) set of inner ears from flesh/tan cardstock (you will need to use the detail body for these)
  • Assemble Monkey using photo above as a guide.
Step 4:
Using the Steampunk Charms die set cut the following:
  • (1) Hat from black cardstock.
  • (1) Hat Band from Silver Metallic Shimmer Sheetz (that has Clear Double Sided Adhesive Tape on the back).
  • (1) set of Wings from White Iridescent Shimmer Sheetz (no adhesive).
  • (1) Small Gear from Copper Cardstock.
NOTE: You will need to use a Metal Adaptor Plate when cutting Shimmer Sheetz.
  • Assemble Hat using photo above as a guide.
  • Adhere the Hat to the monkey's hand (see photo below)

Step 5:
Use the two oval dies from the Oval Pull Card die set to cut two large ovals from Rich Black Soft Finish Cardstock and two smaller ovals from White Soft Finish Cardstock.
  • Using a blending tool and Vintage Photo Distress Oxide ink around the edges of both white circles.
  • Layer the white ovals to the black ovals.
  • Adhere one of the oval sets to the oval on the front of the card using foam tape.
  • Adhere Jink the Monkey holding the hat to the front oval using foam tape.

Step 6:
Using the other set of white/black oval layers we created in step 5, stamp the "steampunk birthday greetings' sentiment to the centre of the white oval using black ink. 
  • Adhere to the reverse side of the oval (see photo above).
Step 7:
Using the Gears from the Steampunk Charms and Clock and Gears die set, die cut two or three of each gears from both black and copper cardstock. 
  • Layer gears as desired and use to decorate the card. Refer to photo above for placement.
  • Use a Black/Silver Glitter Dots Peel Off Sticker to the centre of each of the gears and also to the closure tab at the top of the card.
Thanks for stopping by today, I hope you enjoyed my tutorial.

Supplies:

Elizabeth Craft Designs:


Other:

Cardstock; Copper; Brown; Flesh
Inks - Black; Vintage Photo Distress Oxide
Blending Tool
Foam Tape


Thursday, March 9, 2017

Happy Easter


Hi everyone,

It's my turn to post a Pop It Ups Wednesday tutorial on the Elizabeth Craft Designs blog today. With Easter being just over a month away, I thought it would be fun to share an Easter card with you all. For my card I have used the Pop It Ups Hanging Charm Pull Tab die set along with Lucky the Rabbit and the basket from Props 7.


Here is how I created my card:


Step 1 - Using the Lucky the Rabbit die set, die cut the following:
  • (1) Solid Body from Black Cardstock
  • (1) Each of all remaining Rabbit Body pieces from White Soft Finish Cardstock that has Clear Double Sided Adhesive Tape on the back.
  • Using the Props 7 die set, die cut the following:
  • (4) Baskets from White Soft Finish Cardstock
  • (4) Basket Detail pieces from White Soft Finish Cardstock
  • (4) Grass pieces from White Soft Finish Cardstock that has Clear Double Sided Adhesive Tape on the back.
  • 20 Easter Eggs from White Soft Finish Cardstock that has Clear Double Sided Adhesive Tape on the back.

  • Color basket pieces, grass and eggs. Assemble the basket (refer to Karen Burniston's photo above on how to do this).
  • Add the grass piece and 5 eggs to each basket.

Step 2 - Cut a piece of Rosebud Soft Finish Cardstock that measures 5 1/2 inches x 11 inches. Score along the 11 inch side at 5 1/2 inches and fold. (Optional - if you wish to have a flat card as I have for mine, adhere the folded card together. If you prefer to have the hanging charm on a folded card, leave card as is.
  • Cut a piece of designer paper which is 5 1/4 inches square and adhere to the front of the Rosebud Soft Finish Card.
Step 3 - Using the Hanging Charm Pull Card die set, die cut the die base from designer paper (Tip: depending on the thickness of your designer paper you may wish to die cut one from designer paper and one from card and glue together for extra strength,
  • Die cut the Tab from Pink Peach Soft Finish Cardstock (Tip - position the top cutting plate onto the die so that it doesn't cut the top section of the tab, so you can make it longer.)
  • Using the Rectangle from the Dotted Scallop Rectangles, die cut a rectangle that is closest to size of the Hanging Charm Pull Tab card base. 
  • Adhere the Card base to the Dotted Scallop Rectangle and assemble the Hanging Charm Pull Tab to the card referring to Karen Burniston's Assembly Video found here.


Step 4. Adhere the Hanging Charm Pull tab to the right hand side of the card as per photo above.
  • Using the Easter Egg die set, die cut two of the smallest eggs from White Soft Finish Cardstock that has Clear Double Sided Adhesive Tape on the front. 
  • Remove the protective backing from one of the eggs and cover the adhesive with Cool Diamond Silk Microfine Glitter. Color glittered egg as desired.
  • Use the Grass die from the Easter Egg die set and die cut one piece from cardstock, color green.
  • Position the two eggs on either side of the top of the tab, add the grass to the bottom of the egg. Refer to photo above as a guide.
  • Use the Happy Easter sentiment from the Happy Easter Peel Off Stickers to the bottom of the pink rectangle which is revealed when you pull the tab to make the Hanging Charm Pull Tab pop up.


Step 5. Die cut the smallest Stitched Oval from White Soft Finish Cardstock.
  • Die cut the second smallest Dotted Scallop Oval from Rosebud Soft Finish Cardstock, layer the two ovals together and attach to the bottom section of the pull up panel of the Hanging Charm Pull Tab.
  • Attach Lucky the Rabbit to the oval using foam tape.
  • Attach one of the basket of eggs to the rabbits arm as per photo above.
  • Adhere the other baskets to the left hand side of the card.

Step 6 - I prefer to create this style of card flat, so I decorate the back of the card. However if you prefer yours to be on a folded card, this could go on the inside of the card.

  • Cut a piece of White Soft Finish Cardstock that measures 5 1/4 inches square. Adhere to the back of the pink card.
  • Use the grass die from the Outdoor Edges die set, die cut grass from green cardstock. Adhere to the bottom edge of card.
  • Using the smallest egg from the Easter Egg die set, die cut four eggs using White Soft Finish Cardstock, adhere under the grass tufts on card.
Step 7.  Die cut the "Happy" from the A Way with Words - Happy Anniversary from black cardstock that has Clear Double Sided Adhesive Tape on the back. Attach to card as per photo above.
  • Add the "Easter" sentiment from the Happy Easter Peel Off Stickers to the left side of sentiment.
Thanks for stopping by today, I hope you enjoyed my tutorial.

Supplies:

Elizabeth Craft Designs:

Other: 
Designer Paper - Kaisercraft Fairy Bread 12 x 12 Paper; Graphic 45 Come Away With Me Cosmopolitan 12 x 12 Paper
Copics
Foam Tape


Thursday, February 9, 2017

I Love Us


Hi everyone,

It's my turn to post a Pop It Ups Wednesday tutorial on the Elizabeth Craft Designs blog today. I have been having fun lately creating Z fold cards using the Pop It Ups Pivot Card dies. Seeing Valentines Day is just under a week away I thought it might be fun to create a Valentine card using the Heart Pivot Card die set.

Here is how I created my card:


1. Cut a piece of red cardstock that measures 12 inches x 5 1/2 inches. Score at 4 inches and 8 inches.
  • Cut a piece of designer paper that measures 12 inches x 5 1/2 inches. Score at 4 inches and 8 inches.
  • Adhere the left hand panel of the designer paper to the left hand panel of the score red card.
  • Place the centre nib of the heart pivot die to the score line on the right hand side of the card (see photo above). Run through die cutting machine.

  • Carefully trim out the designer paper hearts from the heart pivot area so it reveals the red hearts from the cardstock below.
  • Adhere the remaining two panels of the designer paper to the red cardstock.


2. From the Flower Pot Pop Stand die set, die cut the following:
  • (4) Large Flowers from red cardstock
  • (4) Medium Flowers from red cardstock
  • (3) Large Flowers from pink cardstock
  • (3) Medium Flowers from pink cardstock
  • (5) Leaves from green cardstock
  • Shape the leaves using the leaf tool and leaf pad. Add highlights to the leaves using PanPastels.
  • Shape the flowers using the tools in the All Metal Tool set. Add highlights to the flowers using PanPastels.
  • Adhere the medium flower into the large flower.
  • Add Coral See Prills from the Flower Pot Prills set to the centres of each flower. 

3. Die cut an oval from the Stitched Ovals die set from White Soft Finish Cardstock.
  • Die cut an oval from the Dotted Scallop Ovals from gold cardstock. Layer the two ovals together.
  • Attach the ovals to the centre of the far left panel using foam tape.
4.  Die cut the word "Valentine" from the Love Sentiments die set from gold cardstock that has Clear Double Sided Adhesive Tape on the front. Remove the protective backing from the sentiment and cover adhesive with Desert Gold Silk Microfine Glitter. Polish the glitter into the adhesive with finger. Return excess glitter to jar.
  • Adhere the "Valentine" sentiment to the centre of the ovals.
  • Attach flowers to the card as per photo above.

5. Using the Heart Pivot Card die set die cut the following:
  • (2) Large Hearts from gold cardstock
  • (2) Medium Hearts from White Soft Finish Cardstock.
  • Layer hearts together.
  • Using the Best Wishes Clear Stamp set, stamp the " I love Us" and "You & Me" sentiment onto the white hearts using black ink.
  • Adhere hearts to pivot hearts using foam tape.
6. Adhere remaining flowers to card as per photo above.

Thanks for stopping by, I hope you enjoyed my tutorial.

Supplies:

Elizabeth Craft Designs:


Other:
Cardstock - Red; Pink; Green; Gold
Designer Paper - Graphic 45 Mon Amour 12 x 12 paper
Inks - Black
Multi Medium Matte
Foam Tape
Copics


Saturday, December 24, 2016

Pull Card Edges Fun part 3


Hi everyone,

Over the past two days I have shared how to use the edges from the Pull Card Edges die set designed by Karen Burniston for Elizabeth Craft Designs to create fun decorate  edges on cards other than Pull Cards. Today I complete my tutorial. If you would like to see the full tutorial, either scroll day to the next two blog posts or visit the Elizabeth Craft Designs blog where the full tutorial is in one post. 

Here is how I created my card - 

1. Cut a piece of white cardstock that measures 4 1/2 inches x 11 inches. Score and fold to create a top folding card that measures 4 1/2 inches x 5 1/2 inches.
  • Cut a piece of "fishtail" designer paper which measures 4 1/2 inches x 3 1/2 inches and adhere to the top front of the folded white card.


2. Cut a piece of "Cat" designer paper that measures 4 1/2 inches x 5 1/2 inches. Position the Circle Pull Card Edge as per photo above and run through die cutting machine.
  • Die cut a piece of brown card using the Circle Pull Card Edge and adhere this piece underneath the circle part of the designer paper so part of the brown card shows as a border.
  • Adhere designer paper to front of card.
3. Using the largest circles from the Twist Circle Pop Up Card die cut the stitched circle from white cardstock and the largest circle from brown cardstock. Layer circles together and attach to the circle area of front of card using foam tape.

4. Die cut and assemble Whiskers the Cat and attach to the circles.

5. Using the sentiment from the Just a Note Clear Stamp set, stamp using black ink onto white cardstock.
  • Die cut sentiment using the smaller labels from the Katie Label Pivot Card die set.
  • Adhere sentiment label to the lower left hand side of card so part of the label is off the card, trim edge. 


6. Inside of Card -
  • Cut a piece of designer paper that measures 4 1/2 inches x 4 1/2 inches. Place the Circle Pull Card Edge at an angle at the top of the designer as we did for the front of the card. 
  • Adhere designer paper to the lower inside of card.
  • Stamp the sentiment from the Occasions Clear Stamp Set using black ink to the circle area of card.
Thanks for stopping by today, I hope you enjoyed my tutorial.


Stamps: Just a Note; Occasions Clear Stamp Sets - Elizabeth Craft Designs
Paper: White; Brown; Black; Tan; Pink; Red; Furry Friends Collection DP - Kaisercraft
Dies: Pull Card Edges; Whiskers the Cat - designed by Karen Burniston for Elizabeth Craft Designs
Other ECD Products: Clear Double Sided Adhesive Tape 64mm
Other: Black Ink; Foam Tape