Thursday, January 31, 2008

Notes!

It's time for another fab/sassy challenge I do with a bunch of friends on SCS. This week our challenge was to create something using chipboard .... so I decided to get out my bind it all and create a notebook!

I created the lines for my paper using 'excel' and then printed it out and cut the paper to the size I needed ... I have kept some of the off cuts because they will come in handy for a future book or two. I cut my chipboard to the size to match the inner pages and then covered it using my DP.

Yes I am still having fun coloring bees in non traditional bee colors ... heheheheehe! this time round blue & brown to match the DP I used for this book. I used my rectangle nestabilities to create my layers I used for my bees. I also paper pierced the two top corners of this panel.

To Finish the book off ... I created the word 'Notes" using my computer and attached the book plate over it.


Recipe: Stamps: Bees - Stampendous
Papers: White; Cool Caribbean & Chocolate Chip - SU; Retro DP - DCWV
Other: Black Ink; Rectangle Nestabilities; Paper Piercing Mat & Guide; Hodgepodge Hardware; Bind It All; Foam Tape


Wednesday, January 30, 2008

Howdy!

It has been one of those days today ..... it started off with the cat bringing in a mouse which was still alive so I had to get my DH to come back so that could be sorted out ... thank goodness he wasn't available to come back or I am not sure what I would have done there ...arghhhhhhhhh.

And then to top things off .... my modem died! Fortunately DH and I were able to go out this afternoon and buy a new one so that drama was short lived ... but even so it was an inconvenience and put many of the plans I had to do today on hold.

But today is sketch challenge day ... and fortunately now I have access to the internet again I was able to check out what todays sketch was on SCS. A nice simple one ... which is just what I needed today!

There were some good things that happened today ... and that included receiving some stamps that I had ordered ... one lot I had ordered just before Christmas so I was very relieved to see them turn up and the other was the Cowboy & Indians sets from The Cat's Pajamas ... which I just couldn't resist when they were released last week. So of course I had to use one of my new stamps on my card I created today.

I used my oval nestabilities to create the layers for my little cowboy. All the papers used in this card come from the At Home Simply Scrappin' Kits.


Recipe:
Stamps: Havin' a Pow Wow & It's a Western Thing Sets - The Cat's Pajamas
Papers: White; Buckaroo Blue, Chocolate Chip, Cranberry Crisp & DP from At Home Simply Scrappin' Kits
Other: Black Ink; Creamy Caramel SU Ink; Brown Brads; Oval Nestabilities; Paper Piercing Mat & Tool; Foam Tape

Tuesday, January 29, 2008

Treasures and A "Purr"fect Friend!

Ahoy ye mateys!

It’s TREASURE HUNT TUESDAY @ RUBBERNECKER. The Treasure if you find it, will be a free image. However, to receive the Treasure a purchase of any size is required, and your treasure must be claimed between 4am -9pm PST today (Tuesday) . Not only is today Treasure Hunt Day, but for every $50 in stamps purchased, you will receive one FREE stamp. You can check out more information on the Rubbernecker Home Page.

While you are on the Rubbernecker Homepage make sure and read about the Rubber Bucks Monthly Drawing AND the FREE stamp offer:

*** Each month you can qualify to win $100 coupon good for Rubbernecker or Stamp Oasis stamps! For every $20 you spend, your name is entered once into a drawing.

*** For every $50 you spend on Rubbernecker, Stamp Oasis or KK Originals stamps, you get to choose a FREE stamp!

We also have some Rubbernecker Buck Gift Certificates to give away as Blog Candy!!! These are redeemable for any stamps in the Rubbernecker, Stamp Oasis or KK Original sections!

This week's Blog Candy links:

Jeanne Streiff

Sherry Cheever

Shelly Kuck

The first clue will be on Shelly's blog.

My card today was a fun card to create ... I have always enjoyed creating cards that involve some sort of a scene ... I don't do as many as I used to but when I get the opportunity I really enjoy making them.

The stamps used on this card are all from the Rubbernecker Stamps range.

I started this card by stamping the Alley background onto my white card using black ink. I also stamp the cats on another piece of scrap white card and cut them out. I could have stamped the cats first and masked them ... but I wanted the cats to be 3D'd from the rest of the scene so did it the other way instead. After coloring the alley background & the cats, I then mounted the cats over the scene using foam tape.

Recipe:
Stamps: Alley Background, Howling Cats & "Purr"fect Friend Text - Rubbernecker Stamps
Paper: White; Black; Wasabi & Not Quite Navy - SU
Other: Black Ink; Blue Bayou SU Ink; Foam Tape

Monday, January 28, 2008

A Happy Occasion!


I am again combining two challenges today for this card ..... the first challenge is one that I do with my goofy CCEE friends on SCS ... this week we had a supply challenge. Tosh sent us each a clear square frame and the little clear heart embellishment. Our instructions were to use either one or both on our card. I used just the clear square frame on mine.

The second challenge is the MFT sketch challenge which you can find on the MFT Member Forum on SCS .... the square frame was just perfect to fit in the top right hand corner of the card and a great opportunity for me to play with another stamp from My Favorite Things "Happy Occasions" Set ... I left off the words which were below the flowers as I didn't want this to be a Mothers Day card which is what the words refer to.

I used my square nestabilities to layer my square frame ..... and used my script cuttlebug embossing folder to texturise the panel it is sitting on. I also use my white brilliance ink to highlight the raised words on this panel.

I am not really used to putting this amount of flowers on a card but as this is what the sketch asked for I did ... fortunately I had enough in the colors & sizes I needed. The sketch also called for something in the bottom righthand corner so I used my photo corner punch to add the photo corner with a brad there.


Recipe:
Stamps:
Happy Occasions & Happiest Birthday Wishes Sets - My Favorite Things
Paper: White; Pretty In Pink, Close To Cocoa & Pomegranate - SU
Other: Black Ink; Pretty In Pink & Pomegranate SU Ink; White Brilliance Ink;Tombow Marker #126; Script Cuttlebug Embossing Folder; Burgundy Grosgrain Ribbon; Corner Punch; Square Nestabilities; Clear Frames;


Sunday, January 27, 2008

Clean House .... Lazy Stamper!!!!

Here is another sneak peek at the new Domestic Goddess set by Hanna Stamps which will be released this coming Friday 1st February.

At Kristi's birthday party held in the Hanna Members Forum of SCS, there were a number of challenges to help celebrate the occasion. One of these challenges was a sketch challenge .... and this is my version of the sketch.

I used my rectangle nestabilities to frame my main image. And of course I am loving that verse .... now if only I could convince my DH that stamping were more important then housework .... hehehehe ... yeah I know it will never happen!

Recipe:
Stamps: Domestic Goddess Set - Hanna Stamps
Paper: White; Cool Caribbean, Groovy Guava & Gable Green - SU; DP - Rhonna Farrier
Other: Black Ink; Cool Caribbean SU Ink; Aqua Brads; Rectangle Nestabilities; Foam Tape


Saturday, January 26, 2008

Happy Australia Day & Redraw!

aus

To all my fellow Australians who read my blog .... Happy Australia Day .... I am proud to be Australian!!!!!!!!!!!!!

*******************************

Rubbernecker Bucks Redraw

As I still haven't heard from Melinda re the Rubbernecker bucks blog candy ... I have redrawn it ... so now we have a new winner.

I used random.org and the winner number this time was #11 ........ Adair

"I would say my favorite technique lately is watercoloring and Prisma color magic. I seem to do one of these with almost every card. Adair"

Congratulations Adair .... email me and I will organise getting your prize to you.

Sow Seeds of Love!

Today I combined two challenges to create my card that I have posted here! First up it is for the color challenge to celebrate Kristi's birthday ... the owner of Hanna Stamps! As it is her birthday we are having a party for her over in the Hanna Stamps Members forum of SCS tonight from 8pm - 11pm EST .... we will be having challenges and giveaways of not yet released stamps ... so why not head on over if you can!!!!!!! The colors we had to use for the color challenge today were Kristi's favorite colors: Charcoal Grey; Shades of Teal & Pink ... hopefully I have achieved that in this card. Don't forget that these new Riley stamps will be released by Hanna Stamps on Friday 1st February!

The second challenge here is Beate's weekend sketch challenge ..... I did have to flip the sketch this week so that I could use the Riley Moose image I wanted to on my card ... I prefer my images looking the towards the verse rather then away from as it would have been otherwise!

I think this card is pretty much self explanatory ... except for how I did my scallop layer for my verse ... that is actually 3 scallop squares joined together to make the size I need.

Recipe:
Stamps: Garden Riley & Words Hanna Would Say - Hanna Stamps; Scratched Grid - CHF
Paper: White; Grey; Pretty In Pink; Not Quite Navy
Other: Black Ink; Blue Bayou SU Ink; Square Nestabilities; Paper Piercing Mat & Tool; Pink & Blue Brads; Prima Flower; Photo Corner Punch; Blue Ribbon; Foam Tape

Friday, January 25, 2008

Penguin for a Friend!


I made this for a friend who loves penguins who celebrated her 50th birthday earlier in the week!

The penguin itself is made using a set of pear dies from Some Assembly Required ... they have a number of fantastic stamps, stencils and dies which allow you to make 3 D items like I have here!
It may look like this would have taken me a long time ... but in truth this most probably was quicker to make then some of the cards I post here all the time ... it helps that I have made many things using this die besides the penguin of course.

And sorry no I don't have instructions for this particular item ... mainly because you HAVE to have either the pear stamp, stencil or die to be able to create it in the first place .... and if you have either of those items then it is just a matter of following the instructions that come with that item but substituting the colors as shown here.


Recipe:
Paper:
White; Black; Red; Yellow
Other:
Pear Dies - Some Assembly Required; Googly Eyes


********** I still haven't heard back from the winner of my Rubbernecker Bucks Blog Candy I announced here on Wednesday ( Melissa) .... I will give her another 24 hrs to email me (link on sidebar) and if I haven't heard from her then I will draw out a new name. ***********

Thursday, January 24, 2008

Riley's Flying Da Plane!

Doesn't Riley look cute flying his plane!!! I am soooo in love with these Riley Moose stamps, I know many of you are waiting for the 1st February when the 6 Riley stamps myself and the other Hanna Stamps Design Team Members have been posting to our blogs and SCS galleries will be released. This Riley Moose image I have used on the card above will not be released then .... but you can have a change of winning it if you like!!!!

To create this card I stamp Riley on my card and stamped my verse into the banner section of the plane .... I used the tree from the "tis the season" set in the right corner to look like Riley is flying over them and the sun in the top left corner. I layered Riley using my square nestabilities
... I cut 2 scallop square shapes and joined them so that I could get the length I needed. The background on the bottom layer was created using my weave backgrounder & blue bayou ink.
Btw this is another card using this weeks color challenge ... it really suited the plane!

So how can you win this cute little Riley Moose ..... or maybe another Hanna stamp set not yet released. Here's how ................................


It's Kristi's birthday (the owner of Hanna Stamps) ... and so we are having a party to celebrate and you are all invited!!!!!!!!!!!!!!

When: Friday 25th January 8pm - 11pm EST

Where: Hanna Stamps Members Forum on SCS

What's Happening: Free Giveaways!!!!!!!!!!
Challenges!!!!!!!!

Come join us for the fun!!!!!!!!!!!!!!!!!!!!


Recipe:
Stamps
:
Tis the Season Set, Words Hanna Would Say & Riley in Plane - Hanna Stamps; Sun - Posh; Weave Backgrounder - CHF
Paper:
White; Soft Sky, Blue Bayou & Real Red - SU
Other:
Black Ink; Blue Bayou & Sun Yellow SU Ink; Celeste Blue Impress Ink; Blue Brads; Square Nestabilities; Foam Tape

A Chocolate Birthday!

This week I had to create a card suitable for a teenager .... that was the challenge with my fab/sassy friends that I do each week.

It has been a long long time since I had teenagers around the place ... but I do think this card would be suitable ... I hope so anyway. My first thought for this challenge was to use Gina K's phone ... but I also knew a friend was using that so I wanted to go in a different direction. Of course I don't have any teenagers to give this to ... but I think it would do equally well for anyone older ... so I will likely keep it to give to my DD later in the year.


Recipe:
Stamps: Nay - Rubber Romance; Sentiment - Lizzie Anne Designs
Paper: White; Pretty In Pink & Pomegranate - SU; White; Rectangled DP - KI Memories
Other: Black Ink; Pomegranate SU Ink; Burgundy Grosgrain Ribbon; Circle Nestabilities; Brads; Foam Tape

Wednesday, January 23, 2008

Rubbernecker Bucks Winner!

It's time to announce the winner of the Rubbernecker Bucks that I offered on my blog yesterday thanks to Rubbernecker Stamps.

Thank you everyone who left comments to my blog candy post ... it was very interesting to read what everyones favorites techniques were.

I used random.org to pick the winner!!!!!!!!

As you can see the winner was post #16 which was:
Blogger Melissa said...

My favorite technique is watercoloring.

Congratulations Melissa ... email me so I can arrange getting your prize of $10 Rubbernecker Bucks to you.

Thanks everyone for playing!!!!!!!

Plan Bee!

It's Wednesday, so that means it is time for another sketch challenge on SCS. The stamp I was originally planning on using for this challenge didn't really suit this particular sketch so it was onto plan b or is that bee!!!!!!

I started making my card with the view of maybe putting a verse in the centre panel rather than an image ...... but when I was digging through some stamps I received yesterday I found this one so decided to use this instead.

As many of you are aware .... until recently I would color my images true to the color they are in nature ... but I have managed to create a few blue owls in the past so I decided why not "pink bees" ..... so here it is!!!!!

As in previous cards I used my scallop rectangle nestabilities to create my layered piece under the bee .... for this one I cut out 2 rectangles from the pomegranate card and joined them so that it would be long enough for my image. I also thought it needed something in the bottom left corner of the bee panel so I got out my paper piercing mat & tool and added some piercing to that corner.

Recipe:
Stamps: Bee Party - Stampendous
Paper: Pretty In Pink & Pomegranate - SU; Black; White; Rectangled DP - KI Memories
Other: Black Ink; Rectangle Nestabilities; Paper Piercing Mat & Tool; Corner Punch; Clear Stickles; Foam Tape

A Clean House!


Here is a sneak peek of the latest Hanna Stamp range which is to be released on Friday 1st February! Don't you just love her!!!!!! This set is being called Domestic Goddess ..... and contains Hanna vacuuming, the verse and a number of other cleaning related stamps! I so love the verse .... guess I should keep that in mind ... I don't want to be known as a lazy stamper ..... bwahahahahahahahaha!

I decided to try out the color challenge over on SCS for this card .... this week the colors were .... real red, soft sky & blue bayou ... not colors I would normally use together but it was fun for this card! I added the paper piercing corner to the top corners of my main panel and also 2 rows along the side of the blue bayou panel on the left of the card. I joined two scallop rectangle nestabilities to get the size rectangle I needed for this image.


It's Kristi's birthday (the owner of Hanna Stamps) ... and so we are having a party to celebrate and you are all invited!!!!!!!!!!!!!!

When: Friday 25th January 8pm - 11pm EST

Where: Hanna Stamps Members Forum on SCS

What's Happening: Free Giveaways!!!!!!!!!!
Challenges!!!!!!!!

Come join us for the fun!!!!!!!!!!!!!!!!!!!!

Recipe:
Stamps: Domestic Goddess Set - Hanna Stamps
Paper: White; Real Red, Soft Sky & Blue Bayou
Other: Black Ink; Paper Piercing Mat & Tool; Rectangle Nestabilities; Foam Tape

Tuesday, January 22, 2008

Good Friends are Priceless!


I am still trying to catch up on some sketch challenges I like to participate in after the weekend. Today I was able to get my card made for the MFT Sketch Challenge which is posted in the My Favorite Things Member Company Forum each week.

I haven't played with my "Say Charge" set for a while so I thought it was time to get that one out to play this time round ... it is such a fun set! I did flip the sketch as I preferred the image to be facing the embellishment I added to my card rather than away from it ... but otherwise it is the same sketch.

Recipe:
Stamps: Say Charge - My Favorite Things
Papers: White; Cool Caribbean, Old Olive & Chocolate Chip - SU; Retro DP - DCWV
Other: Black Ink; Chocolate Chip SU Ink; Circle Nesabilities; Photo Corner Punch; Brown Grosgrain Ribbon

A Treasure Hunt, Blog Candy & A Card!

Ahoy ye mateys!

It’s TREASURE HUNT TUESDAY @ RUBBERNECKER. The Treasure if you find it, will be a free image. However, to receive the Treasure a purchase of any size is required, and your treasure must be claimed between 5:00 am PST until 9:00 pm PST today (8:00 am EST - 12:00 am EST). Not only is today Treasure Hunt Day, but for every $50 in stamps purchased, you will receive one FREE stamp. You can check out more information on the Rubbernecker Home Page.

While you are on the Rubbernecker Homepage make sure and read about the Rubber Bucks Monthly Drawing AND the FREE stamp offer:

*** Each month you can qualify to win $100 coupon good for Rubbernecker or Stamp Oasis stamps! For every $20 you spend, your name is entered once into a drawing.

*** For every $50 you spend on Rubbernecker, Stamp Oasis or KK Originals stamps, you get to choose a FREE stamp!

But there is more!!!!!!!

Four of the Rubbernecker Stamps Design Team members are offering blog candy today!

And I am one one them!!!!!


To win all you need to do is leave a comment today on my blog and tell me what your favorite stamping technique is .... I have many favorite techniques one of which is using bleach on my cards ... which is the tehcnique I have used for the cards I am posting here today ... more about them in a bit.

Once you have left a comment here ... head on over to the other blogs below and comment on their blogs for more chances of blog candy .... Oh yes and what do you get .... I almost forgot to tell you all ;)


You can find the first clue to the Treasure Hunt on Kittie’s Blog!!!


Ok now onto my cards for today .... as I said earlier ... one of my favorite techniques is to use bleach to create my cards ... and that is exactly what I did here!

Unfortunately the photos here don't do the cards justice ... it is really hard to get a decent photo of these ... the main color used here is black and the pieces that look like kraft are actually gray.

For both these cards I first stamped the Calla Lillies onto black card using black pigment ink and then embossed using clear ep. I then painted the bleach (I prefer to have a waterbrush pen just for this purpose as it is a safer option than having it in a contain that could spill everywhere) onto the flower just as you would if you were painting or coloring any other image. Once the image is completely painted ... leave to dry and you will see the color changing .... how the color will change can vary from different brand of card.

For the background I again used bleach but this time I had my bleach in a spray bottle and sprayed it over the piece that was to be the background ... which results in the speckled look I have here. Sooooo easy but effective too.

As you can see in the top card .... I left it like that the bleached look can look very effective. However if you like you can take it a step further which is what i did with my second card ... once I had finished bleaching the flowers I then went back over the flowers and painted them using radiant pearls. You could also use various other coloring methods if you preferred.

For for info on the bleach technique ... check out my bleach tutorial here.


Recipe:
Stamps: Calla Lillies - Rubbernecker Stamps
Paper: Black; Grey
Other: Black Pigment Ink; Clear EP; Bleach; Waterbrush Pen.

Monday, January 21, 2008

It's a Photo!


Yes I know this is a very different card for me to post, however this is for a challenge I do with my goofy CCEE friends over at SCS. Our challenge today was to create a card that features a photo. The photo could be from a magazine or your I had taken as long as there was a photo on it.

I am hoping that I have done something different that what the others would do ... I do like the effect of this technique.

To create this look I used my rectangle acrylic blocks from Stylish Images (Aust) .... as these are clear and also thick you can see exactly where to place them on your photo to get the look you are after and also because they are thick I can use my craft knife directly around the rectangles.

I started in the centre placing the smallest rectangle I wanted to use over the image which is the feature so I didn't lose any of the polar bear and then just kept cutting out each rectangle a bigger size till I got to the end of the photo. Before I started cutting though I did run the photo through my xyron to save trying to adhere those narrow strips later.

To attach to my card .... I started with the centre piece .... then placed the 2nd piece around without removing the adhesive ... this piece is just there so I can get the correct placement for the 3rd piece ...... continue placing the pieces alternating between removing adhesive and not ... when all the photo is down ... remove the pieces without the adhesive so that you can see the black card in between each piece.

I then layered this to my wild wasabi, river rock and hunter green card.

To finish off the card I added some snowflakes to two of the corners. And can you believe it ..... NO STAMPING!!!!!

Recipe:
Paper: Black; Wild Wasabi, River Rock & Hunter Green - SU
Other: Snowflake Cuttlebug Die, xyron 510, Right Rectangles & More Right Rectangles Acrylic Templates - Stylish Images

Baby Girl!

Yes sorry it is another baby card ... I seem to be making baby cards right now ... but I promise I will move onto something else shortly ;) ....... I had this image out to do this card even before my second friend told me she was expecting a baby hehe .... it is just concidence! It is way too early to know even what either of them are having as yet .... knowing those two ... probably twins!!!! bwahahahahahahaha! (Sorry that was cruel ;) )

This card is for Beate's Weekend Sketch challenge ... I normally do this on a Saturday but because I was busy with VSN all weekend over on SCS .... I only got around to doing it last night .... I am even amazed I did it then actually ... cause I was soooo tired .... but Beate's sketches do that to ya ... you can't help but do them hehe!

The elephant here is by Peachy Keen Stamps ... I think she is the cutest (it's a baby girl card so the elephant has to be a girl here right!) .... I stamped the elephant onto white card and then layered her to my largest scallop rectangle I have.

The background piece is done using my baby cuttlebug embossing folder ... once I had embossed the background ... I went over the raised areas using my sponging block and Pretty In Pink SU ink pad.

I have had the baby bottle buttons for sometime so decided to use them rather than brads for a change ... yes no brads in this card not even one!!!!!! And I used my oval & label punches to create the layers for my sentiment. To finish of the card, I added stitching & dots around my pink layers using my white gel pen.

Recipe:
Stamps: Baby Elephant - Peachy Keen Stamps; Sentiment - Baby Set by Fiskars
Paper: White; Blush Blossom & Pretty In Pink - SU; Smokey - Bazzill
Other: Black Ink; Pretty In Pink SU Ink; Bottle Buttons; Oval Punches; Label Punch; Baby Cuttlebug Embossing Folder; White Gel Pen; Foam Tape

Sunday, January 20, 2008

It's A Baby!

During weekend a couple of my friends announced that they were having a baby this year .... so I felt like making a baby card :) .

This card combines two challenges, the Celebrate MFT challenge and the Featured Stamper on SCS. This week's featured stamper is KathyC and after some time browsing her gallery I decided to CASE this card of hers. As per the featured stamper rules I had to make at least 2 changes to my card .... here are my changes:
  • Changed the colors.
  • Changed the image used.
  • Changed the DP
  • Changed the position of the ribbon
  • Added a layer to my scallop shape
  • Changed the position of my sentiment
  • Added a brad to the top left corner of the DP panel
  • Changed the background stamp used.
  • Paper Pieced my main image.
I didn't have the right color ribbon so I created my own using white grosgrain ribbon and my alcohol markers.
Recipe:
Stamps: Its A Shower Set - My Favorite Things; Scratched Grid Backgrounder - CHF
Paper: White; Soft Sky, Blue Bayou & Soft Sky DP - SU
Other: Black Ink; Blue Bayou SU Ink; White Grosgrain Ribbon; Blue Brad; Circle Nestabilities; Foam Tape

Panty Template


Here is the template for the panty card I created for my VSN challenge I hosted on SCS today. This template will get you both the panty card and the bra card I did. Click on the template below which should bring it up as full size, save it to your computer and then you will be able to print it off.


Recipe:
Stamps: Verse - Rubbernecker
Paper: Blush Blossom - SU; Retro DP - DCWV
Other: Chocolate Chip SU Ink; Pink Chalk


VSN Jan 08 Day 2

VSN is over for another weekend, it has been a fun with weekend with lots of great challenges for us to participate in. The theme this weekend was "Girls Night Out" so all the challenges related in some way around this. I really enjoyed playing the challenges, chatting to some of you and supporting the other hostesses. If you haven't had time to play and still would like to then there is still time just head over to the VSN forum and check out the challenges, as long as the card takes you 45 mins to create once you start stamping you are fine .... your card does need to be in the appropriate gallery by 3pm Sunday ET.

Here are my samples from todays challenges. Being a hostess for VSN I am able to play the challenges prior to this weekend ... this helps us check that the challenges are do-able in the time limit etc. Even though we get to play before hand we still have to stick to all the VSN rules eg the 45 mins time limit etc.


The first challenge today that I did was "Let's do our Nails" for this challenge we had to create a card using the polished stone technique. This isn't my most favorite card out of all the ones I did .... but we all have some we don't like as much as others.

Recipe: Stamps: Magenta (dragonfly); Stamp In Style - (Dragonfly word)
Paper: White Gloss; Certainly Celery & Garden Green - SU
Other: Black Ink; lettuce, pesto and bottle adirondack alcohol inks; Black Brads; Score It Board


This card was for the "Bling It On" challenge ... we had to give our card some form of bling .... glitter, sparkles anything as long as it was bling.

I recently received these fun martini rhinestone embellishments from my friend Tosh .... and as soon as I saw this challenge I thought of them. The only stamping for this card is the verse on the outside and inside.

The inside sentiments reads: "Happiness is clean underwear and a dirty Martini."

You might understand why I would want a clean underwear stamp further down this post.


Recipe: Stamps: Happiness Is - Club Stamp; Dirty Martini Text (Inside) - Rubbernecker Paper: Black Card; Grey Card; Pixie Pink - SU; Midnight Rouge DP - Cherry Arte Other: Black Ink; Martini Rhinestone Embellishment - Me & My Big Ideas
"Everyone Needs Closure" was the theme for the next challenge .... the idea was to make a card using a different fold or closure. I decide to do create a Z fold card

Recipe: Stamps: Boy with Dog - High Hopes; Hi - Impression Obsession
Papers: White; Old Olive, Cool Caribbean & Cameo Coral - SU; Retro DP - DCWV
Other: Black Ink; Square & Circle Nestabilities; Brads

The next two cards (the one above and the one below) were my samples for the challenge I hosted this weekend. The challenge was "Put on Your Big Girl Panties!", the idea was to create a panty card of some type. Participants could either make their panty card using the template I provided which would make the card above or they could make a card that used a panty stamp of some type.

Using the template I provided .... you are also able to make a bonus card if desired ... that is the card with the bra on it. I had fun making the above cards and thought the sentiments I chose worked so well with these two cards.

In case you can't read them the bra card says "You're a perfect pair" not exactly what was meant when this stamp was made I am sure ... but I am sure their are some who do have the perfect "pair" but that sure isn't me!

And as the panty card is showing the rear view of a person, I couldn't resist adding .... "I'm Behind You 100%"


Recipe: Stamps: Perfect Pair - Gina K Designs; Behind You 100% - Rubbernecker
Paper: Blush Blossom - SU; Retro DP - DCWV
Other: Chocolate Chip SU Ink; Pink Chalks

This is my second sample for my "Panty Card" challenge. I just love this dog! This was a very quick card, the sketch is one that Cammie did for the Gina K release party.

Recipe: Stamps: Dog - Rubbernecker; Verse - Missy B Designs Paper: White; Elegant Eggplant & Lavendar Lace - SU; DP - Penny Black Other: Black Ink; Circle & Square Nestabilities; CM cutter; Paper Piercing Mat & Tool

A friend gave me this stamp for Christmas and I thought it was perfect for the overall theme of the weekend so decided to use it for this next challenge ..... "Eyes Have It!" Of course for this challenge we had to use eyelets on our card. I used to love using eyelets and have lots of them but these days I tend to pick brads to eyelets, so it was fun to get out the old eyelets for this one.

Recipe: Stamps: Girl - Stamps Happen Papers: White; Black; Grey; Rose Red - SU Other - Black Ink; Eyelets; Script Cuttlebug Embossing Folder; Foam Tape

And finally the last challenge of the weekend "Standing at the Fridge Door". The idea here was to use all our "leftovers" we had left out and create a grid type card.

I had some DP and scraps left over from the sketch card I did this week so I used those to create my card here ... I also had Riley Moose already stamped out so I grabbed him and colored him to suit the colors used here.

This is of course another of the Riley Moose stamps which will be released by Hanna Stamps on the 1st February.


Recipe: Stamps: Riley Moose - Hanna Stamps
Papers: White; Pumpkin Pie & Chocolate Chip - SU; Retro DP - DCWV
Other: Black Ink; Ticket Corner Punch


Saturday, January 19, 2008

VSN Jan 08 Day 1

The first day of VSN was a complete success! I had a ton of fun and I hope you did too if you played along.

I managed to get to play in 5 of the 6 challenges ... although I did play a little ahead of time being that I am again a hostess for this VSN. Of course I did still need to play by the rules in regard to time limits etc just like everyone else.


This first one I did actually make in real VSN time as I didn't get time to make it before that. I decided to use another of the Riley stamps by Hanna Stamps which are going to be released on the 1st February .... I am just loving these stamps!

I know the circle looks a little crooked here in the photo .... but it isn't that is just the illusion you get because you can see the back of the card from the front ... I cut the circle out using my circle cutter.


Recipe:
Stamps: Riley - Hanna Stamps; Easter - MFT; Wheel B'Ground - SU
Paper: White; Pretty In Pink; Chocolate Chip & Regal Rose - SU
Other: Black Ink; Pretty In Pink SU Ink; Paper Piercing Mat & Tool; Prima Flower; Pink Brad


This card was for the Chocolate or Shoes Challenges .... the hostess provided us with a picture of yummy chocolate shoes which we were to use as our inspiration ... we could make a shoe card, a chocolate card or a card using those colors or all 3 ..... I guess I could say mine is all three as I would title this one Chocolate Shoes!

Recipe:
Stamps: Shoes - Impression Obsession; Verse - Pink Cat Studio
Paper: Pretty in Pink, Regal Rose & Chocolate Chip - SU; White
Other: Chocolate Chip SU Ink; Paper Piercing Mat & Tool; Pink Brads


The 2 photos above are for the next challenge I did ... "V Neck ..... baby ... wink". For this challenge we were to create a criss cross card. My photos show with the insert in and out of the card.

Recipe:
Stamps: Wanted & Bronc Buster - Stampin' Up
Paper: White; Blue Bayou & Chocolate Chip - SU; DP - Sandylion
Other: Close to Cocoa SU Ink; Tab Punch; Corner Rounder; Chocolate Brad; Decorative Brad; Circle Nestabilities


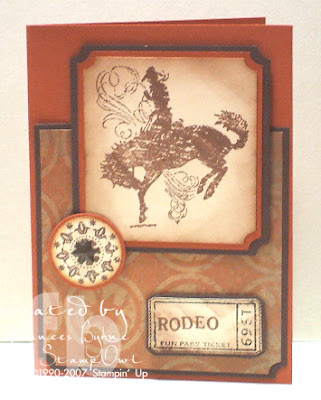
This card is for the "She's got a ticket to stamp" challenge, our card had to have some form of ticket on it ... as I knew I had a ticket stamp I decided to fish it out and came up with this card.

Recipe:
Stamps: Bronc Buster & Wanted - Stampin' Up; Karen Foster Snap Stamps; Ticket Stamp - Print Blocks
Paper: Very Vanilla, Really Rust; Chocolate Chip & Outlaw DP - SU
Other: Close to Cocoa SU Ink; Ticket Corner Punch; Star Brad; Circle Punch; Foam Tape


My final card for today was for the "Nail Polish, Mud Mask & Lotion Challenge". Our card had to contain some masking. I stamped the penguins, created a mask which I put over them. I also used a torn mask to create the ice area of the card. With both masks in place I brayered in the sky and then stamped the trees in the background. When all this was completed I removed both masks.

Recipe: Stamps: Penguins - Peachy Keen Stamps; Trees & Verse - SU
Paper: White; Black; Taken with Teal - SU
Other: Black Ink; Soft Sky, Cool Caribbean & Brocade Blue SU Ink


Friday, January 18, 2008

Cheers Riley!


Here is another sneak peek at the new Riley stamps which will be released by Hanna Stamps on the 1st February. This one is all set for St Patricks Day which when you think about it isn't all that far away.

I am having so much fun playing with these new stamps and as I had a couple of friends here yesterday and was showing them how to make "kick stand" cards ... I decided to make another of these myself this time with Riley on it.


Recipe: Stamps: Riley - Hanna Stamps; Cheers - Stamping Bella; Handmade Oval Shadow
Paper: White; Garden Green & Old Olive - Stampin' Up; DP - ??
Other: Black Ink; River Rock SU Ink; Word Window Punch; Photo Corner Punch; Circle Nestabilities; Olive Brads; Hodgepog Hardware; Green Grosgain Ribbon.

Thursday, January 17, 2008

Virtual Stamp Night!

smiley on computer

Just a reminder to everyone that this weekend is Virtual Stamp Night on SCS.

VSN begins on
Friday at 6pm EST; Saturday begins at 12 noon EST. Challenges are posted every hour until 11pm EST each day in the VSN forum .

For any Aussies wishing to join in the fun these times convert to 9am Saturday and 3am Sunday morning (Qld time) ... and no I won't be there at 3am .... but I will be there for most of the weekend. Come on over and say hi.

Please come and join us for some fun .... stamp a little or even just chat with other stampers if that is more your thing. If you don't have time to play all weekend ... just pop in and try a challenge or two. You have until 11pm Sunday to upload your challenges to the SCS gallery.

If you have any questions about VSN, leave me a comment here or ask in the VSN forum of SCS

Easter Riley

Here is another sneak peek of the new Riley stamps to be released by Hanna Stamps on the 1st February. Isn't this just so cute ... Riley popping out of an Easter Egg ... I know Easter seems a long way away ... but in reality it isn't and don't be fooled cause this year Easter falls at the end of March not April like it normally does .... I believe my birthday is actually Easter Monday this year ;)

This card is for a challenge I do with my fab/sassy friends on SCS .... this week we had to create a card using paper piecing ... if you look at the egg on the card you will see I paper pieced the same paper onto the egg as I used for the bottom of the panel .... you might need to look closer but it is there ..... I promise. I also paper pieced the bow and raised the bow section up using foam tape.

I also decided to use this card to play in this months DD sketch challenge on SCS .... I think I have skipped a couple of months playing their sketches so I really wanted to make sure I did it this time round.


Recipe:
Stamps: Riley in Easter Egg - Hanna Stamps; Verse - MFT
Paper: White; Lavender Lace, Apricot Appeal, Certainly Celery & Cameo Coral - SU; Nana's Kids DP - DCWV
Other: Black Ink; Tea Dye Distress Ink; Circle Nestabilities; Lavender & Green Brads; Photo Corner Punch; Foam Tape

Wednesday, January 16, 2008

Meet Riley Moose!

Have you met Riley Moose yet???? Isn't he just he cutest!!!!! Riley is a new line of stamps which will be released on the 1st February by Hanna Stamps. These stamps come in both wood mounted and unmounted red rubber ... your choice!

Keep an eye on my blog and the blogs of the other Hanna Stamps design team for more sneak peeks of this adorable line!

I have some more news about Hanna Stamps to share with you to today ... Hanna Stamps is now a Member Company over at SCS. You can come visit us there to chat, participate in sketches & other challenges, hear the latest news on releases etc. Why not come on over and drop in to say hi! You can find us here!

It's Wednesday today so time for another sketch challenge from SCS as you can see I decided to create my card with one of the new Riley Moose images . I stamped Riley onto white card twice using black ink, the second image I cut out the head only and attached that over the head of the base panel. I used my ticket corner punch and my paper piercing mat and tool to create my corners .... as you can see I omitted the paper piercing on the bottom right hand corner.

The "Happy Birthday 2 U" circle sentiment is one from Lizzie Anne Designs .... I layered this using my circle nestabilities.


Recipe:
Stamps: Riley Moose - Hanna Stamps; Verse - Lizzie Anne Designs
Paper: White; Pumpkin Pie & Chocolate Chip - Stampin' Up; Retro DP - DCWV
Other: Black Ink; Chocolate Chip SU Ink; Brown Brads; Circle Nestabilities; Ticket Corner Punch; Paper Piercing Mat & Tool; Brown Grosgrain Ribbon; Foam Tape

Wishes Come True!

My Gina K ordered arrived yesterday morning, how cool that these arrived the same day that Gina announced her new design team for the coming 3 months ..... you can see her post here. I couldn't believe it when I first opened up the email from Gina to inform me I was on her team this round ..... I am so looking forward to it!

I had a busy day yesterday as I had a friend over and we went shopping for square envelopes which we found but I also managed to find some new DP during my travels too ... this one used here is one of them. Of course I had to make a card last night using one of my new stamps and some of my new DP ;)

Yeah I know it is bright .... you might need sunnies (hehehehe!), but I just had to use that DP with the giraffe .... I think it would make a great kids birthday card!

I stamped the giraffe onto my white card using black ink, and colored ... I just love those hearts instead of spots on the giraffe's back ...... I was tempted to turn this into a valentines card but I figured I had enough of those here for now esp considering my DH doesn't do valentines hehe! I masked the giraffe so that I could add the grass and clouds around her.

For the pink panel I used my heart cuttlebug embossing folder to emboss just the top section of the card, this was a little tricky when I came to the other side of the card ... but as the band was going across the card anyway ... I just folded the card there so I could get it in my machine! Shhhhh don't tell! I added the DP across the card and added my ribbon. Stamped my verse below on the portion of the pink card that I hadn't embossed and then mounted this all to my folded white card.


Recipe:
Stamps: Just so Hippy & Rectangle Greetings - Gina K Designs, Clouds - Art Impressions; Grass - Stamp It
Paper: White; Pink Passion & Green Galore - Stampin' Up; Playtime DP - Kaiser
Other: Black Ink; Green Galore SU Ink; Celeste Blue Impress Ink; Ticket Corner Punch; Heart Cuttlebug Embossing Folder; Pink Grosgrain Ribbon