Saturday, December 8, 2018

Buzzin' With New For You!


Hi Crafty Friends,

It’s challenge time with the “Crazies” over on the Crazy 4 Challenges blog.  As challenge hostess for December I am continuing to issue the challenges. Today is our final challenge for 2018 as we are all taking a break so we can spend time with our families. We will be back next year with lots more fun challenges to play along with!

For our challenge this week we are creating a card using your favorite "Crazy" sketch from our 2018 sketches.


As you can see I am  taking a break from Christmas cards today. I decided to use our May Sketch C4C435 to create my card today.

I have used Honey Bee Stamps Build a Bee Clear Stamp set as well as one of their stencils from the Hexagon Layering Stencils to create the background.

I used an older "bee" themed sentiment, masking one row so I could white emboss the sentiment. I used Honey Bee Stamps new Banner Builder die set to die cut the sentiments. I think I will be getting a lot of use out of this die set as it gives many options of die cutting a sentiment.


As you can see I have created a pop-up card using Karen Burniston's Katherine Label Pop-up die set. I again created the background panels using the Layering Hexagon Stencil and Distress inks.

To decorate my card I used sentiments from The Stamps of Life and more of the bee images from Honey Bee Stamps.


Here is another photo of the inside of my card taken at a different angle so you can see the pop-up piece of the card a little better.

Don't forget to check out the rest of the “Crazies” cards over on the Crazy 4 Challenges blog and also their individual blogs for more details.


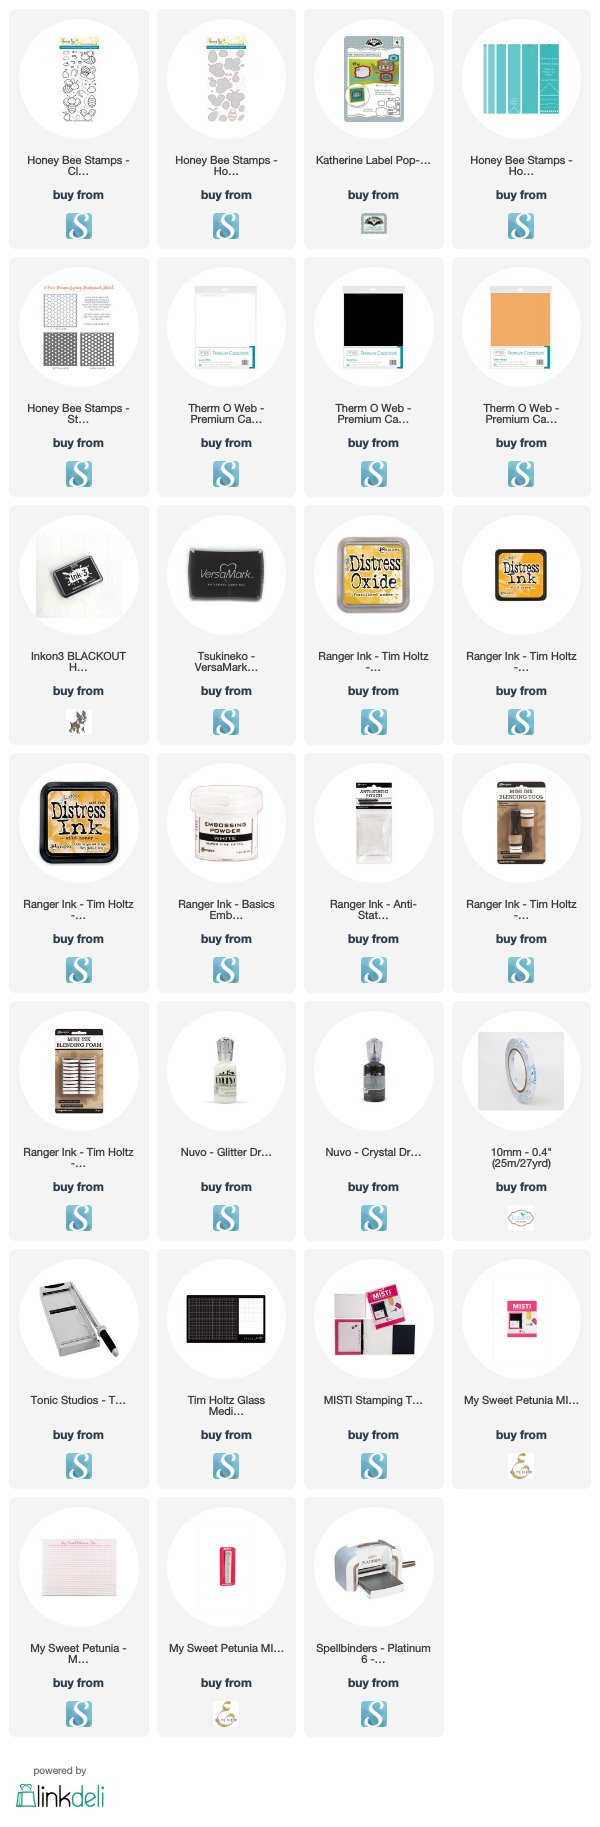
Supplies:
For your shopping convenience, all products are linked below. Compensated affiliate links are used where possible with no extra cost to you. This helps me to continue to share all the projects I include on my blog. Please note I only use and share products I love.

Buzzin' With News For You Stamp - The Peddler's Pack


Friday, December 7, 2018

Nordic Christmas Crackers


Hi Crafty Friends, 

Today  am sharing some fun mini Christmas Crackers using a new die set from Tonic Studios I purchased a few months ago.

This die set was included as an extra to one of Tonic Studios magazines that they put out every quarter. Last I checked there were still some available from Scrapbook.com and I have included the link below in my supply list if anyone needs this die.

The die is the Nordic Christmas Cracker. It comes with the main die to die cut the cracker itself and then 4 dies to decorate the top of the cracker and 8 small rectangle dies to decorate the top of the crackers.


For my crackers today I used the main cracker die to die cut red cardstock and then I used the tree decorative die to decorate the top of the crackers, die cutting from gold cardstock.


Also included in the magazine I purchased to get the cracker die, was a die set called Nordic Christmas Trio Panel. It includes a frame and 3 decorative panels. Two of the decorative panels coordinate with the cracker die. So for the two crackers above I used the reindeer and Christmas tree die.

Supplies:
For your shopping convenience, all products are linked below. Compensated affiliate links are used where possible with no extra cost to you. This helps me to continue to share all the projects I include on my blog. Please note I only use and share products I love.


Thursday, December 6, 2018

You've Been Elf'd


Hi Crafty Friends,

It's challenge time with my friends over on the CCEE Stampers challenge blog. Being a brand new month it is time to introduce our new challenge hostess which is me!!!

Elf Antics - One of the traditions I love to do at Christmas has to do with Elf on the Shelf. I know some people love them and some people hate them .... I am in the love category. For our challenge this week include an elf on your card.

For my card today I created a Christmas card using the Charm Accordion die set from Karen Burniston. 

I die cut the Charm Accordion using teal cardstock and then splattered white paint over the cardstock to resemble snow. Along the bottom edge of the card I used the snow border from the Nature Edges die set. The snowflake in the centre of the card is from the Winter Charms die set. 


To decorate my card I used the elves from the Mama Elephant Little Elf Agenda Clear Stamp set. I also added a tree which is from the Evergreen Pivot Panels die set.

The sentiments are from a retired stamp set from Essentials by Ellen.

To finish off the card I added some White Blizzard Nuvo Drops to the snow areas of the card.

Don't forget to check out the CCEE Stampers blog (goes live 12 AM EST) to see the rest of the creations the CCEE Stampers created this week. You can also see more details of their creations on their individual blogs:


Supplies:
For your shopping convenience, all products are linked below. Compensated affiliate links are used where possible with no extra cost to you. This helps me to continue to share all the projects I include on my blog. Please note I only use and share products I love.

Elf'd Clear Stamp Set - Essentials by Ellen


Wednesday, December 5, 2018

Stencilled Poinsettia Cards


Hi Crafty Friends,

Today I am sharing three stencilled Christmas cards I created using a new Honey Bee Stamps Poinsettia Stencil I purchased recently.

I wanted to create some glittered cards using glitter paste, but the Nuvo glittered pastes I have in red and green are both dried up. So I decided to pull out my Viva pastes in gold and red and used them instead.


For my first card I used Viva's Carmine-Red Metallic 3D Stamp Paint through the stencil. I then trimmed a section of the panel and added it to a folded card.

I added a sentiment which I stamps using red ink and then embossed using silver pearl embossing powder adding the sentiment to circles.

To finish off the card I added large jewels over the centre circles of the poinsettia and some tiny jewels randomly over the card.


I added the left over pieced of stencilled cardstock to the left hand side of my card and then added a sentiment.


For my second card I used Viva's Gold 3D Stamp Paint through the stencil on red cardstock. I die cut the panel using MFT Stamps Stitched Scallop Basic Edge die set, layering it onto a folded white card. I added a sentiment to the lower right hand side of the card using gold embossing powder.

To finish off the card I added some tiny gold jewels over the card.


For the inside of the card I added the negative piece of the stencilled poinsettia panel to the bottom of the card and added a sentiment.


For my final card I again used Viva's Gold 3D Stamp Paint through the stencil on red cardstock. 

I trimmed off part of the panel and added a thin strip of green cardstock to the right hand side of the card.

For the sentiment I stamped using gold embossing powder and then die cut using two of the dies from Honey Bee Stamps Banner Builder die set.

I added large and small red jewels over the card.


For the inside of my card I added the left over stencilled panel to the left hand sided and gold embossed a sentiment.

Supplies:
For your shopping convenience, all products are linked below. Compensated affiliate links are used where possible with no extra cost to you. This helps me to continue to share all the projects I include on my blog. Please note I only use and share products I love.

Carmine-Red Metallic 3D Stamp Paint - Viva
Gold 3D Stamp Paint - Viva
Jolly Sentiments Clear Stamp Set - Kaisercraft
Traditional Sentiments Clear Stamp Set - Kaisercraft


Tuesday, December 4, 2018

December 2018 Karen Burniston Designer Challenge


Hi Crafty Friends,

Welcome to our December Karen Burniston Designer Challenge.

Check out Karen Burniston's blog on Wednesday (US Time) when you will be able to see what all the designers created for the challenge this month, plus Karen will have an amazing video tutorial to share with us all.

Our challenge theme this month is ....  "INK IT!" - incorporate inks (or paints, or sprays, or pastes) into a card of any theme.


I have been having fun this year creating sky backgrounds using distress oxide inks. I love how easy they blend together and also the look of them to create daytime, nighttime or snowy backgrounds. I am not sure why I have been creating so many snowy scenes this year for Christmas seeing that it is hot where I live on Christmas day ... but I have been having fun creating them so that is what I decided to do for this months challenge.


To create my scene I had die cut the largest rectangle from the Crosshatch Rectangles die set and then used Distress Oxide inks to create the sky. I used Picket Fence Distress Paint which I watered down slightly and splattered that all over my background.

For the snow drifts, I die cut the same rectangle I used for the sky and then used the snow/dirt border from the Nature Edges die set.

For the trees I used one of the trees from the Evergreen Pivot Panels die set, using the stencil feature to add white gel pen.


For the pop up portion of the card I used the Katherine Label Pop-up die set. 

To decorate my card I used Stampin' Up's Signs of Santa Clear Stamp set. After attaching all the images to the card, I added White Blizzard Nuvo Drops to the snowy areas of the card.


For the front of the card I repeated many of the elements I used on the inside of the card. I added the "Merry Christmas" sentiment which is from the Word Set 3 - Holiday die set.

Don't forget to visit Karen Burniston's blog on Wednesday when you will be able to see what all the designers created for the challenge this month.


Supplies:
For your shopping convenience, all products are linked below. Compensated affiliate links are used where possible with no extra cost to you. This helps me to continue to share all the projects I include on my blog. Please note I only use and share products I love.

Signs of Santa Clear Stamp Set - Stampin' Up


Monday, December 3, 2018

A Meowy Christmas To All


Hi Crafty Friends,

Today I am sharing another Christmas card with you all. Recently when I attended a local craft show, I succumbed to buying this cute stamp set from Mama Elephant which features cats in the form of a Christmas tree ... isn't it adorable!!!

To created my card I die cut the scalloped card front included in Mama Elephant's Framed Tags- Hexastar die set. I then used the Ellen Hutson Snowfall Backdrop to die cut the snow background to this panel. I then used Distress Oxide inks to create my sky.


To create the snow bank at the bottom of the card, I used the Lawn Fawn Stitched Hillside Borders die set. 

Along the bottom of the snow bank, I added the sentiment which is white embossed onto red cardstock.

Finally my panel was attached to a top-folding card which has red striped paper added to the top and bottom of the card.


For the inside of my card, I added the same striped papers to the bottom of the card and then attached the two cats also from the Oh Kitty Tree stamp set onto the paper.

To finish off the card I added the sentiment which is stamped using red ink.

Supplies:
For your shopping convenience, all products are linked below. Compensated affiliate links are used where possible with no extra cost to you. This helps me to continue to share all the projects I include on my blog. Please note I only use and share products I love.

Seasonal Sentiments Clear Stamp set - MFT Stamps


Sunday, December 2, 2018

Enjoy Coffee


Hi Crafty Friends,
Today I am playing along in the Fall/Winter Coffee Lovers Blog Hop which is being held from Friday 30th November to Friday 7th December.


Seeing it is December and Christmas is only a few weeks away, I decided to go with a Christmas/Winter theme for my card.


To create the base of my card I used Honey Bee Stamps Coffee Cup Card die set which creates a folded coffee cup card along with the wrap to go around the middle.

I die cut the coffee cup base using red cardstock and then stamped the border stamp from the Concord & 9th Cozy Christmas stamp set completely over the front of the card, I stamped the border using VersaMark ink and embossed it using white embossing powder.

I die cut the lid using white cardstock and stamped a Christmas sentiment from a Waffle Flower Stamps stamp set.


I die cut the wrap using Kraft cardstock. I then stamped the "Enjoy" sentiment along the bottom edge of the wrap.

I stamped three Christmas trees also from the Cozy Christmas stamp set using green ink on green cardstock and then die cut the trees and adhered them to the top of the wrap adding the centre tree to the wrap using foam tape.

To finish off the card I adhered some silver stars to the trees and the lid.


For the inside of the card I stamped three of the sentiments and the border from the Cozy Christmas Clear Stamp set using VersaMark ink and White Embossing Powder.

Supplies:
For your shopping convenience, all products are linked below. Compensated affiliate links are used where possible with no extra cost to you. This helps me to continue to share all the projects I include on my blog. Please note I only use and share products I love.


Saturday, December 1, 2018

It's a Tree-mendous Time of the Year


Hi Crafty Friends,

It’s challenge time with the “Crazies” over on the Crazy 4 Challenges blog. Being a brand new month it is time to introduce a new challenge hostess which is me.

It's a Tree-mendous Time of the Year - 
It's December 1st and for me that means it is time to decorate the Christmas tree. For our challenge this week, create a card that features a tree. Your card can include a Christmas tree, pine branches of a Christmas tree or even a tree in a summer or winter setting.


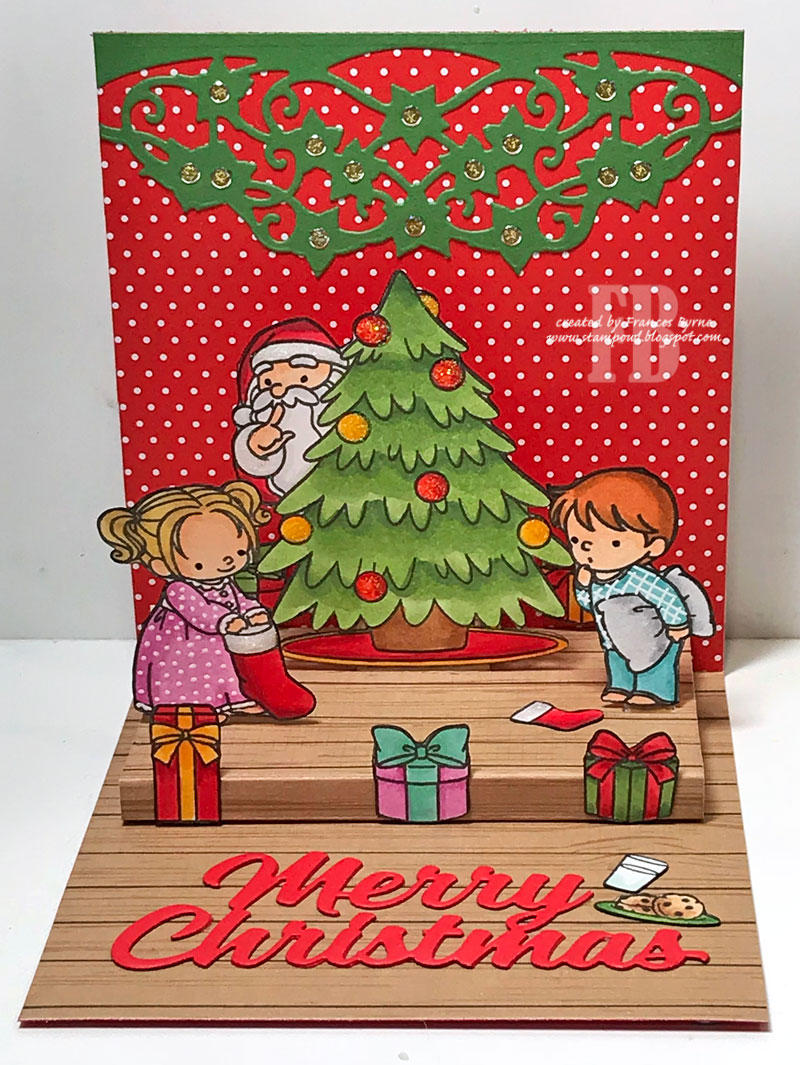
For my card today I decided to create a pop up card using the floating floor die from  Karen Burniston's House and Fence die set. As you can see I have created a Christmas scene using wood paper for the base and floating floor and red polka dot paper for the back.

To decorate my card I used stamps from MFT Stamps Secret Santa stamp set.

Along the top of the card I added a border using the Tonic Studios Celebration Season Header Fold die set.

I added the "Merry Christmas" sentiment on the bottom of my card.


Here is another view of the inside of my card so you can see the floating floor part of the card a little better.


For the front of the card I added the Santa peeking out behind the tree that I used on the inside and a sentiment from the stamp set. This was layered using the Circles Crosshatch die set.

Don't forget to check out the rest of the “Crazies” cards over on the Crazy 4 Challenges blog and also their individual blogs for more details.


Supplies:
For your shopping convenience, all products are linked below. Compensated affiliate links are used where possible with no extra cost to you. This helps me to continue to share all the projects I include on my blog. Please note I only use and share products I love.

Celebration Seasons Header Fold die set - Tonic Studios