Friday, November 30, 2018

Rebus - Names Starting with "O"


Hi Crafty Friends,

It's time to share another rebus puzzle swap with you. This month the theme is Names Starting with the Letter "O". 

If you would like to solve my rebus puzzle, why not post a comment on my blog post with your answers. I will let you know what the correct answers are next time I post a rebus card here.

How did you go solving my October Rebus which was"Songs by Cher".
 Here are the correct answers so you can check how you did.

  1. Notorious
  2. To Catch a Thief
  3. Bringing Up Baby
  4. Gunga Din
  5. Night and Day
  6. I Was A Male War Bride
  7. Hot Saturday
  8. Father Goose


You can find all my past Rebus Cards here.


Thursday, November 29, 2018

Circles and Squares


Hi Crafty Friends,

It's challenge time with my friends over on the CCEE Stampers challenge blog. Anne Harmon our challenge hostess for the month finishes off the month with one last challenge.

Circles and squares are simple  geometric shapes. Make a card using at least one of each.


I recently viewed a YouTube video where Rina Krupsky shared how to create a mandala using mostly squares and circles from her Mandala Maker Clear Stamp set available from Gina K Designs. As I purchased this stamp set a month or so ago, I thought it was the perfect set to use for this challenge. My mandala is inspired by the one Rina created with maybe a tiny change in the centre.

I did change up the colors for my mandala to what Rina used as I was using mine for a Christmas card. The colors on the mandala match the colors used on the card a lot better than show in the photo. Sometimes you can't get the colors to be true when taking photos.

After creating the mandala, I cut it around around the edge of the mandala.


Here is an overhead view of my card so you can see the folds in the card a little better.

In the centre of the card I added a Christmas sentiment from a retired Kaisercraft stamp set.


Here is a look at my card when it is closed ready to be placed in an envelope.

Don't forget to check out the CCEE Stampers blog (goes live 12 AM EST) to see the rest of the creations the CCEE Stampers created this week. You can also see more details of their creations on their individual blogs:


Supplies:
For your shopping convenience, all products are linked below. Compensated affiliate links are used where possible with no extra cost to you. This helps me to continue to share all the projects I include on my blog. Please note I only use and share products I love.

Traditional Sentiments - Kaisercraft


Wednesday, November 28, 2018

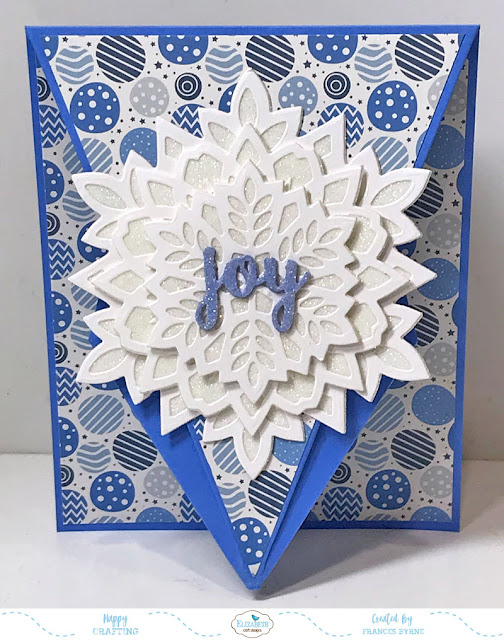
Snowflake Arrow Fold Card


Hi Crafty Friends,

My card today is for a challenge I do with a couple of friends of mine. Each month we challenge each other to create something using supplies we all own.

This month our challenge was to create an Arrow Fold Card.


Earlier in the year I created a square version of this style of card, which you can see here. So when I was looking up the instructions of this card I decided to try the rectangle version this time around.

If you would like to try this style of card yourself you can find directions on how to created them at these sites: Square Version and Rectangle Version

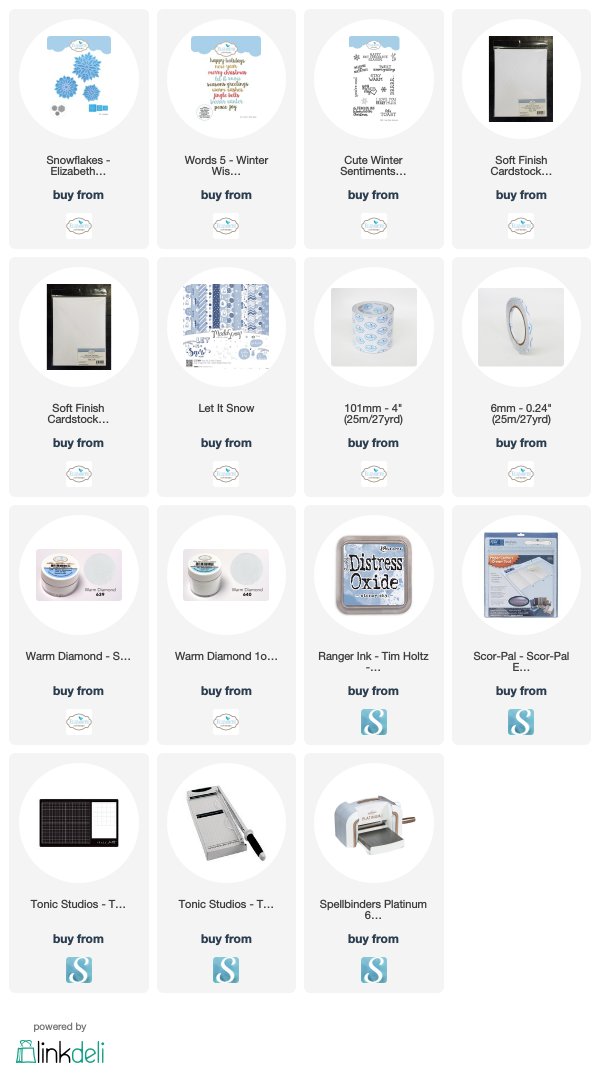
To decorate my card I used products from Elizabeth Craft Designs. The snowflakes are from the Snowflakes die set which I die cut using White Soft Finish Cardstock for the decorative snowflakes and White Soft Finish Cardstock that has Clear Double Sided Adhesive Tape on the front for the solid snowflakes. After adhering both snowflakes together I added Warm Diamond Silk Microfine Glitter over the exposed adhesive. The snowflakes were then layered together using foam tape in between each snowflake.


For the sentiments used on this card I used the "Joy" and "Let It Snow" sentiments from the Words 5 - Winter Wishes die set. I die cut three of each sentiment from blue cardstock with the top sentiment having Clear Double Sided Adhesive Tape on the front. I then covered the adhesive with Warm Diamond Silk Microfine Glitter.

The patterned paper is from the ModaScrap Let It Snow 6 x 6 Patterned Paper Pack.


Here is a look at the inside of the card. After adding the sentiment I also stamped a few snowflakes which are from the Cute Winter Wishes Clear Stamp set.

Supplies:
For your shopping convenience, all products are linked below. Compensated affiliate links are used where possible with no extra cost to you. This helps me to continue to share all the projects I include on my blog. Please note I only use and share products I love.


Tuesday, November 27, 2018

Jingle Bells


Hi Crafty Friends,

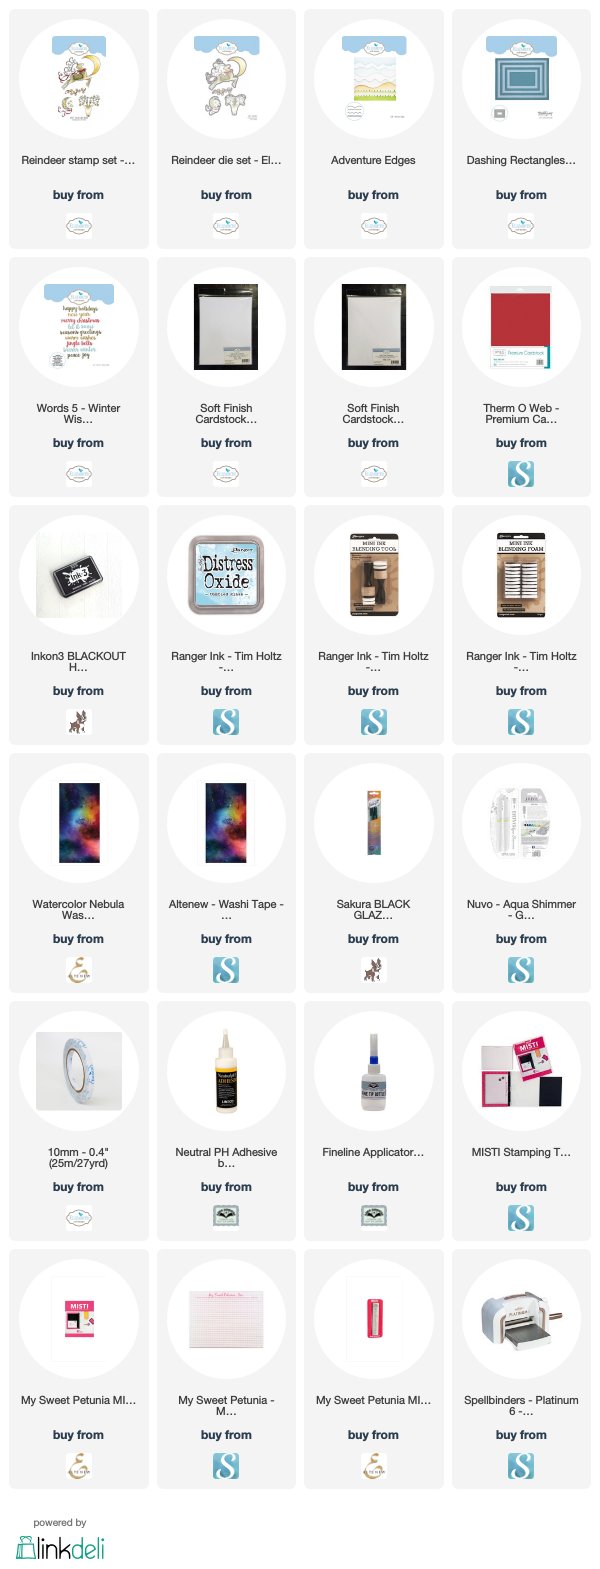
Today I am sharing a Christmas card I made using some stamps and dies from Elizabeth Craft Designs.

For the base of the card I used Altenew's Watercolor Nebula Washi Tape which I adhered to white cardstock. I then die cut this using a rectangle die from the Dashing Rectangles die set.

Along the bottom of the card I added some clouds using the cloud die from the Adventure Edges die set. 

I added the "Jingle Bells" sentiment to the bottom cloud.


The reindeer is from Reindeer Clear Stamp set with coordinating dies. After die cutting the reindeer, I used a kraft knife to remove some of the excess white in between the antlers and the ribbon as I wanted more of the background to show through.

I then adhere my panel to a folded white card base.


For the inside of the card I added a sentiment from the Holiday Cheer Clear Stamp set and added some bells above and below the sentiment which are also included in the Reindeer Clear Stamp set.

Stamps:
For your shopping convenience, all products are linked below. Compensated affiliate links are used where possible with no extra cost to you. This helps me to continue to share all the projects I include on my blog. Please note I only use and share products I love.


Monday, November 26, 2018

Advent Calendar Card


Hi Crafty Friends,

Today I am sharing a Christmas card I created using the Hero Arts November My Monthly Hero Kit. When I ordered this I wasn't expecting to receive it in time to use it this year as postage from the USA to Australia normally takes at least 3 weeks and at this time of year could be even longer. I had one parcel take 4 weeks just to come from Sydney to Brisbane which really used to only take a few days. Anyway Hero Arts sent the kits FedEx Economy which meant it only took a week to reach me, so of course I had to play with it. Thank you Hero Arts!!!!!!

Unfortunately this kit has been sold out, however there is a similar stamp and die set which can be used for both Christmas and birthdays etc, which I have linked in the supplies in case you are interested.


I stamped the large ornament background stamp onto white cardstock using VersaMark ink and embossed it using white embossing powder. I then used Distress Oxide inks in various shades of red to create an ombre look. To add the dates onto each ornament I used the gold embossing powder which was included in the kit.

Finally I used the ornament die to die cut the panel. This die die cuts the ornaments, leaving the top of each ornament attached to the background so you can open up each of the ornaments to reveal what is stamped underneath each ornament.


On a separate piece of white cardstock I used the ornament die as a guide to where to stamp each of the images also included in the kit. I stamped the images in red, green, brown and yellow inks and then added Nuvo Drops to a few of the images in Red Berry & White Blizzard.


For the inside of the card I created a pop-up card using the pop-up die included in Karen Burniston's Explosion Pop-up die set. I used white cardstock for the inside which I colored using the same colors as I used on the ornament panel on the front of the card.

I stamped a second ornament panel onto white cardstock and embossed using white embossing powder and colored using the darkest red Distress Oxide I used on the front. I then cut the panel in half to add to the top and bottom edges of the card.


For the sentiment I used Karen Burniston's Merry Christmas die which I die cut using red cardstock. I adhered it to a rectangle panel which I adhered to the pop-up panel.

Supplies:
For your shopping convenience, all products are linked below. Compensated affiliate links are used where possible with no extra cost to you. This helps me to continue to share all the projects I include on my blog. Please note I only use and share products I love.



Sunday, November 25, 2018

We Were Cut Out To Be Friends


Hi Crafty Friends,

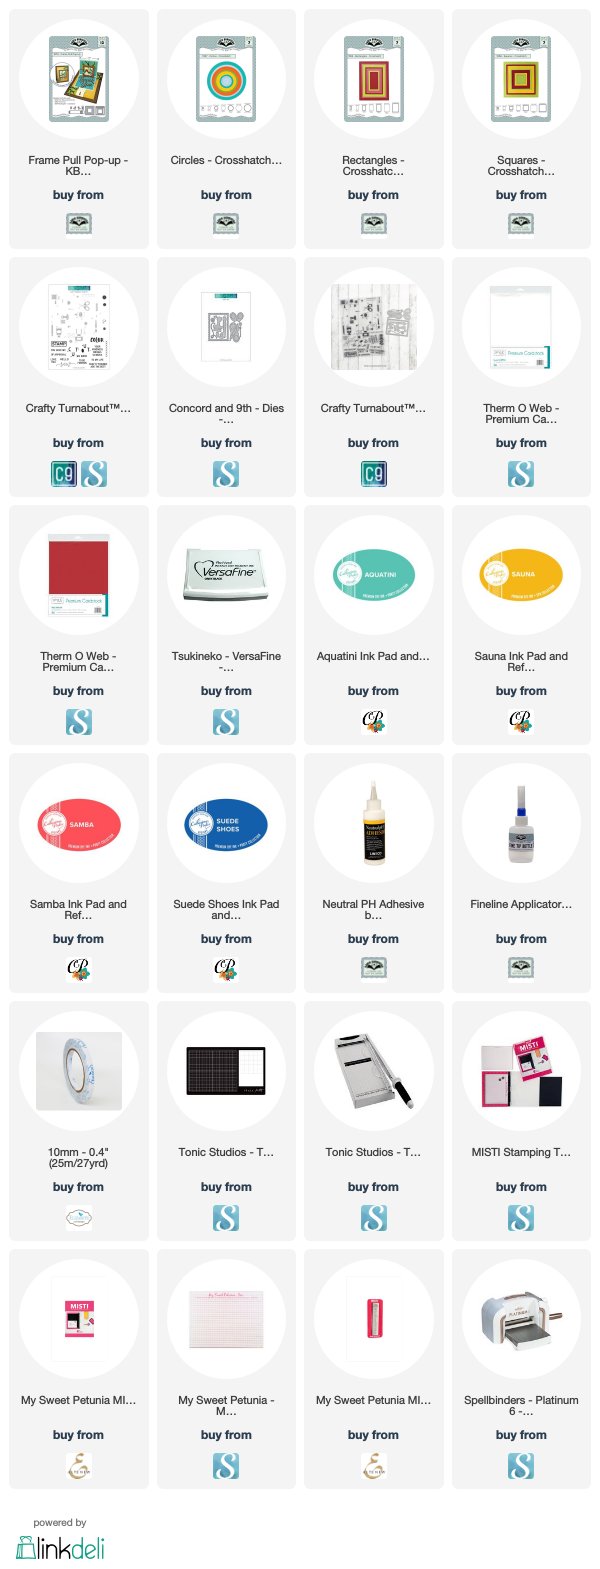
Today I am sharing a Frame Pull Pop-up card using Karen Burniston's Frame Pull Pop-up die set. 


To decorate my card I used stamps and dies from Concord & 9th Crafty Turnabout stamp and die set.

To create the turnabout panel I used colors from Catherine Pooler inks to stamp the multi colored background. I die cut the panel using the Crosshatch Rectangles die set.


Here is a quick video to show my card in action.


When you pull the tab at the bottom of the card it opens a pop up panel with an image of an old fashioned version of a rubber stamps.

I added the Frame Pull Pop-up to the front of a top-fold card.


For the inside of the card I die cut a white panel using the Crosshatch Rectangles die set and added a decorated panel using the Crafty Turnabout stamp set. 

The sentiment used here is also from this stamp set.

I punch a semi circle to the centre of the base of the card to make it easier to pull the tab.

Supplies:
For your shopping convenience, all products are linked below. Compensated affiliate links are used where possible with no extra cost to you. This helps me to continue to share all the projects I include on my blog. Please note I only use and share products I love.


Saturday, November 24, 2018

Take a Hike


Hi Crafty Friends,

It’s challenge time with the “Crazies” over on the Crazy 4 Challenges blog. Joanne Grzelak our challenge hostess for the month finishes off the month with one last challenge.

Apparently last week, on the 17th, it was  Take a Hike Day.  Be inspired by a hiking theme.  You could create a scenic card or have one with hiking boots.  Use your imagination to create a card related to hiking.


I knew when I read this challenge that I had a couple of things that would work for this  challenge and I wanted to make use of both these products for my card today. The first was this cute bear which is a retired stamp set from MFT Stamps (Fred Bear Takes a Hike). The second item was a really old embossing folder from Spellbinders which is revealed when the slider is pulled.

As you may be able to tell I created a Double Slider Surprise card using the Lawn Fawn die set and a few other dies from Lawn Fawn to create the outdoor scene.


Here is a quick video to see my card in action.


When you pull the tabs on either side of the card it reveals to sliding panels which have been embossed using the embossing folder. If you look closely at the panels you can see the imprint of the boots. I added sentiments from Kraftin' Kimmie Stamps Happy Campers stamp set.


Here is a look at the inside of my card. I die cut the panels using the new Heffy Doodle Metric Stitched Rectangles die set (also used on the patterned paper on the front). It is awesome to finally have a rectangle die set to suit metric style cards which is the measurement I use down here in Australia.

The sentiment used here is another retired stamp, this time from Paper Pretties.

Don't forget to check out the rest of the “Crazies” cards over on the Crazy 4 Challenges blog and also their individual blogs for more details.


Supplies:
For your shopping convenience, all products are linked below. Compensated affiliate links are used where possible with no extra cost to you. This helps me to continue to share all the projects I include on my blog. Please note I only use and share products I love.

Kickin' Rubber M Bossibilities - Spellbinders (retired)
Fred Bear Takes a Hike - MFT Stamps (retired)
Inspirational Quotes - Paper Pretties (retired)


Friday, November 23, 2018

Glittered Ornament Christmas Favor Boxes


Hi Crafty Friends,

Today I am joining the A Way With Words Design Team to show some fun ways to use the Gable Box die to make gifts for Christmas. Don't forget to check out the Elizabeth Craft Designs blog once you are finished here to see some other amazing ideas.


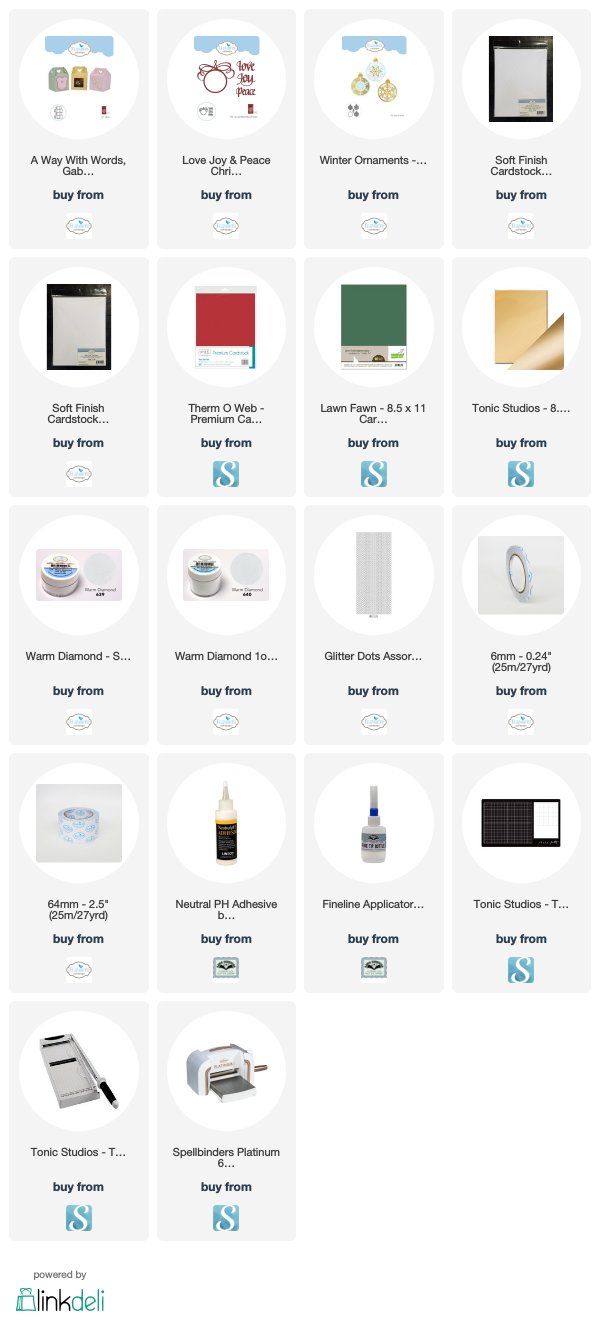
These fun boxes were made using products from Elizabeth Craft Designs. The Gable Box & Love Joy & Peace Christmas Ornament die sets are Suzanne Cannon/A Way With Words die sets. The Winter Ornaments die set designed by Joset Designs.

With the Christmas just over a month away now, I thought these would be fun to make as favor boxes or to use as place cards, by adding a name to each box and having something fun inside.


For these favour boxes I decided to keep to the traditional red & green Christmas colors. I die cut the gable boxes from red and green cardstock and assembled them using Clear Double Sided Adhesive Tape.

For the ornaments, I die cut either a red or green decorative ornament from the Winter Ornaments die set. I die cut the solid ornament using White Soft Finish Cardstock which has Clear Double Sided Adhesive Tape on the front. I then removed the protective backing from the adhesive tape and adhered the decorative overlay to the solid ornament. I then covered the exposed adhesive with Warm Diamond Silk Microfine Glitter. To the centre of each of the ornaments I added a Glitter Dots Peel Off Sticker.

Gold toppers were added to each of the ornaments.


I added an ornament to both opposite sides of the box and to the other sides I added the "Joy" sentiment from the A Way With Words - Love Joy & Peace Christmas Ornament die set.


Here is another look at my two favour boxes. 

Would you like to see more ideas seeing how to decorate these fun Gable Boxes. Suzanne Cannon has a fun blog post today of different way her Design Team and some of the Elizabeth Craft Design Team have used this die set. You can see that blog post here.

Supplies:
For your shopping convenience, all products are linked below. Compensated affiliate links are used where possible with no extra cost to you. This helps me to continue to share all the projects I include on my blog. Please note I only use and share products I love.


Thursday, November 22, 2018

Lettuce Celebrate!


Hi Crafty Friends,

It's challenge time with my friends over on the CCEE Stampers challenge blog. Anne Harmon our challenge hostess for the month continues to issue the challenges.

Apparently today is Anne's daughter's birthday, who loves to get funny cards. Our challenge this week is to make a birthday card, extra points if it's humorous.

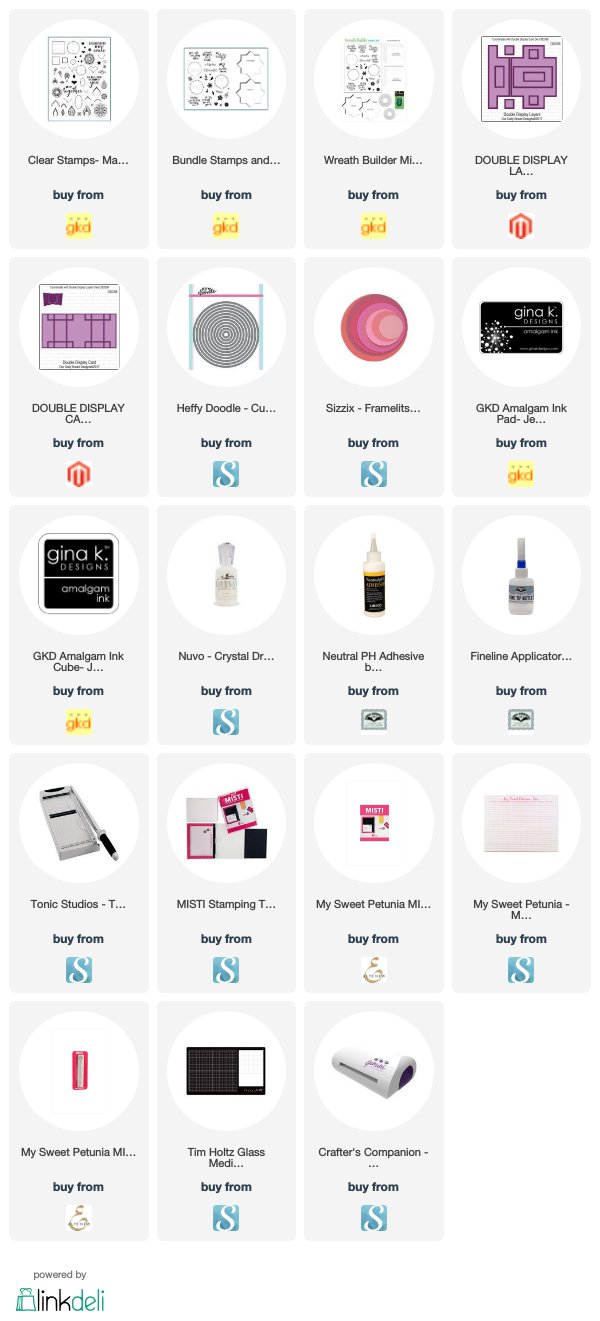
As you can see I have created a diorama card using Our Daily Bread Designs Diorama with Layers die set. I also used Art Impressions Gotta Garden Stamp set to decorate my card. Hopefully this can be classed as humorous to some degree.


I wanted to make use of the "Lettuce Celebrate" sentiment, so I pulled out an old Penny Black stamp I had in my stash and stamped the image a number of times and then cut out all the lettuces and the lettuce sign and added them to the vegetable garden beds inside the diorama.

The back panel (sky) of the card was created using Distress Oxide inks in various blue inks and then using the Earth & Sky Stencil and White Picket Fence Distress Ink. 

I added the man wheeling the woman in the wheelbarrow to the back of the diorama.

On the front of the diorama I added the woman jumping for joy, the tools and gloves and also two sentiments inside a yellow circle which represents the sun.


For the back of the diorama, I die cut two squares adding ground to the bottom of the squares. I then added the gnome and tool and again two more sentiments from the stamp set.


This card folds flat, so it is easy to pop in an envelope for mailing.

Don't forget to check out the CCEE Stampers blog (goes live 12 AM EST) to see the rest of the creations the CCEE Stampers created this week. You can also see more details of their creations on their individual blogs:


Supplies:
For your shopping convenience, all products are linked below. Compensated affiliate links are used where possible with no extra cost to you. This helps me to continue to share all the projects I include on my blog. Please note I only use and share products I love.

Lettuce Row Stamp - Penny Black