Showing posts with label Lawn Fawn Magic Iris Card. Show all posts

Monday, June 12, 2023

You're the Bees Knees

Hi Crafty Friends,

Today is the 3rd Anniversary of the Slimline Card Addicts Facebook Group, a group I started with my friends Karen Aicken three years ago because of our love of Slimline Cards. Neither of us ever dreamed that the group would grow so. quickly and now has a membership of over 9500 members.

Of course I had to make a Slimline card to celebrate the occasion, for my card I have mostly used stamps and dies from Lawn Fawn's recent May release.


Here is a quick video to see my card in action.


One of the dies that came out in the May release was the Magic Iris Bee Hive Add On, this can be used as a stand alone die or used in conjunction with the Magic Iris and Magic Iris Add On die sets. 

Lawn Fawn's Magic Iris dies were designed to work with an A5 card (4 1/4 inches x 5 1/2 inches), however I wanted to make a Slimline Card. I had to do a few little alterations to make it work, but I am happy with how it turned out. I used the largest Slimline Rectangle die from Lawn Fawn's Large Slimline with Sliders die set, so I could get the stitching around the edge of my panel. I then used Distress Oxide inks to add my sky background. I couldn't use the Magic Iris Add On die set to die cut the panel, so I used this instead to mark the placement of the circle and the semi circles on my card. I then used circle dies to cut these pieces out. I also needed to layer my slimline panel to a white panel for some extra width to hid the magic iris mechanism. I did need to do a little trimming once the mechanism was in place and if you look closely you can see a tiny bit of brown poking out on the left side, but for the most part it is ok. I also had to play around with the lever piece as my semi circle wasn't the exact size as the magic iris one.


Here you can see the magic iris starting to open and reveal the hidden message.

I used the grass die from Made To Surprise's Perky Pooches die set to add the grass layers.


And finally the full reveal of the hidden message. I used an older bee themed sentiment die from Darcie's Stamps for my message, which I white embossed onto brown cardstock.

To decorate the remainder of the card, I used the Hive Five stamp set, as well as the branch & small flowers from the Bee Hive die set.

Here is a quick look at my card showing the Magic Iris closed, partially open and fully open.


Of course seeing this is a bee themed card and Lawn Fawn also released a Bee Pop-up die set, I had to incorporate that into the inside of my card.

First I die cut two Slimline Rectangle Panels using a Picket Fence Studios die set. I then used  the first layer of a Honey Bee Stamps Stacking Hexagon Stencil set to add the hexagons randomly over my background. I also added a few black splatters.


After assembling the bee, I added it to the centre of my card.


Finally I added two sentiments to the inside panels using an older Honey Bee Stamps stamp set called Hi Honey.





 

Thursday, August 25, 2022

Happy Birthday Earthling


Hi Crafty Friends,

It's challenge time with my friends over on the CCEE Stampers challenge blog. As challenge hostess of the month, I finish off the month with one last challenge.

According to the Days of the Year web site, yesterday 24th August was Pluto Demoted Day, this day marks the occasion in 2006 when Pluto was demoted from being a planet to a dwarf planet. For our challenge today, create a card that has a space theme.


Over the years, I have created many space themed cards so I wanted to make something different to the ones I have made in the past. It has also been about a year since I have made a Magic Iris card, that that is what I decided to use for our challenge this week. I used Lawn Fawn's Magic Iris and Magic Iris Add-On die sets to create the magic iris portion of this card.

Here is a quick video to see my card in action. 


To create the background of my card I grabbed some papers from the Craft Consortium's Ink Drops Vivid Paper Pad. This has to be one of the most versatile papers as I have used it for so many different themes, all I needed to do for this card is splatter over some white paint and Liquid Stardust to give it the outer space feel.


Here you can see my card with the "Magic Iris" full open. I had made this card and was ready to video the opening and closing of my magic iris and it started playing up, so I carefully removed the front from the card base (I didn't want to ruin the inside of my card) and. added an extra layer of foam tape around the edge of the card and a layer to the three bridge pieces on the magic iris. Once I had re-assembled my card, the magic iris worked perfectly as you can tell by the video above.


Here is a quick look at my card showing the Magic Iris closed, partially open and fully open.

To decorate the front of the card I added the moon surface using Whimsy Stamps Moon Background stamp. The sentiment shown when the magic iris is fully open is from Honey Bee Stamps Stellar Sentiments stamp set.


I had intended to keep this card to just the Magic Iris on the front, but when I had finished the front and was about to work out what to do in the inside I ended up deciding to fully decorate the inside too. So I added more splattered papers and the moon.

Most of the images used on both the front and back of my card are from MFT Stamps Space Explorer stamp set, but as I have many space themed stamp sets I did pull out a few extra planets and the alien from a couple of other sets, including Honey Bee Stamps Far Out Friends and a discontinued There She Goes stamp set called Out of this World.

I created a pop-up card for the inside using the mechanism from Karen Burniston's Katherine Label Pop-up to pop up the cute astronaut holding the balloons. You can see how the pop up mechanism moves the astronaut up and down in the video above.

Finally I added another sentiment using the Honey Bee Stamps Stellar Sentiments stamp set. I used the smallest rectangle die included in the Karen Burnsiton's Long Rectangles - Crosshatch die set to layer the sentiment. 

Don't forget to check out the CCEE Stampers blog (goes live 12 AM EST) to see the rest of the creations the CCEE Stampers created this week. You can also see more details of their creations on their individual blogs:

Other Supplies:

Out of this World Stamp set - There She Goes (discontinued)


Thursday, August 19, 2021

Swimming By

Hi Crafty Friends,

It's challenge time with my friends over on the CCEE Stampers challenge blog. As challenge hostess for the month, I continue to issue the challenges.

Apparently today is Photography Day. For our challenge this week include something on your card that is photographic related … a photo/photos; images of photos, cameras etc. 


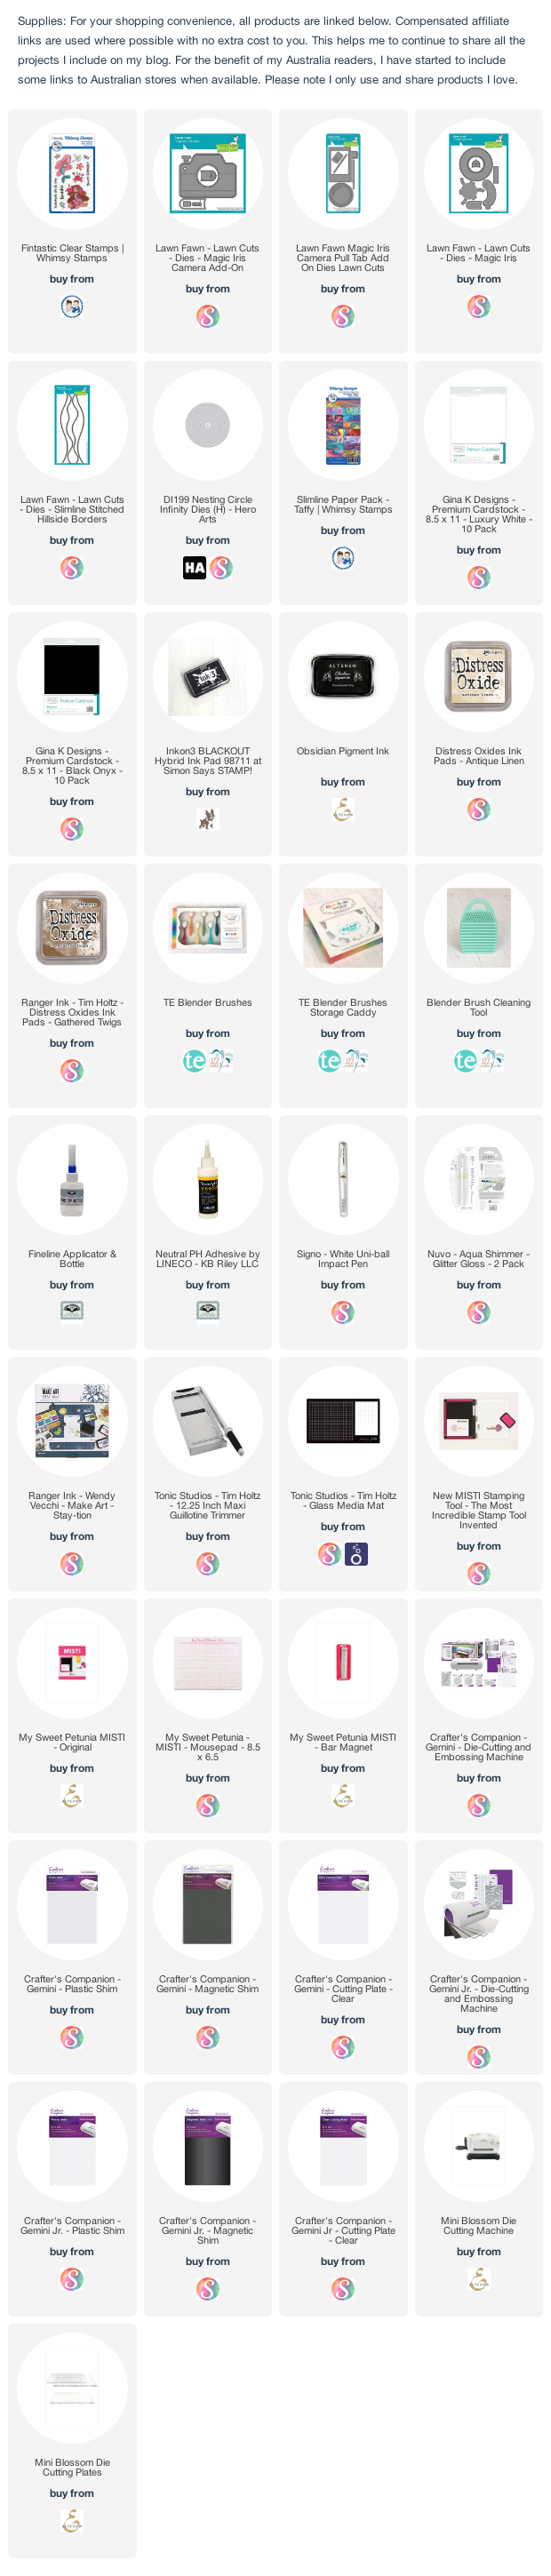
For my card I decided to pull out my Lawn Fawn Magic Iris Camera Add on die set to create a Magic Iris card. I have seen lots of cards using this die set that incorporate scenes, which is what I did for my card today, also making it a Slimline card.

I extended the tab that opens and closes the magic iris, to make it easier to grab when it is at the bottom of the card. While the tab is above the card when it is completely closed, the card will still fit into a #10 envelope, if you move the tab down slightly so it is below the fold in the card.

I recently received an order from Whimsy Stamps which included this wonderful "Taffy" Slimline Paper which I used for the background of my card. In that parcel was also this cute Mermaid set so I decided to use that on my card as well.


I also used Lawn Fawn's Slimline Stitched Hillside Border die set to create the sand along the bottom of the card and camera.

As you can see, I added a sentiment and a few more fish to the centre part of the magic iris, so it is revealed when it is fully opened.


I kept the inside of my card simple, adding another piece of the patterned paper along the bottom of the card. I also added another of the mermaids, fish and added a sentiment. 

Don't forget to check out the CCEE Stampers blog (goes live 12 AM EST) to see the rest of the creations the CCEE Stampers created this week. You can also see more details of their creations on their individual blogs:

Monday, January 4, 2021

A Little Birdie Told Me ...


Hi Crafty Friends,

Just before Christmas, I purchased a few of Lawn Fawn's new release stamps and dies including this cute birdhouse die set which is an add on die set for their Magic Iris die set. For my card today I decided to use the birdhouse without the Magic Iris so I can use it on a slimline card.

For the background of my card, I used one of the papers from Trinity Stamps Winter Hues Paper Pad. I love the soft colors in this collection of papers. 

I used the cloud and fence from Honey Bee Stamps Horizon Slimline Borders die set to add to the card. The grass was created using MFT Stamps Slimline Grassy Hills die set.

I added the sentiment to the centre of the birdhouse using a sentiment from Stampendous' Tweet Chirps stamp set.


For the inside of the card I created a pop-up card using Karen Burniston's Katherine Label Pop-up die set. I added three more sentiments to the oval panels which are also from the sentiment set I used on the front of the card. The sentiments are layered using some older oval dies from Spellbinders.

Along the bottom edge of the card I added some grass, using the MFT Stamps Slimline Grassy Hills die set.

Other Supplies:
Tweet Chirps Stamp Set - Stampendous
Mega Ovals Die Set - Spellbinders (discontinued)
Mega Scalloped Ovals Die Set - Spellbinders (discontinued)


Tuesday, September 15, 2020

Ho Ho Ho Snow Globe Magic Iris Card


Hi Crafty Friends,

Today I am sharing a Christmas card I created using the new Magic Iris - Snow Globe Add on die set released by Lawn Fawn early in September.  I love now Lawn Fawn come out with add ons to existing die sets to get more options with what you already have. 

Here is a quick video to see my card in action.


To create the snow globe portion of the card, I first stamped Whimsy Stamps Snow Flurry Background stamp onto white cardstock using VersaMark ink and embossed using white embossing powder. I then used Distress Oxide ink in Speckled Egg and Tumbled Glass to create an embossed resist technique. I also added the embossed resist technique to the "sausage" used for the Magic Iris portion of the card.

I die cut the snowglobe from this embossed resist panel.

I die cut the lower portion of the snow globe again this time from white glitter cardstock and adhered it to the snow glove.

Finally I die cut the stand portion of the snow globe and the two trims for the stand from gold cardstock and then add some shading to the sides using Vintage Photo and Walnut Stain Distress Oxide ink.

I assembled the Snow Globe & Magic Iris and then set this aside.


To decorate my snow globe I used Lawn Fawn's Ho-Ho-Holidays stamp set.

I white embossed the sentiment onto red cardstock and then used the label die included in the Snow Globe Magic Iris Add On to die cut the sentiment.

I added the snow globe to a top folding white card that had red checked pattern paper to the front.

I added the "Merry Christmas" sentiment using The Ton's Easy Expressions - Holiday stamp set and coordinating dies.


Here you can see the snow globe side by side as the iris in the lens is opening.


For the inside of the card I used Lawn Fawn's Slimline Stitched Hillside Borders and Slimline Forest Builder to add the snowy hillside. 

I stamped the reindeer & sleigh to the bottom of the hill, as well as the sentiment  which are both also from Lawn Fawn's Ho-Ho-Holidays stamp set.

Supplies:

For your shopping convenience, all products are linked below. Compensated affiliate links are used where possible with no extra cost to you. This helps me to continue to share all the projects I include on my blog. For the benefit of my Australia readers, I have started to include some links to Australian stores when available. Please note I only use and share products I love.


Monday, June 29, 2020

I Love Your Smile


Hi Crafty Friends,

Today I am sharing a card I created using the new Magic Iris - Camera Add on die set released by Lawn Fawn last week. I love now Lawn Fawn come out with add ons to existing die sets to get more options with what you already have. 


Here is a quick video to see my card in action.

I was originally planning on using a different stamp set with the camera die, but after I had used the patterned papers on my card, I decided it needed something that I could color to coordinate with the papers. So I opted for using CC Designs Funny Faces stamp, this stamp is actually a boy and a girl, but I was able to position the stamp so that only the girl was seen. As this looks a lot like my granddaughter, I will probably keep this for her birthday which is later in the year.


When you pull the lever at the top right hand side of the camera, the iris of the lens starts to open to reveal an image.


Here you can see the image completely revealed.

I added the "Smile" sentiment which is an older die from Honey Bee Stamps and also a sentiment from the coordinating stamp set.

I also added the "8" to the left side of the camera, as that is how old she will be.


Here you can see the camera side by side as the iris in the lens is opening.


For the inside of the card I used the Magic Iris Camera Pull Tab Add On to add the photo frame.

I also added sentiments from The Ton's Easy Expressions Birthday stamp set and coordinating dies.

Supplies:
For your shopping convenience, all products are linked below. Compensated affiliate links are used where possible with no extra cost to you. This helps me to continue to share all the projects I include on my blog. For the benefit of my Australia readers, I have started to include some links to Australian stores when available. Please note I only use and share products I love.


Thursday, April 16, 2020

Floral Magic Iris Card


Hi Crafty Friends,

It's challenge time with my friends over on the CCEE Stampers challenge blog. As challenge hostess for the month, I continue to issue the challenges.

Stencils - There are so many fun stencils out there these days, to help decorate our cards. Let's create a card that uses at least one stencil, either for a background or focal image.


For my card today I used Taylored Expressions Spring Fling Stencil to create the stencilled floral background on my card. This stencil is a three piece layering stencil which allows for a multi colored background.

I created a Magic Iris Card using dies from Lawn Fawn.


Here is a quick video to see my card in action.


I used Lawn Fawn's Stitched Flower Frame to add the large flower around the Magic Iris portion of the card.

In the centre of the Magic Iris I added a sentiment using La La Land Crafts stamp set.

The sentiment at the top of the card is from Taylored Expressions Simple Strips - Birthday and the coordinating die set.


Here is a quick look at my card showing the Magic Iris closed, partially open and then fully open.


For the inside of my card, I added a piece of left over stencilled piece of cardstock to the bottom of the white panel. I added a birthday sentiment using a sentiment from MFT Stamps Bitty Birthday Wishes stamp set and the grasshopper from The Stamping Village's Happy Birthday stamp set.

Don't forget to check out the CCEE Stampers blog (goes live 12 AM EST) to see the rest of the creations the CCEE Stampers created this week. You can also see more details of their creations on their individual blogs:


Supplies:
For your shopping convenience, all products are linked below. Compensated affiliate links are used where possible with no extra cost to you. This helps me to continue to share all the projects I include on my blog. For the benefit of my Australia readers, I have started to include some links to Australian stores when available. Please note I only use and share products I love.


Friday, April 3, 2020

50th Birthday Magic Iris Card


Hi Crafty Friends,

A few week's ago my daughter attended a 50th Birthday party for a friend of hers. Of course I had to make a special card for her to take to the party.

I created another Magic Iris Card using Lawn Fawn's Magic Iris, Magic Iris Add-on and Stitched Balloon Frames die sets.


Here is a quick video to see my card in action.


For the background of my card I used MFT Stamps Number Jumble Background. This background was stamped onto white cardstock and embossed using white embossing powder. I then blended Catherine Pooler inks on the over the panel in It's A Girl and Be Mine.

I added the sentiment to the top left corner of the card which is from Unity Stamps Hugs, Kisses & Birthday Wishes stamp set. I used Honey Bee Stamps Banner Builder die set.


When you pull the tab which is located at the top left corner of the card, it opens the balloon to reveal a message.

For this card I used the "Happy Birthday" sentiment  from Lawn Fawn's Reveal Wheel Circle Sentiments stamp set. I added the "50" to the centre of the opening using a number die set.


Here is a quick look at my card showing the Magic Iris closed, partly open and then fully open.


For the inside of the card I added two sentiments which are from a The Stamps of Life stamp set. I also added two number balloons "50". The number balloons are from a die set I received last year in a La La Land Crafts Card kit.

Supplies:
For your shopping convenience, all products are linked below. Compensated affiliate links are used where possible with no extra cost to you. This helps me to continue to share all the projects I include on my blog. For the benefit of my Australia readers, I have started to include some links to Australian stores when available. Please note I only use and share products I love.