Showing posts with label Z Fold Card. Show all posts

Tuesday, January 16, 2024

Birthday Wishes


Hi Crafty Friends,

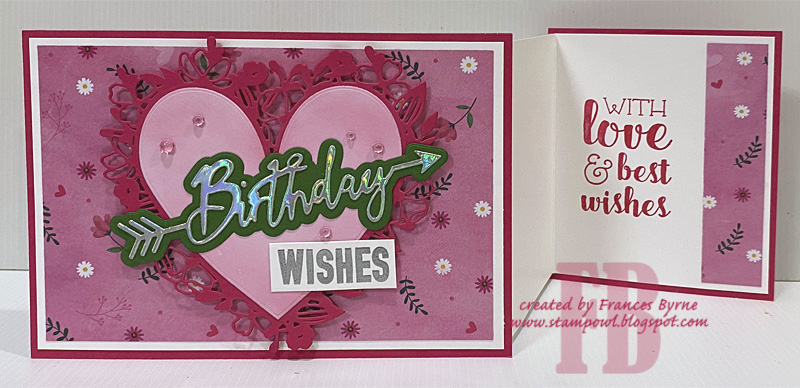
Today I am sharing a Z Fold Card I created using a tutorial that Sam Calcott shared recently. You can find her tutorial here.

To decorate my card, I used dies and stamps from My Creative Life. I opted to create a birthday card, but with a change of sentiment it could easily be a valentine or another other love related occasion. 

The sentiment on the inner part of the card is from Card Making Magic.


Here is a look at my card, when it is closed ready to be placed in an envelope. The finished card, measures 7 inches x 5 inches.


Monday, January 1, 2024

18th Birthday


Hi Crafty Friends,

Happy New Year to you all and thanks for stopping by my blog, I hope 2024 is a good year for us all!

Today I am sharing the second 18th birthday card I created for my daughter to give to her nieces who are turning 18 this month.

I have again used the large number 18 from Creative Craft Products 18 die set from their Numbers Galore Collection.


As the nieces are twins, I kept the elements I used on the cards the same. I just changed up the style of card I created and the papers, so they are a little different.

As you can see, this time around I created a Z Fold Card.

I added the hands holding the wine glasses to the inner panel. I also added a birthday sentiment.


Here is a look at my card when it is folded ready to be placed in an envelope. This card is approximately 6 1/2 inches tall by 6 inches wide.


And finally a look at the back of my card, I added a birthday sentiment and a couple of balloons.


Tuesday, December 19, 2023

Honeycomb Snowman


Hi Crafty Friends,

Today I am sharing a Christmas themed Z Fold Card that I created recently.

A year or two ago, Craft Stash released some Christmas themed Honeycomb die sets which I missed out on at the time. So I was very happy when I discovered a few months ago that they had re-released them. Of course I ordered them as I love creating Honeycomb Cards. This card using the Snowman die from the Honeycomb Christmas Collection from Creative Craft Products.


So that this card can be mailed if needed. I added hook and loop tape to the back of the honeycomb piece. When the recipient receives the card, they can open up the honeycomb section and it will attach itself to the hook portion of the tape to secure it in position.


Here is a look at my card, when the card is opened. I added an oval panel on the back panel which is hidden under the snowman. I added a Christmas sentiment to the oval using one of the stamps included in the Honeycomb Christmas Sentiment stamp set.

I also added some snowflakes randomly around the card using a die from Karen Burniston.


I added a panel to the back of the card, for a place to add a sentiment and a personal greeting. 


Friday, October 6, 2023

Thank You Very Much


Hi Crafty Friends,

I recently needed a male themed Thank You card in a hurry, so I pulled out my Thank You Very Much Glimmer Plate from Spellbinders to make this card. 


I used black foil to foil the sentiment and layered it to the card using the Notched Edge Nested Squares from Creative Craft Products. 


As you can see by the photo above, I created a Z Fold Card. I have added another of the notched squares for a place to write a hand written message.


Other Supplies:
Thank You Very Much Glimmer Plate - Spellbinders


Monday, June 5, 2023

Blue Floral Mother's Day


Hi Crafty Friends,

Mother's Day was last month, but I didn't get around to making any Mother's Day cards to share on my blog as I didn't need them for Mother's Day. However I did realise that I needed to make some to add to my two daughter's card packs I give to them at the end of the year, so today I am sharing one I have made for that purpose.

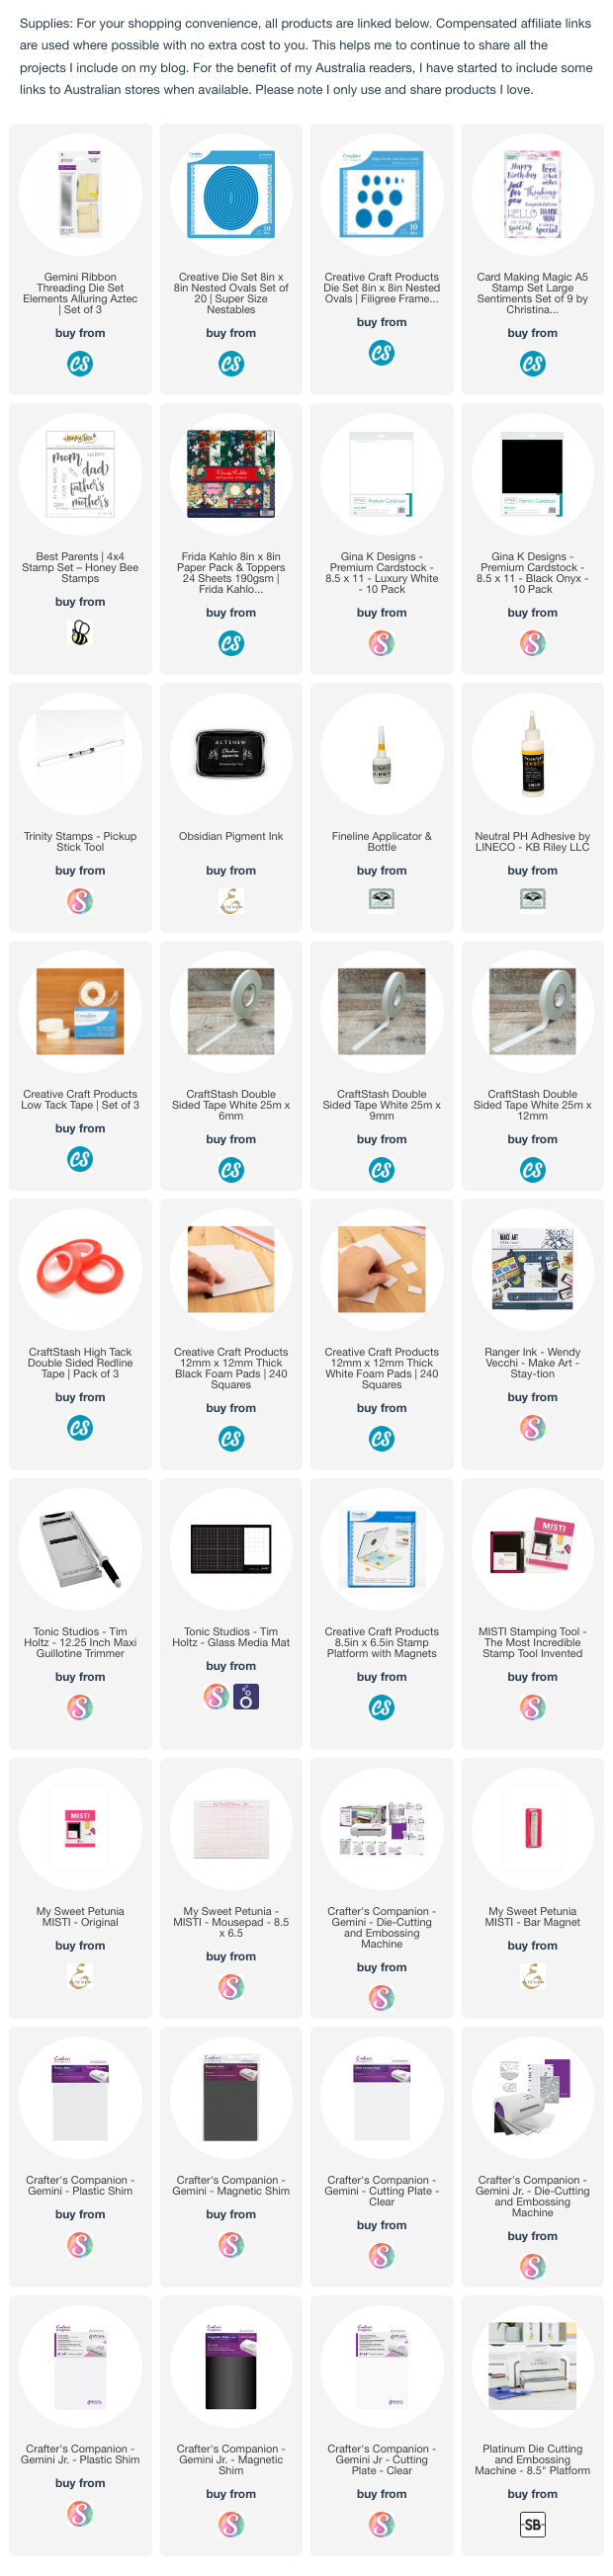
As you can see I have created a Z Fold Card and I used one of Crafter's Companion's Ribbon Threading die sets to decorate the left and right sides of my card. For this card I used the Alluring Aztec Ribbon Threading die set.


To decorate my card I used pattern paper from the Frida Kahlo Paper Pack from Creative Craft Products. I hand cut one of the flowers from the patterned paper to use to embellish the oval panel on the front of the card.


I used oval dies from Creative Craft Products for all the oval layers of this card. For the Mother's Day sentiment, I used an older stamp set from Honey Bee Stamps ... Best Parents.


Here is a look at the back of my card. I decorated each of the panels on the back as I did the front. For the sentiment on the back of the card I used a sentiment from Card Making Magic.


Tuesday, April 11, 2023

Roaring Good Time


Hi Crafty Friends,

It was my birthday last month and of course being an avid card maker, I had to get something card making related as a present. I was lucky enough to get Crafter's Companions Roaring Twenties Collection from my husband. Of course I had to make a card using some of the products from the collection.

For my first card using this collection, I created a Z Fold Card.

On the front of the card I added the diamond panel which is a Waffle Flower Crafts Radiating Diamond Frame die. I die cut the frame from gold mirror cardstock and then layered it onto burgundy cardstock and trimmed around the edge. I then used the Charleston Couple die which I die cut from black and gold cardstock, layering the black over the gold offsetting slightly.


On the right side of the card I added the scallop border using the Shell Scallop Die set. I die cut the border directly onto the right edge of the card. I then die cut two more borders, one from gold mirror card and another from burgundy cardstock. I layered the burgundy border directly to the back of the gold mirror border. I then adhered the gold mirror border behind the one on the card off setting slightly. Adding the burgundy border behind the gold one, gave a nice finish to the back of the card.

For the sentiment, I used the Like A Stars stamp set that coordinating with the collection. I die cut the sentiment using Pinkfresh Studio's Nested Diamonds Die Set.

To finish off the front of the card I added some gold metallic pearls randomly around the card.


I added a panel to the back of the card, for a place to add another stamp sentiment and a somewhere to write a personal greeting. You can see how the border on the left matches with the rest of the card rather than seeing white from the back of the gold mirror cardstock.


Thursday, April 6, 2023

Floral Swirls Birthday


Hi Crafty Friends,

  Today I am sharing a birthday themed Z Fold Card using dies from Crafter's Companion and Creative Craft Products.


To create my card I used Crafter's Companion's Decorative Gatefold - Floral Swirls die set. This die set comes with two edger dies which can be used to create a gatefold card, but as you can see on the photo above they can also be used to create beautiful edges to your card. The two edger dies both have a different design, giving you more options. I used the floral design to create the border on both edges of my card.

The "Happy Birthday" was created using Creative Craft Product's Modern Sentiments die set.


I added white gems to the centre of each of the flowers that are on the edge border using Pink Fresh Studio's Glacier Jewels.


The card folds flat and measures approximately 6 inches square when folded.


I added a panel to the back of the card, for a place to add a sentiment and a personal greeting. The sentiment is from a Made To Surprise by Sam Calcott.


Wednesday, May 18, 2022

Divinity Designs Blessings Box

 
Hi Crafty Friends, 

Today I am sharing three more cards using stamps, dies and papers from the Divinity Designs April 2022 Blessings Box. 


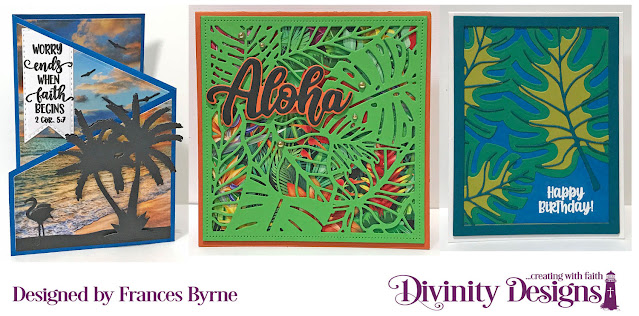
For my first card today I have a Z Fold Card using Divinity Designs Z Fold Card with Layers die set.


I used patterned paper from the Sunset Skies Slimline Sized Paper Pad to add the layers to each of the various panels.

I decorated each of the panels using the Beach Silhouettes die set, die cutting each of the images from black cardstock.

I used three of the sentiments from the Mahola Stamp set to add to my card.

I die cut the "No Worries!" sentiment using one of the sentiment strips from the Sentiment Strips die set. The larger sentiment on the last panel is die cut using the Double Stitched Circles and Circles die sets.


The sentiment on the front panel is die cut using one of the pennants from the Double Stitched Pennants die set. 

I added more images to the panels using the Beach Silhouettes die set. The palm tree of the right panel is ahead behind the one on the front panel so it can only be seen when you open the card. This meant I had to use the back side of the die for this particular image 


For my second card, I created a square card using the Square Card Base with Layer die set. I added the Tropical Leaf Square Background die which I die cut from green cardstock. I layered this over a square panel of patterned paper using the Tropical Brights Paper Pad.

I used the Aloha sentiment which I added to the top left corner of the card.


For my final card I create a A2 Card using the A2 Card Base with Layer die set.

The inspiration for the colours used on this card was a background of a message I saw on Facebook recently. I loved the look so tried to replicate it on my card.
 
I used the Monstera Layering Combo die set to die cut the layered dies in various colours and layered them up. 

I white embossed the birthday sentiment to the lower right hand corner of my card using one of the sentiments included in the Mahola stamp set.








Tuesday, February 15, 2022

Sympathy Z Fold


Hi Crafty Friends,

Today I am sharing a Z Fold Card using stamps, dies and papers from the Divinity Designs January 2022 Blessings Box.

Some of the products included in the Blessings Box this time around have a sympathy theme, there are two sympathy themed stamp sets and 2 word die sets. 


I have created a Z Fold Card using Divinity Designs Z Fold with Layers die set. For each of the layers on this card I added papers from the Beauty in Blooms 6 x 6 Patterned Paper Pad.

I used the Slimline With Sympathy and Layers die set which I added to the front of the card. I die cut the letters from bright pink cardstock and then die cut the shadow dies from vellum.

On the centre panel I added a cross using the Layering Crosses die set which is one of the die sets from the February/March Release.

On the far right panel I added a sentiment from the 'Sorry for your Loss" stamp set. I layered this using the Double Stitched Circles and Circles die set. I then used the Spiral Sphere die for the bottom layer, this is another die included in the Blessings Box.

I added the cross again on the centre panel on the back of my card, placing it a little higher on my card, so it could be seen when the card is closed.

On the back of the front panel, I added another sentiment from the "Sorry for your Loss" stamp set, using the Double Stitched Circles and Circles die sets for layering.