Showing posts with label Clearly Besotted. Show all posts

Thursday, February 22, 2024

Measure Up


Hi Crafty Friends,

Today I am sharing a sewing and postage themed Slimline Pop Up Card.


Last year, I purchased Waffle Flower Crafts Postage Collage dies and stencils. I love them so much that when they released their other postage themed dies/stencils in other size formats I had to add some of them to my stash.

One that I purchased was the die stencils in the slimline format.

As you can see I went with a sewing theme for my card, using stamps from Clearly Besotted. 

After I mounted my card to my top folding card base, I added the wax seal to the lower left corner of my card. In case you can't see, the wax seal has a sewing machine on it.


For the inside of my card, I created a pop-up card, using Karen Burniston's Katherine Label Pop-up die set. Rather than adding the label from the die set to my card, I kept with the postage theme and added the postage stamp. The sentiment is from a Your Next Stamp stamp set.


I also wanted to include something sewing related to the inside of my card, so I decided to go with the zipper border. This is an older die I purchased many years ago by a company called Zippity Do Da. The die is actually only about 6 inches long, but with some careful partial die cutting I was able to die cut it so it would fit the length of my slimline card.


Friday, December 15, 2023

Build A Snowman


Hi Crafty Friends,

Welcome to my blog. Today I am sharing a Faux Postage themed Christmas card that I created recently.

For the "Faux Postage" themed stamps and dies I used products from Waffle Flower Crafts that I purchased a few months ago. I have been wanting to create a Christmas themed card using these products, since I purchased them.

To decorate my "postage stamps" I used Clearly Besotted's Build a Snowman stamp set, which sadly has been discontinued now. 

I forgot that I had also purchased Made To Surprise by Sam Calcott's Happy Mail Christmas stamp set, until I was decorating the inside of the card. But I was able to add the red "Merry Christmas" postage mark to the lower left hand side of the front of the card.


For the inside of the card, I added a white panel to which I added the "Merriest Christmas" sentiment which is a Betterpress plate from Spellbinders.

I also added a few of the postal marks from Made To Surprise's Happy Mail Christmas stamp set.


Monday, July 24, 2023

Teacher Mini Slimline Shaker


Hi Crafty Friends,

Today I am sharing a Teacher themed Mini Slimline Shaker Card I created recently. I still need to build up my stock of teacher cards, so I have enough for my grandchildren to give to their teachers at the end of the year. I am slowly getting there.

Trinity stamps recently released some Flat Acetate Shaker Pouches in various card formats. I decided to get a few different options to try out. For my card today I decided to try out the Mini Slimline Shaker Pouches, these pouches fit on a rectangle that measures 2 3/4 inches x 5 3/4 inches. As I wanted to add a layer as well as a border on my Mini Slimline card, I made my card so it was 3 1/4 inches x 6 1/4 inches. The shaker pouches also have a protective backing on them, so make sure you remove that before you attach the shaker to your card ... don't ask me how I know!

To decorate my card I used the book stacks, owl and cat from Clearly Besotted's Rhyme Time stamp set.


Here is a look at the shaker when it has been shaken and laying on my desk, so you can see the shaker portion of the card.

I added the die cut "teacher" which is an older die from Heffy Doodle Stamps. I also added the "#1" using Karen Burniston's Mini Alphabet and Numbers die set.


For the layers of my. card, both inside and out I used Trinity Stamps' Mini Slimline Stitched Layers Stack die set.

For the sentiment I used MFT Stamps' Teach, Sleep, Repeat stamps set for the "Thank You and Teacher" the remainder of the sentiment is from Heffy Doodle Stamps Teach Me Words stamp set.

I also added the apple which is from a Mama Elephant stamp set.

Other Supplies:

Teacher Die - Heffy Doodle Stamps
Sequins - various colours.


Friday, July 21, 2023

You Are So Space'ial


Hi Crafty Friends,

According to the Days of the Year website, yesterday (20th July) was National Moon Day and Space Exploration Day. 

I remember back in 1969, it was the 21st for us down here in Australia. We had just arrived at school to be told we could go home as the first man was walking on the moon and we could watch this event on our TV's at home.

As you can see I decided to create a space themed card to celebrate these events.

Here is a quick video to see my card in action.


For my card today, I created a 5 x 7 Flip and See Card using Made to Surprise by Sam Calcott's 5 x 7 Flip and See Card die set.

I used stamps from Clearly Besotted's Balloon Bunch Space stamp set to decorate my card.

The sentiment at the top left side of my card, I used a sentiment from Made To Surprise's Out in Space stamp set.


When you pull the tab at the right hand side of the card, the top panel flips to the left to reveal another space scene. I used the same stamp sets on this panel as I did on the front of my card. The sentiment used on this panel is from the Clearly Besotted stamp set.


This card is then layered onto a side folding 5 x 7 card. I added a few more images from the Clearly Besotted stamp set.

I also added two more of the sentiments from the Made To Surprise Out In Space stamp set.


Other Supplies:

Out In Space Stamp Set - Made To Surprise by Sam Calcott (discontinued)


Thursday, July 20, 2023

Chess Slimline Pop-up


Hi Crafty Friends,

According to the Days of the Year website, today (20th July) is International Chess Day. As I had ordered a chess theme stamp set from Clearly Besotted a month or so ago this seemed like the perfect time to pull it out and make a card using it.


As you can see I created a Slimline Pop-up card to create my chess themed scene. The chess themed stamp set is Clearly Besotted's Your Move stamp set, I just love those cute characters holding the different chess pieces.

For the card I used Karen Burniston's Mini Pops Pop-up and Small Scene Bam Box die sets to create the pop-up elements of the card. The two character's at the very back use one of the single pop-up dies from the Mini Pops Pop-up die set. The other four characters are popped up using the Small Scene Bam Box die set. I die cut the bam box from green cardstock to match the grass base and also added the grass piece to the front to hide the bam box.


I used the sun from the Landscape Scene die set to add the sun to the top right hand side of my card.

The greenery at the back of the card uses a die from Spellbinders Hummingbird and Lily die set.

For the "Happy Birthday" I used Honey Bee Stamps Birthday Wishes stamp set with coordinating dies and hot foil plate. The "birthday" is foiled using black foil using the solid plate to get the negative sentiment image.

I computer generated the "fun and games" sentiment at the bottom of the card.


I kept the front of the card fairly simple, seeing the focus is on the inside of the card. To help keep the card closed, I used the Long Flap and Closure die set, using magnets to keep the card closed.

I added a few more of the cute characters holding the chess pieces to decorate the front.

For the sentiment, I used Karen Burniston's Alphabet die set to make the word "Chess". I then added the  "Wanted To Say" using a Julie Hickey stamp set.


Here is a look at the front of my card with the Flap open. As you can see, I die cut another of the flaps from green cardstock and adhered it to the front of the card, to help ground the characters. This is hidden when the flap is closed.


Thursday, June 8, 2023

Thank You Teacher


Hi Crafty Friends,

Thanks for visiting my blog. Today I am sharing an interactive Teacher thank you card that I created. This is one of four I have made so far this year for my grandchildren to give to their teachers at the end of the year. I think I still have a few left to make.
This year I purchased a few new stamp and die sets with a school/teacher theme and this card uses a few of these stamp sets. 

I also recently received my Made To Surprise Flip and See dies from their April release, so I decided to pull out the 5 x 7 die set to use on this card.

To create the front panel of my card, I used MFT Stamps Slimline English Brick Wall Stencil to make the background. I also used Clearly Besotted's Clever Corners stamp set for the cute owl and book scene.

I used MFT Stamps Teach, Sleep, Repeat stamp set for the sentiment. I doctored two sentiments included in the set to come up with the "Thank You Teacher" sentiment.

Here is a quick video to see my card in action.


When you pull the tab at the bottom of the card, the top panel flips up to reveal a teacher themed sentiment and images. I used the same stamp sets on this panel as I did on the front of my card.


This card is then layered onto a top folding 5 x 7 card. I added another sentiment and two pencil images to this panel.


Tuesday, December 13, 2022

Karen Burniston - KB Riley LLC December 2022 Release Blog Hop


Hi Crafty Friends,
Welcome to our Karen Burniston Products - KB Riley LLC December Release Blog Hop. The Design Team have come together with Karen today for a fun blog hop to celebrate the release of 11 new dies. Sneak peeks of the new release started last week, and the dies are available to order NOW!


This release includes:
  • 2 new charm die sets
  • 1 new stand alone die set
  • 2 new Tiny House Add-Ons sets
  • 2 new Pop-up die sets
  • 1 new Woven Box Basket die set
  • 2 new Crosshatch die sets
  • 1 new Box die set
Dies are available to order now on the website.
GIVEAWAY:
To celebrate the release Karen Burniston and each of the Karen Burniston - KB Riley LLC Design Team members will be giving away a $25 Gift Certificate to some lucky person who comments on our blog posts, so make sure you join the hop and comment on everyone's blog post. Winners will be randomly chosen from ALL of the blog hop comments received on our blog posts by Monday, 19th December 2022. Lots of chances to win some goodies, so just leave a comment on this post or any other blog hop posts to enter! Don't forget to leave some way for us to contact you, in case you are a lucky winner!


My card today uses three of the new die sets being released ... Dog Tiny House Add-Ons; Bam Box Pop-up and Hexagon - Crosshatch die sets.

I have created a Slimline Card with a 3/4 Front. To create my card I cut two pieces of red cardstock for the base. The back measures 3 5/8 inches x 8 5/8 inches. The front is 3 5/8 inches x 6 inches, I then scored along the long side of this panel at 1/2 inch to adhere this panel to the back panel. Once I had the base of my card all done, I was then able to add my layers. As this is a Christmas card, I decided to bling it up a little by adding holographic card for the layer under the patterned papers.


Here is a quick video to see my card in action.


For the dog house I used the new Dog Tiny House Add-On die set with the Tiny House Pop-up die set. The new add on set comes with the walls for the dog house, a dog, bones, a paw print, a ball, collar and a dog. The walls and paw print have the stamp feature on them which means you can ink up the die to add the colour as you die cut.

Although this die set does come with a dog, as I had to make a pug themed Christmas card for my daughter to give to her vet, I decided to use pugs on this card. The pugs in this set are from an older Clearly Besotted Bah Hum-Pug! stamp set and as there were already a few pugs stamps, cut and coloured in the back of the stamp set and went with three of those. 


For the two pugs not attached to the dog house, I used the pop-up included in the new Bam Box Pop-up die set to pop them up. When my card is. closed the two pugs adhered to the Bam Boxes are on top of each other adding bulk to that area, next time I make this type of card I will make sure that I adhere them in different positions. The Bam Box folds flat for closing and pops up when you open the card.

I used the two of the labels included in the Bam Box Pop-up die set to add the two labels on the inside of the card. One has a stamped sentiment from an older pug themed stamp set, the other is blank for the sender to write a personal message.


As this card has three pop ups and is a little bulky, I needed a way to keep the card closed when needed. So I created a belly band. I used the new Hexagons -  Crosshatch die set for the layering panels and then added a pug image using Crafter's Companion's Bah! 
Humbug! stamp set.


Here is one last look at my card when it is open with the belly band sitting on the right side of the card.

Well that's about it from me today, thank you for dropping by. To continue on the blog hop, click on the next person on the list, which is  Nicky Foden


Here is the complete blog hop list in case you need it.


Blog Hop List:


Karen Burniston

Lois Bak

Sue Small-Krieder

Karen Aicken

Jennifer Webster

Frances Byrne. <<<< YOU ARE HERE >>>>

Nicky Foden

Sandy Diller

Suzanne Smit

Fran Sabad


Monday, October 3, 2022

Fabulous Teacher


Hi Crafty Friends,

Today I am sharing another Teacher thank you card. December isn't all that far away now that it is already October, and I still have a few more teacher thank you cards to get made for my grandchildren to give to their teachers at the end of the school year.


When Lawn Fawn's most recent release came out at the end of August, I had no intention of buying their newest interactive card, the Peekaboo Pop-up die set which basically is a wiper card. I already had the Mama Elephant one from years ago, and I had just received all the ones from Made to Surprise. So I didn't order it. A few days after my order arrived and I kept seeing more cards made using this die set I decided it was different enough from the others and fortunately my local retailer still had it in stock. Hence today's card is a Peekaboo Pop-up using the new Lawn Fawn die set.


To decorate my card, I used two stamp sets from Clearly Besotted ... School Day Play and Stationery Plushies. I also pulled out an older Heffy Doodle Stamp Set for the blackboard called Teacher's Pet.

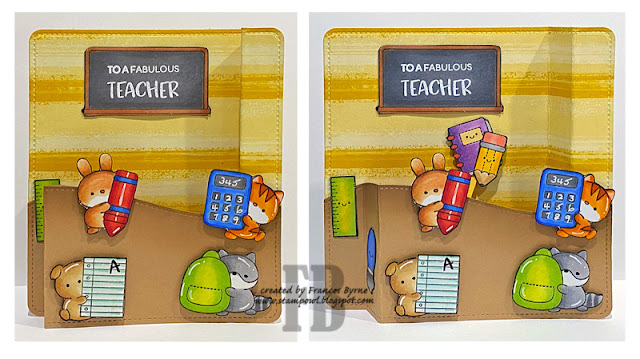
You can see how the book and pencil that you can see under the blackboard are revealed when you pull the sides out.


The Peekaboo Pop-up die set, comes with a rectangle panel to add to the back of the card. As I was adding mine to a white card base, I added a black layer between. 

All the sentiments on this card are from one of my go to teacher themed sentiment sets from Heffy Doodle called "Teach Me Words" it has so many different sentiments and even though I have other sentiment sets, this one often gets used on my cards.

I added to more images that I had left over from decorating the front of my card to finish the card.


Wednesday, August 31, 2022

Thank You Teacher

Hi Crafty Friends,

Today I am sharing another sneak peeks of one of the new Karen Burniston die sets which is being released next Monday 5th September.


Yesterday I shared a card using the new Label Charm Pop-up die set which I created in Mini Slimline format. For my card today I decided to use the same die set, however I created a side folding A2 card. This die set was designed to work on a side folding card which was 5 - 6 inches wide.


I need teacher thank you cards for my grandchildren to give to their teachers at the end of the year when school breaks up for the year. So for this card I pulled out Clearly Besotted's School Day Play stamp set, I love the cute characters in this set that are holding school related items.

I used Karen Burniston's Thank You die which I cute apart to make in one line and added it along the bottom of my card.


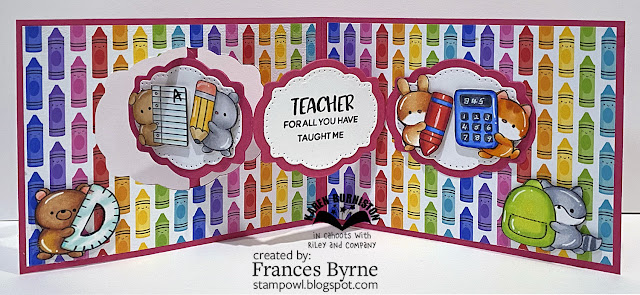
When you open the card, the images that show on the label when the card is closed pivot around so they can be seen on the inside too. I added a sentiment to the centre label which is from Heffy Doodle's Teach Me Words die set.