Showing posts with label La-La Land Crafts. Show all posts

Monday, February 17, 2025

Tee-riffic 60th Birthday


Hi Crafty Friends,

It seems that this year my friends (and myself) are celebrating big ‘0’ birthdays, be it 60; 70 or 80! So there will be lots of opportunities to pull out my various number dies to make aged birthday cards.

For as long as I can remember (over 20 years) I have made my friend who loves to play golf a golf themed birthday card. Last year when I was ill and not stamping I was unable to make a special card, but fortunately I did have a golf themed card that I had in my stash.

When I was thinking about what type of card to make this year, I remembered the Made To Surprise Circle Cracker Tower Card. The circles down each side of the centre panel are perfect for golf balls. I used a very old Cuttlebug embossing folder to give the circles a golf ball look,

This year my friend is celebrating her 60th birthday, so I decided to pull out the new Spellbinders Bougie Birthday die set to create the cake which I decorated in a golf theme.


I used light brown cardstock for the cake and green for all the icing elements. The ‘60’ is from Spellbinders Classy Numbers die set, which are diecutting from silver mirror cardstock.

I added the cute golfing gophers (or is that golphers haha) which are from La-La Land Crafts Tee-riffic stamp set. 

I added the birthday sentiment which is an older die set from Spellbinders. The sentiment is die cut from silver mirror cardstock & layered onto a layer the same colour as the cake, so that it gave some height but didn’t overwhelm the scene.


For the back of the card, I added a panel to the centre. The golf green uses an older stamp from Magnilia Stamps. I added another of the gophers to the l green”. For the sentiment I doctored & combined two sentiment from the Made To Surprise Go Sporty stamp set.
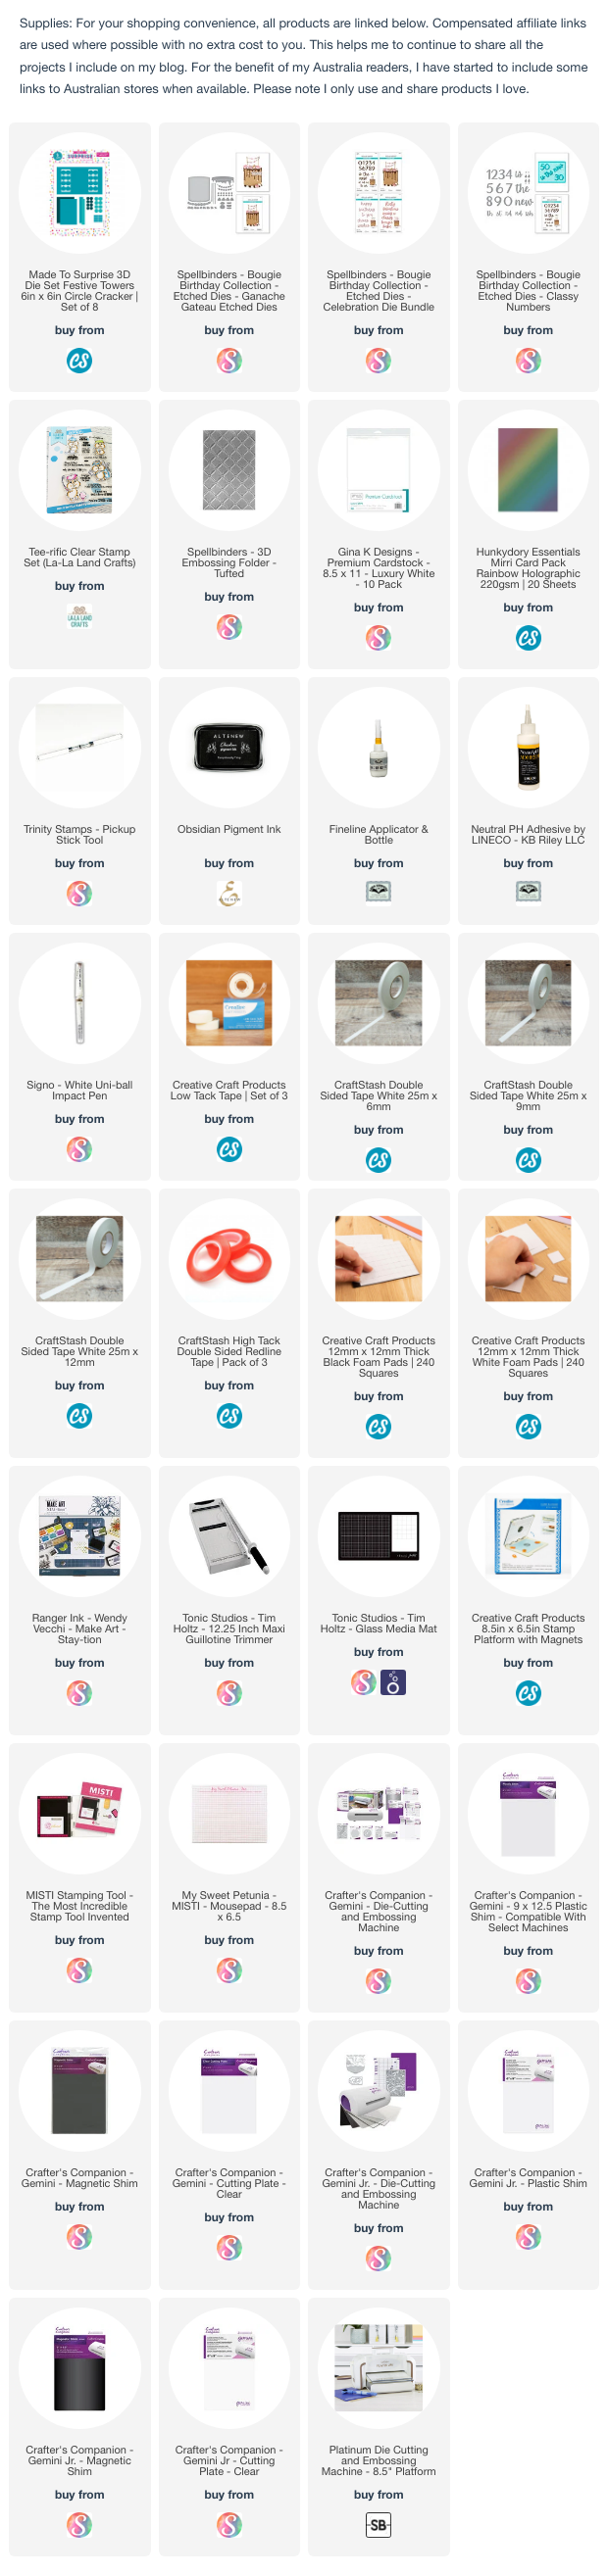


Other Supplies:
Spellbinders Yana's Layered Script Sentiments Stamp/Die Set
Made to Surprise Go Sporty Stamp/Die Set
Cuttlebug Tiny Bubbles Embossing Folder


Friday, August 11, 2023

Water You Doing?


Hi Crafty Friends,

Today I am sharing an underwater themed Accordion Card that I created recently.

For the base of the card I used Creative Craft Products Accordion Stepper card from the Supersize Step On Up Collection. This is the larger of the two Accordion Stepper cards that have dies available from Creative Craft Products. This card measures slightly over 6 3/4 inches square when folded and will fit into a 7 inch square envelope.


To decorate my card I used stamps and dies from La-La Land Crafts June 2023 Card Kit.

My Wax Seal Kit from Made To Surprise by Sam Calcott, finally arrived so of course I had to add a wax seal to my card. You can see the Happy Birthday Wax Seal just above Marci.


I decorate the two larger squares on the back of my card, one to add a sentiment, and the other for a place to write a personal greeting.


Wednesday, July 5, 2023

Wonderland


Hi Crafty Friends,

Thanks for dropping by today. According to the Day of the Year Web Site, yesterday (4th July) was Alice in Wonderland Day. Of course this was as good an excuse as any to pull out my Alice in Wonderland stamps and play!

Here is a quick video to see my card in action.

I have created a 5 x 7 Flip and See Card using Made To Surprise by Sam Calcott's 5 x 7 Flip and See Card die set. I am really enjoying making this style of card. 

To decorate my card I used stamps from La-La Land Crafts Wonderland Collection. For the front of my card I used the Tumbling Down Marci stamp set for both Alice and the sentiments.


When you pull the tab at the bottom of the card, the top panel flips up to reveal a cute scene of the Mad Hatter and Dormouse. this images are from the Curiouser and Curiouser Stamp set.


This card is then layered onto a top folding 5 x 7 card. I used the rectangle dies from the Flip and See die set to add the layers on the inside of my card.

I added the White Rabbit from the All Mad Here Stamp set to the left side of my card.

I added a birthday sentiment using one from Creative Craft Products Impossible Card Landscape Sentiments stamp set. The "Oh dear! Oh dear!" sentiment is from the Curiouser and Curiouser stamp set.


Monday, July 3, 2023

Picnic Easel Card


Hi Crafty Friends,

According to the Days of the Year Web Site, today (3rd July) is National Picnic Month. Seeing I had recently received some picnic themed stamps/dies of course I had to pull them out to play.

This card using stamps and dies from La-La Land Crafts May Kit of the month which includes two stamp sets and three die sets all with a picnic theme. I love the picnic table and basket included in this set.


I decided to create a 5 x 7 Easel Card. For the background panel on the top part of the card I created a scene pattern paper from Made To Surprise by Sam Calcott's Twist and Pop Patterned Paper Pad, this was the perfect size to use for this card and made the background very easy.

I used Lawn Fawn's Watercolor Wishes Paper Pad for the base portion of the card.


The card folds flat, and will easily go into a 5 x 7 envelope. 

I paper pieced the girls pants, top and hat using various patterned papers.


Here is a look at the base of my card. I added the sentiment to the centre of the card to use as a stopper for the easel. I added the cat and watermelon to the right corner. I die cut another piece of red gingham paper to use as a picnic blanket and added more of the food to the blanket.


Other Supplies:

Twist and Pop 8 x 8 Patterned Paper Pad - Made To Surprise


Friday, June 23, 2023

Karen Burniston - KB Riley LLC June 2023 Release Blog Hop


Hi Crafty Friends, 


Welcome to our Karen Burniston Products - KB Riley LLC June Release Blog Hop. The Design Team have come together with Karen today for a fun blog hop to celebrate the release of 9 new dies. Sneak peeks of the new release started earlier in the week, and the dies are available to order NOW!


 This release includes:

  • 2 new Charm Sets
  • 1 new Word Set
  • 2 new Add-on Sets
  • 3 new Pop-up Die Sets
  • 1 stand alone Die Set


Dies are available to order now on the website. 


GIVEAWAY:


To celebrate the release Karen Burniston and each of the Karen Burniston - KB Riley LLC Design Team members will be giving away a $25 Gift Certificate to some lucky person who comments on our blog posts, so make sure you join the hop and comment on everyone's blog post. Winners will be randomly chosen from ALL of the blog hop comments received on our blog posts by Friday, 30th June 2023. Lots of chances to win some goodies, so just leave a comment on this post or any other blog hop posts to enter! Don't forget to leave some way for us to contact you, in case you are a lucky winner!


For my card today I have used the new House of Cards Pop-up die set ... this is such a fun die set and one that will be great for male cards too. When I first saw this die I thought of the Queen of Hearts in Alice in Wonderland, so that is what I did for my card.


Here is a quick video to see my card in action.


The House of Cards die set, come complete with the "A" for Ace and the four suits (hearts; diamonds, Spades and Clubs) so you can make your own playing cards if you want to. For my card I used a set of mini playing cards that I have had for years to die cut all the playing cards. I had a clean up earlier in the year and I debated throwing these out as I hadn't used for years ... I am glad I didn't. I believe KB Riley will also be selling Mini Playing Cards if you want to use them.

My card is a 5 inch x 7 inch card, and I added a gusset to the centre of the card. I ended up building up 4 rows of playing cards. 

The stamped images used on this card are all from La-La Land Crafts.


I used the smaller rectangles from the Rectangles - Crosshatch die set to the lower right hand corner of my card, for a place to write a personal greeting.

The "You're A Big Deal" sentiment comes from the new Word Set 17 - Congratulations die set.


I kept the front of my card fairly simple, seeing the focus of the card is the inside. I used the same layer for the pattern papers.

I used the Happy Birthday and Happy Birthday Shadow die sets to add the birthday sentiment. I found a smaller playing card set in my stash, so I took the aces out of there to add above the sentiment.

I added one more stamped image to the right hand side of the card.


Well that's about it from me today, thank you for dropping by. To continue on the blog hop, click on the next person on the list, which is  Jennifer Webster


Here is the complete blog hop list in case you need it.


Blog Hop List:


Karen Burniston

Lois Bak

Sue Small-Krieder

Frances Byrne. <<<< YOU ARE HERE >>>>

Jennifer Webster

Fran Sabad

Suzanne Smit

Nicky Foden


Monday, June 19, 2023

Happy Birthday


Hi Crafty Friends,

Today I am sharing a birthday card I created recently.

A while back I purchased Paper Discovery's Happy Birthday Word Panel die, this die is massive! A lot bigger than I was expecting being approximately 8 inches x 5 inches. When I pulled it out recently to look at, I had a Centre Step Card on my desk and when I put it up against that, I thought it might work ... so that is what I have done for my card today.

I used the High Centre Stepper Card die set from Creative Craft Products, this is a much wider card than the normal Centre Stepper Cards and I am liking it more and more. I die cut the card base from white and the birthday sentiment from black, layering the sentiment up 3 layers for strength.


I die cut the layers using some rainbow paper I have had in my stash for years, probably at least 20 years if not more. The rainbow layer is normally the outer layer, but I wanted a black layer, so I cut that by hand around all the pieces.

I had a few dogs left over from another card I made using La-La Land Crafts Pawsome Friends stamps set, so I used them and stamped a couple more to add to my card. I also die cut some bones using a Whimsy Stamps stamp set and added those to my card.


For the inside of my card, I used the larger rectangle die included in the die set to die cut the white layer and added a black matting layer. I then added two sentiments and another dog using the stamps from the La-La Land Crafts stamp set.


Thursday, May 25, 2023

Wheely Awesome Day


Hi Crafty Friends,

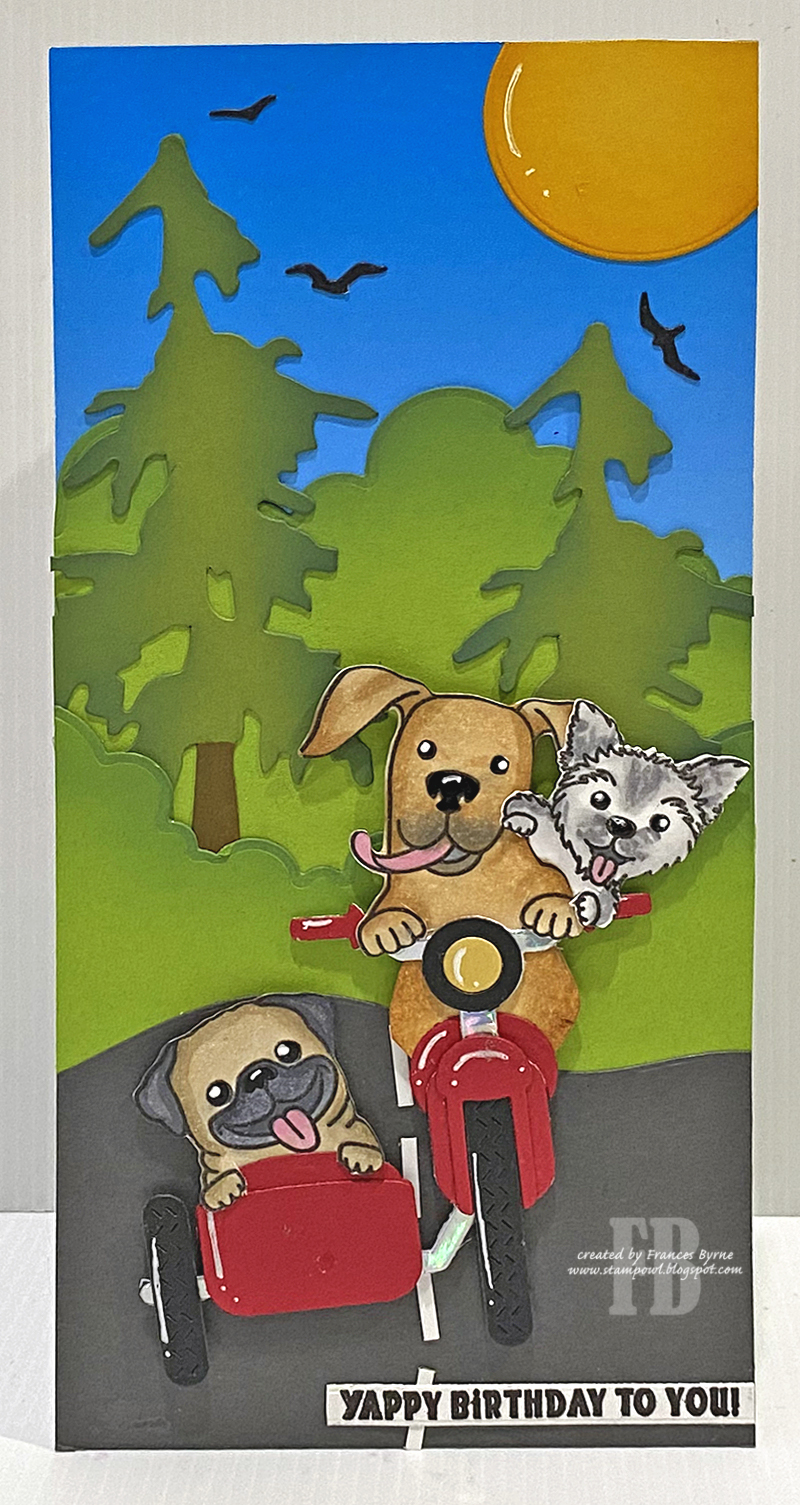
Today I am sharing a fun dog themed Slimline Pop-up card I created recently using stamps and dies from various companies.

La-La Land Crafts recently released a kit that included a dog themed stamp set that included a pug. I am always looking out for pug stamps and I am a grandmother to a pug LOL! The first thing I did when I started playing with the stamp set, was to stamp and colour all the images. I noticed one of the dogs could look like a Maltese terrier and as I have one of those, I coloured the image like mine. I had also coloured another of the dogs brown which then looked like my other daughter's dog, so of course I had to make a card that incorporated all three.


I created a Slimline card that measures 4 inches x 8 1/2 inches, I wanted the wider size so the dogs all fitted easily.

I used ombre designer paper for the sky. I then used the cloud die included in Spellbinders Hummingbird & Lily die set, I have a feeling I will be using this a lot as those clouds are very pronounced and work well for bushes too. Finally I added the road at the bottom of the card.

I die cut two pine trees using an older Sizzix Big die which I added to the top of the card. I also added a circle for the sun to the top right hand corner of my card.

I used the Motorcycle w/Side Car die and the Pawsome Friend stamp set, both from La-La Land Crafts to add my doggy scene. To finish off the front of the card, I added three birds using a Honey Bee Stamps stamp set.


As you can see, I created a pop-up to the inside of my card using Karen Burniston's Katherine Label Pop-up die set. I love adding a double pop-up with these dies when I make a Slimline card.

I used the Cloud border from the Spellbinders die set again to create the greenery along the bottom of my card. I also added another pine tree.

As the dogs on the front are in a motorcycle, I thought the "Wheely Awesome Day" sentiment which is from a Made To Surprise stamp set. The dog themed sentiment is from the Pawsome Friend stamp set.

Finally I stamped out three more of the dogs and added them to the labels. Maybe they flew off the motorcycle and landed there LOL!

Other Supplies:

Pine Tree - Sizzix / Tim Holtz (discontinued)


Friday, May 5, 2023

3D Castle Card


Hi Crafty Friends,

Tomorrow, 6th May is the coronation of King Charles III and his wife Queen Camilla. As this is such an historical occasion I decided to make a card to celebrate the event.


For the castle I used Paper. Discovery's Perfect Castle die set which I purchased from Craft Stash last year when it was on special. This is a 3D die. Normally the towers would be square, but as I didn't want my card to have that much depth, I made a few adjusts to the die cut pieces before assembly. I also cut the tower die cuts in half and this die is rather long as it can be used for a number of different projects.

If you look at the walls you will see the brick detail which is another die included in the set.


I originally wanted to add this to an easel card, but doing that would mean the castle would be at an angle which I didn't like. So instead I added a green panel to the back of the front panel of my card which can be folded into the card when mailing and then folded underneath the castle for display.


I used La La Land Crafts Prince Luka and Princess Marcie for the King and Queen, these are older stamps I have had in my stash for years and are no longer available.


The castle towers fold flat in towards the centre of the card so that it can be placed in an envelope. This is a fairly large card measuring 7 inches wide x 6 1/2 inches tall, I don't I will end up giving this to anyone but keep it on display in my room.


For the inside of my card, I added La La Land Crafts Heart Chair stamp another I have had for years. I thought it could be a throne.

I added a birthday sentiment using a Honey Bee Stamp set and the "Royal Treatment" sentiment which is from an older MFT Stamps stamp set, that set is no longer available but I did find another one on the MFT Stamps web site which I have linked below.


Other Supplies:

  • Prince Luka Stamp - La La Land Crafts (discontinued)
  • Princess Marci Stamp - La La Land Crafts (discontinued)
  • Heart Chair Stamp - La La Land Crafts (discontinued)
  • Royal Friend Stamp Set - MFT Stamps (discontinued)


Monday, March 20, 2023

Celebrate with Bubbles


Hi Crafty Friends,

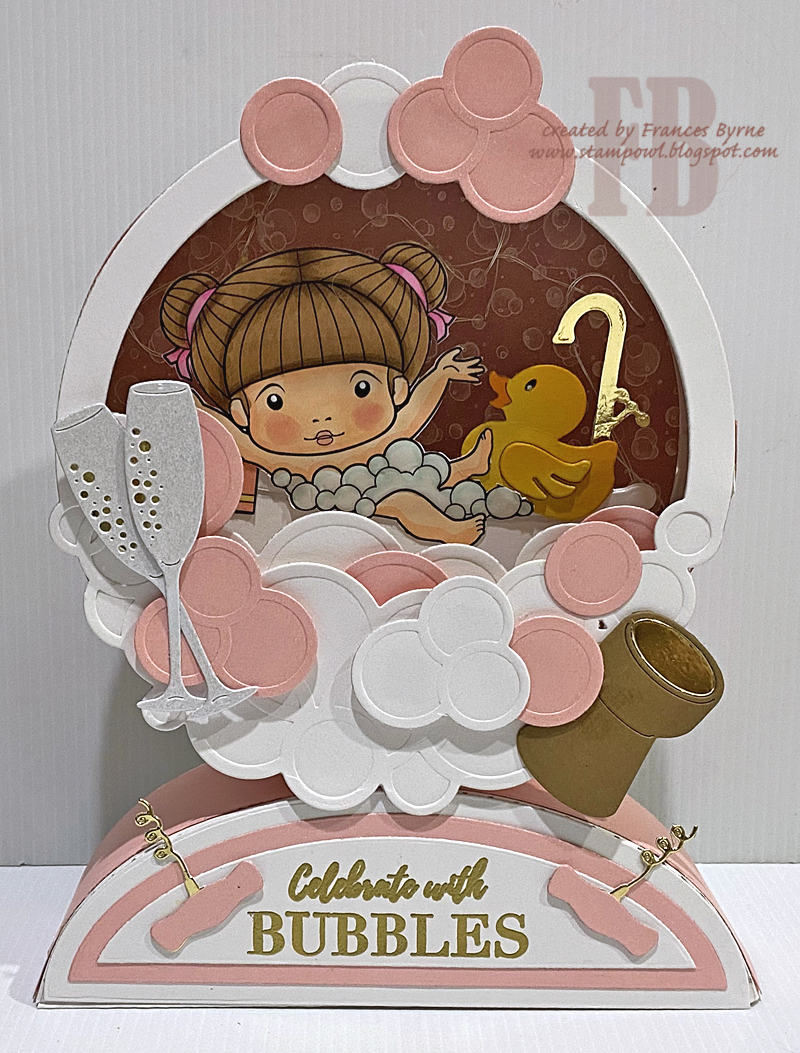
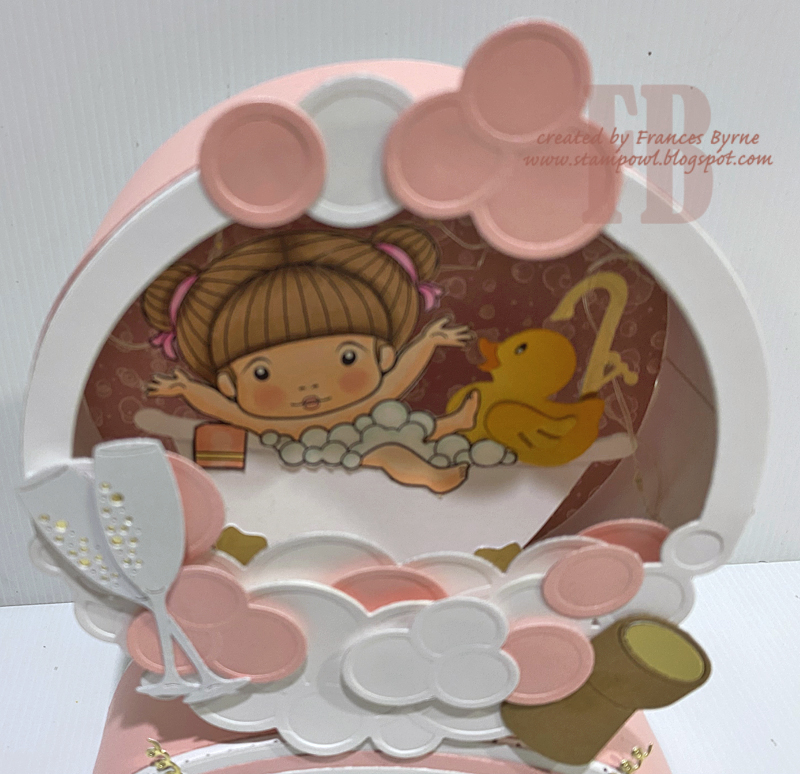
Today I am sharing a fun "bubbly" birthday card using dies from Made To Surprise by Sam Calcott.

Last month, Sam latest release was the 3D Display Card & Stand Collection, as my order arrived late last week I wasted no time pulling out some of the dies to make a card. For this card I used the 3D Display Card & Stand Mechanism die set, the Circular Frame Bubbles die sets and the Cheers, Beer and Champagne Stamp/Die set.

One of the first things I thought of when I saw the bubble frame was a bath scene, which is what I did here.

I used a digital stamp from La-La Land Crafts which I purchased years ago for another bath themed card. Now this stamp does come with a bath and a duck, but I cut both of those off and just used the girl and the bubbles. For the bath I used the Bath Pop Stand die set designed by Karen Burniston for Elizabeth Craft Designs, it's hard to see the bath in the photos, but it is a lot easier in real life. I also used the duck from from the Circular Frame Bubbles die set.


As you can see, this card lights up. I used Studio Lights Fairy Lights kit to add the lights, the battery pack is stored in the oval shaped base which is easily accessible to turn on and off.


I was originally going to make this card using aqua and white, but then I found some pink bubble paper that I used to decorate the back of the inner circle, so as you can see I ended up going with pink and white instead.


I used two of the circle dies included in the 3D Display Card & Stand Mechanism die set to add the layers to the back of the card. I added two of the sentiments and two glasses using the Cheers, Beers and Champagne stamp/die set.


Here is a close up photo, so you can see the bath a little easier.


And one final close up, this time with the lights turned on.

This 3d card is rather large, it measures approximately 6 1/2 inches x 8 inches and would probably be better suited to go into a bag rather than and envelope.


Other Supplies:
Bath Pop-Stand Die Set - Designed by Karen Burniston for Elizabeth Craft Designs (discontinued)
Bath Time Marcie Digital Stamp - La-La Land Crafts (discontinued)