Showing posts with label Calendar. Show all posts

Sunday, April 19, 2020

Rotating Calendar


Hi Crafty Friends,

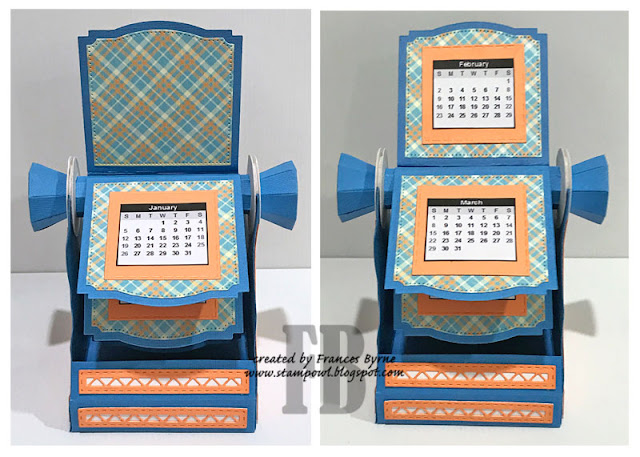
Today I am sharing a calendar I created recently. Back in February Tonic Studios released the Rotating Memoirs die sets which consisted of three different die sets, one base set which includes everything you need to make one of these fun rolodex type item. There are another two die sets which include different dies to decorate your project if you so wished.


When I saw this advertised by Tonic Studios it really appealed to me and fortunately Craft Stash UK was taking pre orders and that weekend they also had free postage which when buying anything in Australia is a big deal, so decided to order a set for one of my daughters to give to me for my birthday. With the Coronavirus shutting down China, I wasn't sure if they would get stocks in in time, but fortunately it did and my parcel of dies arrived a couple of days after my birthday.


I found a couple of videos on YouTube which helped me with the assembly of this. You do need 12 x 12 cardstock for this and as I thought I would need 4 sheets I had to go with lighter weight cardstock, but it turns out I didn't need 4 sheets, I only needed to die cut the sides a second time which I probably would have gotten out of the scraps from the 12 x 12 sheet. 


Here is a quick video of my calendar in action.


For my calendar today I used two of the die sets, the main die set and one of the coordinating die sets to create the pages.


I found a calendar that I thought would work online and printed that out to use for each of the individual papers. This Rotating Memoirs die can take eight pages, so I used six for the calendar and then the other two pages I used for the year and a decorative feature.


The hardest part to make this was actually attaching the pages to the cylinder at the top. I tried a variety of tapes in my stash and none of them held type. I tried my favorite glue which normally works for everything, even that had issues. In the end I had to resort of adding one or two, allowing them to dry for about 30 mins and then coming back to add more. I have since ordered some red liner tape, so hopefully next time I won't have the same issue.


And finally one more photo showing the decorative panel included in the die set, this could also be used on cards.


Supplies:
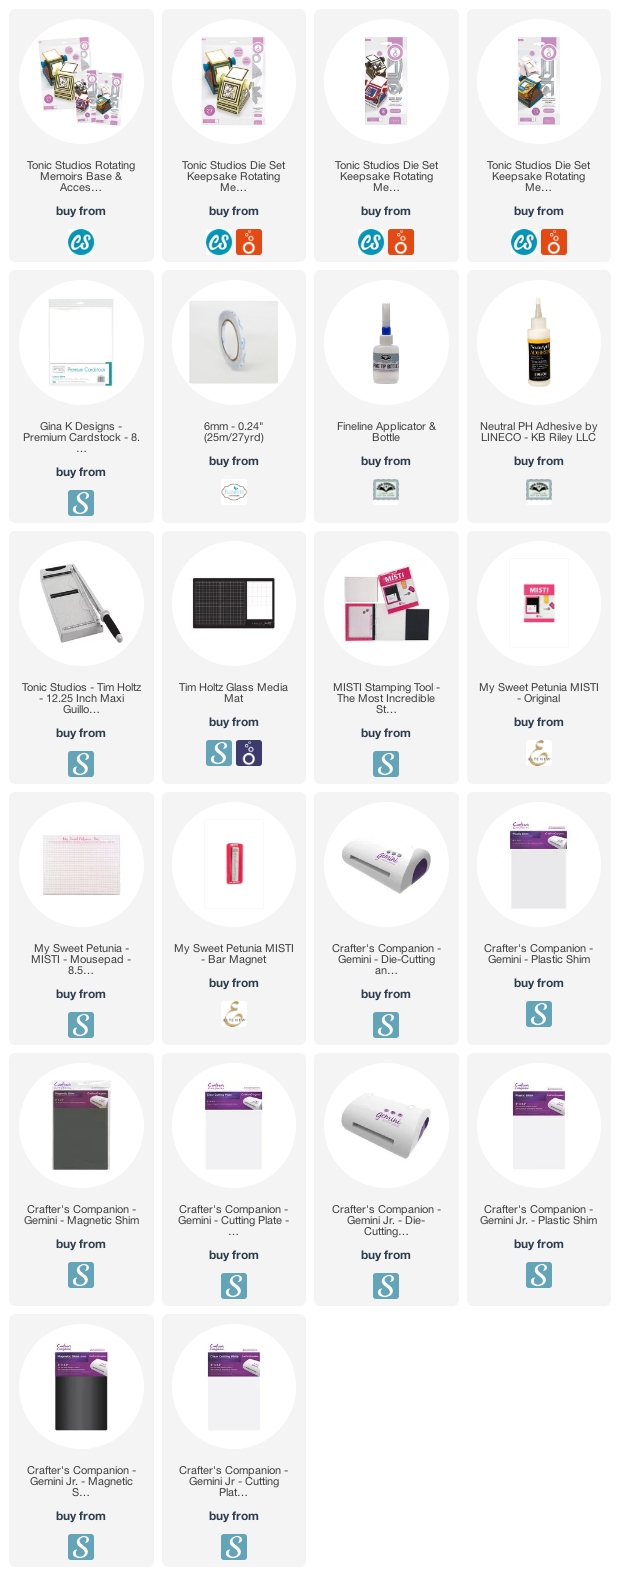
For your shopping convenience, all products are linked below. Compensated affiliate links are used where possible with no extra cost to you. This helps me to continue to share all the projects I include on my blog. For the benefit of my Australia readers, I have started to include some links to Australian stores when available. Please note I only use and share products I love.


Saturday, December 28, 2019

2020 Surprise Ball Pop-up Calendar


Hi Crafty Friends,

There are only a few days left of 2019, so today I am sharing a calendar I created to use for 2020.

I used Karen Burniston's Surprise Ball Pop-up to create my calendar. It is free standing, as I wanted something that I could put on my desk and refer to when needed throughout the year. I have my computer to tell me the date when I need it, but this will be useful when I am looking for what day a particular date falls on, or how many weeks to ..... etc.


Here is a quick video to see my calendar in action. As I love owls, it wasn't hard to decide to add an owl to the top of the calendar.

As you can see in the video, the owl and the top portion of the calendar, can turn so that the owl aligns with the current month. Once July arrives, it is just a matter of removing the brad which holds the owl section to the top of the surprise ball calendar, and placing on the bottom section, so that the bottom portion is now visit at the top.


Edit: A few people have asked about the calendar I used to create this. So I have decided to attach the jpg of the one I used for any of you who wish to replicate this idea. One tip .... make sure when you are die cutting all the individual calendars that you line the narrower end of the die to where the name of the month is, so the calendars are in the correct orientation.


Supplies:
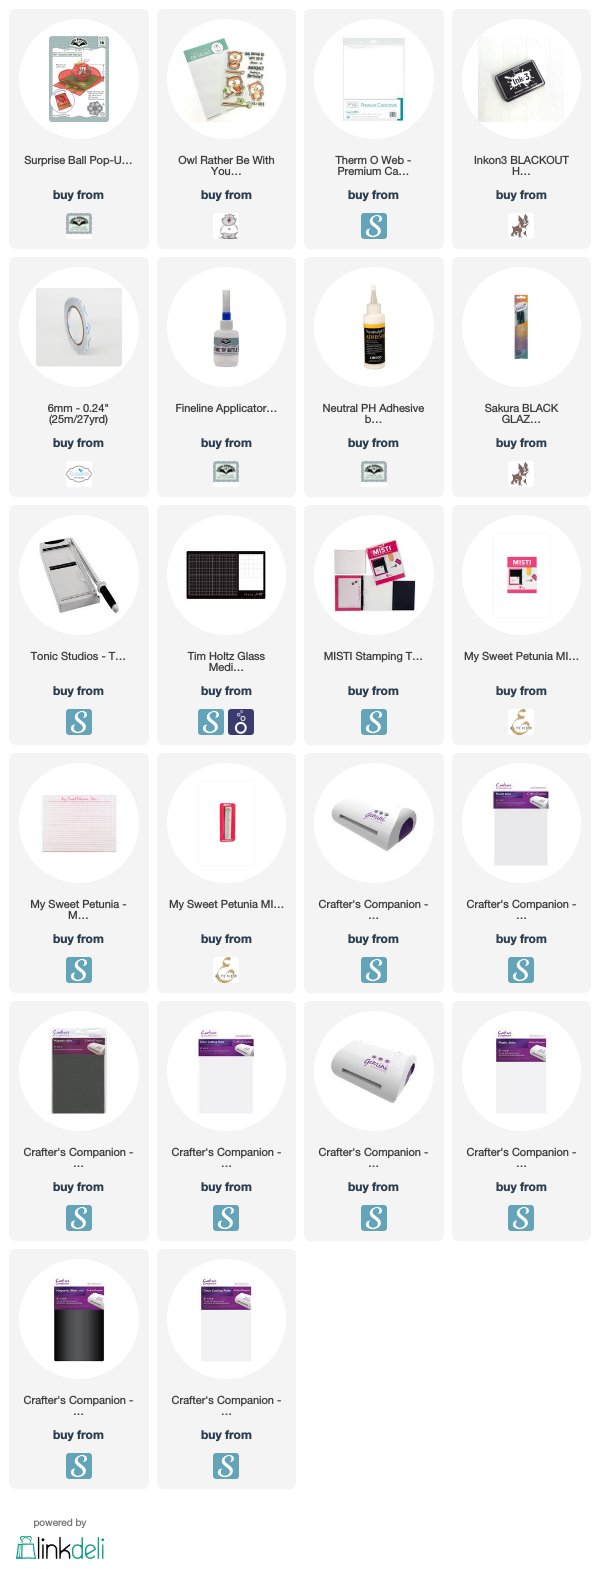
For your shopping convenience, all products are linked below. Compensated affiliate links are used where possible with no extra cost to you. This helps me to continue to share all the projects I include on my blog. For the benefit of my Australia readers, I have started to include some links to Australian stores when available. Please note I only use and share products I love.


Wednesday, August 16, 2017

ECD August Designer Challenge


Hi everyone,

It's time for our August ECD Design Team Designer challenge. Check out the Elizabeth Craft Designs blog today to see what our talented designed created for the challenge.

This time around our challenge is Gift Giving - There are many times throughout the year when we need to give a gift to someone .... Birthdays, Christmas, Teacher Thank You's etc. Create something for today's challenge that could be given as a gift, either completely handmade, or something purchased and then decorated to give it that special touch.


For today's challenge Elizabeth Craft Designs are giving away a $20 Gift Card to use on our website to 3 winners


To enter simply leave a comment on the Elizabeth Craft Designs Challenge post and tell us "What are some homemade and crafty gifts you have created over the years?


We will select 3 lucky winners in a random drawing 


The winners will be announced on Friday, August 18 on the Elizabeth Craft Designs blog.

*************************


I decided to create a calendar as my gift for our challenge this month. Calendars are something that the recipient can use all year round. There are so many fun ways to create calendars depending on how much time you want to put it to it, so either something really quick or something a little more complicated like the one I made here. 


This calendar uses a fair amount of dies and stamps because it is 13 pages. As I live in Australia and our seasons are the opposite to those who live in the Northern Hemisphere I was able to use many of the new released dies on my calendar. I have managed to use 10 of the new die sets, 3 of the new stamp/die sets and 3 new sentiment sets which were released by Elizabeth Craft Designs this week, plus there are a few other die sets also incorporated.  Of course you don't have to use so many. If you haven't seen Elizabeth Craft Designs latest release of stamps and dies, you can check them out here.

To create this calendar I needed:
  • 13 pieces of polka dot patterned paper 5 inches x 5 inches (1 piece for each month and one for the cover.) I used ModaScraps Thinking About Polinesia; Thinking About Grand Canyon and Thinking About Rio de Janeiro for my pages.
  • 2 Jump Rings to bind the calendar
  • Calendar (I used a ready made calendar I purchased earlier in the year, but you either make your own on your computer or download something online.
  • Stamps and dies as desired for each month.

The Cover - 

I kept the cover of my calendar very simple as it probably won't be seen again once it starts been used next year. 

I used the ModaScrap Romantic Corners on two of my corners and added one of the labels from the new Labels 1 die set and added the "2018" using the Numbers & More 1 die set.

January begins a brand new year and is also Australia Day for those of us 'down under' So I decided to celebrate this month.

For this page I have used the new Balloons die set, Banners die set and the Banner Sentiment Clear Stamp set. The patterned paper on this page is from Thinking About Polinesia.

February - This is the only page in my calendar where I didn't use anything from the new release, as I decided to go with a Valentine theme.

For this page I used the Love Sentiments; ModaScrap Lace Heart; Scallop Hearts and True Red Silk Microfine Glitter. I used paper from the Thinking About Rio de Janeiro paper pack.

March is my birthday month, so of course I had to put something on this page that I love .... which of course is OWLS!!!!!

Here I used the new Krista Schneider Give A Hoot Clear Stamp Set with coordinating dies, Woodland Pals Clear Stamp Set with coordinating dies,  If Animals Could Talk Clear Stamp set and Rio de Janeiro Paper Pack.

Of course the owls needed a branch to sit on, which I found in the Woodland Pals stamp set, as I needed it longer than what it was I stamped the image onto white cardstock, then placed the die over the image. When I placed the image into my die cutting machine, I placed the clear cutting pad onto my image so that it didn't cover the bottom of the tree image so it didn't cut that part out. I then removed the die, lengthened the tree by drawing in lines and coloring. 


April .... this was actually the last month I did and I was running out of ideas, but I still have lots of dies I could play with 😀. 

For this page I used the new Cake die set and also created a table cloth/table using the Fishtail Borders die set and ModaScrap Sweet Vintage Rose Patterned Paper pack. Base paper here is from Polinesia Paper Pack.

May - For this page I decided to use some of the Susan's Garden recent release dies to create this scene.

For this page I have used Susan's Garden CountryScapes English Cottage 2; CountryScapes Land & Sea; Behind the Scenes - Earth & Sky Stencil and Behind the Scenes Mountain & Split Rail Fence Stencil. I also used the new Home Sweet Home Clear Stamp set which was released this week. The paper used on this page is from the Polinesia Paper Pack.


June - for those of you living in the Northern Hemisphere it may seem strange seeing snow for June, but here in Australia winter officially starts on the 1st June. I doesn't really get cold enough here where I live to snow, but nothing says it is winter better than snow and besides I wanted to use the new Snowflakes die set from Elizabeth Craft Designs newest licensed designer - Becky Seddon. 

For this page I used the Snowflakes die set; White Soft Finish Cardstock; Thinking About Polinesia Paper Pack and Transparent/Silver Glitter Dot Peel Off Stickers.


July - is the middle of winter down here in Australia and again I have never seen snow where I live and I am more likely to see a Kangaroo then a deer if I went to a forest .... but I just had to use another of Becky Seddon's new die sets. 

For this page I used the Reindeer die set; Thinking About Polinesia Paper Pack; Transparent/Silver Glitter Dots Peel Off Stickers


August - Our last month of winter. Winters seem to be getting warm as I am getting older down here so it has been a long time since I have needed a fire, but a couple of our previous houses did have open fires and we did have a closed in one in this house before it got too old to be safe to use it anymore.

For this page I used another of Becky Seddon's new die sets ... Hanging The Christmas Stockings (off course I didn't add the stockings seeing it was only August). I also added the dog from the Krista Schneider Dreamers Clear Stamp set with coordinating dies. 


September means that Spring is here and all those beautiful flowers start to bloom. I added Nuvo drops to the berries.

For this page I used the new Krista Schneider Blossom Time Clear Stamp set & coordinating dies; Blooms & Leaves Clear Stamp set & coordinating dies as well as the A Way with Words - 4 Seasons die set. 

October of course is Halloween, and while Halloween isn't as big down here as it is in the USA we do occasionally get a  trick or treater or two knock on our door.

For this page I have used the new Ghosts die set; Halloween Scenery die set along with the Fitted Circles die set to create the moon. The paper on this page is from the ModaScrap Thinking About Polinesia Paper Pack.

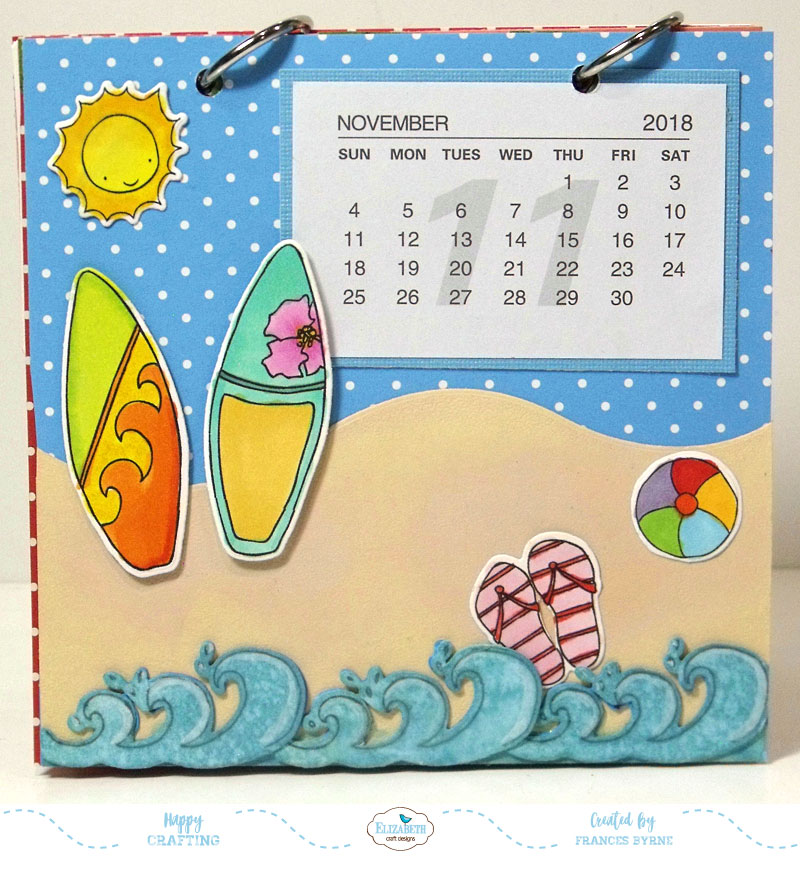
November - the weather is starting to get hot ready for Summer next month, so everyone loves the beach and surfing.

For this page I have used the Krista Schneider Sun & Surf Clear Stamps & coordinating dies. Adventure Edges. The paper used here is from ModaScrap Thinking About Rio de Janeiro Paper Pack. 


December - the final month of the year and also the beginning of summer for those of us 'down under'. Of course it is also Christmas so a perfect time to play with another new Christmas die set.

This page uses Becky Seddon's Beautiful Baubles die set; Solar Gold & Cool Diamond Silk Microfine Glitters; Clear Double Sided Adhesive Tape; Red/Gold Glitter Dots Peel Off Stickers. The paper used here is ModaScrap Thinking About Grand Canyon.


I hope you enjoyed my project today. Don't forget to check out the Elizabeth Craft Designs blog to see all the wonderful creations by our talented designers and for a change to win the giveaway.

Supplies:

Elizabeth Craft Designs:

Banner Sentiments - COMING SOON

Other:
Cardstock - various colors
Distress Oxide Ink - Forest Moss; Broken China; Antique Linen; Fossilised Amber; Wild Honey; Spiced Marmalade; Vintage Photo; Candied Apple; Peeled Paint; Frayed Burlap 
Wink of Stella Glitter Pen
Nuvo Drops - White Blizzard; Ebony Black
Copic Markers


Tuesday, March 8, 2016

Owl Calendar


Hi everyone,

Today I am sharing a calendar I created to sit on my desk this year, so I can easily tell what the date is. Of course what would I want to look at all year long ..... an owl!

I used the new Stampendous Woodland Animals stamp set to create the owl for this calendar. I popped the owl's head onto an action wobble so I can sit there wobbling it's head whenever I feel like it!


Stamps: Woodland Animals - Stampendous
Paper: White; Kites & Stripes DP - Fabscraps
Dies: Woodland Animals - Stampendous
Other: Black Ink; Action Wobble; Calendar; Acrylic Photo Frame; Foam Tape; Copics


Friday, January 1, 2016

2016


Hi everyone,

Happy New Year ... it's already 2016 down here in Australia. I hope 2016 brings you all nothing but the best!


It's time for our December Elizabeth Craft Designs Designer Challenge. Check out the Elizabeth Crafts Designs blog today where you will be able to see what all the designers created for the challenge this month.


Our challenge this month is Make a unique calendar that gets the year 2016 off to a creative start!


Every year I buy these tiny tear off calendars with the intention of creating cards or calendars to give to people. Seldom do I manage to use any, so I figured this was a great challenge to get to use at least one of those tiny calendars I have for 2016. 

A few weeks ago when I was thinking about this challenge, I noticed that these tiny calendars fit on the rectangle part of the Gift Card Accordion die so I figured that would be something different to use for a calendar.

I love combining accordion cards so for the base of my card I combined the Gift Card Accordion (centre page) with the new Oval Landscape Accordion (pages on either end). This is one of the brand new dies designed by Karen Burniston and being released by Elizabeth Craft Designs at CHA next week. I covered the first and third pages with designer paper and the centre page I used the new Trellis Wavy Frames.


To decorate the first and third pages I used the new Shells Large die set which is part of the new Joset Designs range of dies being release by Elizabeth Craft Designs at CHA next week. This fun set contains a collection for 3 shells and a crab all have the solid die and then the detail overlay die to put over the solid one. I die cut these from White Soft Finish Cardstock and then colored them with distress inks to match my designer paper.


Here is a close up look at the third page of my Calendar Accordion. The shells on this page are mirrored to match those on the first page. I closed my card up before attach the craft in the lower left hand corner so that when the card is closed it is hidden by the crabs on the first page.


Here is the front of my card when it is closed. You can see that I added the craft to the lower right hand side of my card.

I wanted to include the year to my calendar so I used the new Banner dies also from the Joset Designs range. This is a collection of 4 dies which can be mixed and matched. For my card today I decided to use the same banner as it fitted the numbers a little better. I think I will be using these a lot! The numbers for the year are from the Numbers & More 1 die set. 

That's it from me today, thank you for visiting my blog. To see what the other designers created for this challenge don't forget to check out the Elizabeth Craft Designs blog post which goes live 8AM MT.


Supplies:

Elizabeth Craft Designs:


Other:
Cardstock: Teal; Rust; Yellow
Designer Paper: Bo Bunny Boardwalk Playtime DP
Inks: Festive Berries Distress Ink; Evergreen Bough Distress Ink; Spiced Marmalade Distress Ink; Fossilized Amber Distress Ink
Foam Tape


Tuesday, December 29, 2015

2016 is Coming


It's our Cornish Heritage Farms Design Team challenge time again over on the Cornish Heritage Farms blog. This time round our challenge is hosted by Me.


2016 is almost upon us, so for our challenge this week lets include a calendar on our cards/projects. It may just be one month e.g. January or the whole year.


Every year I buy a packet of those tiny calendars and every year I hardly use many of them, so this was a great challenge to at least use one of the little calendars haha.

I used an Acrylic Card Stand/Photo Holder which I purchased in a cheap shop, and these make easy calendars to give as gifts at this time of year. All you need to do is cut a piece of designer paper the size of the frame and insert it into the frame. And then decorate the top with a calendar and any image you want.  


Don't forget to check out the rest of the Design Team's blogs today to see what they created for this challenge.


Steph Ackerman


Stamps: Floral 11 Digital Stamp - Cornish Heritage Farms
Paper: White; Peach; Flirty/Summer Crush DP - Maja Designs
Dies: Circle Stax - MFT Stamps
Other: Acrylic Card Stand/Photo Holder; Foam Tape; Copics


Saturday, November 8, 2014

Handmade Holidays Blog Hop

Handmade Holidays 2014 Hop Logo 
Welcome to the 4th Annual Handmade Holidays Blog Hop!

A few years ago we were looking online for handmade gift ideas and thought it would be great if there was a resource dedicated JUST to handmade gift ideas. Enter the Handmade Holidays hop!

We've gathered over 100 of our creative blogger friends in the craft industry as well as some of our fellow product manufacturers to bring you a plethora of inspiring gift ideas you can make now to give to your friends, family, and colleagues. Pin and bookmark these ideas for this holiday season and to use throughout the year! Each day of the hop features approximately 30 gift projects and you can "hop" from one blog to another to check them all out.


For my gift idea today, I decided to create a Calendar using Peel Off Stickers from Elizabeth Craft Designs. Calendars are something that the recipient can use year round.

For those that know me, it isn't a big surprise that I have an owl on the cover of my calendar ... after all I love owls.

Here is how I created my calendar:


1. First up you will need the following supplies: Peel Off Stickers of your choice; Double Sided Adhesive; Warm Diamond Silk Microfine Glitter; 12 pieces of White Card 5 1/2 inches x 4 1/4 inches;  Extra white card to use with Double Sided Adhesive Paper to prepare peel off stickers;
2 pieces of Chipboard 5 1/2 inches x 4 1/4 inches; 2 Rings; 12 pieces of 6 x 6 Designer Paper of your choice; Foam Tape and Copics.


You will also need a calendar, for mine I created my own in Excel which I printed on one page and then trimmed each month separately using my trimmer and keeping a thin border around the outline of each month. If you would like to download a PDF version of my calendar you can do so by clicking on the link on the calendar above.

2. Cover each of the white card with the designer paper, trimming off any excess paper. For my cover I didn't have any more of the designer paper I used for each of the months, but I did have some offcuts. So I used the offcuts to cover the front. I then used Peel off stickers to decorate the cover.

I used Owl Circles (SKU 2560); Lines(SKU 1016) - Black; Numbers 2 (SKU 1253) and Ribbon Fantasy (SKU 1276) to decorate my cover.

3. Cut a piece of white card and a piece of Double Sided Adhesive Paper that are approx 4 1/4 inches x 11 inches. Remove the release sheet from one side of the adhesive paper and set it aside upside down on your desk (shiny side up). Adhere our Double Sided Adhesive sheet to the piece of white card.

Place your selected Peel Off Sticker pieces sticky side up onto the release sheet that we set aside earlier.

Take your white card and place it with the adhesive side facing down onto the release sheet with the Peel-Offs on it. The Peel-Offs will lift from the release sheet and stick to the adhesive on the card stock.

Turn your card so the release sheet is now on top. Take off the release sheet and make sure not to touch the images on the adhesive.

Cover the adhesive with Warm Diamond Silk Microfine Glitter and polish over all the images with your finger. You can see a video Els created using this technique here. Color your images as desired.

4. Use a hole punch to punch two holes in each of your pages making sure the holes are lined up with the previously punched holes. Sandwich the designer paper covered pages between the covered chipboard cover and the undecorated back chipboard cover and used the rings to hold in place.

Now it is time to decorate your calendar pages, here is how I decorated my pages. Elizabeth Craft Designs have a wide range of Peel Off Stickers so of course you could decorate your months with the Peel Off Stickers of your choice.


I live in Australia, so it is summer in January so I wanted something to reflect this so I decorated my January page using Lighthouses(SKU 2574) and Rainy Day Peel Off Stickers (SKU 2588) for the sun.
For my February page I used Cute Bears (SKU 2535) to celebrate Valentine's Day.


March is my birthday month, so I couldn't resist using Balloons(SKU 2552) to decorate this month's page.

For my April Page, I remembered the rhyme "April Showers" so used Rainy Day Peel Off Stickers (SKU 2588) for my page.


May of course finishes off the rhyme, "... bring May Flowers" and down here May is also Mother's Day so flowers are popular then. I used Flower Vines (SKU 2544) for this page.
For the June Page I used Hats (SKU 2529).


July is the middle of winter down here in Australia and while we don't see snow where I live, snowmen do make you think about it being cold and winter so I decided to use Snowman in Frame (SKU 2583) and Snowflakes Small(SKU 8530) to decorate my page.

For August I decided to use Coffee and Tea (SKU 2531) to decorate my page.


September brings with it the beginning of Spring so I decided to use Ladybugs(SKU 2341) and

Glitter Elegant Swirls (SKU 1283) Green/Gold for this page.

And of course Halloween is at the end of October so  I used Halloween in Frame (SKU 2585).


For my November page I just had to use the cute Puppies(SKU 2584).

And finally, December brings us to Christmas and to give this page a Christmas feel I used Christmas Ornaments Round (SKU 2573) and Lines(SKU 1016) Gold

Are you ready for lots more creative handmade gift ideas and projects?? Follow along on our blog hop! Simply click on each of the links below to be taken to that post with additional information and photos on how to create a handmade gift project. Have fun and pin away!

  Clearsnap
  Ellison Educational Equipment
  Walnut Hollow 
 Graphic 45 
Neat and Tangled
Therm O Web
Westcott
Elizabeth Craft Designs 
Pink and Main
The Buckle Boutique
Scrapbook Adhesives by 3L
Rowland Technologies 
ICE Resin
Hydrangea Hippo
Clearsnap - Suzanne Austin
Stencil1 - Ed Roth 
Graphic 45 -Nadya Lifa
Cookies for Breakfast- Beth Pingry
Cupcakes and Crinoline - Mary Beth Sharkey
Elizabeth Craft Designs - Frances Byrne   <-----You Are Here
Lazy Mom’s - Joanna Grzeszczak
Homemade Ginger - Megan Kapple
Scrapbook Adhesives by 3L - Asia King
Ellison Educational Equipment - Anna-Karin Evaldsson
One Artsy Mama- Amy Latta
Therm O Web - Alice Golden 
Lovely Etc - Carrie Spalding
ICE Resin - Clare Horner
Pink and Main - Yolie Burke 
The Buckle Boutique - Stephanie Nericcio
Modern Surrealist - Marisa Pawelko
A Little Craft In Your Day - Tanner Bell 
Artsy Findings - Cheryl Waters
Stampin Mindy - Mindy Baxter


Follow our Handmade Holidays Gift Ideas Pinterest board for even more inspiration!

Follow Jennifer Priest of RainMaker Media Works + Hydrangea Hippo's board Handmade Holidays on Pinterest.

A huge thank you to our sponsors for this hop - please visit their blogs below and follow them. And be sure to come back tomorrow for another 30+ amazing Handmade Gift Ideas!

Handmade Holidays 2014 Hop Logo SPONSORS 300dpi


Additional Sponsorship provided to bloggers by: