Showing posts with label Galaxy Sky Technique. Show all posts

Monday, August 3, 2020

Out Of This World


Hi Crafty Friends,

Today I am sharing another Slimline card I created recently.

For my card today I used Whimsy Stamps Slimline Wonky Windows die set. I die cut the slimline die from white cardstock and also from a panel that I had created the galaxy sky technique to. I then placed the galaxy sky solid pieces into the windows.

To decorate my card I used Mama Elephant's Little Agenda Spaceship stamp set. I added a sentiment also from the stamp set to the bottom right hand corner panel.


For the inside of the card I used PinkFresh Studio's Slim Diagonal Rectangle die set to die cut the white panel. 

I added a sentiment to the centre of the panel which is from Honey Bee Stamps Stellar Sentiments stamp set. I also added a few more of the images from the Little Agenda Spaceship stamp set.


Supplies:
For your shopping convenience, all products are linked below. Compensated affiliate links are used where possible with no extra cost to you. This helps me to continue to share all the projects I include on my blog. For the benefit of my Australia readers, I have started to include some links to Australian stores when available. Please note I only use and share products I love.


Tuesday, April 14, 2020

Have A Stellar Birthday


Hi Crafty Friends,

Today I am sharing a Slimline card, this card measures 3 1/2 inches x 8 1/2 inches and fits inside a business size envelope.

To create the slimline card I used Trinity Stamps Stitched Card Panels and Windows die set.

For the background of my card, I created the galaxy sky background using distress oxide inks. I then splattered the background with white paint & Lawn Fawn's Liquid Stardust. I then white embossed the constellation and stars to the background.

The space images are all from Avery Elle's Astronauts stamp set.


For the inside of the card I stamped two sentiments, one from the Avery Elle stamp set and the Happy Birthday sentiment is from the MFT Stamps Bitty Birthday sentiments. I also added a few more of the space images to the card.


Supplies:
For your shopping convenience, all products are linked below. Compensated affiliate links are used where possible with no extra cost to you. This helps me to continue to share all the projects I include on my blog. For the benefit of my Australia readers, I have started to include some links to Australian stores when available. Please note I only use and share products I love.


Monday, June 4, 2018

Hoping Your Birthday is a Blast!


Hi Crafty Friends,

Today I am sharing a new style of card that I discovered recently while browsing online. This card is called a Double Tower Card and you can find how to create this here. 

This is a fairly tall card being 7 inches tall, so it was the perfect opportunity to pull out a new space stamp set I recently purchased from Uniquely Creative. 

For the background I used Distress Oxide inks to create the Galaxy Sky Technique.


I also pulled out a few of my other space themed stamp sets, from Lawn Fawn, MFT Stamps and There She Goes to finish my card.


The accordion panels on either side of this card seemed the ideal place to add some embellishments, so I added numbers and a couple of aliens ... so it looks like you are counting down to BLAST OFF!


Here is another view of the card, this time when it is lying on the desk. Hopefully you can see the side panels a little better,  it was hard to photograph this so you can see the beauty of this card.


On the back of the card I added a white panel to add a sentiment and one of the spaceman from the stamp set.

Supplies:
Stamps: Have a Blast - Uniquely Creative; Beam Me Up - Lawn Fawn; Space Explorer - MFT; Out of this World - There She Goes
Paper: White Black


Saturday, May 5, 2018

Bam! Zap! Pow! Super Birthday


Hi Crafty Friends,

It’s challenge time with the “Crazies” over on the Crazy 4 Challenges blog. Being a brand new month it is  time to introduce our new challenge hostess which is Amy Ottmers.

Apparently today is "Free Comic Book Day", so our challenge this week is to make a "Super Hero" card/project.

My youngest daughter has been very into Super Heroes for years and I remember her going to the city on this day each year to visit the comic shops there to get free comic books. 


I have a number of "Super Hero" stamps/dies to select from and decided to use these cuties from C.C. Stamps ... I couldn't decide whether to use the boy or the girl ... so as you can see I used both! 

To create my card I started by die cutting the Cupcake Pop-up into a white card. Now when Karen Burniston released this die set last year I never thought I would use this as a generic pop-up die but I seem to reach for it all the time. It is perfect to have things pop up with a little height and each to disguise the cupcake. The two super heroes fit perfectly on the cupcake pop-up.

I used the galaxy sky technique for my background of my card using various colors of Distress Oxides. I then spritz the background with water from a Distress Sprayer and splattered watered down Copic Opaque White all over the background.


On the rectangle pop-up panel below the cupcake I added the City Skyline using black and gold cardstock.

The yellow & black "Bam! Zap! & Pow! die cuts are a set from Frantic Stamper. 

To finish off the inside of the card I added a birthday sentiment which I added using the label dies from Karen's Katherine Label Pop-up.


As the focus of this card is on the inside, I kept the front fairly simple. I repeated the galaxy sky background and then added the Zap! Bam! Pow! die cuts to my card. To fill in the gaps I added the star from Frantic Stampers Heroic Symbols die set to which I added a blue Nuvo drop in the centre of the three full symbols.

Don't forget to check out the rest of the “Crazies” cards over on the Crazy 4 Challenges blog and also their individual blogs for more details.


Supplies:


Other:

Stamps: Super Hero Henry; Super Hero Twila - C. C. Designs; Wet & Wild - Penny Black
Dies: Skyline Border; Solid Skyline Border - MFT Stamps; Pow, Zap, Bam; Heroic Symbols - Frantic Stamper
Other: Foam Tape;  Copic Opaque White; Copics 

Friday, May 4, 2018

May the 4th Be With You


Hi Crafty Friends,

Today is May the 4th ... which means it is Star Wars Day and also International Space Day .... May the 4th Be With You! To celebrate the day I decided to create a space themed card using Lawn Fawn's Beam Me Up Clear Stamp set.

I created a Centre Step Card using the Cheery Lynn Designs Centre Step die, you can also create this style of card by following a tutorial I made over 6 years ago which you will find on YouTube here.


To create the background of this card I used Distress Oxide  inks and the Galaxy Sky Technique. I then splattered some watered down Copic Opaque White over the background to resemble stars.

The cratered planet on the base of the card is a stamp from an old There She Goes stamp set, which seems to be my go to when I am making space cards. I also added a few planets from this stamp set and an MFT Stamps stamp set.


For the inside of my card, I added a sentiment using stamps from the Lawn Fawn Beam Me Up Clear Stamp set and surrounded this with a few more aliens from the stamp set.

Supplies:


Stamps: Space Explorer - MFT Stamps; Out of This World - There She Goes
Dies: Centre Step Card - Cheery Lynn Designs
Other: Copic Opaque White; Foam Tape; Copics

Saturday, March 17, 2018

Mission Control We Have A Birthday


Hi Crafty Friends,

It’s challenge time with the “Crazies” over on the Crazy 4 Challenges blog. Bonnie Sharp our challenge hostess for the month, continues to issue the challenges.

Being the third Saturday of the month it is time for a sketch challenge.


When I first saw this sketch I thought hmmm this one is going to be a tough one, but the more I looked at the sketch the half circle on the bottom of the sketch reminded me of either the moon or a grassy hillside. 

I wanted to play with doing the Galaxy Sky Technique using Distress Oxide inks, so a space theme card it became. I really liked how easy it was to create the background using Distress Oxide inks.

I used stamps from MFT Stamps and There She Goes Stamps to create the space themed card.


Most of you know I love making pop-up cards so that is what I did for the inside. I used Karen Burniston's Cupcake Pop-up Card die set to die cut the cupcake pop up die from white cardstock and then masked each of the areas to create the moon surface and space scene.

I love how easy it is to disguise the fact that the pop up is a cupcake. 

I decorated the top part of the inside using spaceman, planets, stars and a space ship. On the bottom panel I added a birthday sentiment, the 8th from Karen's Numbers die set and an alien.

This is another card that my grandson will get for his 8th birthday later this year, probably from his auntie.


Here is another view of the inside of the card taken at an angle, so you can see the pop-up portion of the card a little easier.

Don't forget to check out the rest of the “Crazies” cards over on the Crazy 4 Challenges blog and also their individual blogs for more details.


Supplies:


Stamps: Space Explorers - MFT Stamps; Out of this World - There She Goes
Paper: White Soft Finish Cardstock; Black
Dies: Cupcake Pop-up Card ; Numbers; Katherine Label Pop-up - Karen Burniston
Other: Black Ink; Peacock Feathers Distress Oxide; Wilted Violet Distress Oxide; Picked Raspberry Distress Oxide; Blueprint Sketch Distress Oxide; Black Soot Distress Oxide; Black Glaze Pen; White Gel Pen; Foam Tape; Copics


Wednesday, September 20, 2017

ECD September Designer Challenge


Hi everyone,

It's time for our September ECD Design Team Designer challenge. Check out the Elizabeth Craft Designs blog today to see what our talented designed created for the challenge.

Our challenge this month is ..... Spooktacular Creations - It's just over a month away until Halloween. Create a card or project with a Halloween theme.

I have created two cards for this month's challenge. To see my second card, scroll down to the blog post below this one.


For today's challenge Elizabeth Craft Designs are giving away a $20 Gift Card to use on our website to 3 winners. 

To enter simply leave a comment on the Elizabeth Craft Designs Challenge post and tell us "What are some of your favorite products you choose when creating spooky scenes for Halloween?”


We will select 3 lucky winners in a random drawing 


The winners will be announced on Friday, September 22nd on the Elizabeth Craft Designs blog.

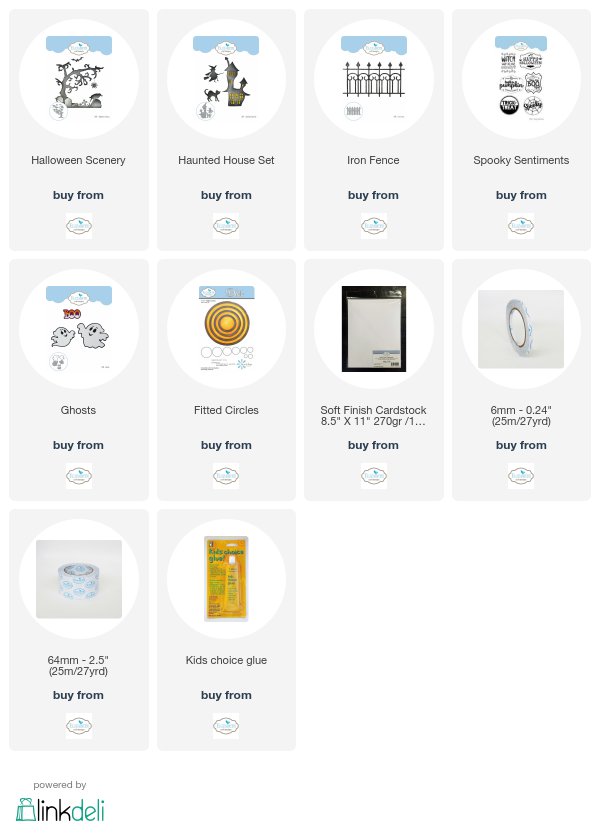
For my card today I have created a "U Fold Card", I have discovered this style of card quite recently and have been having fun creating them. I have used a number of the new Halloween themed die sets which were released by Elizabeth Craft Designs in August to create my card. 

The background of my card uses the galaxy background technique which I have been having fun with this year. I used distress inks to create the background. It is a little to see the effect of this background totally on this card as a lot of the color is hidden by the die cuts, but it is there.

I apologise that my instructions are using metric rather than imperial measurements, I didn't think when I started my project to work in inches. It is pretty easy to convert if you wish to replicate this card. If I made this particular card again, I would probably make it slightly taller to allow for the tall haunted house, the chimney is about 1 inch over the top of the card, but as I have things hanging off the sides I don't think this matters. 


Here is how I created my card:

Step 1 - 
  • Cut a piece of white cardstock that measures 12.5cm x 20cm.
  • Randomly sponge on Picked Raspberry, Twisted Citron and Salty Ocean Distress Inks over the card. Leave some areas white.
  • Sponge Chipped Sapphire Distress Ink around the edges of the card and blending over the previously applied colors.
  • Finally apply black ink around the edges and over the card, you don't want to to completely cover the colors you have laid down. You decide how much you want to show through for your finished project.
  • Finally add some picket fence distress paint to an acrylic block, thin with water and use a paint brush to splatter white all over the background to create stars.
Step 2 - 

  • Cut a piece of black cardstock that measures 22.5cm x 13cm.
  • Score along the long side at 3.5cm; 7cm; 15.5cm and 19cm.
  • The score lines closest to the edge will be mountain folds, and the centre lines valley folds.
Step 3 -
  • Take the Galaxy Sky Background panel and cut the panel into 5 panels .... four will be 3cm wide and the centre panel will be 8cm wide.
  • Adhere panels to black card as per photo above.

Step 4 - 
  • Create two bridges for the centre panel to which will hold the haunted house and fence. One bridge will be 2.5cm x 12.5cm and the other 2.5cm x 10.5cm.
  • Score the 12.5cm length bridge at 2cm either end and the 10.5cm one at 1 cm either end. 
  • Apply adhesive to the 1cm ends of the shortest bridge and adhere it to the edge of the 2cm bridge.
  • Attach both bridges to the bottom centre of card as per photo above.

Step 5 - Decorating the card.
  • Using the smallest circle from the Fitted Circles die set, die cut a circle from orange cardstock.
  • Sponge the edge of the circle with black ink.
  • Adhere circle to top right centre panel.
  • From the Haunted House die set, die cut the witch, house and cat from black cardstock.
  • Adhere the witch so that part of it is covering the moon.
  • Adhere yellow cardstock behind the windows of the haunted house. (Optional - sponge around the edge of the house with white ink). To attach the house to the back bridge, add a length of black cardstock that will to the back of the house which extends approximately 2cm from the bottom of the house (tab). Attach this tab behind the bridge closest to the centre panel so the house is flush with the top of the bridge.
  • From the Iron Fence die set, die cut the fence using light grey cardstock. Apply adhesive to the bottom part of the fence and adhere to the front of the other bridge.
  • From the Ghost die set, die cut the small and large ghosts from white and black cardstock. 
  • Assemble ghosts.
  • Adhere the small ghost to the left hand panel using foam tape, and the large ghost to the top of the right hand panel using adhesive. 

  • Using the Halloween Scenery die set, die cut the tree from black cardstock. Cut off the roots of the tree and adhere on an angle to the right hand panel.
  • Using the Halloween Scenery die set, die cut the graveyard scene on a piece of dark grey card that is 16cm long so that you have approximately 2.5cm edge at the bottom. Note - the graveyard scene will be shorter than your cardstock, so you will need to trim the top left and right edges so it is level with the bottom of the elements closest to the edge of the scene.
  • Apply black ink around the edges of the scene.
  • Use a white gel pen to write "R.I.P" on both gravestones.
  • Apply adhesive to the bottom of the right hand panel and adhere the right side of graveyard scene to this panel. 
  • Fold your card so that the two panels on the right hand side are open, but the two on the left are folded on top of each other onto centre panel. Apply adhesive to the bottom of the left hand panel and adhere final edge of graveyard scene. Trim off any excess cardstock.
  • Adhere the cat that you die cut earlier to the left hand side of the graveyard scene.
  • Die cut 3 bats (Halloween Scenery die set) using dark grey cardstock. Adhere one to the roof of the house and the other two on the side panels in the centre of the card.


Step 6 - 

  •  Stamp the "Trick or Treat" sentiment from the Halloween Sentiments Clear Stamp set onto white cardstock using black ink. Trim into a rectangle.
  • Adhere to left side of front of card as per photo above.

Here you can see how the card folds flat for easy mailing. This particular card may not fit into a standard size envelope due to the height of the card. But you can easily adapt this style of card so that it does.

I hope you enjoyed my project today. Don't forget to check out the Elizabeth Craft Designs blog to see all the wonderful creations by our talented designers and for a change to win the giveaway.

Supplies:

Elizabeth Craft Designs:


Other:


Cardstock - White; Black; Yellow; Orange; Grey; Dark Grey
Inks - Picked Raspberry; Twisted Citron; Salty Ocean; Chipped Sapphire Distress Inks; Black Ink
Picket Fence Distress Paint
Paintbrush
White Gel Pen
Foam Tape


Thursday, March 30, 2017

Out of this World

Hi everyone,

It's challenge time with my friends over on the CCEE Stampers challenge blog. Lynn McAuley our challenge hostess finishes off her month with one last challenge.

Today is Vincent Van Gogh's 164th Birthday. For our challenge this week Lynn has asked us to use the lyrics of the song "Vincent" by Don McLean be our inspiration when creating our card.

For my card this week I have made a Double Z Fold Card, I really like this style of card and have been having fun making them, especially this one which has to be my favorite of those I have done so far.

For my inspiration I went with the first line of the song .... "Starry, starry night...". As you can see we are looking at the stars from earth but from somewhere else in space haha. I so wanted to pull out my favorite space stamp set from There She Goes Clear Stamps once more. 

To create the background of my card I used the Galaxy Sky Technique using various colors of distress ink and then flicking Picket Fence Distress Paint over the background to resemble stars.


Here is a photo of my card taken at a different angle so you can see the whole card which includes the corner of the card.

For the moon that has the sentiment "You're out of this world!" I stamped the sentiment onto white cardstock, die cut using the smallest circle from the Fitted Circles from Elizabeth Craft Designs and then used the Stage It Stencil Petite Flourish to add some texture to the circle using Pumice Stone Distress Ink.


Here is a look at my card when it is closed ready to be placed in an envelope.


And finally one last photo, this time so you can see the inserts I added to the square in the corner so I could have my astronaut and space ship floating in space.


Don't forget to check out the CCEE Stampers blog (goes live 12 AM EST) to see the rest of the creations the CCEE Stampers created this week. You can also see more details of their creations on their individual blogs:


Vicky Gould


Stamps: Out of this World - There She Goes Clear Stamps
Paper: White; Black
Dies: Fitted Circles; ModaScrap Stitched Fishtail Banner - Elizabeth Craft Designs
Other: Black Ink; Tumbled Glass Distress Ink; Mustard Seed Distress Ink; Picked Raspberry Distress Ink; Chipped Sapphire Distress Ink; Black Soot Distress Ink; Pumice Stone Distress InkPicket Fence Distress Paint; Stage It Stencil Petite Flourish - ECD; Splatter Brush; MISTI; Foam Tape; Copics