Showing posts with label Stamps by Krista. Show all posts

Wednesday, November 21, 2018

Elizabeth Craft Designs November Designer Challenge


Hi Crafty Friends,

It's time for our July Elizabeth Craft Designs Design Team Designer challenge. Check out the Elizabeth Craft Designs blog today to see what our talented designers created for the challenge. 

Our challenge this month is ..... 
A Floral Christmas- Flowers and foliage can play a big part in our Christmas decorating. For our challenge this month create a card or project that features either flowers, foliage etc. It can be using traditional flowers and foliage that are used at Christmas time (e.g. poinsettia's, holly, pine boughs etc.) or use something non traditional and make it Christmassy by using Christmas colors or something Christmas related on your card project.


For today's challenge Elizabeth Craft Designs are giving away a $20 Gift Card to use on our website to 3 winners

To enter simply leave a comment on the Elizabeth Craft Designs Facebook Giveaway Blog Post or the Elizabeth Craft Designs Challenge post and tell us Which flower or foliage die or stamp set would you chose to create a Christmas card or decoration.

We will select 3 lucky winners in a random drawing 

The winners will be announced on Friday, November 23rd on the Elizabeth Craft Designs blog and our Facebook page.


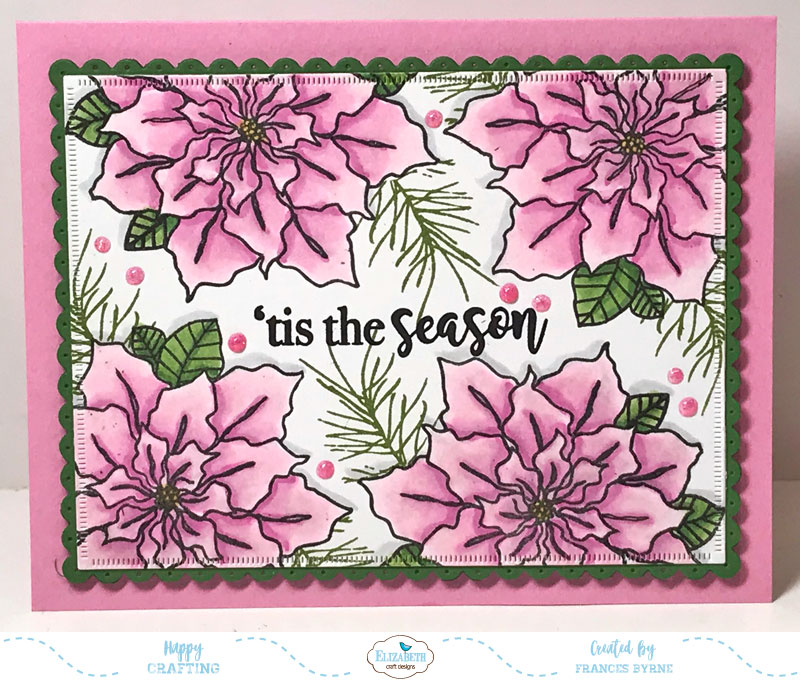
For my card today I used the new Krista Schneider Poinsettia Clear Stamp set. I die cut a piece of white cardstock using the second largest rectangle from the Dashing Rectangles die set. I then placed the rectangle in my MISTI stamp platform and positioned the poinsettia to the top right hand corner of the card using black ink.  I then turned the card around so that the bottom left corner was at the top right and stamped again.

Next I stamped the other two poinsettias onto the card using the same method as above but in a different position.

I masked the poinsettia's and stamped the green pine leaves around the card.

The card was layered onto a green panel die cut using the Dotted Scallop Rectangles and then mounted onto a folded pink card using fun foam.

I added the 'Tis the Season sentiment to the centre of the card using black ink.

To finish off the front of the card I added some pink Nuvo Drops.


For the inside of the card I stamped another poinsettia to the bottom left hand corner of the card and then used the A Way With Words - Merry Christmas sentiment to the top right corner, this was die cut using pink and green cardstock and then offset slightly when layered.

I hope you enjoyed my project today. Don't forget to check out the Elizabeth Craft Designs blog to see all the wonderful creations by our talented designers and for a change to win the giveaway.


Supplies:
For your shopping convenience, all products are linked below. Compensated affiliate links are used where possible with no extra cost to you. This helps me to continue to share all the projects I include on my blog. Please note I only use and share products I love.



Saturday, February 18, 2017

Special Birthday Wishes!


Hi everyone,

It’s challenge time with the “Crazies” over on the Crazy 4 Challenges blog. Tammy Hershberger our challenge hostess for the month continues to issue the challenges.

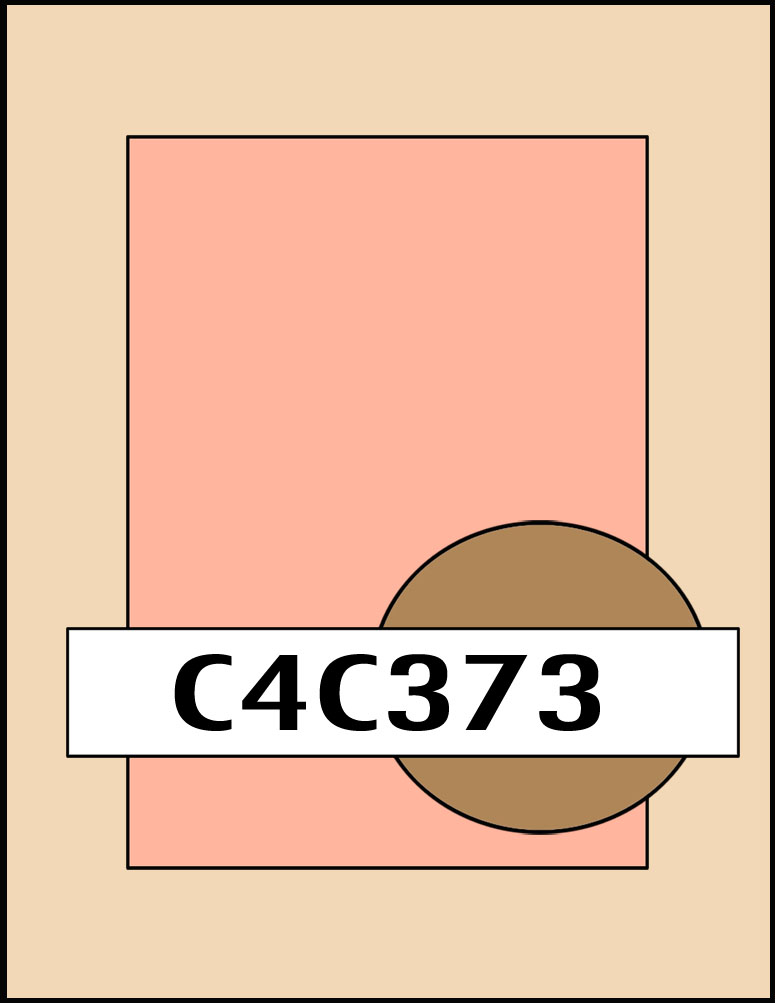
Being the third Saturday of the month it is time for a sketch challenge.


I enjoyed playing with this sketch. I substituted the circle for one of the flowers from the Krista Schneider Flower Power stamp set which was released recently by Elizabeth Craft Designs. 

I added the "Special" sentiment from the A Way With Words Special Moments die set which has been layered onto a white card that has been die cut using the Stitched Fishtail Banners. I die cut both ends so I had a double ended fishtail banner.

I also added the Garden Notes - Ivy Vine to decorate the flower.


For the inside of the card I created a pop up card using the Lorna Label Pop Up Card die set designed by Karen Burniston for Elizabeth Craft Designs.

I added two birthday sentiments to the card.


Here is another photo of the inside of my card taken at a different angle so you can see the pop up part of the card a little better.

Don't forget to check out the rest of the “Crazies” cards over on the Crazy 4 Challenges blog and also their individual blogs for more details.

Lisa Henke (February Guest Designer)


Stamps: Flower Power - Elizabeth Craft Designs; Birthday Messages - Simon Says Stamp!
Paper: White; Pink; Dark Pink; Hello Happiness - Taylored Expressions
Dies: Pop It Ups Lorna Labels Pop Up; ModaScrap Stitched Fishtail Banners; Garden Notes Ivy Vine; A Way With Words Special Moments - Elizabeth Craft Designs
Other ECD Products: Clear Double Sided Adhesive Tape; PanPastel Sets 1 & 3
Black Ink; Pink Candy Dots; Foam Tape; Copics


Thursday, February 16, 2017

Happy Bird-day!


Hi everyone,

It's challenge time with my friends over on the CCEE Stampers challenge blog. Liz Williams our challenge hostess for the month continues to issue the challenges.

Our challenge this week is in honor of Liz and Lynn’s mom’s birthday today, make a feminine birthday card for some special lady in your life.


As I had a few images sitting on my desk from Krista Schneider's Happy Bird-day stamp set which was recently released by Elizabeth Craft Designs, I decided to use them for my card this week. I also used the ModaScrap Stitched Fishtail Banners.


For the inside of the card I created a pop up card using the Pop It Ups Happy Birthday Pop Up Card die set designed by Karen Burniston for Elizabeth Craft Designs.

The designer paper panels on the top and bottom edges of the card were created using the wavy border from the Beach Edges die set. I finished decorating the card using a few more images from the Happy Bird-day! stamp set.


Here is another view of the inside of the card, so you can see the pop up part of the card a little easier.


Don't forget to check out the CCEE Stampers blog (goes live 12 AM EST) to see the rest of the creations the CCEE Stampers created this week. You can also see more details of their creations on their individual blogs:


Vicky Gould


Stamps: Bird-day Party - Elizabeth Craft Designs
Paper: White; Orange; Green; Toy Box Dream DP - Bo Bunny
Dies: Pop It Ups Happy Birthday Pop Up; Pop It Ups Beach Edges; Bird-day Party Coordinating Dies; ModaScrap Stitched Fishtails Banners; Celebrate -  - Elizabeth Craft Designs
Other ECD Products: Clear Double Sided Adhesive Tape 64mm
Other: Black Ink; Foam Tape; Copics


Tuesday, February 14, 2017

Birch Forest Scene


Hi everyone,

It's my turn to post a tutorial today on the Elizabeth Craft Designs blog. Today I am playing with one of the new stamp set designed by Elizabeth Craft Designs new Designer Krista Schneider, the Stamps by Krista range, I love creating scenes using stamps, so I decided to use the stamps from the Birch Forest stamp set to create the scene on my card.

Here is how I created my card:


1. Cut a piece of White Soft Finish Cardstock that measures 3 1/2 inches x 5 1/2 inches.
  • Using black ink stamp the deer slightly off centre and close to the bottom of the card.
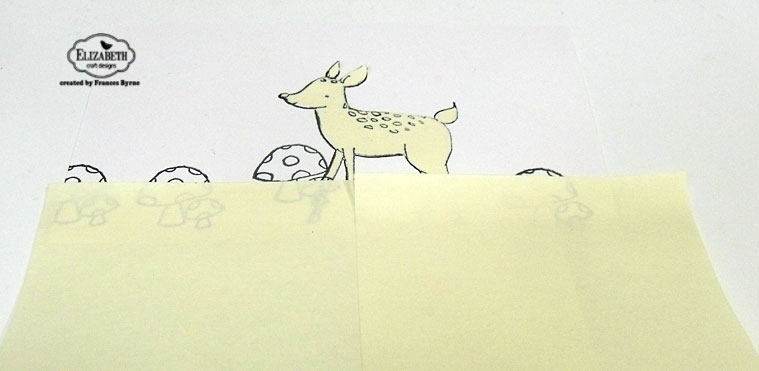
  • Stamp another deer onto a post it note, cut out the image to create a mask. Note: When creating a mask cut the image just inside of the line rather than outside to prevent a halo effect.
  • Place mask over deer.
  • Stamp the mushroom image onto the card four times as per photo above. Note - one mushroom is stamped over the deers front leg  and another mushroom is stamped so it is slightly off the card.

  • Take a post it note or scrap paper and place the top of the paper where you would like the top of the ground to be. For my card it is approximate 3/4 inch from the bottom of the card.

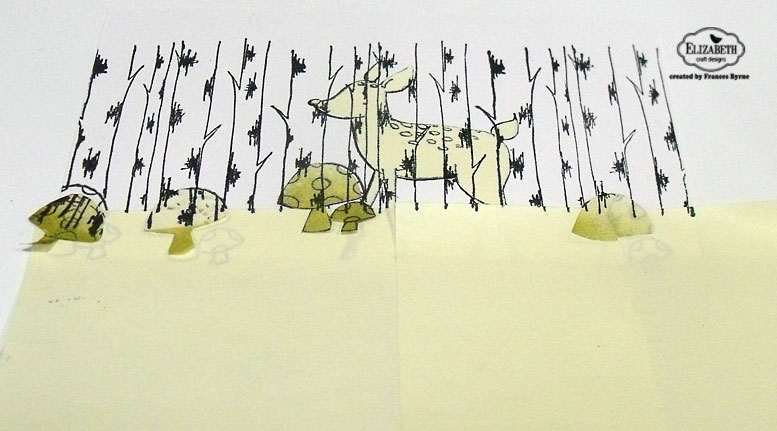
  • Stamp the mushrooms onto post it notes and cut out to create masks. Note - when create multiple masks of the same image. Stamp the image onto one piece of post it note, but cut out 3 or 4 layers at the same time.
  • Place the mushroom masks wherever the larger post it note does cover the mushrooms.

  • Stamp the birch trees along the card so that the bottom of the trees line up with the top of the large post it note. For my card I stamped the trees three times.

  • Remove all masks.
  • Color as desired.


    2. Trim down the top of the card so that it is level with the top of the trees. (mine is 3 inches high).
    • Using the largest die from the Postage Stamp Rectangles die set, die cut the longest edge of the die from black card. Repeat.
    • Use the edge to create a border underneath your white card, refer to photo above.
    3. Cut a piece of red cardstock that measures 5 1/2 inches x 8 1/2 inches. Score along the 8 1/2 inch side at 4 1/4 inches to create a 5 1/2 inch x 4 1/4 inch top folding card.
    • Adhere white panel to red folded card.
    4. Stamp the 'Thinking of You' sentiment from the General Sentiments Clear Stamp set onto White Soft Finish Cardstock using black ink.
    • Die cut the sentiment using one of the fishtail banners from the Stitched Fishtail Banners die set. 
    • Adhere sentiment to top left side of card.


    5. The inside of the card;
    • Cut a piece of White Soft Finish Cardstock that measures 3 inches x 5 1/2 inches.
    • Stamp the owl from the Birch Forest Clear Stamp set to the right hand side of the card. Create a mask using a post it note. 
    • Stamp the mushrooms so that the owl appears to be sitting on the large mushroom.
    • Stamp the sentiment 'Hello' from the General Sentments Clear Stamp set to the centre of the card.
    6. Use the negative piece that was left when you die cut the Postage Stamp Rectangle die to create the border for the front of the card, to create a scallop border for the inside of the card.
    • Adhere white panel to centre of inside of card.
    Thank you for stopping by today, I hope you enjoyed my tutorial.

    Supplies:

    Elizabeth Craft Designs:


    Other:
    Cardstock - Black; Red
    Ink - Black
    Copics
    Post it Notes


    Tuesday, February 7, 2017

    Thinking of You


    Hi everyone,

    Today I am playing with one of the new stamp sets which has recently been released by Elizabeth Craft Designs. The stamp set I used on this card is called Purr.


    As you can see I have created a scene on the front of my card using various dies from Elizabeth Craft Designs. The brick wall was created using the Bricks die, I die cut this twice using Silver Gray Soft Finish Cardstock which had Clear Double Sided Adhesive Tape on the back and layered it onto a piece of Brick Red Soft Finish Cardstock. I had to overlap the bricks in places to get the long wall I wanted.

    For the grass I used the grass from the Pop It Ups Outdoor Edges die set which I die cut using Olive Twist Soft Finish Cardstock. 

    This was all layered onto a piece of Whisper Blue Soft Finish Cardstock which had been die cut using one of the squares from the Stitched Squares die set and then layered onto the Dotted Scallop Square which is in Rich Black Soft Finish Cardstock. The base of my card is Silver Gray Soft Finish Cardstock.

    I added some clouds from the Rainbow Sky die set.

    I stamped the two cats and the fishbone onto White Soft Finish Cardstock using black ink and then die cut the images using the coordinating dies. I did do a little extra trimming to the fishbone before adhering it to my card.


    For the inside of my card I stamped the other cat & a dragonfly from the Purr stamp set and adhered them to the lower right hand side of my card.

    I finished my card by adding the "Thinking of You" sentiment to the top left hand side of the card.


    Stamps: Stamps by Krista Purr - Elizabeth Craft Designs
    Elizabeth Craft Designs Soft Finish Cardstock: White; Brick Red; Silver Gray; Olive Twist;  Whisper Blue; Rich Black
    Dies: Bricks; Pop It Ups Outdoor Edges; Stitched Squares; Dotted Scallop Squares; Rainbow Sky; Thinking of You - Elizabeth Craft Designs
    Other ECD Products: Clear Double Sided Adhesive Tape 101mm
    Other: Black Ink; Foam Tape; Copics


    Wednesday, February 1, 2017

    Wishing


    Hi everyone,

    My card today uses more new products from Elizabeth Craft Designs. If you haven't figured out by now, I have been having so much fun with all the new products which were released this month.

    For the background of my card I used the ModaScrap Leaf Pocket. Rather than use this die as a pocket I decided to use it as a background. 
    • I cut a piece of white cardstock that had Clear Double Sided Adhesive Tape on the front using one of the Stitched Rectangles. 
    • It it is always handy to keep the big sheets of release paper that you remove when using Clear Double Sided Adhesive tape or sheets. I used a slightly bigger release sheet that I had put aside from a previous project to die cut the leaf pocket die. 
    • Remove the release sheet from the stitched rectangle and place the die cut release sheet background over the adhesive. Use the full release sheet you just removed from the adhesive to cover your card and use a bone folder to ensure the leaf background release sheet is attached to your card.
    • Cover the exposed adhesive that shows through the Leaf Pocket design using Forest Silk Microfine Glitter, remove excess to the jar and polish the glitter into the adhesive using your finger. 
    • Carefully remove the Leaf Pocket Release sheet and cover the remaining adhesive using Light Brown Silk Microfine Glitter. Remove excess to the jar and polish the glitter into the adhesive using your finger. 
    Layer the background onto a Dotted Scallop Rectangle.

    The flower is one of the new Stamps by Krista Flower Power  also available from Elizabeth Craft Designs. I love that these stamps also have available coordinating dies so it is easy to die cut the images. I added three leaves from the Moda Scrap Pair of Leaves 2 die set.

    To finish of the front of the card I added the "Wishing" from the new A Way with Words Wishing You  A die set.


    For the inside of my card I added another panel using the Leaf Pocket using the same technique as the front, this time cutting the panel down so it only fitted part of the card.

    I also add the remainder of the sentiment from the A Way With Words - Wishing You A sentiment set and also the A Way with Words Happy Birthday sentiment.

    Stamps: Stamps by Krista Flower Power -  - Elizabeth Craft Designs
    Paper: White Soft Finish Cardstock; Café au Lait Soft Finish Cardstock; Olive Twist Soft Finish Cardstock - Elizabeth Craft Designs
    Dies: ModaScrap Leaf Pocket; ModaScrap Pair of Leaves 2; Stitched Rectangles; Dotted Scallop Rectangles; A Way with Words Wishing You A; A Way with Words Happy Birthday 2  - Elizabeth Craft Designs
    Other ECD Products: Clear Double Sided Adhesive Sheet; Forest Silk Microfine Glitter; Light Brown Silk Microfine Glitter
    Other: Foam Tape

    Tuesday, January 31, 2017

    Bird-day Bonbon Box


    Hi everyone,

    Today I am sharing a gift box I created recently using some new products from Elizabeth Craft Designs.

    I love making gift boxes and it is even easier to make if you have a die that does the cutting and scoring for you. For my box today I used the new Bonbon Box die from the Els van de Burgt Studios line of dies.


    I die cut the box using aqua cardstock and then I sponged stars all over the box using the new A Way with Stencils Butterflies and Stars stencil.


    To decorate the box I used the Bird-Day Party stamp set and co ordinating die set. One thing I love about having the co ordinating die set is that I was able to die cut the image from aqua card to match my box and then adhere this die cut behind the die cut stamped image, so that when you look at the box you see aqua behind the images instead of white.


    Another view of the Bonbon Box, I love that there is also a die in the co ordinating die set so you can die cut the sentiment if you want to.

    Stamps: Stamps by Krista Bird-Day Party - Elizabeth Craft Designs
    Paper: White; Aqua
    Dies: Bonbon Box; Bird-Day Party Coordinating Dies - Elizabeth Craft Designs
    Other ECD Products: A Way With Stencils Butterflies and Stars;
    Other: Cracked Pistachio Distress Ink;


    Sunday, January 29, 2017

    Hello


    Hi everyone,

    My card today uses new products which were released by Elizabeth Craft Designs this month.

    I used the straight and scallop fishtail border from the Fishtail Borders die set. I slightly offset the border to get an interesting angle and used the piece that is removed from the "fishtail" for my card. I layered the designer paper over the green and adhered to my card.

    The flower and leaves are from the new Stamps by Krista Spring Blooms stamp set which also has coordinating dies which I used to die cut the shapes.


    For the inside of my card I used the "fishtail" part of the designer paper (remember I had offset the die which is why it doesn't look exactly like a fishtail) and added it to the bottom of my card and then added the flower and sentiment.

    Stamps: Stamps by Krista Spring Blooms - Elizabeth Craft Designs
    Paper: White; Purple; Green; Autumn Picnic DP - Maja Design
    Dies: Spring Blooms Coordinating Dies; Fishtail Borders - Elizabeth Craft Designs
    Other: Black Ink; Foam Tape; Copics


    Wednesday, January 25, 2017

    ECD January Coloring Designer Challenge


    Hi everyone,

    This year the Elizabeth Craft Designs Coloring Design Team have reintroduced the Designer Challenge. From February on we will host our challenge on the third Tuesday of the month. For January we are playing a week later to allow for the beginning of the year and for all the new products to get to our new Design Team Members. 


    Our challenge this time round is .... Cute Critters - Include one or more critters on your card or project.


    Elizabeth Craft Designs has a number of new stamp sets being released which include some cute critters in them, it was almost tough to make a decision as to which stamp set to use for this challenge. In the end I decided to use the cute monkey included in the Jungle Cuties stamp set. There is also a coordinating die set to accompany the stamp set, which makes it even easier to cut out all the images.


    For my card today I decided to create a baby card using two of the new stamp sets. I have used Zoo Babies and Jungle Cuties. I love how adorable these images are. The new stamp sets also have coordinating dies to go with all the images which makes it super easy to stamp and cut out any of the images you want to use.

    As you can see I have created an Combo Accordion Card using the Pop It Ups Gift Card Accordion and the Pop It Ups Oval Landscape Accordion die sets.


    For the centre page of my accordion card I used the baby sentiment from the  A Way with Words -Baby Love die set. I die cut the word three times using cardstock that had Clear Double Sided Adhesive Tape on the back and layered the three sentiments together to give dimension.

    I added the word "Boy" which is from the Pop It Ups Baby Clear Stamp set.


    Here is my card closed ready to be placed in an envelope.


    Don't forget to check out the Elizabeth Craft Designs blog to see all the wonderful creations by our talented designers.

    Supplies:

    Elizabeth Craft Designs:

    Other:
    Cardstock - Blue
    Designer Paper - Doodlebug Design Inc. Snips & Snails 6 x 6 Paper Pad
    Inks - Black
    Foam Tape
    Copics


    Monday, January 23, 2017

    Happy Bird-day!


    Hi everyone,

    Today I have another card to share using the new Stamps by Krista range of stamps available soon from Elizabeth Craft Designs.

    For my card today I have used the Bird-day Party stamp set to create a birthday card. I stamped the birds and cake on White Soft Finish Cardstock and then used one of the Stitched Fishtails dies to cut out the card. This was then layered onto a fishtail die cut from the Fitted Fishtails die set.

    For the sentiment I die cut the sentiment using the Moda Scrap Stitched Fishtail Banners die set.


    For the inside of my card I die cut a square from the Fitted Squares die set and stamped the bird, balloon and colored flowers.


    Stamps: Bird-day Party! - Elizabeth Craft Designs
    Paper: White; Pink; Green; Giggle DP - Kaisercraft
    Dies: Stitched Fishtails; Fitted Fishtails; Stitched Squares; Fitted Squares; ModaScrap Stitched Fishtail Banners - Elizabeth Craft Designs
    Other: Black Ink; Foam Tape; Copics