Showing posts with label Monochromatic. Show all posts

Saturday, September 25, 2021

Thinking of You


Hi Crafty Friends,

t’s challenge time with the “Crazies” over on the Crazy 4 Challenges blog. Karen Ostergard our challenge hostess for the month, finishes off her month with one last challenge.

This week Karen has asked us to create a monochromatic card.


For my card today I decided to create a Slimline Fold Flap card. One the front rectangle I added the "Thinking of You Perfect Pairings" die set from Concord & 9th. To give it a glittered look, before die cutting the sentiment I added Clear Double Sided Adhesive Tape to the front of the cardstock and then added Cool Diamond Silk Microsoft Glitter over the sentiment.


For the inside of my card I used Woodware's Ode To You Slimline stamp which I placed as close to the fold as possible so it couldn't be seen when the card was closed.

On the left flap, I added the flowers from the frame included in Concord & 9th's Thinking of You Perfect Pairings stamp set.

Don't forget to check out the rest of the “Crazies” cards over on the Crazy 4 Challenges blog and also their individual blogs for more details.


Thursday, March 11, 2021

Pink Butterflies Happy Birthday

Hi Crafty Friends,

It's challenge time with my friends over on the CCEE Stampers challenge blog.  As challenge hostess for the month, I continue to issue the challenges.

Did you know that the 14th March is Learn About Butterflies Day. So for our challenge this week we need to include at least one butterfly on our cards.


As one of the Terrific Towers Die sets I received for Christmas included a Butterfly Edge die which I hadn't used yet, I decided to pull that out to make my card this week.

This card uses the Made To Surprise 6" x 6" Terrific Towers Die Set along with the 6" x 6" Excellent Edges die set. As you can see I created a pink monochromatic card.


I die cut the card base from pink cardstock and then pink glitter cardstock for all the butterflies and layers for the card. After adding all the butterflies to the card, I added Pink Glitter Dot Peel Off Stickers to the centres of the body.

I used the "Happy Birthday" sentiment from the Made To Surprise A5 Stamp Set Sentiments which I stamped onto the white panel using the new Kitsch Flamingo Distress Oxide ink.


Here is another view of the card, this time when it is lying on the desk. Hopefully you can see the side panels a little better.


On the back of the card I added another of the large panels that I used on the front of the card. I added another sentiment this time for the Sentiments 2 stamp set. I also added the pink glitter layers to the base card and a couple of butterflies.

Don't forget to check out the CCEE Stampers blog (goes live 12 AM EST) to see the rest of the creations the CCEE Stampers created this week. You can also see more details of their creations on their individual blogs:


Monday, January 13, 2020

Monochromatic Birthday


Hi Crafty Friends,

Today I am sharing a card I created for Taylored Expressions #TE Maker Challenge. 

Other than the challenge blogs I belong to, it has been years since I have participated in a challenge as I normally work about 3 weeks ahead, so challenges that come up at the last minute don't really work for me. However early in January, Taylored Expressions posted a list of their monthly challenges for the whole year, so I thought I would try and play along each month where I can.

Each month the challenge gives you 3 options, and you need to use at least one of the options in your card with at least one Taylored Expressions product. The challenge options for this month are Masking, Ovals and Grey.

I purchased a couple of Taylored Expressions Masking Stencils in November, unfortunately not the oval so I decided to go with 2 of the three options ... masking and grey.

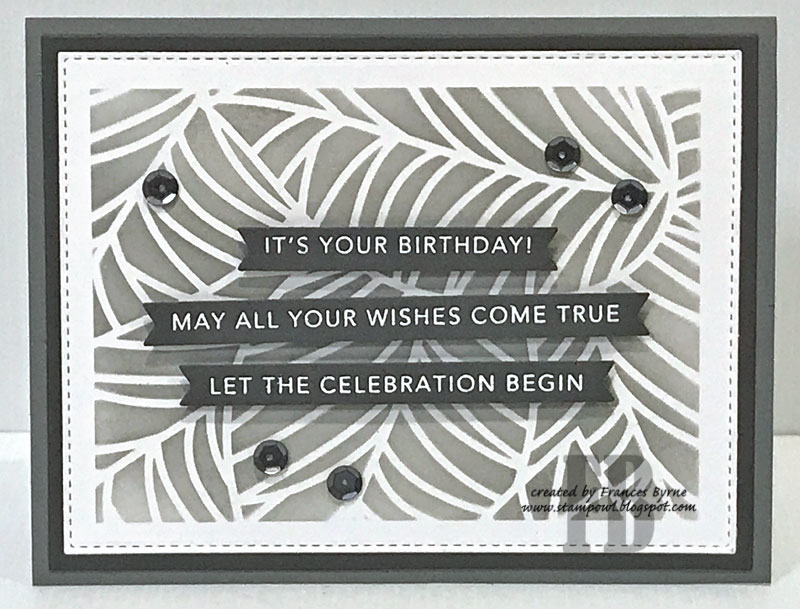
I started by using the larger of the two Rectangle Masking Stencils to mask off my panel. I then used Taylored Expressions Mosaic Leaves Stencil and Catherine Pooler inks in Twilight and Black Jack along with the Taylored Expressions Blender Brushes to add the color to the rectangle panel.

I die cut the panel using a rectangle from Heffy Doodles Stitched Imperial Rectangles die set. This was then layered using two different shades of grey cardstock.

I added three of the sentiments from Taylored Expressions Birthday Simple Sentiments stamp set and coordinating die which were white embossed on grey cardstock. To finish off the front of my card I added a few grey sequins.


For the inside of my card I added three more of the sentiments from the Birthday Simple Sentiments stamp/die set.

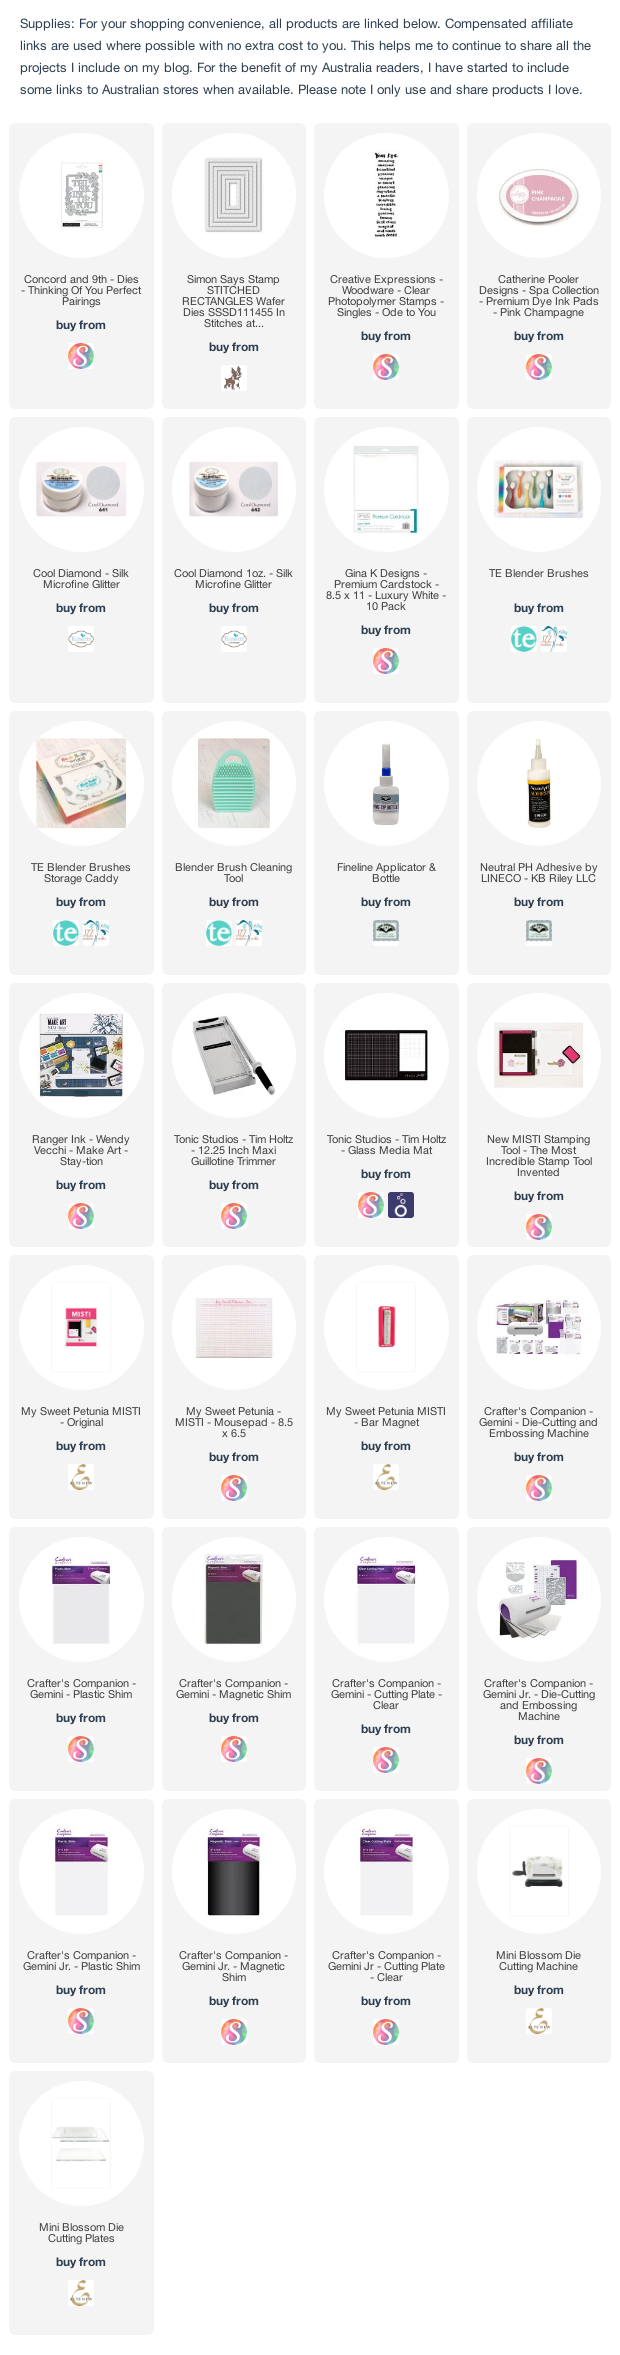
Supplies:
For your shopping convenience, all products are linked below. Compensated affiliate links are used where possible with no extra cost to you. This helps me to continue to share all the projects I include on my blog. For the benefit of my Australia readers, I have started to include some links to Australian stores when available. Please note I only use and share products I love.


Thursday, August 31, 2017

Winter Wishes


Hi everyone,

It's challenge time with my friends over on the CCEE Stampers challenge blog. Anne Harmon our challenge hostess for the month finishes off her month with one last  challenge.

Monochromatic and die cuts - this week we are to create a monochromatic card (one color) using only die cuts.


Today is officially the last day of Winter for those of us down under! So for my card today I decided to create a White on White card with a winter theme. I have used white cardstock; Cool Diamond Silk Microfine Glitter and White Iridescent Shimmer Sheetz to that I would have various whites in my card.

To decorate my card I have used the new Becky Seddon Reindeer die set which was released earlier this month by Elizabeth Craft Designs. I also found a 6 x 6 embossing folder of tree trunks which I was able to use for the back panel of my pop up card. I added three of the large tree trunks from the die set to add texture and depth. 

To create the pop up card I used Elizabeth Craft Designs new General Pop Ups die set which has a number of basic pop up dies in different widths & lengths. For this card I added two.

The sentiment on the base uses the A Way with Words - Let it Snow die set die cut from Shimmer Sheetz and layered onto the small oval from the Entwined Circles die set. I also added Transparent/Silver Glitter Dots Peel off Stickers to the snowflakes for extra sparkle.


Here is another view of my card taken at a different angle so you can see the pop up part of the card a little better. 


I kept the front of my card fairly simple seeing the focus of this card will be on the inside. I added the embossed background again, along with the glittered snowbanks. For the sentiment I used A Way with Words - 4 Seasons for the "Winter" sentiment which was die cut using Shimmer Sheetz. I added the "Wishes" which is from the Best Wishes sentiment die. 


Don't forget to check out the CCEE Stampers blog (goes live 12 AM EST) to see the rest of the creations the CCEE Stampers created this week. You can also see more details of their creations on their individual blogs:


Vicky Gould
Kelly McKown-Santi


Supplies:

Elizabeth Craft Designs:


Other:
Woodgrain Embossing Folder - We R Memory Keepers
Foam Tape


Monday, October 10, 2016

October 2016 Pop It Ups Designer Challenge #1


Hi everyone,

Welcome to our first Pop It Ups Designer Challenge for October. This time round Karen has challenged us to a color challenge with the theme "ROYGBIV" - It's the monochromatic challenge but YOU pick your color from any of the colors of the rainbow. Make a card featuring predominantly Red, Orange, Yellow, Green, Blue, Indigo or Violet.

I tossed up between two colors when I was deciding what I was going to do for this challenge, blue or green. As you can see I finally settled on the color green.

I figured it was about time I tried creating a Staggered Accordion that Karen Burniston shared with us back in July, this was one I have been wanting to try since I first saw Karen's card and video but I have been busy with other things so it didn't get done. You can see Karen's tutorial on how to create this style of card here

The base of this card was created using the Fancy Label Accordion card die set. 


To decorate my card I used the largest snowflake from the Snowflakes die set, the snowflake from the Holiday Charms die set and the snowflake from the Sleigh Gift Card Holder Pop Up die set. Before die cutting all the snowflakes I added Clear Double Sided Adhesive Tape to the front of my card and after die cutting I added Sea Glass Silk Microfine Glitter to each snowflake. 

On the lower section of the first and third pages of the accordion I added the Sleigh from the  Sleigh Gift Card Holder Pop Up die set. 


On the top window in the centre page I added the Christmas Tree Charm from the Holiday Charms die set. I cut two of the trees which both had Clear Double Sided Adhesive Tape on the front. I added Go To Green Silk Microfine Glitter to the adhesive and also added some Green/Gold Glitter Dots Peel Off Stickers to the tree and then adhere one tree to the back of the other so it didn't matter which angle the tree was in you would still see a glittered tree.

On the bottom accordion label I added a sentiment from the Holiday Clear Stamp set.


Here is a close up of the third/final page of my Staggered Accordion card which is the same as the first page. 

I have also added Gold/Silver Glitter Border Peel Off Stickers to each of the edges of my accordion pages.


And finally my card when it is closed ready to be placed in an envelope. The snowflake that is on the first page pivots so it is seen when the card is closed.

I added the "Merry Christmas" sentiment to the lower part of the front of the card which is from the Merry Christmas Pop Up die set. 

If you are looking to purchase Karen's Pop It Ups dies in Australia you can find them at Craft Giraffe (now online only).

Don't forget to check out  Karen Burniston's blog  on Tuesday when you will be able to see what all the designers created for the challenge this month, plus an amazing card/video tutorial from Karen Burniston.


Stamps: Holiday Clear Stamps - designed by Karen Burniston for Elizabeth Craft Designs
Paper: White; Pale Green; Green; Christ Kindle DP - Kaisercraft; Home for Christmas DP - SU; Classic Ten DP - Authentique
Dies: Fancy Label Accordion Card; Holiday Charms; Merry Christmas Pop Up; Sleigh Gift Card Holder Pop Up - designed by Karen Burniston for Elizabeth Craft Designs; Snowflakes - Elizabeth Craft Designs
Other ECD Products: Clear Double Sided Adhesive Tape; Go To Green Silk Microfine Glitter;  Sea Glass Silk Microfine Glitter; Gold/Silver Glitter Border Peel Off Stickers; Green/Silver Glitter Dots Peel Off Stickers
Other: Black Ink; Peeled Paint Distress Ink; Foam Tape; Copics


Friday, July 8, 2016

Flying By To Say


Hi everyone,

It's my turn to post a tutorial on the Elizabeth Craft Designs Blog. For my card today I have been playing with the Stitched Squares die set to create a background on my mostly monochromatic card.

Here is how I created my card:

1. Cut a piece of Dusky Sky Soft Finish Cardstock that measures 5 1/2 inches x 11 inches. Score along the 11 inch side at 5 1/2 inches and fold along the score line to create a top folded card.

  • Counting from the small centre die in the Stitched Squares die set, take the fourth and sixth die. Place the smaller of these two dies so that it is centred into the larger square. Place removable tape so that secures the dies together to create a frame.
  • Use this frame to die cut two frames from Dusky Sky Soft Finish Cardstock and two frames from Bonnie Blue Soft Finish Cardstock.
2. Use the second largest die from the Stitched Squares die set and die cut a scrap piece of cardstock (any color as this will be covered up).
  • Use a pencil to mark the centre point on all sides of the square panel and then create a pencil line so we find the centre of the card.


  • Place Clear Double Sided Adhesive Tape onto all the frames. Place one side of the Dusky Sky frame so that it lines up with the centre point of the card. Trim off excess frame.
  • Use the remaining off cut frame to adhere diagonally opposite on the card. (Refer to photo above for placement.
  • Next take one of the Bonnie Blue frames and adhere to to the other side of the frames already in place. Trim off excess and use this piece to add to the space in the the lower left hand side. (Refer to photo above for placement.

  • Continue adding the frames in place alternating the colors to you have added 3 frames in each quarter of the card.
  • Add tape to the square still not covered and use the solid squares that were created when we die cut the frames to fill in the last pieces. (You should be able to use one solid square to do two of the small fill in squares).
  • Using the largest square from the Dotted Scallop Squares die set, die cut from Bonnie Blue Soft Finish Cardstock.  Layer our decorated background panel onto the scalloped panel and adhere this to the folded card we created in step 1.
3. Counting from the small centre die in the Dotted Scallop Squares die set, die cut the the fifth die from Bonnie Blue Soft Finish Cardstock.
  • Counting from the small centre die in the Stitched Squares die set, die cut the fourth die from White Soft Finish Cardstock. 
  • Adhere the white panel to the scalloped blue panel.
  • Turn this panel so it is a diamond shape. Using the "Flying by to Say" sentiment from the What's Up? Clear Stamp Set, stamp this so it is onto the centre right side of the white panel. (Refer to photo at top for placement).
  • Adhere panel so it is centred on the front of the card using foam tape.
4. Using the Hot Air Balloons Die set die cut the following:
  • (1) Large Hot Air Balloon from Whisper Blue Soft Finish Cardstock
  • (1) Large Hot Air Balloon from Dusky Sky Soft Finish Cardstock (that has Clear Double Sided Adhesive Tape on the back)
  • (1) Large Hot Air Balloon from Dark Goldenrod Soft Finish Cardstock (that has Clear Double Sided Adhesive Tape on the back)
  • (1) Scallop Hot Air Balloon Decorator piece from Bonnie Blue Soft Finish Cardstock (that has Clear Double Sided Adhesive Tape on the back)
  • Use the Whisper Blue Hot Air Balloon as the base. 
  • Cut the basket and strings from the Dark Goldenrod Hot Air Balloon and adhere these over the base hot air balloon. 
  • Trim out the second and fourth panels from the Dusky Sky Hot Air Balloon and adhere this over the base hot air balloon.
  • Adhere the Bonnie Blue decorator piece on top of the hot air balloon.
  • Attach the completed Hot Air Balloon to the left side of the white panel on the front of the card.

5. Use the remaining 2 squares that were creating when we created all the frames. Adhere them to the inside of the card as per photo above. (Tip: I used a left over piece of frame to place temporarily in the corner of the card to help with exact placement).


6. Counting from the small centre die in the Stitched Squares die set, die cut the third die from White Soft Finish Cardstock. 

  • Counting from the small centre die in the Dotted Scallop Squares die set, die cut the fourth die from Bonnie Blue Soft Finish Cardstock. 
  • Layer the white panel to the blue scallop panel and adhere to centre of card.
  • Using the Happy Birthday die, die cut from Dusky Sky Soft Finish Cardstock that has Clear Double Sided Adhesive Tape adhered on the back. Adhere sentiment to centre of white panel.


  • Thanks for stopping by today, I hope you enjoyed my tutorial.

    Supplies:

    Elizabeth Craft Designs:

    Other: 
    Inks - Black
    Die Cutting Machine


    Saturday, February 13, 2016

    To My Main Squeeze!


    Hi everyone,


    It’s challenge time with the “Crazies” over on the Crazy 4 Challenges blog. Peggy our challenge hostess for February continues to issue the challenges.


    Tomorrow is Valentine’s Day and I am sure we will be seeing a lot of pinks and reds. The challenge today is to make a monochromatic card using pinks and reds.

    A few weeks ago I need to make a few Heart Pivot Card samples for a demo I was doing at my local store. This is one I made so that it would work for this challenge and my demo :)

    This time round I adhered a piece of designer paper onto a piece of card 12 inches long and 6 inches high. I score the card at 4 inches and 8 inches and then die cut the  Heart Pivot Card die designed by Karen Burniston for Elizabeth Craft Designs on the 8 inch score line to create a Z Fold Card.


    Here is a quick video to see my card in action.


    This is the front of the card when the card is folded. This is another of Art Impressions Hugs stamp sets that uses the action wobbles to make the head and arms wobble ... check out the video above.


    And finally a close up of the Heart Pivot portion of my card ... oops looks like I failed monochromatic as I notice I added gold keys ... sorry!


    Don't forget to check out the rest of the “Crazies” cards over on the Crazy 4 Challenges blog and also their individual blogs for more details.

    Anja de Regt
    Barbara Anders
    Jessie Rone
    Joanne Grzelak
    Karen Aicken
    Maryann Einam
    Vicki Burdick
    Peggy McCurry
    Raquel Mason
    Rebecca Ednie
    Jen Benner 

    Vicki Dutcher - February Guest Designer


    Stamps: Main Squeeze - Art Impressions
    Paper: White; Pink;  Jack & Jill Mini Flowers - Echo Park
    Dies: Heart Pivot Card - designed by Karen Burniston for Elizabeth Craft Designs
    Other: Black Ink; Spun Sugar Distress Ink; Action Wobble; Foam Tape; Copics


    Monday, September 14, 2015

    Karen Burniston September Designer Challenge Day 1


    Hi everyone,

    It's time for our September Karen Burniston Designer Challenge. This time around the theme for our challenge is  Celebrate! - interpret the theme however you want. Any type of joyful card meant to celebrate an accomplishment, milestone, birthday, new baby, etc. - also please incorporate any of the Frame Edges as an added twist.

    As I have been wanting to create an Open Centre Accordion Card ever since Karen Burniston shared her card she created for the August Designer Challenge. This seemed like the perfect opportunity. You can find Karen's directions on how to create this style of card on her YouTube Video here.

    For my card I used the Katie Label Accordion Card. I decided to go with a birthday theme and tried to keep it pretty much monochromatic.


    For the Open Centre Panels, I decorated the edge using the Katie Stars Frame Edges.  The presents on the centre panels are from the Gifts Peel Off Stickers. I attached the peel offs to card that had been covered with Transparent Double Sided Adhesive Tape and then covered the adhesive with Warm Diamond Silk Microfine Glitter. I added two owl theme sentiments above the gifts. 
    The two outer Accordion pages have been covered with designer paper. I used Poppy the Owl, sitting on a branch (All Seasons Tree) and sporting a party hat from the Props 2 set.  The top layer and the pom pom have been covered with Teal Silk Microfine Glitter.


     Here is my card when it is closed ready to be placed in an envelope.


    If you are looking to purchase Karen's Pop It Ups dies in Australia you can find them at Craft Giraffe (formerly Photo Continental).

    Don't forget to check out the Elizabeth Craft Designs blog on Wednesday when you will be able to see what all the designers created for the challenge this month, plus an amazing card/video tutorial from Karen Burniston.

    I will be back tomorrow with another card I created for this challenge.

    Stamps: Bugsy and Owly - Penny Black; Chatting Whoots Set - Art Impressions
    Paper: White; Teal; Dark Teal; Streamers DP - We R Memory Keepers
    Dies: Katie Label Accordion Card; Katie Stars Frame Edges; Poppy the Owl; All Seasons Tree;  Props 2 Party - designed by Karen Burniston for Elizabeth Craft Designs
    Other ECD Products: Transparent Double Sided Adhesive Tape 64mm; Teal Silk Microfine Glitter; Warm Diamond Silk Microfine Glitter; Gifts Peel-Off Stickers
    Other: Black Ink; Foam Tape; Copics