Friday, May 19, 2017

Thanks


Hi everyone,

My card today uses one of the new ModaScrap dies which were recently released by Elizabeth Craft Designs. I used the ModaScrap Flower Lace 2 die. 

A few weeks ago, Sanna also on the ECD Design Team shared a card she made using one of the new flower lace dies which she had turned into a stamp by die cutting the die from fun foam. I loved the idea of using the die in this way that I had to create my own flower lace stamps and create a card or two.
You can see Sanna's tutorial on how to create stamps from dies here.


I decided to play with my Distress Oxide ink pads to create my card. I wanted to see the effect of using these inks on kraft card which I really like.

For my card I used Spiced Marmalade; Fossilised Amber and Peeled Paint Distress Oxide inks for the background using the smooching technique. I also used Vintage Photo Distress Oxide to stamp the Flower Lace 2 image.

I used the Stitched Rectangles and Dotted Scallop Rectangles to create the layers of my card. I die cut the 'Thank' sentiment from kraft cardstock and brown cardstock and offset the kraft slightly so you could see the brown color of the sentiment underneath.


For the inside of my card I stamped another Flower Lace 2 on the bottom right hand corner of my card. I also added a sentiment.


Here is my 'stamp' I created which was die cut from fun foam. Once I had die cut the image I adhered the fun foam flourish onto think acetate (I used old packaging) so that the stamp was studier. I used my MISTI to stamp the image by adding some Clear Double Sided Adhesive to the back of the acetate to attach it to the door of the MISTI.

Stamps: Occasions Clear Stamps - Elizabeth Craft Designs
Paper: Kraft; Brown
Dies: ModaScrap Flower Lace 2; Stitched Rectangles; Dotted Scallop Rectangles; Thanks - Elizabeth Craft Designs
Other: Spiced Marmalade Distress Oxide; Fossilized Amber Distress Oxide; Peeled Paint Distress Oxide; Vintage Photo Distress Oxide; Fun Foam


Thursday, May 18, 2017

Birthday Fishes


Hi everyone,

It's challenge time with my friends over on the CCEE Stampers challenge blog. Lois Bak our challenge hostess for the month continues to issue the challenges.

Lois loves to make Fun Fold cards. So for our challenge this week we are to make a card that includes more than one fold.


For my card I created a Centre Step Card using the die from Cheery Lynn Designs.

To decorate my card I used some new dies I received as a freebie in a magazine that I recently purchased. I die cut a whole bunch of the images using black cardstock, so I have heaps for a few more cards yet.

For the background of the card I used some digital papers that were a bonus to download from the same magazine which were designed to work with the dies. 


For the inside of the card I added a few more of the die cuts and also added a sentiment.

Don't forget to check out the CCEE Stampers blog (goes live 12 AM EST) to see the rest of the creations the CCEE Stampers created this week. You can also see more details of their creations on their individual blogs:


Vicky Gould


Stamps: Best Fishes - Simon Says Stamp!; Fish Wishes - Paper Pretties
Paper: White; Black; Blue; Freshwater Friends Digital Paper - Die-Cutting Essentials Magazine
Dies: Centre Step Card - Cheery Lynn Designs; Freshwater Friends - Die-Cutting Essentials Magazine
Other: Black Ink; Clear Double Sided Adhesive Tape - Elizabeth Craft Designs


Wednesday, May 17, 2017

ECD May Coloring Designer Challenge


Hi everyone,

It's time for our May Coloring Design Team Designer challenge. Check out the Elizabeth Craft Designs blog today to see what our talented designed created for the challenge.


Sliders & Spinners - Using any of our stamp sets create a card that slides or spins using the Joset Designs Sliders & Spinners die set.

As you can see I created two cards for this challenge one that would slide and one that would spin.

*****************

For today's challenge Elizabeth Craft Designs are giving away Joset Designs Sliders & Spinners die set to 3 winners. 


To enter simply leave a comment on the Elizabeth Craft Designs Challenge post and tell us " What Elizabeth Craft Designs image would you make spin or slide?

We will select 3 lucky winners in a random drawing 

The winners will be announced on Friday, May 19 on the Elizabeth Craft Designs blog.


************************


I have made a couple of spinner cards this year using the Joset Designs Sliders & Spinners  die set but as I hadn't made any slider cards I decided I would for this challenge. My card above is a Hidden Slider Card.


Here is a short video so you can see the slider card in action.


Here is how I created my card:


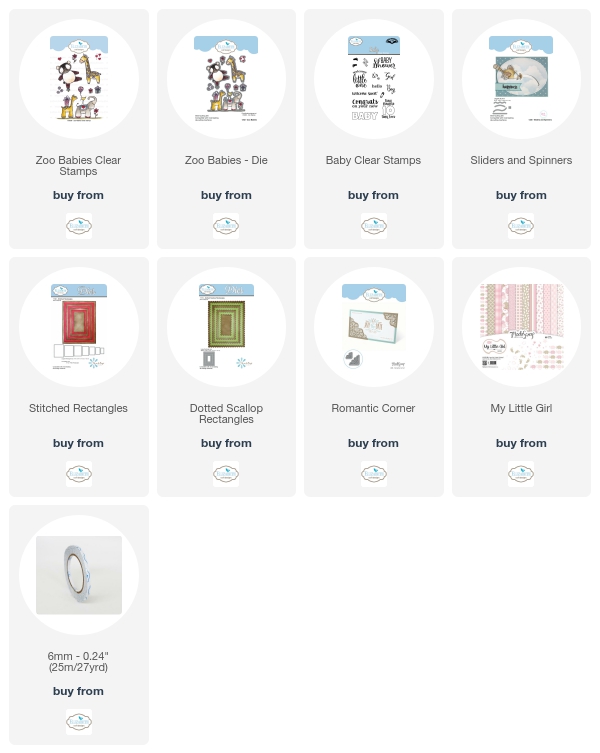
Step 1 -
  • The card base measures 5 3/4 inches x 4 1/2 inches.
  • Die cut the largest Dotted Scallop Rectangles from brown cardstock
  • Die Cut the striped paper from the ModaScrap My Little Girl Paper Pack using the second largest Stitched Rectangles.
  • Die Cut the tan paper from the ModaScrap My Little Girl Paper Pack using the second largest Stitched Rectangles. Trim down to 1 1/4 inches.
  • Layer the three large layers together to create the card base.
Step 2 - 
  • Die cut two of the small corners from the Romantic Corners die set. Trim of the tabs and adhere to the top corners of the card.
Step 3 - 
  • Stamp the giraffe/elephant image from the Krista Schneider Zoo Babies stamp set and die cut using the coordinating dies.
  • Color as deslred.
  • Cut two tabs approx 1/4 inch wide and adhere to the back of one leg of the elephant and one leg of the giraffe.


Step 4 - 

  • Cut a piece of white cardstock that measures the same size as the tan panel we created in step 1.
  • Place the long straight spinner/slider die to the centre of the card and die cut.
Step 5 - 
  • Stamp the word "Baby" from the Baby Sentiments Clear stamps onto a piece of white cardstock. Color the letters.
  • Trim the cardstock to approx 5/8 inch wide and approx 5 1/2 inches long 

Step 6 -
  • Place the sentiment strip so that it is centre onto the white cardstock that we created in step 4.
  • Place foam tape around the edges close to the strip.
  • Attach to the bottom of the striped paper.
  • Place the image towards the left side of the card so that the bottom of the image is just under the top edge of the white cardstock slider piece (see above)
  • Adhere the tabs to the sentiment strip which shows through the die cut slider hole using foam tape.
  • Adhere foam tape around the bottom, left and right edges.

  • Stamp the sentiment "Congrats on your new" from the Baby sentiments clear stamps the tan panel and then adhere over the white slider panel.
  • Add pearls to the bottom left side of the card.


Step 7 Inside of the Card -
  • Decorate the inside of the card using photo above as a guide.
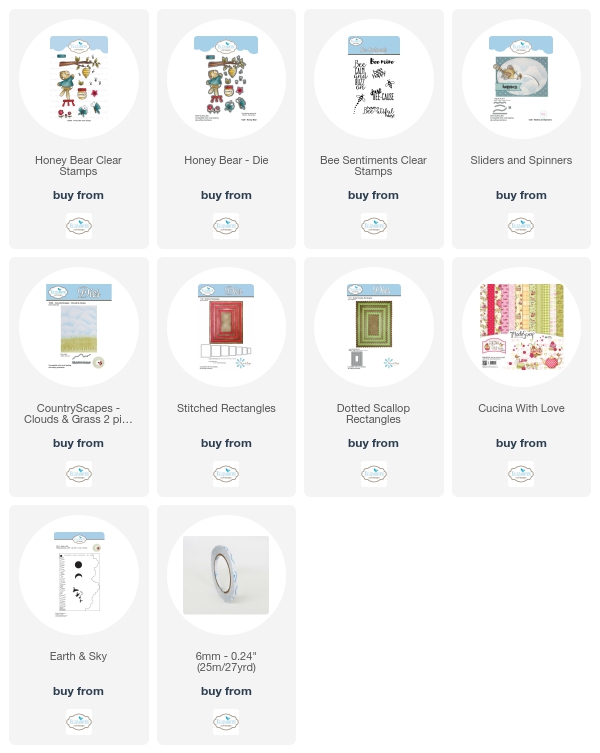
For my second card today I created a Spinner card using the Joset Designs Sliders & Spinners die set. I used the Krista Schneider Honey Bear Clear Stamp set with coordinating dies. The bear is catching the jar of honey he keeps throwing in the air.


Here is a short video so you can see the slider card in action.

Here is how I created my card:

Step 1 -
  • Stamp the images from the Honey Bear Clear Stamp set onto White Soft Finish Cardstock, die cut using coordinating dies and color as using medium of your choice.

Step 2 -
  • Using the second largest rectangle from the Stitched Rectangles die set, die two from White Soft Finish Cardstock
  • Place the bear on chair image on the card so that you can see where you need to die cut the curved spinner from the Spinners & Sliders die set. Die cut spinner.

Step 3 -
  • Sponge clouds using the Behinds the Scenes Earth & Sky stencil over both white rectangles.
  • Die cut grass from the CountryScapes Clouds & Grass die twice for Green designer paper, layer to the bottom of the rectangle which as the spinner panel die cut into it.
  • Assemble scene.
Step 4 - 
  • Place a penny so it is under the spinner opening of the card (tip - I die cut a circle the same size as my penny which I sponged with clouds and adhered to the top of the penny so it couldn't be seen through the opening)
  • Place two layers of foam tape to the centre of the penny (tip - I used the circle dies included in the Spinners & Sliders die set to create my own foam tape, not what is shown on the photo above which is much too large for it to spin)
  • Attach the honey jar to the top of the foam tape.

Step 5 - 

  • Adhere two layers of foam tape all around the back of the card making sure not to get any tape near where the penny will travel.
  • Adhere this rectangle onto the second rectangle.
  • Layer panel onto a scallop rectangle created using the Dotted Scallop Rectangles die set and then onto a folded white card.

Step 6 -
  • Decorate the inside of the card as per photo above.


That's it from me today, I hope you enjoyed my card and tutorial. Don't forget to check out the Elizabeth Craft Designs blog to see all the wonderful creations by our talented designers and for a change to win the giveaway.


Supplies:

Elizabeth Craft Designs:

Baby Slider Card -


Other:
Cardstock - Pink; Dark Pink; Brown; Red
Black Ink
Pearls
Foam Tape
Copics


Tuesday, May 16, 2017

Teddy Bear Picnic Birthday Shaker Card


Hi everyone,

It's my turn to post a tutorial on the Elizabeth Craft Designs blog today for the Coloring Design Team. Shaker Card can be so much fun to create so I decided to create one using Krista Schneider's Teddy Bear Picnic Clear Stamp set with coordinating dies.


Here is how I created my card:


Step 1 -
Create a square base card using Perfect Purple Soft Finish Cardstock that measures 5 1/2 inches square when folded.
  • Use ModaScrap designer paper to die cut a square using the largest square from the Fitted Squares die set.
  • Using the Rosebud Soft Finish Cardstock, die cut a square using the largest square from the Stitched Square die set.
  • Layer the two together and adhere to the front of the folded card.

Step 2 -
Using the Stitched Fishtails die set, place the fifth largest fishtail inside the third largest fishtail so that it is evenly spaced. Place removable tape to secure dies together so you can cut frames.
  • Using the fishtail frame we created above, die cut the following:
  • (1) x Purple Paw Print ModaScrap Designer paper
  • (1) x White Soft Finish Cardstock
  • (1) x White Fun Foam which has Clear Double Sided Adhesive on the back
Using the third largest fishtail from the Stitched Fishtails die set, die cut the following:
  • (1) x Pink Stripe ModaScrap Designer Paper
  • (1) x White Soft Finish Cardstock
Using the third largest fishtail from the Fitted Fishtails die set, die cut one from clear acetate.


Step 3 - Assembling the shaker

  • Layer the Paw Print ModaScrap Designer paper fishtail frame to the White Soft Finish Cardstock Fishtail Frame.
  • Adhere the acetate fishtail to the back of the white fishtail frame.
  • Position the small Pink Stripe ModaScrap Designer Paper to the centre of the White Soft Finish Cardstock fishtail. (TIP: Place the fun foam fishtail frame over the white cardstock and use this as a guide as to where to place the designer paper.
  • Die cut the word "Happy" from the Happy Birthday die set from Rosebud Soft Finish Cardstock that has Clear Double Sided Adhesive on the back. Place the sentiment towards the top of the pink striped designer paper.
  • Use a copic marker to color the edges of the fun foam frame, then adhere this to the top of the fishtail base card.
  • Place sequins in the colors of your choice to the centre of the fishtail frame.
  • Place the acetate/designer paper frame to the top of the fun foam frame to complete the shaker card.

Step 4 - 
  • Using the middle die from the Stitched Fishtail Banners die set, die cut two from Rosebud Soft Finish Cardstock and one from Perfect Purple Soft Finish Cardstock.
  • Using the small "Happy Birthday" sentiment from the Steampunk Clear Stamp set, mask off all the words other than "Birthday using masking tape or post it notes and ink the birthday onto one of the pink fishtail banners. (Tip: Make sure you remove the masking tape or post it note after you have inked up the stamp and before you stamp the sentiment onto the cardstock.
  • Adhere the fishtail banners to the bottom of the shaker piece using photo above as a guide.

Step 5 -
Using the Teddy Bear Picnic Clear Stamp set, stamp the Teddy Bears and two balloons onto White Soft Finish Cardstock using black ink. Die cut images using coordinating dies. 
  • Using the balloon from the Bird-day Party Clear Stamp set, stamp the balloon onto White Soft Finish Cardstock using black ink. Die cut image using coordinating die.
  • Color all images
  • Adhere the images to the card using photo above as a guide.

Step 6 - The Inside of Card:

Using the fifth largest Fitted Fishtail die, die cut a fishtail using the designer paper piece that came from the centre of the Paw Print Designer Paper Fishtail Frame on the front of the card.
  • Stamp the 'Happy Birthday' from the Occasions Clear Stamp set to the centre of this fishtail using black ink.
  • Use the fifth largest die from the Stitched Fishtails die set to cut a fishtail from Perfect Purple Soft Finish Cardstock.
  • Layer the two together and adhere to the top left hand side of the card.
Step 7 -
Using the Teddy Bear Picnic Clear Stamp set, stamp the tiny bear onto White Soft Finish Cardstock using black ink. Die cut image using coordinating die.
  • Using the Bird-day Party Clear Stamp set, stamp the birthday cake onto White Soft Finish Cardstock using black ink. Die cut image using coordinating die.
  • Color images and adhere to the lower right hand side of card.
Thanks for stopping by today, I hope you enjoyed my card and tutorial.


Monday, May 15, 2017

Birthday Wishes


Hi everyone,

Today I am sharing another birthday card using various dies from Elizabeth Craft Designs.

This card is very similar to a card I created early in April using the ModaScrap Rose Pocket die as a stencil with Silk Microfine Glitter to create a glittered background. This time round I used different colors.  

If you want to see how I used the Rose Pocket die as a stencil you can see my tutorial on my other post here. This time round I used the whole of the Stitched Rectangle and Dotted Scallop Rectangle panels rather than cutting off the top and bottom parts off as I did in my previous card.

I added the "birthday" sentiment from the A Way with Words - Happy Birthday 2 die onto the ModaScrap Stitched Fishtail Banners. 

I also added two of the dragonflies from the new ModaScrap Dragonfly1 die set to the glittered background. All the dragonflies where die cut twice and then layered the body of one dragonfly to the body of the one underneath, so the wings of the dragonflies looked like they were flying.


For the inside of my card I added the "Wishes" word from the A Way with Words - Best Wishes die set . I stamped the "Birthday" from the Happy Birthday sentiment in the General Sentiments Clear Stamp set using black in at the top left hand side of the "Wishes"

Finally I added one more dragonfly to my card.


Stamps: General Sentiments - Elizabeth Craft Designs
Paper: White; Black; Gold; Pink
Dies: ModaScrap Stitched Fishtail Banners; ModaScrap Dragonfly 1; Stiched Rectangles; Dotted Scallop Rectangles
Other ECD Products: Silverado Silk Microfine Glitter; Light Gold Silk Microfine Glitter; Clear Double Sided Adhesive Tape.
Other: Black Ink; Foam Tape

Sunday, May 14, 2017

Follow your Dreams


Hi everyone,

Today I am sharing another card using some of the new ModaScrap which have been released by Elizabeth Craft Designs.

For this card I have die cut the smallest corner die from the Romantic Corner die set  four times from White Soft Finish Cardstock and attached them to each corner of my card. 

For the layers I have used the Stitched Squares and Dotted Scallop Squares. I added a sentiment from the Joset Designs Dreams Sentiment Clear Stamp set.

To finish off my card I added two of the new dragonflies from the Dragonfly 1 die set which were die cut from cardstock that had Clear Double Sided Adhesive Tape on the front and then covered using Lavender Silk Microfine Glitter.


For the inside of my card I die cut two more of the corner pocket dies from White soft Finish Cardstock and adhered them to the two lower corners of my card.

I have added another sentiment and another dragonfly.

Stamps: Dream Sentiments - Elizabeth Craft Designs
Paper: White; Lavender and Dark Fuchsia Soft Finish Cardstock
Dies: ModaScrap Romantic Corner; ModaScrap Dragonfly 1; Stitched Squares; Dotted Scallop Squares; 
Other ECD Products: Clear Double Sided Adhesive Tape 64mm; Lavender Silk Microfine Glitter
Other: Black Ink; Foam Tape;


Saturday, May 13, 2017

Have a Roaring Great Birthday!


Hi everyone,

It’s challenge time with the “Crazies” over on the Crazy 4 Challenges blog. Barb Anders our challenge hostess for the month, continues to issue the challenges.

Apparently May is Barb's birth month and the gem stone for May is the emerald.  So for our challenge this week, Barb has asked us to use some shade of green on your card—bonus points if it’s emerald green 


Recently while surfing on Facebook, I saw a post which showed this cute "Safari Friends" stamp set which was a freebie on a Papercraft Essentials magazine. Of course I had to go to our local newsagent to see if I could find a copy of the magazine before they sold them all. As you can see I was lucky and got one.

This is such a super cute set! Of course I had to create a scene using this stamp set and the Lawn Fawn Stitched Hillside Pop-Ups die set! I have to say I love this die set and have been having lots of fun with it. I still have a few ideas that I want to create using this die!

As you can see I have lots of 'green' on my card. I also added the Grassy Hillside Pop-Up Add-On to the pop up part of my card, this die is made to go over the Pop Up base to give you the rugged grassy look to which I have added my animals.

I know in real life you wouldn't find a lion and a tiger in the jungle together, tigers don't live in Africa ... but when you create cards you don't always have to stick to real life right! 


Here is another photo of the inside of my card taken at a different angle, so you can see all the different layers of the pop up part of the card a little better.

The sentiment on the inside of the card was computer generated.


For the front of the card of my card I have added a few more of the animals from the Safari Friends stamp set. The giraffe, I cut it's neck (it didn't hurt!), so I could add the sign with the birthday sentiment. This time round I used the sentiments from the stamp set.

Don't forget to check out the rest of the “Crazies” cards over on the Crazy 4 Challenges blog and also their individual blogs for more details.


Lori Tecler (May Guest Designer)


Stamps: Safari Friends - Papercrafts Essentials Freebie
Paper: White; Magic in the Sky DP; Park Play DP - Bella Blvd
Dies: Stitched Hillside Pop-Ups;  Grassy Hillside Pop-Up Add-on; Grassy Hillside Borders - Lawn Fawn; Pop it Ups Katie Label Pivot Card - Elizabeth Craft Designs
Other: Black Ink; Scan N Cut; Foam Tape; Copics