Monday, June 20, 2016

Karen Burniston June Designer Challenge Day 1


Hi everyone,

It's time for our May Karen Burniston Designer Challenge. This time round Karen has given us the theme ....  Summer Lovin'! Make a project to celebrate Summer - this could be nature, or beach or 4th of July or anything that means "summer" to you.

For my first card for this challenge, I decided to go with a beach theme.


As you can see I have created another Pull Tab card using the Hanging Charm Pull Tab die set. To create the layers for the base of my card I have used the Stitched and Dotted Scallop Square die set and the Dotted Scallop Rectangles die set.

Rather than use the frame that comes with the Hanging Charm Pull Tab, I decided to use the Stitched Ovals and Dotted Scallop Ovals.


Here is another look at my card taken at a different angle so you can see how the card pops up.

When the pull tab is pulled to the open position it reveals the message "Just a note to say" from the Just a Note Clear Stamp set.


To decorate my card I used Rocky the Crab, along with the Palm Tree and Pail die sets. 

To create the waves and sand along the bottom of the oval shape, I die cut the card stocks using the Stitched Oval die and then used the waves and sand dies from the Beach Edges die set. 

All the elements except for the crab were die cut using Soft Finish Cardstock (I already had Rocky made up waiting to be used)

I used the Sun from the Oval Pull Card die set on the top of the Pull Tab to which I stamped the arrow from the Steampunk Clear Stamp set.


I chose to keep my Pull Tab card a flat card, so I decorated the back of the card with more designer paper and a couple of sentiments.

The "hello" is from the Rectangle Accordion Card die set and the Summer is from the A Way with Words 4 Seasons die set.

If you are looking to purchase Karen's Pop It Ups dies in Australia you can find them at Craft Giraffe (formerly Photo Continental).

Don't forget to check out  Karen Burniston's blog  on Wednesday when you will be able to see what all the designers created for the challenge this month, plus an amazing card/video tutorial from Karen Burniston.


I will be back tomorrow with another card I created for this challenge.


Stamps: Just a Note Clear Stamps; Steampunk Clear Stamps - designed by Karen Burniston for Elizabeth Craft Designs
Paper: White; Sunflower; Bright Orange; Spring Green; Dark Chocolate; Rust; Bluebell; Buttercream Soft Finish Cardstock; Red; Black; Sunkissed Beach Party DP - Doodlebug Inc.
Dies: Hanging Charm Pull Tab; Palm Tree and Pail; Rocky the Crab; Beach Edges; Oval Pull Card; Oval Accordion Card  - designed by Karen Burniston for Elizabeth Craft Designs; Stitched Squares; Dotted Scallop Squares; Dotted Scallop Rectangles; Stitched Ovals; Dotted Scallop Ovals; A Way with Words 4 Seasons - Elizabeth Craft Designs
Other ECD Products: Clear Double Sided Adhesive Tape
Other: Black Ink; Gathered Twigs Distress Ink; Shabby Shutters Distress Ink; Foam Tape


Sunday, June 19, 2016

Bee-autiful Day


Hi everyone,

Today I am sharing another project I created some years ago, but have never shared on my blog.

Here you can see my book when it is closed.


This is called a Star Book, when you open the book up and tie the ribbon so that the two covers are back to back you can see the star shape from overhead.


Here is another view of the star book when it is opened taken from overhead.


All the pages in this book were decorated using stamps from Alota Rubber Stamps, unfortunately this company closed down a few years ago.

This pages uses the Bugs full of Blueberries stamp.


I just love this space scene using the cute little bees. This is the Outer Space Bugs & Girl Space Bug.


This one is named after my friend and her hubby ... Mary Ann/Ian Building Aussie Burger. 


This scene was created using the Bug Reading with Laying Down Boy Bug.


Here we have Crystal & Renee Tea Bugs .


The two scuba diving bees in this scene are named after my husband and I :) ... I had a few stamps made by this company that the owner Helene named after my family members.


And finally this image is called Susan, Frances and Helene which was named after my good friend Susan, myself and the owner Helene.

It was fun revisiting this project, it brought back a lot of fun memories. Hope you enjoyed it too.

Stamps: Bugs Full of Blueberries; Outer Space Bugs; Girl Space Bug; Crystal & Renee Tea Bugs; Bug Reading; Laying Down Boy Bug;  Mary Ann/Ian Building Aussie Burger; Ocean Scene; Phil  Scuba Diving; Frances; Susan, Frances and Helene
Paper: White; yellow; Black; DP
Other: Black Ink; Ribbon; Copics


Saturday, June 18, 2016

Hooray! It's your Day


Hi everyone,

It’s challenge time with the “Crazies” over on the Crazy 4 Challenges blog. Karen Aicken our challenge hostess for the month continues to issue the challenges.

Being the third Saturday of the month it is time for our sketch challenge. I hope you have fun playing with this layout.


For my card today I created a Pull Card using the Oval Pull Card die set designed by Karen Burniston for Elizabeth Craft Designs. I love how easy it was to make this sketch work with the Oval Pull Card.

To decorate my card I used the cute Pippi Longstocking image from Kraftin' Kimmies Stamps Book Pal stamp set. I also die cut a #4 Balloon, if I don't use this for my Granddaughter, there are plenty of girls in our family who will be turning 4 in the next year.


When you 'pull' the card open it reveals the sentiment. I also added another blank panel for a handwritten greeting.

Don't forget to check out the rest of the “Crazies” cards over on the Crazy 4 Challenges blog and also their individual blogs for more details.

Stamps: Book Pals - Kraftin Kimmies Stamps; General Sentiments - Elizabeth Craft Designs; Birthday Greetings - MFT Stamps
Paper: White; Pink; Blooms DP - Pebbles Inc.; Cosmopolitan DP - Kaisercraft
Dies: Oval Pull Card - designed by Karen Burniston for Elizabeth Craft Designs; Numbered Balloons Die - Avery Elle
Other: Black Ink; foam Tape; Copics


Friday, June 17, 2016

Best Wishes


Hi everyone,

It's my turn to post a tutorial on the Elizabeth Craft Designs blog today. Today I have created a birthday card using the new Turtle die from the Joset Designs Collection.

Here's how I created my card:

Creating the card base - 

1. Cut a piece of True Green Soft Finish Cardstock so it measures 11 inches x 4 1/4 inches. Score along the 11 inch side at 51/2 inches and fold.


  • Cut a piece of designer paper 4 1/4 inches x 5 1/2 inches. Using the wavy border from the Outdoor Edges die set, position the border so it is at a slight angle as per photo above. Run through die cutting machine.
  • Cut a piece of Brick Red Soft Finish Cardstock so that is it approx 4 3/4 inches x 1 1/2 inches. Place the border die we used on the designer paper on the card and run through die cutting machine.
  • Attach the designer paper panel to the Brick Red Card border so that a small amount of the Brick Red Card shows through. (Refer to photo above)

  • Adhere the designer paper panel to the folded green card as per photo above.
2. Using the Turtle die set die cut the following: 
  • (1) Solid Turtle Body from White Soft Finish Cardstock
  • (1) Outline Turtle Body from White Soft Finish Cardstock that has Clear Double Sided Adhesive Tape on the back)
  • Sponge the Outline Turtle Body using Peeled Paint Distress Ink
  • Sponge the Solid Turtle Body using Tea Dye Distress Ink on the lower part of the turtles back; and Shabby Shutters Distress Ink and Peeled Paint Distress Ink around the edges.
  • Adhere the Outline Body to the Solid Body.
  • Attach the Turtle to the lower left hand sided of the card using foam tape (Refer to photo above of placement).
3. Using the Best Wishes Sentiment die, die cut from Rich Black Soft Finish Cardstock that has Clear Double Sided Adhesive Tape on the back. 
  • Adhere to the the lower right hand side of the green panel of the folded card (Refer to photo above for placement).

4. The Inside of the Card: 
  • Using the left over pieces of Designer Paper and Brick Red Soft Finish Cardstock from creating the card front. Layer the Designer Paper onto the Brick Red Soft Finish Cardstock so that a small amount of Brick Red Cardstock is showing.
  • Using the Seaweed die set, die cut two of the Coral dies from White Soft Finish Cardstock that has Clear Double Sided Adhesive Tape on the back. Sponge the Coral pieces using Dried Marigold and Spiced Marmalade Distress Ink.
  • Position the Coral pieces to the bottom of the inside of the white card using photo above for placement. 
  • Adhere the Designer Paper Panel to the bottom of the card so they overlap the Coral pieces.
  • Using the A Way with Words Happy Birthday 2 die set, die cut from True Green Soft Finish Cardstock that has Clear Double Sided Adhesive Tape on the back. Adhere sentiment to top portion of card.

Thanks for stopping by today, I hope you enjoyed my tutorial.


Supplies:


Elizabeth Craft Designs:
Brick Red Soft Finish Cardstock


Other:
Designer Paper - Graphic 45 Steampunk Splash 12 x 12 Designer Paper
Inks - Tea Dye Distress Ink; Shabby Shutters Distress Ink; Peeled Paint Distress Ink; Dried Marigold Distress Ink; Spiced Marmalade Distress Ink
Blending Tool
Die Cutting Machine


Thursday, June 16, 2016

For a Little Girl who's 1


Hi everyone,

It's challenge time with my friends over on the CCEE Stampers challenge blog.This week our challenge hostess for the month Vicky Gould continues to issue the challenges.

Apparently today is Vicky's sister’s birthday.  So she has challenged us to createbirthday cards today….something we can all stock up on!


The other week my sister asked if I would create a special card for her Granddaughter's first birthday ... she wanted the number 1 on it and also a deer as her granddaughters name means deer.

While looking for something else I discovered this cute Bambi stamp which I thought would be perfect for her card. 

As you can see I have created a Pull Card using the Oval Pull Card die set designed by Karen Burniston for Elizabeth Craft Designs.


When you 'pull' the card open it reveals a birthday sentiment on the oval panel. On the right hand edge of the card I added the # 1 along with a couple of hearts.

Don't forget to check out the CCEE Stampers blog (goes live 12 AM EST) to see the rest of the creations the CCEE Stampers created this week. You can also see more details of their creations on their individual blogs:


Anne Harmon
Joanne Grzelak
Liz Williams
Lois Bak
Lynn McAuley
Maryann Einam


Stamps: Bambi - All Night Media; Make a Wish - Paper Pretties
Paper: White; Dark Pink; Believe Grace DP - Bo Bunny; Cool Summer DP - Carta Bella
Dies: Oval Pull Card - designed by Karen Burniston for Elizabeth Craft Designs; Décor N More #1 - MFT Stamps
Other: Black Ink; Foam Tape; Copics


Tuesday, June 14, 2016

Pocket Full of Good Luck


Hi everyone,

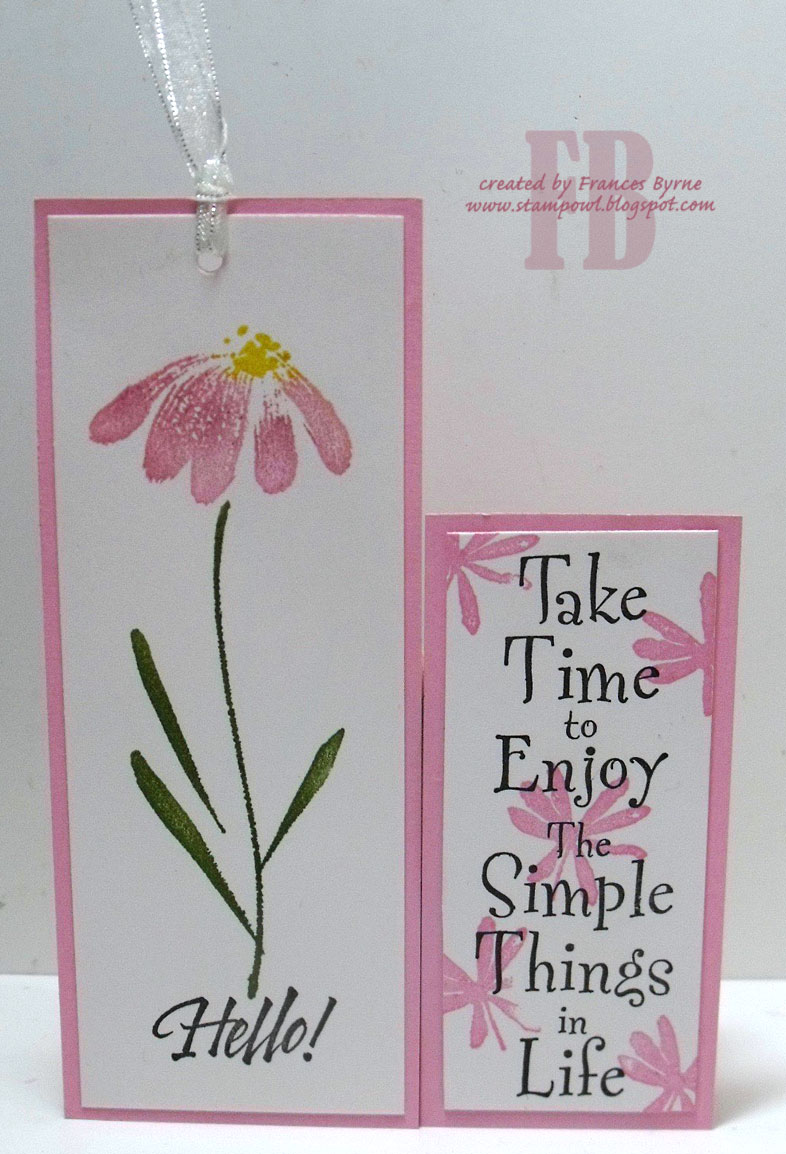
Today I am sharing a Diagonal Pocket Card I created some time ago which I haven't blogged as yet.


I created my card from a single sheet of white A4 card which I decorated before folding using stamps. I added a pink insert to the section where the pocket is and added a butterfly to the top right hand corner.


This card has a single pocket on the outside and another on the inside.

You can insert tags, money, gift vouchers etc, depending on what your needs are at the time. I decided to create two tags to insert in my pockets.


Here is a close up look at the tags I created.


When you open the card it reveals the second pocket. I added the second tag and a sentiment on a tag created using a punch.

Stamps: Daisy - Penny Black; Butterfly - Stamp It; Flower - Hero Arts; Background - unknown; Take Time - Hero Arts; Hello - Hero Arts; Pocket Full of Good Luck - Lucy's Stamps
Paper: White; Pink
Other: Black Ink; Pink Ink; Green Ink; Yellow Ink; Pink Eyelets; Tag Punch; Ribbon


Monday, June 13, 2016

Hip Hip Hooray


Hi everyone,

Today I am sharing a card I created a year or so back which I haven't blogged as yet. This is an origami shirt card created from one sheet of card. 

I stamped the map background all over the kraft card using blue ink. I added a pocket, tie and stripes to the sleeves and collar using blue card.


This card opens to reveal a birthday sentiment.


Stamps: Hip Hip - Kaisercraft; Map Background - Unknown; Happy Birthday - Stamp It
Paper: White; Kraft; Blue
Other: Black Ink; Blue Ink


Sunday, June 12, 2016

Tons of Fun


Hi everyone,

Today I am sharing a card I created using Art Impressions Tons of Fun stamp set, I just love these cute stacked elephants.


I kept the layout of the inside of my card the same as the outside and added a birthday sentiment to the right hand panel.

Stamps: Elephant Stacker - Art Impressions; Birthday Joy Calligraphy - Paper Inspiration
Paper: White; Black; Pink; Save our Rhino DP - FabScraps
Dies: Fishtail Flags - MFT Stamps
Other: Black Ink; Scan N Cut; Black Ribbon; Foam Tape; Copics


Saturday, June 11, 2016

Ahoy!

Hi everyone,

It’s challenge time with the “Crazies” over on the Crazy 4 Challenges blog. Karen Aicken our challenge hostess for the month continues to issue the challenges.

For our challenge this week Karen as asked us to .... Make it MASCULINE. Most of us need a masculine card or two in our stashes so let’s see a masculine project this week. 


A couple of weeks ago Karen Aicken posted a card on her blog where she used the Spiral Circle Pull Card die set to create a Circle card rather than the normal square or rectangle cards we normally make using this die set. Of course I LOVED the idea so my card today is inspired by what she created. You can see Karen's card here.

For my card I used the Spiral Circle Pull Card die set designed by Karen Burniston for Elizabeth Craft Designs to create the basic Pull Card and then used the largest Circle in the Fitted Circles die set to create the circle shape.

To decorate my card I used the Boat die and Ahoy Sentiments  and General Sentiments Clear Stamp Set both from the new Joset Designs Collection which were recently released by Elizabeth Craft Designs.


When you 'pull' the front flap open it reveals two circle panels with sentiments.

Don't forget to check out the rest of the “Crazies” cards over on the Crazy 4 Challenges blog and also their individual blogs for more details.

Stamps: Ahoy Sentiments Clear Stamps - Elizabeth Craft Designs
Paper: White Soft Finish Cardstock; Navy; Orange; Off White; Brown; Yellow; Blue; Snake Skin DP - BellaBlvd
Dies: Spiral Circle Pull Card - designed by Karen Burniston for Elizabeth Craft Designs; Fitted Circles; Stitched Circles; Boat - Elizabeth Craft Designs
Other: Black Ink; Foam Tape; Copics


Friday, June 10, 2016

Oceans of Love


Hi Everyone,


My card today is for a challenge I do with a couple of friends of mine. Each month we get together and go to our favorite paper crafts store and come home with one or two new goodies. So we decided to also challenge ourselves each month using a product we all have.


Last month we all purchased some of the new products from Couture Creations .... designer papers and stamp sets. I only got the designer papers and as they had a sea theme they were perfect to use with some of the new Joset Designs Collection from Elizabeth Craft Designs. For my card I used the Seahorse and Seaweed die sets.

I created a pull card using the Oval Pull Card die set designed by Karen Burniston for Elizabeth Craft Designs


When you "pull" the card open it reveals a sentiment and an underwater scene.


Stamps: Seaside Wishes - Sugar Pea Designs
Paper: White; Sea Shells on a Sea Shore DP - Couture Creations
Dies: Oval Pull Card; Beach Edges - designed by Karen Burniston for Elizabeth Craft Designs; Seahorse; Seaweed - designed by Joset Designs for Elizabeth Craft Designs
Other: Black Ink; Scattered Straw Distress Ink; Wild Honey Distress Ink; Dried Marigold Distress Ink; Peeled Paint Distress Ink; Picket Fence Distress Ink; Foam Tape