Sunday, January 31, 2021

Rebus - Name of Country Starting with the Letters A, B or C


Hi Crafty Friends,

It's time to share another rebus puzzle swap with you. This month the theme is Name of a Country Starting with the Letter A, B or C.

If you would like to solve my rebus puzzle, why not post a comment on my blog post with your answers. I will let you know what the correct answers are next time I post a rebus card here.

How did you go solving my November Rebus which was "Names Starting with the Letter 'W'". Here are the correct answers so you can check how you did.

  1. Wakeley
  2. Wendy
  3. Wellington
  4. Winifred
  5. William
  6. Whitney
  7. Wade
  8. Wilkins
  9. Wilma


You can find all my past Rebus Cards here.


Saturday, January 30, 2021

Sending Wishes


Hi Crafty Friends,

It’s challenge time with the “Crazies” over on the Crazy 4 Challenges blog. Karen Ostergard our challenge hostess for the month, finishes off her month with one last challenge.

Get a jump start on those cards of love today. Create a card with the word "Love" or a heart on it.


For my card today I created a Slimline card using Lawn Fawn's Scalloped Slimline with Hearts - Portrait die set. I also used the Scalloped Slimline with Hearts Landscape die set for the hearts in the centre of the card. The sentiments in the Landscape set suited the challenge theme better than the Portrait set as they were more love related.

I used Distress Oxide inks in Spun Sugar, Worn Lipstick and Picked Raspberry to create an ombre background. I then splattered on white paint and some Picked Raspberry ink all over the background. 

I used the scalloped slimline rectangle panel from the Scalloped Slimline with Hearts Landscape die set to layer the pink heart panel onto. These layers were then adhered to a side folding red slimline card base. My finished card measured 3 1/2 inches x 8 1/2 inches.

To decorate my card I used the a sentiment and images from Lawn Fawn's Dandy Day stamp set.


For the inside of the card I created a pop up card using Karen Burniston's Katherine Label pop-up die set. I added a sentiment from Word Set 6 - Love die set.

On the edges of the card I adde a panel of card using the inks that I used on the front of the card. I also added a scalloped border using Sunny Studio Stamps Basic Slimline Borders die set.

To finish off the card I added a few more of the images from the Dandy Day stamp set.

Don't forget to check out the rest of the “Crazies” cards over on the Crazy 4 Challenges blog and also their individual blogs for more details.


Friday, January 29, 2021

Sunny Wishes


Hi Crafty Friends,

Today I am sharing another Slimline card using the Beach Play stamp set from Hello Bluebird, I posted my first card using this set yesterday for a CCEE Stampers challenge, so scroll down to the next post if you missed it.

For the background of this card I used the Pink and Main Sunburst Slimline die. I die cut the slimline die from yellow and blue cardstock. Before paper piecing the sun rays into the sun ray frame I added shading to the ends of the rays using inks and blender brushes.

I used Lawn Fawn's Slimline Stitched Hillside Borders die set to created the sand area along the bottom of the card.

I added a sentiment to the right side of the card using a sentiment from an older MFT Stamps Doodle Garden Stamp set.

To finish off the card I added some birds using Hero Arts Beach Heroscapes Stamp set.


For the inside of the card, I added more sand along the bottom of the card. I added a few more animals and elements from the Beach Play stamp set.

I stamped two sentiments to the top white area of the card. The first sentiment is from Kraftin' Kimmie Stamps Kimmie's Beachy Sentiments and the bottom one is from MFT Stamps Drink Up the Sunshine stamp set.


Other:
Kimmie's Beachy Sentiments - Kraftin' Kimmie Stamps (discontinued)
Doodle Garden Aloha - MFT Stamps (discontinued)


Thursday, January 28, 2021

Sunshine and Good Times


Hi Crafty Friends,

It's challenge time with my friends over on the CCEE Stampers challenge blog.  Lynn McAuley our challenge hostess for the month, finishes off the month with one last challenge. 

Lynn tells us that ... Many of us are experiencing very cold days during late January. Feature on your design something that makes you feel warm and cozy even on the coldest of winter days


It doesn't snow where I live in Australia, so I don't often make winter themed cards. The exception to this is when I am making Christmas cards which I did for 2 to 3 months prior to Christmas, so making a winter card wasn't really something I wanted to do, and I certainly don't want to make a Christmas card until at least July/August of this year.

So when it came to this challenge I had to come up with a creative idea! I figured one way to keep warm even on the coldest winter day, was to do what ducks do ... fly south for the winter LOL! There is also some place to go where it is warmer and you don't have to worry about snow etc ... whether you live in the Northern Hemisphere or Australia. So if you want to be warmer ... go visit a beach where the weather is warmer. It works for me!

To create my card I used Hello Bluebird's Ocean Waves Scene Horizontal die which I have been wanting to use since I got it in September/October, but was too busy making Christmas Cards.

I also used Hello Bluebird's Beach Play stamp set to decorate my card.


For the inside of the card I created a pop-up card using Karen Burniston's Mini Pops Pop-up die set. I used Heffy Doodles Stitched Slimline Trio die set to cut the panels for the inside layers. For the top layer I added sand and clouds to the panel using Honey Bee Stamps Horizon Slimline Borders die set.

I added the bears, sandcastle and a couple of other elements to the card using the Beach Play stamp set.


I added the birthday sentiment to the card using a sentiment from MFT Stamps Drink Up The Sunshine stamp set. This was layered onto a rectangle die cut using Karen Burniston's Long Rectangles - Crosshatch die set. The rectangle was a little longer than I wanted it to be, so I die cut it twice so it could be cut smaller.

Don't forget to check out the CCEE Stampers blog (goes live 12 AM EST) to see the rest of the creations the CCEE Stampers created this week. You can also see more details of their creations on their individual blogs:


Wednesday, January 27, 2021

Reach For The Stars


Hi Crafty Friends,

Today I am sharing another card I created using stamps and dies from Divinity Designs January 2021 Blessings Box.


I am just loving the new Shaker Stars included in this kit, there are three different sets ... the Star Shaker Kit, Star Shaker Kit Layering Add-On and Star Shaker Kit Inset Add-on. For my card today I used the Star Shaker Kit and the Star Shaker Layering Add-on die sets.

To create the star, I used papers from the Star Shaker Kit- Bright Paper Pad and the Geometric Paper Pad.


I used the Floating Frame Front and A2 Portrait Card Base with Layers die set.

I added the sentiment to the bottom of the card using the Super Star Stamp/Die Duo set.


The shaker star is attached to the inside of the card, so it can see through the square hole from the front. I also added another of the stamped sentiments from the Super Star Stamp/Die Duo.


Tuesday, January 26, 2021

Super Star Cascade Card


Hi Crafty Friends,

Today I am sharing a Cascade Card I created recently using stamps, dies and papers from Divinity Designs January 2021  Blessings Box.

For the base of the card I used the Cascade Card with Layers die set and then used papers from the Star Shaker Kit - Bright Paper Pad.


To decorate my card I used the Star Shaker Kit & Star Shaker Kit Inset Add-Ons die sets. I die cut all the various stars from cardstock in rainbow colors and added them randomly over the card, with the larger stars at the back.


I created a shaker star using both die sets to add to the very front of the card. I added the "Keep Shining Bright" sentiment using the Super Star Stamp/Die Duo set.


I added the "Super Star" die cut sentiment to the largest stars at the back of the card using the dies included in the Super Star Stamp/Die Duo set.


Monday, January 25, 2021

Hey Gnomie!


Hi Crafty Friends,

Today I am sharing a gnome themed Slimline card. I recently got my hands on the Picket Fence Stamps Slim Line Diecutting System die set, this die set apparently can created 256 different card fronts, although I am not sure where they get that number.

For my card today I used the die set and used the two of the circle inserts included in the die set ... the circle with fence and the stitched circle, to die cut my slimline panel. I also used the circle grass die in the set which I die cut three times and adhered behind each of the openings.

To decorate my card I used the Next Door Gnomes stamp set from Hello Bluebird.


For the inside of the card I used one of the grassy hill dies from MFT Stamps Slimline Grassy Hills die-namics set. 

I added two more of the gnomes and the sentiment from the Next Door Gnomes stamp set.


Sunday, January 24, 2021

Phone Booth Slimline Card


Hi Crafty Friends,

I am excited to share a Slimline Card I created using Elizabeth Craft Designs Planner: Essentials Phonebooth Special. This die actually was designed to use to decorate planners or journal books, but it is also the perfect size to use to make a Slimline card.

I die cut the pieces of the phone booth from red cardstock and layered them all together.


The phone booth door opens to reveal the scene inside the phone booth. I used the books included in the Phonebooth Special Extras die set to add the phone books and the shelf the phone is sitting on. I placed 4 phone books on the floor of the phone booth so the monkey to be able to reach the phone.

I used the glasses and hat from the Party Accessories die set to add to the monkey.

I created the phone base using scraps of dies from the die set. The phone cord and receiver are included in the die set.


To turn my card into a Slimline card. I die cut another Phone Booth base, scored about 1 inch down from the top of the phone booth and adhered this to the front panel.


For the inside of my card I adhered the white panel which is from the layer die included in the extras die set.

To decorate this panel I used the Zebra die set, the telephone & cord as well as the three sentiments using the Phonebooth Special Stamp set and coordinating dies.


Saturday, January 23, 2021

Hoot Hoot Slimline

Hi Crafty Friends,

It’s challenge time with the “Crazies” over on the Crazy 4 Challenges blog. Karen Ostergard our challenge hostess for the month, continues to issue the challenges.

For our challenge this week we are to create a card using either green or purple ... or both.


For my card today I created a Slimline card using Waffle Flower's Slimline Angled Panel die. I die cut the die three times using white, green and purple cardstock, I then paper pieced the green and purple strips into the white panel.

To decorate my card I used Leane Creatief's Owly Special Occasions stamp set. I used the branches and leaves from Mama Elephant's Tree Branch Cover Plate.

I stamped the words "Hoot Hoot" onto some of the stripes.


For the inside of the card I die cut another Slimline Angled Panel die, adding the remaining purple and green stripes left over from creating the front of the card. I cut the panel in half and added to both edges of the card. I stamped the "Hoot Hoot" to the purple stripes on each side of the card.

I created a Double Pop-up card using Karen Burniston's Katherine Label Pop-up die set. I added sentiments from a Dare 2B Artzy stamp set. I also added the owls from the stamp set I used on the front of the card to each of the pop up labels.

Don't forget to check out the rest of the “Crazies” cards over on the Crazy 4 Challenges blog and also their individual blogs for more details.

Other:

Owl Special Occasions - Leane Creatief


Friday, January 22, 2021

Be Mine


Hi Crafty Friends,

Today I am sharing other card using some of the stamps and dies from the Divinity Designs January 2021 Release.

For my card today I used the Pierced Heart Background die which I die cut from white cardstock, this was layered onto another panel of white cardstock to give a white on white background.

I cut a panel of patterned paper from the Landscapes Paper Pad (April 2020 Blessings Box) which I cut to the width of the Pierced Heart Background. I added a black border to the top and bottom of this panel and adhered it to the centre of the card.

I die cut the couple and bench from black cards stock (April 2020 Blessings Box) and added  them to the patterned paper. 

I added the "Be Mine" sentiment from the Be Devoted stamp set layering the sentiment using the Sentiment Strips 2 die set.

The card was then adhered to the card using the Matting Rectangle die set and the A2 Portrait Card Base with Layer die set.


For the inside of the card I used the layering panels from both the A2 Portrait Card Base with Layer & Matting Layer die sets.

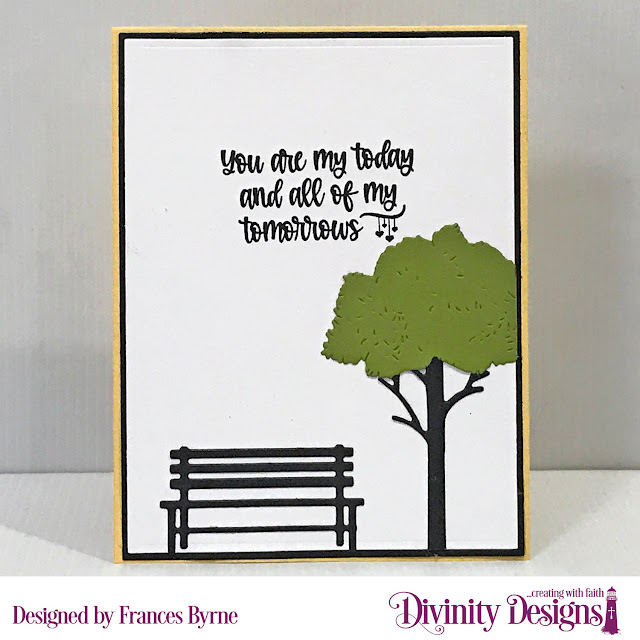
I added the bench and tree from the Park Silhouettes die set.


Thursday, January 21, 2021

Oops!


Hi Crafty Friends,

It's challenge time with my friends over on the CCEE Stampers challenge blog.  Lynn McAuley our challenge hostess for the month, continues to issue the challenges. 

Apparently National Belly Laugh Day is coming up this Sunday! We all need a good laugh these days so create a card that will have us all laughing out loud. Bonus points if you make me spew my coffee on the computer screen when I see your card!! 


Early in January, the area we live in went into a 3 day lockdown so the authorities could control the spread by someone who had contracted COVID 19 ... the UK variant. Of course as soon as this was mention, people went crazy and started panic buying again, even though the stores were remaining open for the 3 days. Toilet paper seems to be one of the things people rush for, for some strange reason. So for my card today I decided to pull out this cutie that I have had in my stash for years ... I have a wood mount stamps by Whipper Snapper Designs and it is called Double Trouble on the block, but when I went searching to see if it was still available to purchase I found it on their website with a new name "Sassy Puppy".

As you can see I created a Slimline card using Trinity Stamps Slimline Stitched Card Panels & Windows.  I die cut the rectangle panel twice using the striped paper and the wood grain paper and then trimmed the wood down to create a room effect.

I die cut another slimline panel using the same die, and then die cut the speech bubble which is from Whimsy Stamps Comic Speech Bubbles die set. I also used the Oops! die set from Whimsy Stamps to die cut the sentiment and added it onto the speech bubble.

I layered the panel to black cardstock and then to a top folding white Slimline card base which is 3 1/2 inches x 8 1/2 inches.


For the inside of the card, I created a pop-up card using Karen Burniston's Katherine Label Pop-up die set. I computer generated the sentiment.

For the borders on the top and bottom edges of the card I used Dare 2B Artzy's Curve Border die set.


Here is a side on view of the inside of my card so you can see the pop up portions a little better.

Don't forget to check out the CCEE Stampers blog (goes live 12 AM EST) to see the rest of the creations the CCEE Stampers created this week. You can also see more details of their creations on their individual blogs: