Hi everyone,
It's my turn to post a Pop it Ups Wednesday tutorial on the Elizabeth Craft Designs blog today. Some years ago Karen Burniston shared how to create a Flying Easel Card which is what I have created for my card today using Poppy the Owl, Labels & Circles; Iron Fence Pop-Up and the All Seasons Tree.
Here is how I created my card:
Step 1 -
Using the Poppy the Owl die set, die cut the following:
- (2) Solid Owl Bodies from Rich Black Soft Finish Cardstock
- (2) Detail Owl Bodies from Designer Paper which has Clear Double Sided Adhesive Tape on the back.
- (2) Sets of Eyes from White Soft Finish Cardstock that has Clear Double Sided Adhesive Tape on the back.
- (1) Set of Solid Owl Feet from Black Soft Finish Cardstock.
- (2) Sets of Detail Owl Feet from orange cardstock which has Clear Double Sided Adhesive Tape on the back.
- (2) Owl's Beaks from orange cardstock that has Clear Double Sided Adhesive Tape on the back.
- Assemble both owls, using photo above as a guide. Place the orange feet on either side of the back feet.
Step 2 -
- Using the two largest labels in the Labels & Circles die set, nest the smaller label inside of the larger one making sure they are evenly spaced. Use tape to temporarily hold the dies together.
- Die cut two frames using these dies from blue cardstock.
- Place one of the frames on your workspace so that the front of the frame is facing down.
- Place a piece of Clear Double Sided Adhesive Tape to the top and bottom edges of the frame.
- Secure a piece of white twice so it is centred in the frame.
- Adhere the second frame over the top of the first frame so it hides the twine on the frame.
- Place a piece of Clear Double Sided Adhesive Tape to the centre back of one of the owls. Place the owl so it is centred onto the twine.
- Add more Clear Double Sided Adhesive Tape to either side of the owl and place the second owl over the top of the first, so you have a two sided owl.
Step 3 -
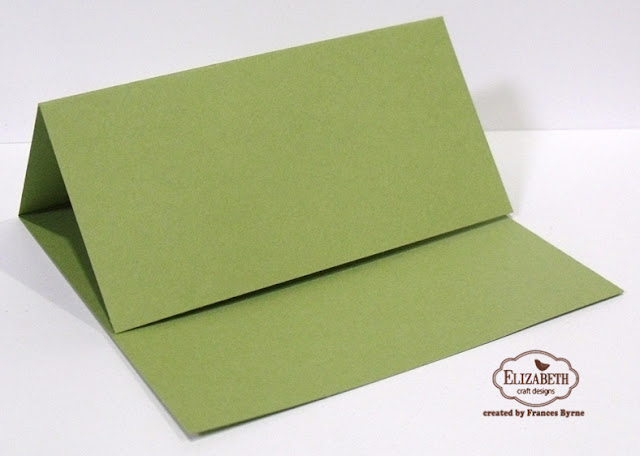
- Cut a piece of green cardstock that measures 5 1/2 inches x 11 inches. Score along the 11 inch side at 2 3/4 inches and 5 1/2 inches.
- Cover the front half of card with designer paper.
- Line up the second largest label from the Labels & Circles die set so that it is centred on the score line on the front of the card. Run through die cutting machine.
- Remove the label from the centre and fold card using photo above as a guide.
- Apply adhesive to the lower half of the frame we created in step 2 and adhere to the window on the card.
Step 4 -
- Die cut the fence from the Iron Fence Pop-Up twice from White Soft Finish Cardstock that has Clear Double Sided Adhesive Tape on the back.
- Die cut the fence also from white fun foam twice.
- Time both ends from the fences on both the cardstock and fun foam pieces.
- Join the two cardstock fences together to form one large fence.
- Adhere cardboard fence to fun foam fences.
- Adhere fence to the base card using photo above as a guide.
- Stamp the sentiment from the Occasions Clear Stamp set onto White Soft Finish Cardstock using brown ink. Cut out the sentiment, leaving a thin strip of white around the sentiment. There to the centre of the fence.
Step 5 -
- Using the tree from the All Seasons Tree die set, die cut a tree from brown cardstock.
- Die cut the leaves from the Curvy Leaves die set two times, add shading to the leaves using Copic markers.
- Adhere the leaves to the tree.
- Adhere the tree to the card using foam tape, so that the tree is towards the left side of the card.
Step 6 -
- Die cut the "Hi Circle" sentiment from the Twist Circle Pop-Up card from green cardstock that has Clear Double Sided Adhesive Tape on the back.
- Die cut a second "Hi Circle" sentiment from brown cardstock that has Clear Double Sided Adhesive Tape on the back.
- Die cut the larger the next sized circle from the Twist Circle Pop-Up card from brown cardstock.
- Adhere the brown "Hi Circle" sentiment to the solid brown circle.
- Adhere the "Hi" from the green "Hi Circle" sentiment to the centre.
- Trim around the larger circle so it is level with the smaller circle.
- Adhere to the right side of card using foam tape. Refer to photo below for placement.
Here is a look at my card when it is closed ready to be placed in an envelope.
Thanks for stopping by today, I hope you enjoyed my tutorial.
Supplies:
Elizabeth Craft Designs:
Poppy the Owl
Labels & Circles
Iron Fence Pop-Up
All Seasons Tree
Twist Circle Pop-Up (Hi)
Curvy Leaves
Occasions Clear Stamp Set
White Soft Finish Cardstock
Rich Black Soft Finish Cardstock
Clear Double Sided Adhesive Tape 64mm
Clear Double Sided Adhesive Tape 3mm
Other:
Cardstock - Green; Blue
Designer Paper - Kaisercraft Redwood 12 x 12 Paper; DCWV Latte Stack 12 x 12 Paper
Inks - Brown
Twine
White Fun Foam
Foam Tape
Copics


2 comments:
Oh, this is FABULOUS! Would you believe I have never made a Flying Easel Card? But you have me putting my thinking cap on with this one. Love it!
loving your paper pieced owl and the fab dimensional leaves/branches
Post a Comment