Sunday, July 9, 2017

Owl Tree


Hi Crafty friends,

A few weeks ago I received a lovely surprise in the mail, one of my blog followers who knows I love owls had seen this cute Die-namites Sweet Owl Tree die online and purchased it and sent it to me ... so exciting!!!!! Thank you Kathleen! I have a lot of owl dies but I definitely hadn't seen this one before.

Of course I had to play with it and create a card. I did cut the die twice from white cardstock adhering the two together to get a thicker image and adhered it to an oval card that I have covered with Silk Microfine Glitter in two different colors ... the sky and grass.

As Father's Day isn't until September down here where I live I decided to create another card for Father's Day as I had recently purchased the long Father's Day border die.


As you can see I turned the card into an Easel card, by die cutting another piece of cardstock that was folded in half.

I added the Father's Day sentiment to the card and also an owl sentiment I got with a freebie stamp set from a magazine.


Here is a look at my card when it is closed.


And one last photo of it laying closed flat on my desk.

Stamps: Owl Sentiment - Make Special Cards Magazine
Paper: White, Brown; DP - DCWV
Dies: Die-namites Sweet Owl Tree; Stitched Ovals; Dotted Scallop Ovals - Elizabeth Craft Designs; Happy Father's Day Border - Lawn Fawn
Other ECD Products: Clear Double Sided Adhesive Tape 101mm; Faded Denim Silk Microfine Glitter; Go To Green Silk Microfine Glitter;
Other: Black Ink; Foam Tape; Copics


Saturday, July 8, 2017

London


Hi everyone,

It’s challenge time with the “Crazies” over on the Crazy 4 Challenges blog. Maryann Einam our challenge hostess for the month continues to issue the challenges.

This week Maryann has asked us to create a card to celebrate a popular travel destination. Any place, town or country.


As you can see I decided to use London as the theme for my card this week. I purchased these stamps a couple of years ago when my youngest daughter moved over there to teach for a couple of years. I had to make her card to wish her good luck using some digital stamps as I discovered I didn't have any London/English themed stamps in my collection and of course I had to fix that ... and then I didn't use them haha!

So with this theme and the fact that two friends and my daughter have been there over the past few months these were more or less calling to be used :).


To create my card I used the new Karen Burniston Katherine Label Pop Up die set .... this is such a fun die set and the possibilities are endless.

When the card is closed you can see the label through the window .... mine has the cat holding onto the "underground" sign.


When you open the card, the label moves towards the top of the card. I kind of went a little crazy decorating the inside of this one! 


Here is another view of the inside of the card which I think makes it easier to see the position of the label on the card.


Here is a quick video to see my card in action.


Don't forget to check out the rest of the “Crazies” cards over on the Crazy 4 Challenges blog and also their individual blogs for more details.


Stamps: Love London; Big Ben - Penny Black
Paper: White; Red; Blue; Sailing Boats DP - FabScraps
Dies: Katherine Label Pop Up - Karen Burniston; Hit the Road - MFT Stamps; Stitched Fishtails - Elizabeth Craft Designs
Other: Black Ink; Foam Tape; Copics


Friday, July 7, 2017

ModaScrap Corner Flowers


Hi everyone,

Today I am sharing a few flowers I created using some ModaScrap dies. I was inspired by some flowers I saw  Chiara of ModaScrap create on Facebook recently and had to give it a go.

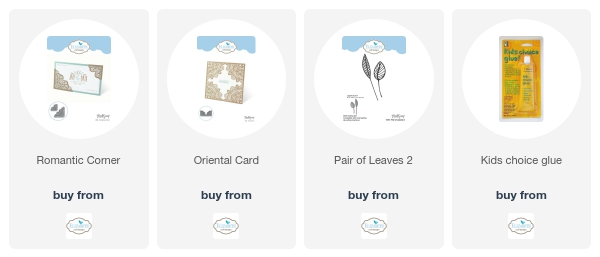
For my flowers I have used the ModaScrap Romantic Corner die set (the small & large pink flowers) and also the Oriental Card die set (the orange flower).

To create the flowers I die cut six of each corner and then folded along each of the tabs, apply glue to the tabs and join together to form a cone shape. Once I had 6 "cones" created I joined them together to form a flower,

I then adhere my flowers to kabab sticks (wire would work too) and die cut the leaves using ModaScrap Pair of Leaves 2 die set and attached them to the kabab stick using green florist tape.


Here is a close up of the large pink flower which was created using the large corner from the Romantic Corner die set.


A close up of the small pink flower which was created using the small corner from the Romantic Corner die set.


And finally a close up of the orange flower which was created using the Oriental Card die set. This one is quicker to create as you have two corners the same size which can be cut at the same time.


Paper: Pink; Orange; Green
Dies: ModaScrap Romantic Corners; ModaScrap Oriental Card; ModaScrap Pair of Leaves - Elizabeth Craft Designs
Other: Florist Tape; Wire


Thursday, July 6, 2017

Super Cupcake Marci


Hi everyone,

It's challenge time with my friends over on the CCEE Stampers challenge blog. Being a brand new month it is time to introduce our new challenge hostess for the month which is Maryann Einam.

Maryann has asked us to create a card using a mask, whether it is using a masking technique or a stamped image of a mask.


I have done a couple of cards recently using masking techniques ... one using dies and another using stamps. But I couldn't decided what I wanted to mask for this challenge ... so next up I went looking to see what images I had that included a mask! 

Finally I discovered La La Land Crafts Super Cupcake Marci which I thought would work well with Karen Burniston's new Cupcake Pop-Up Card die set. Although in the end I used the small cupcakes included in the set but not the actual Cupcake pop-up die.


After I had cut the girl out I was playing with her and some cards on my desk when I got the idea about having her attached to the mechanism in the Katherine Label Pop Up Card die set, which is what I ended up going with.

I added the Skyline Border to the bottom of both panels on the inside of my card and a sentiment and cupcake on the left hand side. On the right I added Marci and as the card opens and closes she flies up and down.


Here is another look at the inside of my card, so you can see how far up Marci can go when the card is opened.


Here is a quick video so you can see my card as it opens and closes.


Don't forget to check out the CCEE Stampers blog (goes live 12 AM EST) to see the rest of the creations the CCEE Stampers created this week. You can also see more details of their creations on their individual blogs:


Vicky Gould
Kelly McKown-Santi


Stamps: Super Cupcake Marci - La La Land Crafts; Super Hero Stamp Set - Frantic Stamper; Birthday Cupcake - Inkadinkadoo; Feathered Friends - Dare 2B Artzy
Paper: White; Pink; Green;
Dies: Katherine Label Pop-Up; Cupcake Pop-Up - Karen Burniston; Stitched Squares; Dotted Scallop Squares - Elizabeth Craft Designs; Skyline Border; Solid Skyline - MFT Stamps
Other: Black Ink; Foam Tape; Copics

Wednesday, July 5, 2017

Rose Gatefold Petal Fold Card


Hi Crafty Friends,

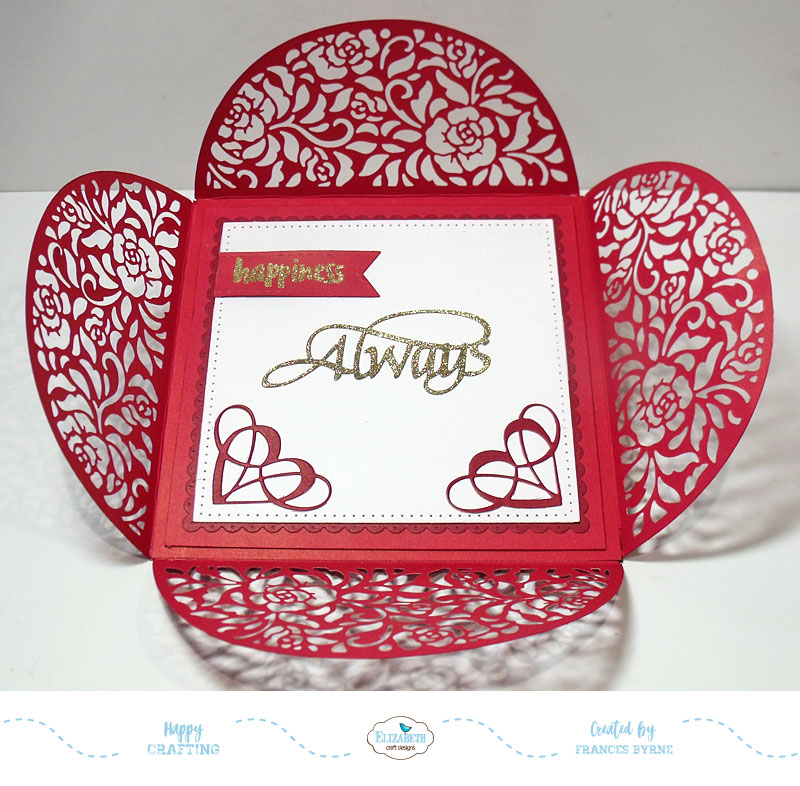
It's my turn to post a tutorial today for the Die Cut Design Team on the Elizabeth Craft Designs blog. This time round I decided to play with the ModaScrap Gatefold - Elegant Roses die to create a "Petal Fold Card". Using this die makes for an elegant card which would be suitable for weddings, invitations or any occasion where you wanted something a little big different. 

As the cardstock I selected to use for my card was two tones a dark red on the front and a light red on the back I decided to keep to the three colors of white; dark red and light red for my card. By keeping the insert loose I could turn it upside down when I closed the card so you could see the second light color red through the openings of the "petals". 

Here is how I created my card:


Step 1 - 
  • Cut a base from dark red cardstock that measures 5 3/4 inches square
  • Cut a base cover from light red cardstock (this will cover the base card when sides have been attached) that measures 5 12/16 inches square
  • Cut 4 sides from dark red cardstock that each measure 3 1/2 inches x 6 inches.
  • Using the ModaScrap Gatefold - Elegant Roses die, place it on one of the pieces of dark red cardstock cut for the sides, so that the straight edge is approx 1/2 inch away from edge of cardstock. Run through die cutting machine. Repeat for all 4 sides.
  • Use a scoring tool to reinforce the score line created by the die, fold and attach Clear Double Sided Adhesive tape to each of the tabs.
  • Trim the sides of each tab at an angle. 

Step 2 - 
  •  Remove the adhesive from one of the tabs from the Gatefold - Elegant Roses die cut and carefully line the fold of the die cut with the edge of the base card (Photo A above).
  • Repeat this on all four sides (refer to photos above.
  • Adhere the base cover we cut in step one over the inside of the base card so it hids the tabs from the side panels. (Photo D above.
  • The sides should be able to fold down onto the base now.


Step 3 - Create the Card Insert:


  •  Cut the base of the inside from light red cardstock that measures 5 1/4 inches square.
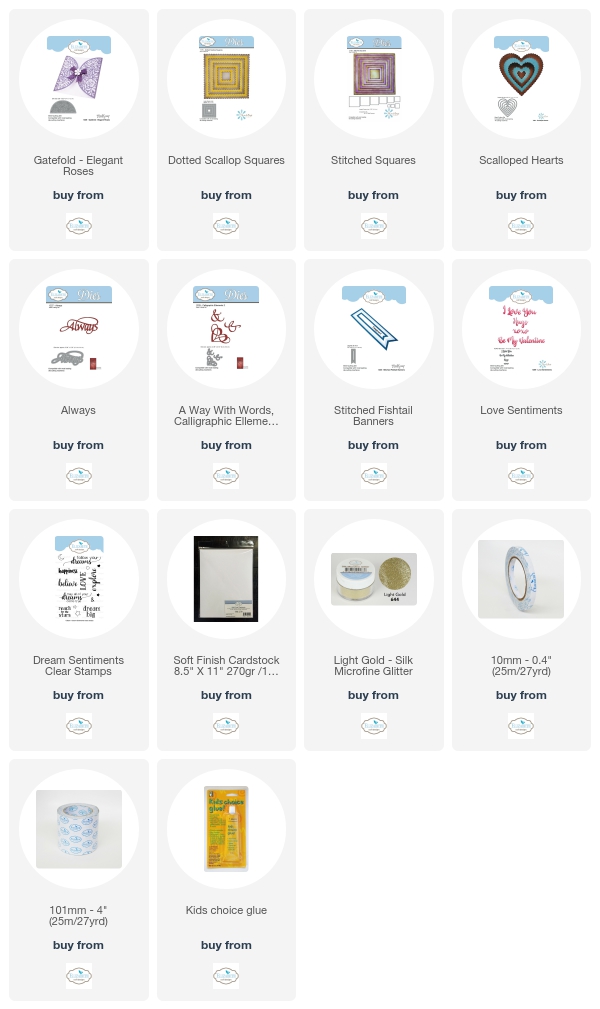
  • Using the largest square from the Dotted Scallop Squares die cut a square from dark red cardstock.
  • Using the second largest square from the Stitched Squares die set cut a square from White Soft Finish Cardstock. 
  • Layer all pieces to form insert (refer to photo above)
Step 4 - 
  • Die cut two hearts from the A Way with Words - Calligraphic Ellements 2 die set from dark red cardstock that has Clear Double Sided Adhesive Tape on the back. Adhere hearts to lower corners of insert.
  • Using the A Way with Words - Always die set, die cut from white cardstock that has Clear Double Sided Adhesive Tape on the front. Remove protective backing from the adhesive and cover the adhesive with Light Gold Silk Microfine Glitter. Return excess glitter to the jar and polish the glitter with your finger. Adhere sentiment to centre of card.
  • Using the second smallest fishtail banner die from the ModaScrap Stitched Fishtail Banners die set, die cut a banner from light red cardstock. Gold emboss the "happiness" sentiments from the Dream Sentiments Clear Stamp set. Adhere to top left hand side of card.
  • Place insert into the centre of the petal card (upside down if you want a solid color showing through the holes in the sides).

Step 5 - Folding the Card:
  • To close the card, first fold down one of the sides into the centre and then fold the second side so it is on top of the first side (photo A)
  • Next fold the third side down so it is is laying down on top of side 2. (photo B).
  • To close the card  .... lift up the edge of side 1 which is closest to the remaining side not folded down yet and slip the remaining unfolded side so it is under side 1 and over side 4. (See photo C)
  • To finish the card die cut a small heart from the Scalloped Hearts die set from White  Soft Finish Cardstock.
  • Die cut the XOXO from the Love Sentiments die set from white cardstock that has Clear Double Sided Adhesive Tape on the front. Add Light Gold Silk Microfine Glitter to sentiment as we did to the sentiment in Step 4. Adhere to heart.
  • Punch a hole in the heart and thread onto ribbon.
  • Thread the ribbon through two of the holes in the "petals" and tie into a bow.
Thank you for stopping by today, I hope you enjoyed my tutorial.

Supplies:

Elizabeth Craft Designs:


Other:
Cardstock: Red two toned cardstock
Inks - VersaMark Ink
Gold Embossing Powder
Sheer Ribbon
Hole Punch


Tuesday, July 4, 2017

Go Wild


Hi Crafty friends,

Today I have another card to share with you using some of the pieces I received in the Simon Says Stamp Card Kit I ordered recently. I have used more of the Numbers Acetate Sheet and another of the designer papers by Illustrated Faith.


I added the cute Kraftin' Kimmie Stamps Party Animals to the lower left hand side of my card.


For the inside I added more of the designer paper, a sentiment and a giraffe from another stamp set.


Stamps: Party Animal - Kraftin' Kimmie Stamps; Go Wild - Gerda Steiner Designs; Make a Wish Cooper - Paper Pretties
Paper: White; Green; Pink; Illustrated Faith DP
Dies: Stitched Circles; Fitted Circles; ModaScrap Stitched Fishtail Banners - Elizabeth Craft Designs
Other: Black Ink; VersaMark Ink; White Embossing Powder; Ilustrated Faith Basic Numbers Acetate Sheet; Foam Tape; Copics

Monday, July 3, 2017

Cacti Thoughts


Hi Crafty Friends,

Today I am sharing another card I created using some of the pieces I created in the Simon Says Stamp Card Kit I purchased recently.

For this card I used one of the Suzy Plantamura Watercolor Cards. I kept the card fairly simple, just using the Stitched Rectangles & Dotted Scallop Rectangles to die cut the card and layer onto a card base. I watercolored the cacti using the Crayola Fine Line markers which were also included in the kit.

Paper: White; Green; Suzy Plantamura Cacti Watercolor Card - Simon Says Stamp
Dies: Stitched Rectangles; Dotted Scallop Rectangles - Elizabeth Craft Designs
Other: Water Brush Foam Tape; Crayola Fine Line Markers


Sunday, July 2, 2017

Sew it's your Birthday


Hi everyone,

Today I am sharing a card I created for a good friend of mine. One of her many talents is sewing so as I had recently purchased this fun stamp set from Lawn Fawn I knew I had to use it to create a card for her.


To create my card I used the new Twist Panel Pop-Up die set from Karen Burniston's new line of dies which you can see on her new web site. Last year I made a number of this style of card using Karen's directions on how to convert her Twist Circle die set, but this new die set makes it so much easier to create and no measuring!!!!!

I couldn't find any sewing themed papers in my stash (I am sure there are some in there somewhere) ... but I did find this piece and I thought that all the different squares might look like pieces of material you might use for quilting which my friend does a lot of.


Here is a look at my card as it is closing.


And finally when it is closed. This will close a little more but I added foam tape too all the pieces on the 4 panel piece of card which does make it thick ... but as this will be hand delivered that won't be a problem!


Here is a look at the front of the card. To create the curvy edge which I used on the instead and outside of the card I used one of the dies from the Nature Edges die set.

Stamps: Sewn with Love - Lawn Fawn; Stitches - Penny Black
Paper: White; Pink; Green; Lime; TV Dinner DP - Cosmo Cricket
Dies: Twist Panel Pop Up; Words Set 2 Birthday - Karen Burniston; Stitched Circles; Dotted Scallop Circles - Elizabeth Craft Designs
Other: Black Ink; Abandoned Coral Distress Ink; Foam Tape; Copics


Saturday, July 1, 2017

Let's Play

Hi everyone,

It’s challenge time with the “Crazies” over on the Crazy 4 Challenges blog. Being a brand new month it is time to introduce a new challenge hostess which is Maryann Einam.

According to the "Days of the Year" calendar today is Hop a Park Day. Use stamps, dies or both to create a scene or something that you may see in a park.


As soon as I saw the theme of this challenge I knew I had to pull out my Lawn Fawn Let's Play stamp and die set to play as many parks have play equipment for kids. As I had recently just received Lawn Fawn's new Magic Color Slider Card die set which I have been wanting to use, it wasn't hard to decide to combine the two. 


Here is a quick video to show what happens when you slide the slider part of the card up and down.


It's been a long time since I have made a Magic Color Slider Card, probably 20 years or so and it is so much easier having a die which does most of the hard work for you. The hardest part of this card is ensuring that your image on the acetate panel inks properly with the Stazon ink ... I did have to touch up some places with a sharpie.


As you can see I added a seesaw with two more cute playmates to the bottom of my card.


One thing you need to keep in mind when you are creating a scene which requires masking and only putting one or two images on the acetate and the remainder of the scene on the colorful side. That is that the images need to match when you pull the white slider piece up. When I first created my card, I had planned to have the squirrel on the slide and just the slide on the front ... but you then see the top of the slide over the squirrel when you pull the tab up ... not very magical! Luckily I was able to scratch the ink off the parts of the slide I didn't want to be there and then line the squirrel up over the existing squirrel and ink that on the acetate panel ... thank goodness for my MISTI!


Finally the inside of my card. I had the swing already cut out from the last time I played with the set so I decided to stamp another squirrel and add that to my card as well. I know I will definitely be making more of these cards in the future 😀.

Don't forget to check out the rest of the “Crazies” cards over on the Crazy 4 Challenges blog and also their individual blogs for more details.


Stamps: Let's Play - Lawn Fawn
Paper: White; Red; Toy Box DP - BoBunny
Dies: Magic Color Slider Card; Let's Play - Lawn Fawn
Other: Black Ink; Stazon Black Ink; Acetate; Foam Tape; Copics