Tuesday, January 7, 2025

January 2025 Karen Burniston Designer Challenge


Hi Crafty Friends,

Welcome to our January Karen Burniston Designer Challenge.

Check out Karen Burniston's blog on Wednesday (US Time) when you will be able to see what all the designers created for the challenge this month, plus Karen will have an amazing video tutorial to share with us all.


Our challenge theme this month is ... "THE FIRST 100 DIES" - Make a card using any of our die sets with item numbers between 1001 and 1100.


My first thought when deciding what to create for this challenge was to make a card using the Katherine Label Pop-up, as this would have to be my most used die. But it was for this reason I decided not to use it and looked in another direction.

Instead I decided to pull out my Fancy Label Accordion die set as this would have been one of the very first Karen Burniston dies I purchased back in 2013 when Karen was designing for Sizzix. Of course there are many improvements on the newer dies from the thick steel rule dies of the past. 

I wanted a colourful card, so I selected the four striped colours included in a pattern paper pad I have and used a differed colour for each of the 4 panels.


To decorate my card I used the Ice Cream Sundae Pop-up die set, using the elements that make up the Ice Cream Sundae for the first and third panels of my card.

On the centre panel I added the "You're Sweet" Sentiment, layering it up to give it some dimension.


For something different, I decided to add a square panel at the end of the accordion card. I have done this before but it was a number of years ago. Besides being able to add another sentiment, it gives a place on the back to be able to write a personal greeting to the recipient.

I used the Ovals Crosshatch for the layers of my card and then added the "Happy Birthday" sentiment. This sentiment does now have a layering die which you can purchase separately, but as it didn't fit into the theme "The First 100 dies" I didn't use it. Everything I used on my card today are from the first 100 dies.

The hearts which I added to the last panel are from the Heart Pivot Panels die set.


Here is a look at my card when it is closed ready to be placed in an envelope.

Don't forget to visit Karen Burniston's blog on Wednesday (US Time) when you will be able to see what all the designers created for the challenge this month.


Monday, January 6, 2025

Another Year Older

Hi Crafty Friends,

Today I am sharing a birthday card I created recently.


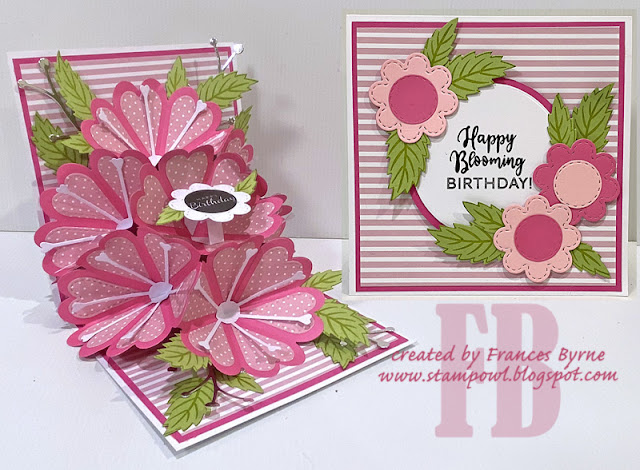
This card uses Made To Surprise by Sam Calcott's 5 x 7 Secret Messages die set. Rather than using the die to create a Secret Message Card, I added a few score lines to the centre portion of the card as per a video by Sam to create the Faceted Diamond Pop-up. 

I added the birthday sentiment to the centre of the card which is also one of Made To Surprise stamp sets.


For the front of the card, I added a yellow panel to my 5 x 7 card which I embossed using Spellbinders Rosette Burst 3D Embossing Folder. 

I used the "Happy" word from Made To Surprise's All the Sentiments die set to add the happy and the birthday is a stamp also included in this set.

To finish the card, I added some balloons using dies included in Spellbinders Birthday Bliss die set, which was the November small die of the month.


Friday, January 3, 2025

Let's Celebrate You

Hi Crafty Friends!

Happy New Year to you all, I hope 2025 is good for us all! 

For my card today I am sharing a Triple Tier Slider card, I have made a few of these over the years, but I love having a die set that cuts everything out for you. This is a 5 x 7 inch card and uses Made To Surprise by Sam Calcott’s Triple Tier Slider die set which was released a while back by Craft Stash. 


To decorate the main panel of my card, I used the cute mouse & boot which are two die sets from Elizabeth Craft Designs. 

When you pull the tab that is showing at the top of the card it reveals a sentiment. This is also from Made To Surprise.


Pulling the tab at the top once more reveals another panel that contains a birthday sentiment which is from the same stamp set.

To finish the card, I added the ‘eek’ word three times randomly around the mouse.


Monday, December 30, 2024

2024 Year In Review

  Hi Crafty Friends,


Well we only have a couple more days left of 2024, so as I have done in past years I will share some of my favourite creations I have made in the past year.

It is always hard to select just one or two cards / projects for each month, however this year due to illness I haven't been able to post as much as I normally would have. In fact there are some months where I didn't post anything at all. So while I normally would spread this review over two days I don't think I need to this year. Hopefully next year I will be able to post a little more then I have this year, fingers crossed anyway!

Here is the selection I came up with, if you click on the card it will take you to the original post.

January


February


March


April

July


October


November


December


Thanks for looking, if you got this far.

Supplies:
Please refer to the individual blog post for supply lists for any of the cards above.


Wednesday, December 25, 2024

Have a Tree Trimming Christmas


Merry  Christmas Everyone!!!!

It's Christmas Day already down here in Australia! I must have been a good girl this year as I did very well! 😀

There are many of you who visit my blog regularly, so I would like to take this opportunity to thank you all so much for your support throughout the year. Hope you all have a wonderful and safe Christmas!

As many of you who follow me know, I have posted a lot this year due to illness. But for as long as I can remember I have always posted a Christmas card on my blog on Christmas day, and of course wanted to do the same this year. So on Saturday I pulled out some of my Karen Burniston dies to create this card. 


For my card today I used Karen Burniston's Christmas Tree Pop-up along with the new Christmas Tree Add-ons die set. This set allows you to add ornaments to your tree which is lots of fun to do! It also gives you a tree skirt which I think makes it easier to add to you card. I created a 5 x 7 inch card which means the tree was able to be centred in my card.

I used the Crosshatch Rectangles die set to create the layers for my card, adding sentiments from the Seasons of Cheer stamp set, I love the tree trimming sentiment included in this stamp set.


I added the stocking border to the top left and bottom right hand sides of my card, as well as two candy canes to the sentiment panel on the right. For these I used the Christmas Borders 2 die set.


Finally the front of my card, which I kept fairly simple seeing the focus is on the inside of my card.

I used the Merry Christmas Lorna Labels Add-ons for the sentiment and I added two more stocking borders to the top and bottom of my card.


Monday, December 23, 2024

Merry Christmas


Hi Crafty Friends,

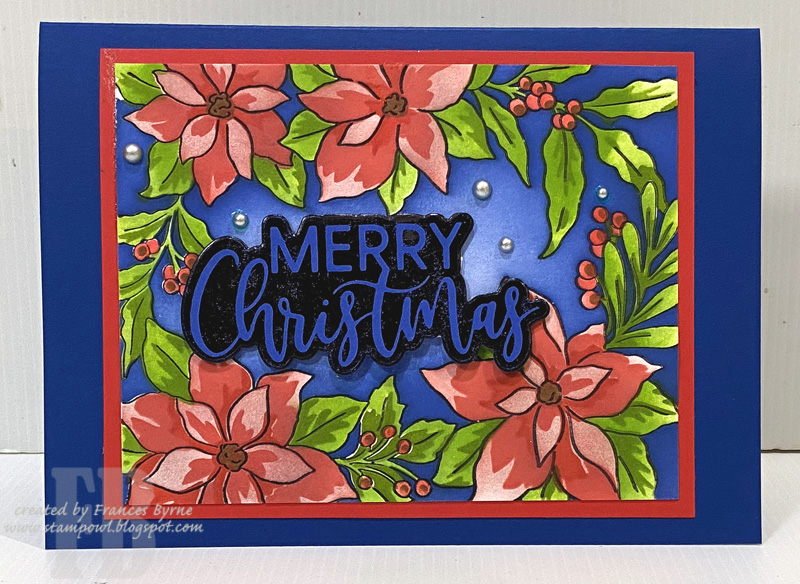
I have one last poinsettia themed Christmas card to share with you today. This card uses the Pinkfresh Studio Poinsettia Frame Betterpress Plate, I shared another card using this plate on Friday which you can see if you scroll down to the next post.

This time round, I opted not to die cut the poinsettia frame out with the coordinating die, instead I used the last stencil to cover the frame up and add background colour. I love this idea and I hope we will see this in other stencil sets in the future.

I added the foiled Merry Christmas to the centre of the frame. This is a Waffle Flower foil plate and is the negative piece of foil which was foiled onto blue card. I had this leftover from a previous project and as it suited this card went with it.


I added the sentiment to the inside of the card. This is a Betterpress plate from Spellbinders.